
You know that moment late September hits, the air changes, and suddenly you remember: Halloween’s coming. Maybe you’ve got a party planned, or maybe you just want to surprise the kids (and yourself) with a home that feels like it stepped out of a cozy, spooky movie. But every year, you find yourself scrolling Pinterest, overwhelmed by endless “haunted mansion” ideas that feel impossible, expensive, or just… not you.
I’ve been there. I’ve seen the overstuffed bins of decorations in the garage, the half-finished projects, and the “quick” Target runs that somehow spiral into hours of indecision. And after decorating dozens of my own and friends’ homes everything from tiny apartments to larger family houses I’ve learned that what matters isn’t perfection, but personality. Halloween decor can and should—be fun, easy, and a little bit magical.
In this guide, I’ll walk you through 15 actionable indoor Halloween decor ideas that I’ve personally tested—and actually enjoyed making. Whether you’re a beginner setting up your first-ever Halloween display, an intermediate DIYer looking to up your game, or an advanced decorator seeking fresh, low-stress twists, you’ll find real, honest advice here. I’ll show you how to avoid the most common mistakes, estimate costs and timeframes, and adapt each idea to your space, budget, and skill level.
By the end, you’ll have clear, step-by-step plans you can tackle this weekend and a home that feels festive, not frantic.
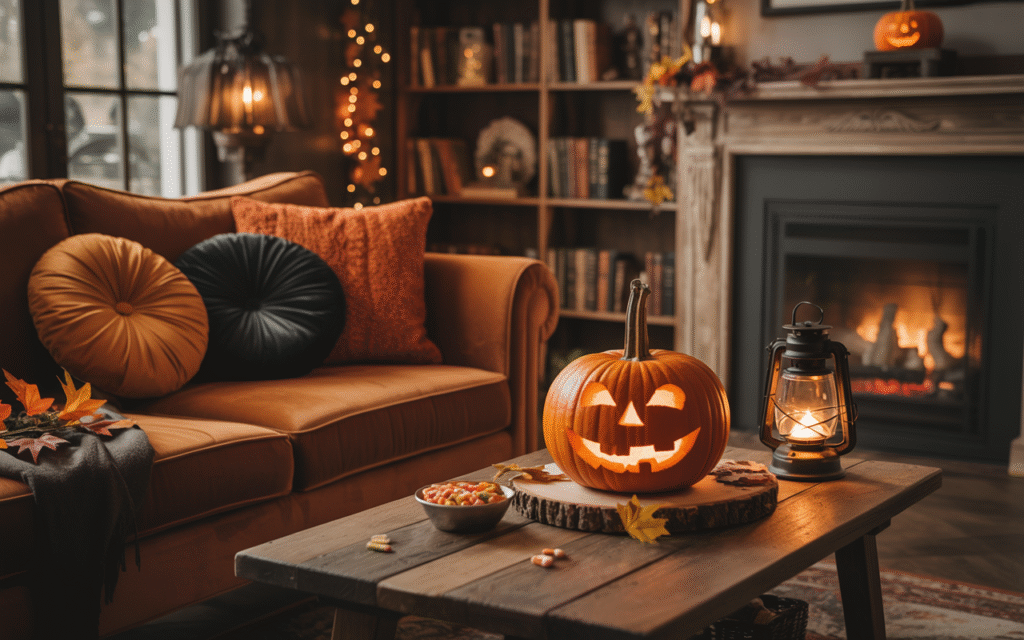
1. Glowing Pumpkin Lanterns
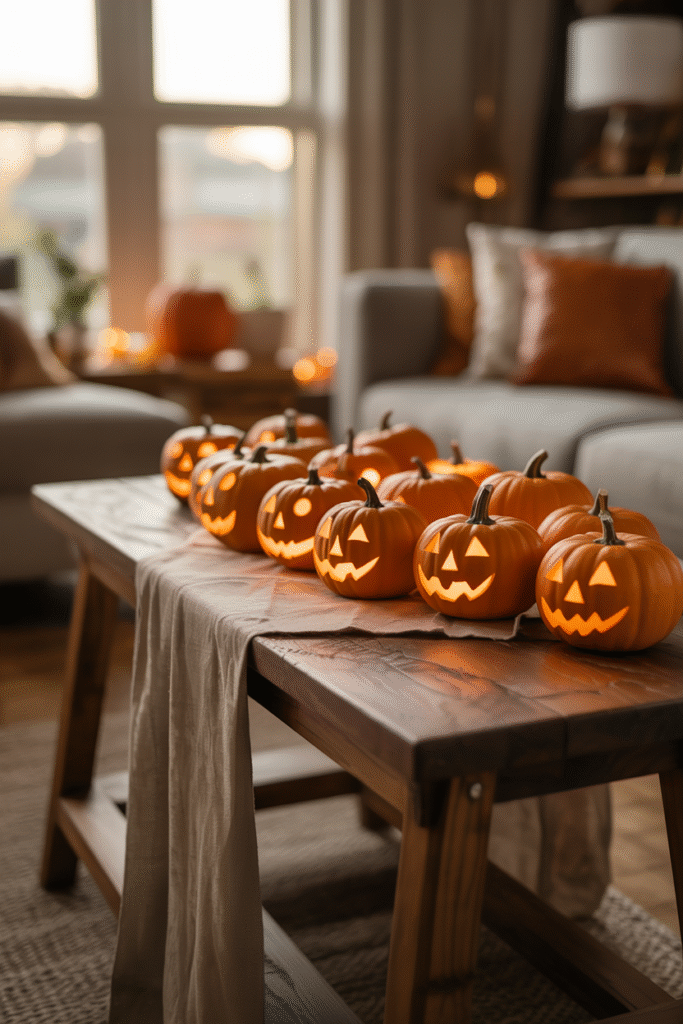
Carving pumpkins is fun, but it’s also messy, time-consuming, and sometimes ends in a pile of goopy guts. Instead, grab a sharpie and draw faces or patterns directly onto mini pumpkins—10–15 cm (4–6 in) ones work best. I’ve found that bold, simple lines photograph well and look great from a distance. Place a battery-operated tea light inside for a soft, safe glow.
Materials:
- Mini pumpkins (real or craft-store faux)
- Permanent marker (black or orange for contrast)
- Battery-operated tea lights
Pro tip:
If you want to get fancy, wrap painter’s tape in stripes or geometric shapes before coloring, then peel the tape away for crisp designs.
What works best is skipping the knife unless you really love carving. Kids can join in safely, and you can reuse the pumpkins year after year if you go faux.
2. Creepy Candlesticks—Instant Mood Lighting
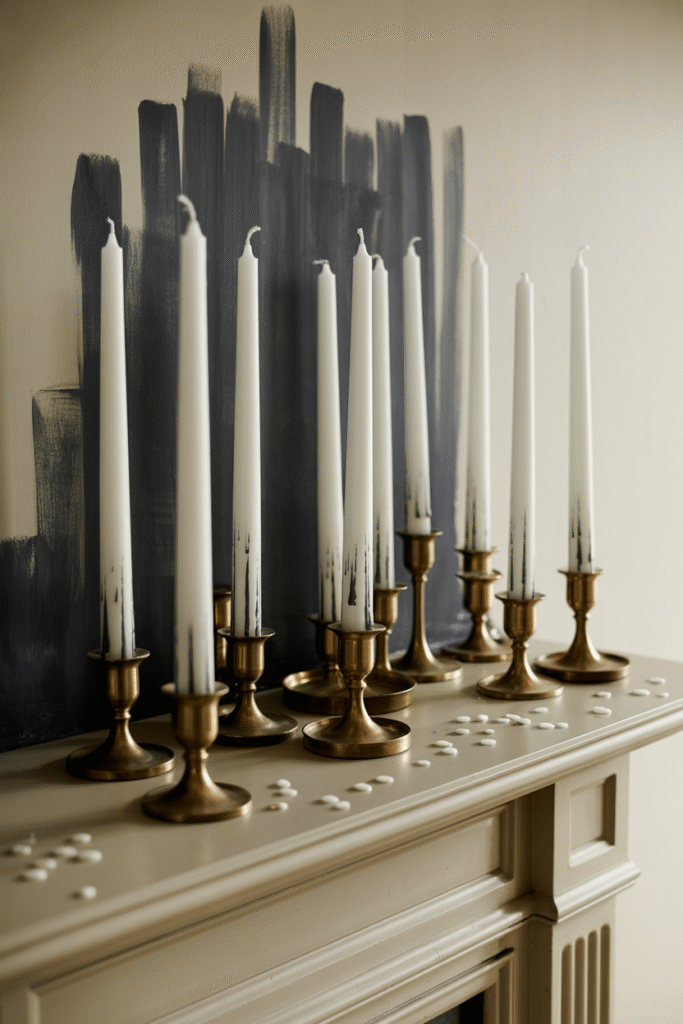
I love the look of old, dripping candles, but real wax can be a nightmare (and a fire hazard). Instead, save those old candles that have burned down, paint them with white acrylic paint, and add streaks of black or gray for that “distressed” look. Cluster them on your mantel or dining table.
Materials:
- Used candles (varying heights)
- White acrylic paint
- Black or gray acrylic paint (optional)
- Paintbrush
Timeframe:
15–20 minutes to paint and dry.
Avoid this:
Don’t use glitter near open flames, even on faux candles. I learned this after a minor (but sparkly) disaster last year.
3. DIY Floating Witch Hats
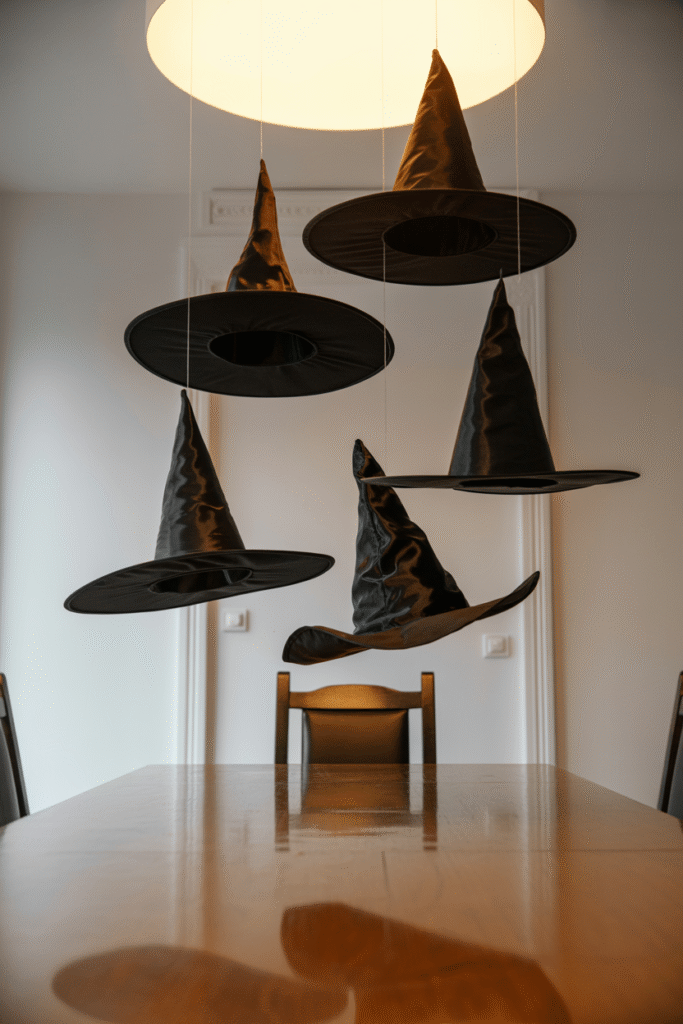
This is a weird one that always gets smiles. Grab a handful of cheap black witch hats (the kind with elastic bands) from the dollar store. Tie fishing line to the tip of each hat and suspend them at different heights from your ceiling—30 cm to 1 m (1–3 ft) apart. Add a small loop of double-sided tape to the brim to keep the hat level.
Materials:
- Black witch hats (small, plastic or fabric)
- Clear fishing line
- Double-sided tape or sticky tack
What works best is hanging them in a corner or above a dining table. I hang about five hats, and it always feels like a coven just dropped in.
4. Haunted Book Stack—Literally
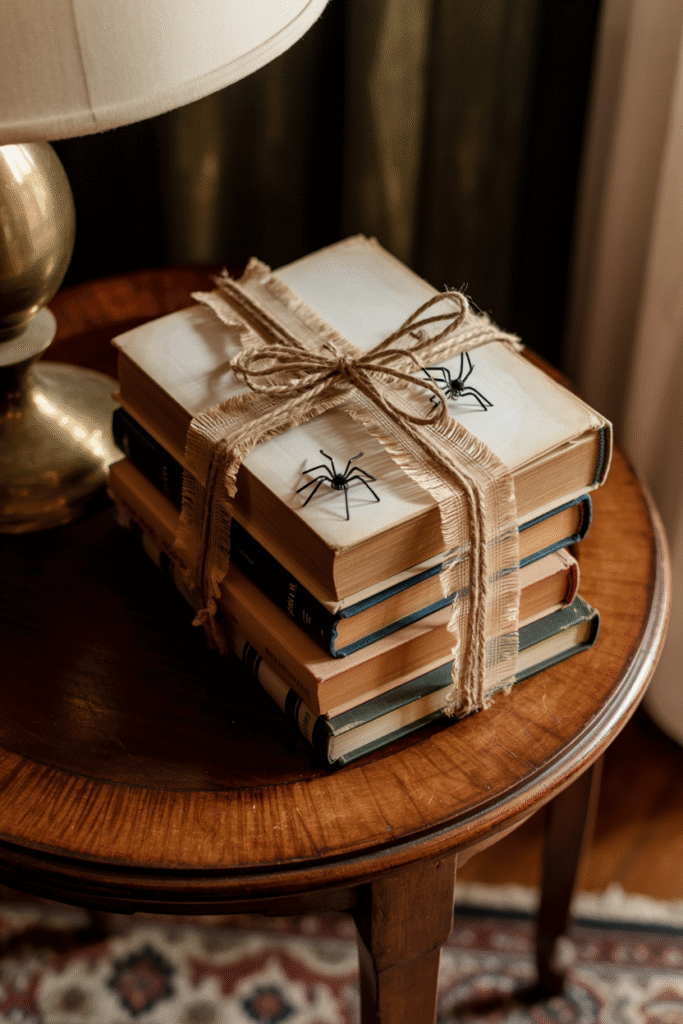
Old books instantly add texture and an eerie library feel. Gather a stack, wrap them in gauze, and tie them with twine or ribbon. Tuck plastic spiders or tiny skulls between the pages. I’ve even sprayed some with watered-down black paint for a “dusty” effect.
Materials:
- Old books (thrift store finds are perfect)
- Gauze or cheesecloth
- Twine or ribbon
- Plastic spiders, skulls, or other small trinkets
Cost:
$5–10 if you need to buy books and accessories.
Avoid this:
Don’t use precious or rare books. Stick to paperbacks or outdated hardcovers.
5. Spooky Silhouettes—Easy Window Scenes
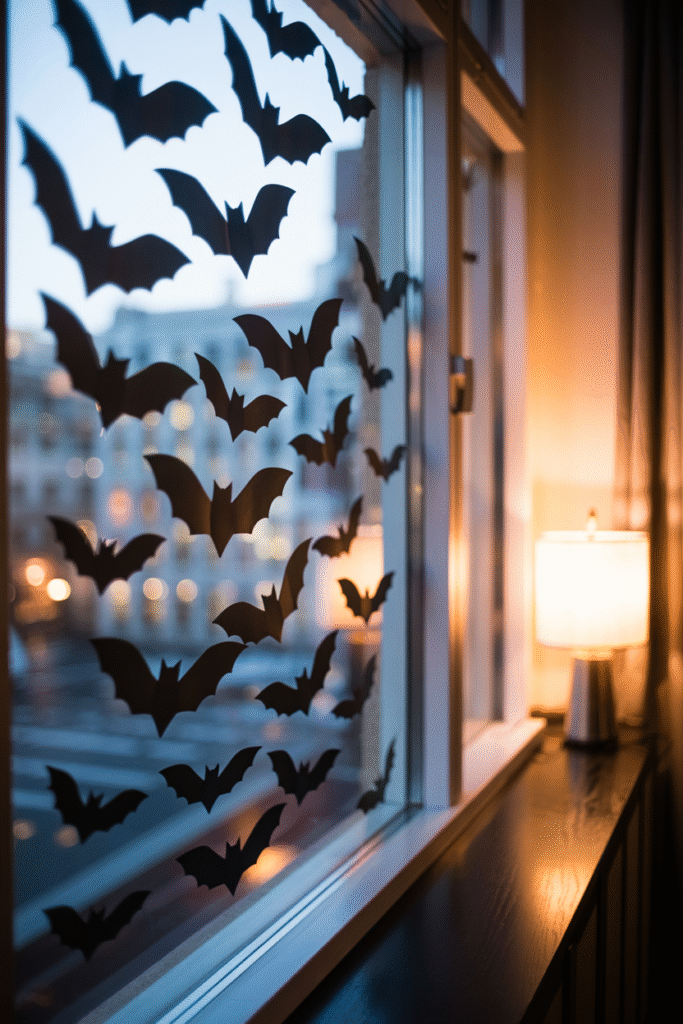
Cut simple Halloween shapes—bats, cats, ghosts—from black construction paper or adhesive vinyl. Stick them to your windows facing outward. When the sun sets, your silhouettes will cast shadows indoors, and when the lights are on inside, they’ll be visible from the street.
Materials:
- Black construction paper or adhesive vinyl
- Scissors or craft knife
- Tape or static-cling window decal sheets
Pro tip:
If you’re not confident in your cutting skills, print templates from free clipart sites and trace.
In my experience, even just three or four bats looks fantastic. I do a different silhouette for each room—ghosts in the kitchen, cats in the living room.
6. Candy Corn Vignette—A Pop of Color
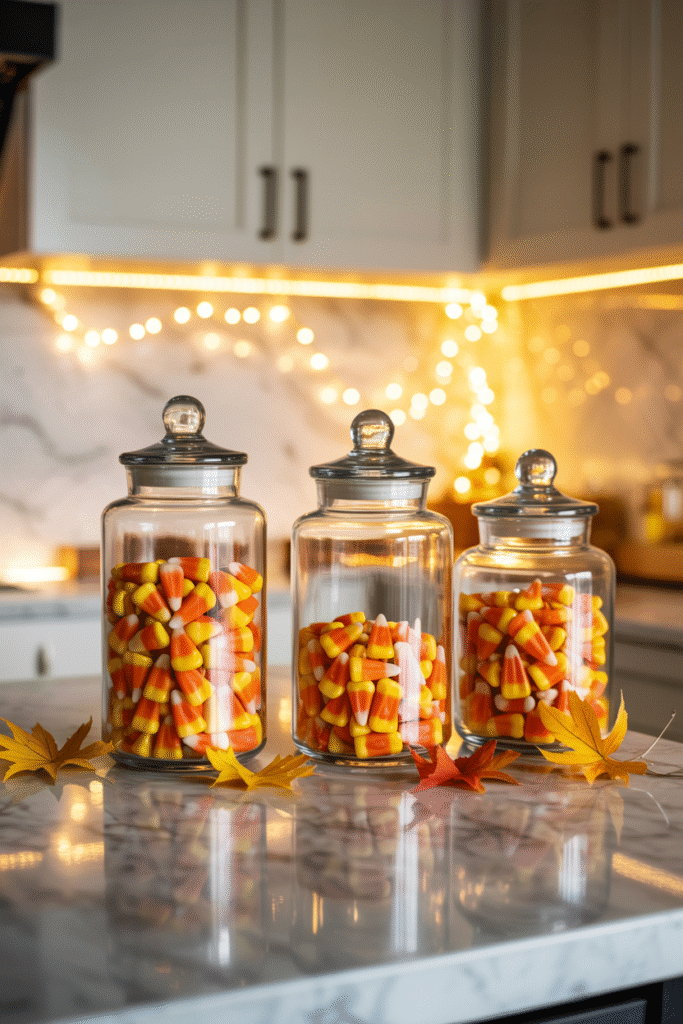
Candy corn is divisive to eat, but it’s a classic visual. Fill clear glass jars (mason jars, vases, even drinking glasses) with layers of orange, yellow, and white candy. Stack them on your dining table, mantel, or entryway console.
Materials:
- Clear glass containers
- Candy corn (or similar chewy candies)
- Optional: Battery-operated string lights to nestle inside
Cost:
$5–15 depending on the size of your containers.
What works best is using real candy—kids love it, and you can eat the leftovers after Halloween.
7. Magnetic Spider Invasion
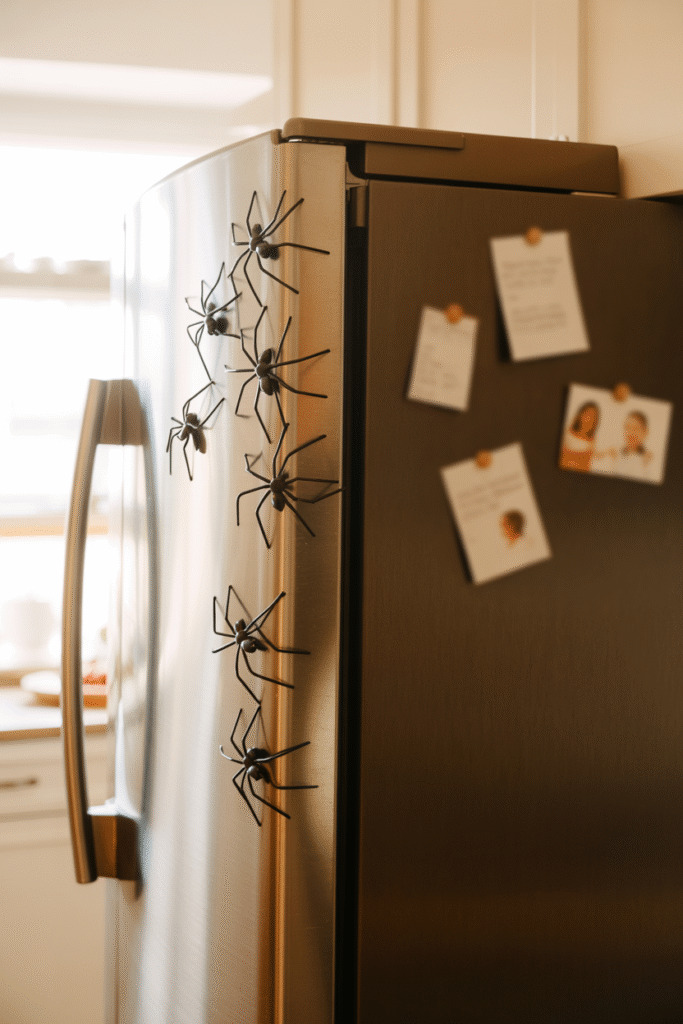
Years ago, I bought a bag of plastic spiders on a whim. Now, I toss a handful onto the fridge or filing cabinet every Halloween. It’s the easiest “wow” effect—and tots love the surprise factor. For a more advanced version, glue tiny magnets to the spiders’ bellies and let them crawl up appliances, picture frames, or metal doorways.
Materials:
- Plastic spiders
- Small neodymium magnets (1 cm / 0.4 in diameter)
- Hot glue gun or strong glue
Timeframe:
5 minutes for simple scattering; 20 minutes to glue magnets and let dry.
Cost:
$3–5 for a bag of spiders and magnets.
Pro tip:
If you have a metal front door, position a few spiders near the handle for a fun jump scare on trick-or-treaters.
8. Paper Lantern Ghosts—A Kid-Friendly Classic
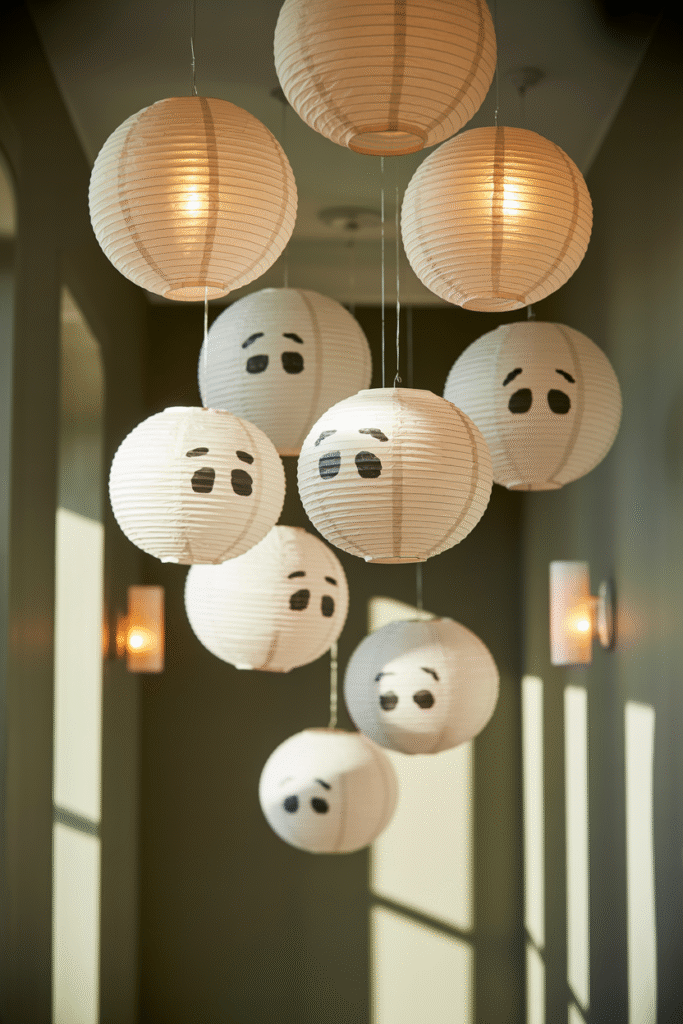
These are a hit in our house. Take small white paper lanterns (15–20 cm / 6–8 in diameter), draw simple ghost faces with a black marker, and hang them from the ceiling with fishing line or ribbon. Try clustering three to five at different heights for a floating effect.
Materials:
- White paper lanterns
- Black marker
- Fishing line or ribbon
- Removable hooks or adhesive wall clips
In my experience, it’s better to avoid gluing the lanterns closed—they fold flat for storage and last years. My kids like giving each ghost a “mood” with different faces.
9. Witch’s Potion Bottles—Instant Apothecary Charm

I’ve collected vintage-looking glass bottles from thrift stores for years. Clear out the labels, fill them with colored water (green, purple, red food dye), and add tags with fun names like “Bat’s Brew” or “Witch’s Tears.” Place them on a tray with dried herbs, candles, and a roll of parchment.
Materials:
- Assorted glass bottles (small and large, cork or cap)
- Food coloring
- Water
- Tags or labels
- Twine or ribbon
Timeframe:
20–30 minutes for washing, mixing, and labeling.
Cost:
$0–10 depending on what you have at home.
Avoid this:
Don’t use real, unmarked chemicals—stick to water and food coloring, especially if kids will be around.
10. Floating Witch Broom Display
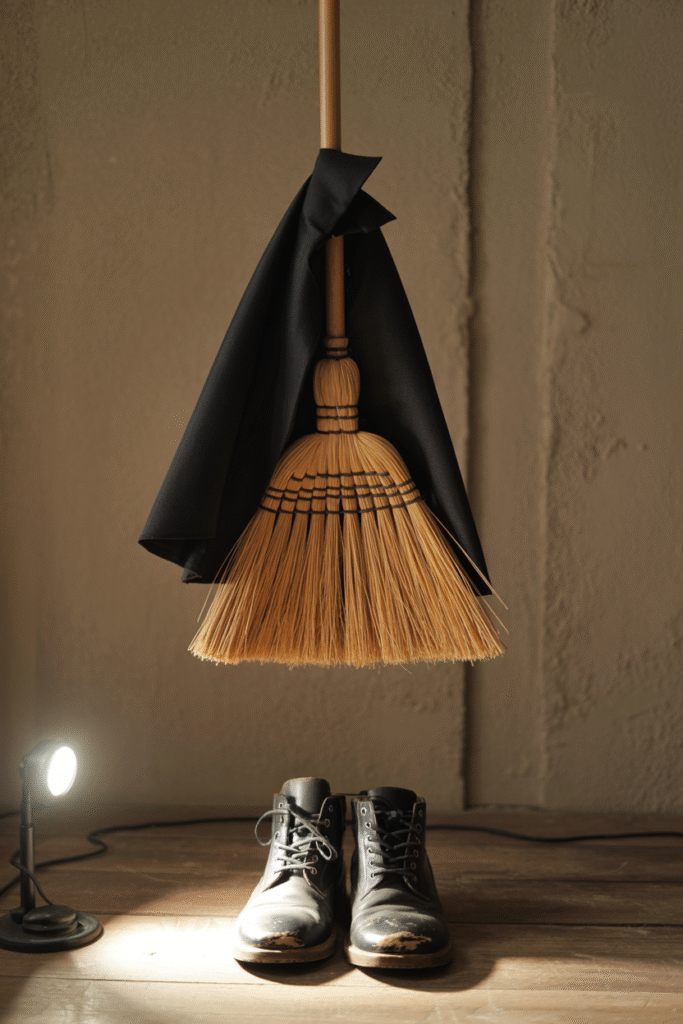
I saw this in a friend’s house and had to copy it. Lean a broomstick (straight from Home Depot or a thrift store) in a corner, add some witchy boots at the base, and drape a cape or shawl over the broom. If you have a motion-activated light, tuck it behind the cape for a subtle “vanishing act” effect.
Materials:
- Broomstick (new or old—doesn’t matter)
- Old boots
- Cape, shawl, or scarf (black or purple)
- Optional: Battery-operated light
What works best is pairing it with the floating witch hats from earlier—it looks like a witch just walked out of the storybooks.
Pro tip:
Use a little painter’s tape to “levitate” the broom a couple of inches off the ground.
11. Haunted Doorway Garland
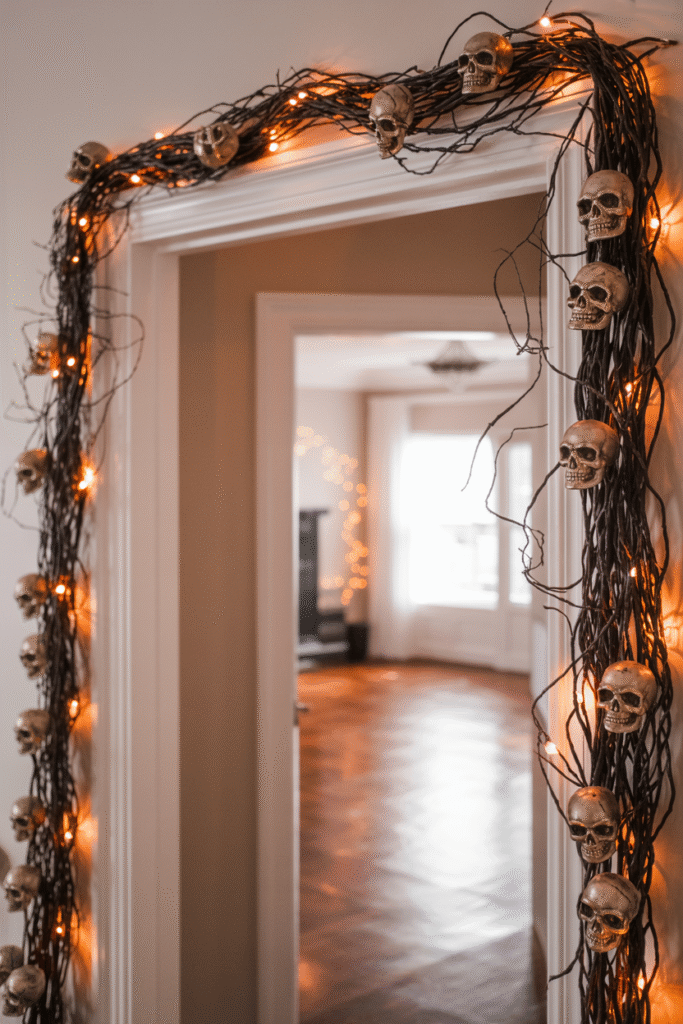
Forget the same old tinsel. Collect faux branches, leaves, or vines (dollar store finds are fine) and weave them together with fairy lights, little skulls, or miniature pumpkins. Hang the garland above your front door or across a large window.
Materials:
- Faux vines or branches
- Battery-operated fairy lights
- Mini pumpkins, skulls, or black roses
- Fishing line or ribbon
Timeframe:
30–45 minutes to assemble and hang.
Cost:
$10–20 for all-new supplies.
In my experience, this looks especially striking paired with a wreath on the opposite side of the door.
12. Creepy Cloth Drapes—Not Just for Outdoors

Old cheesecloth or gauze, sprayed lightly with watered-down black acrylic paint, makes an instant “haunted house” effect. Drape it over furniture, lampshades, or mirrors. For extra creepiness, stuff an old pillowcase with newspaper, tie it with twine, and paint on a ghost face—plop it in a chair for a “resident ghost.”
Materials:
- Cheesecloth or gauze
- Black acrylic paint (watered down)
- Old pillowcase, twine, and newspaper
Timeframe:
15–20 minutes for staining cloth; 10 minutes for making the pillowcase ghost.
Pro tip:
If you’re worried about staining fabric, try this on furniture you can cover with a throw or tablecloth after Halloween.
13. Glowing Tombstones—For Entryway Oomph
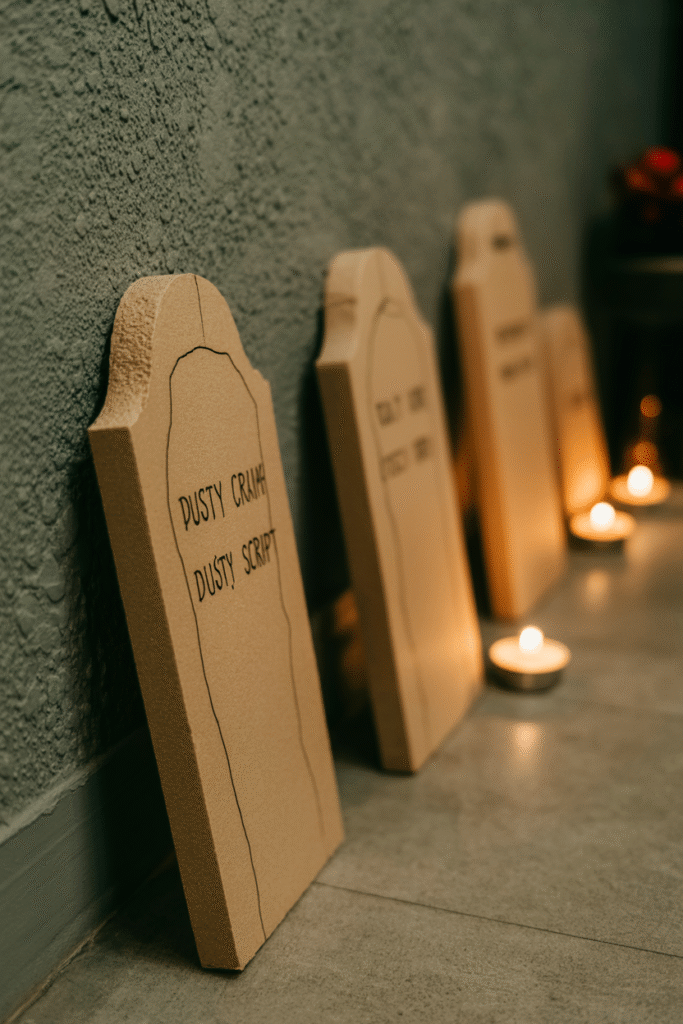
Foam board (from the dollar store or office supply aisle) cuts easily into tombstone shapes—think rounded or jagged tops, about 30–40 cm (12–16 in) tall. Paint them gray, then add “cracked” lines with a black marker. Prop them along your entryway or hallway and tuck a battery-operated tea light behind each for an eerie glow.
Materials:
- Foam board
- Craft knife or scissors
- Gray and black acrylic paint
- Paintbrush
- Battery-operated tea lights
Timeframe:
30–40 minutes for cutting, painting, and drying.
Cost:
$5–10 if you start from scratch.
What works best is giving each tombstone a funny or punny name (“Here Lies Ben Dover”) for a lighter touch. I’ve found families love reading them as they come in.
Pro tip:
If you’re short on time, use adhesive gray craft foam sheets and just stick tombstone shapes to the wall—they look great and peel off easily.
14. Eyeball Terrarium—A Spooky Science Vibe
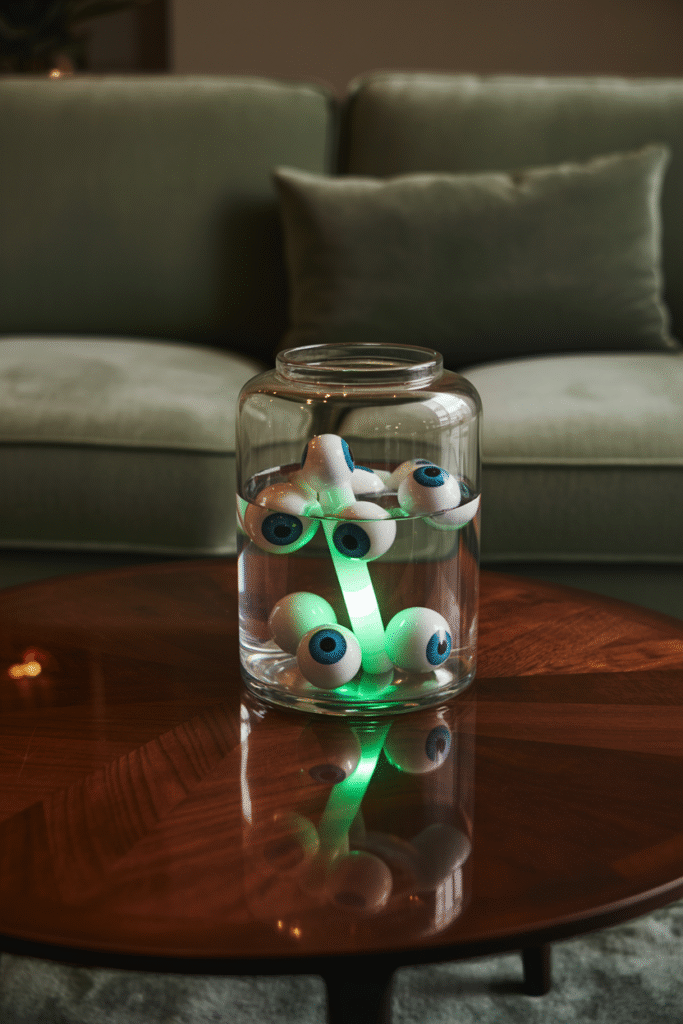
Take a big glass jar or a wide-mouth vase and fill it with water, then add floating plastic eyeballs (party supply stores have them by the dozen). Drop in a green glow stick for an extra “mad scientist” effect. Set it on your coffee table or console for a conversation starter.
Materials:
- Large glass jar or vase
- Plastic eyeballs
- Water
- Green glow stick
Timeframe:
5 minutes to set up.
Cost:
$5–8 for the jar and a bag of eyeballs.
Avoid this:
Don’t use real glass eyes or anything too realistic if you have squeamish visitors. The plastic ones look creepy but still playful.
15. Spellbook Coasters—Practical and Festive
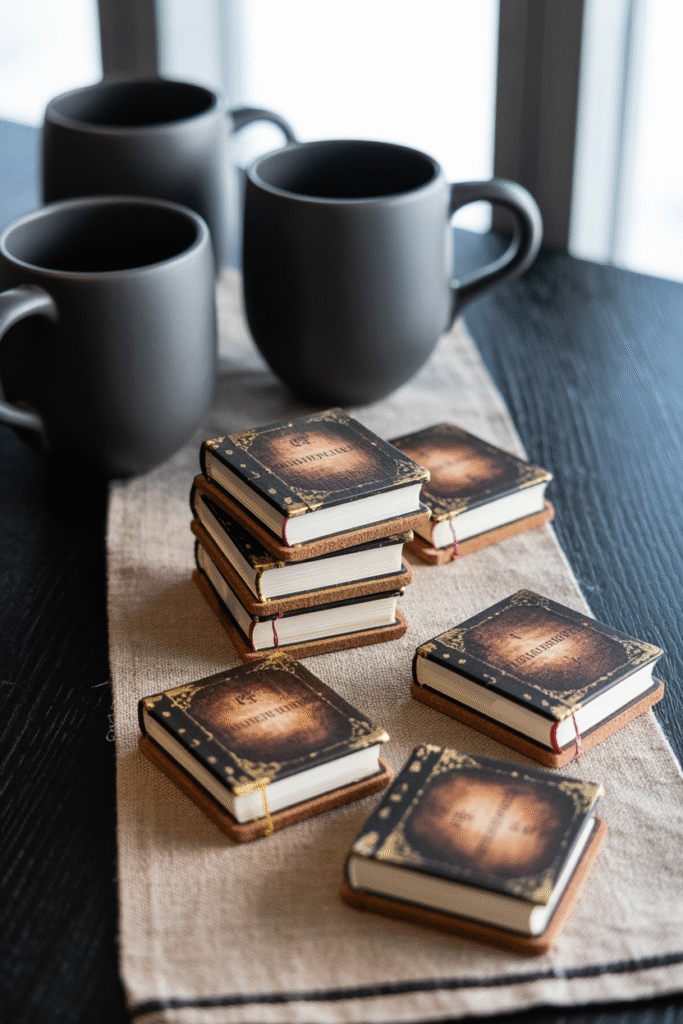
Cut squares of cork or felt to fit under glasses (about 10 x 10 cm / 4 x 4 in), then paint each edge black and the main surface to look like an old leather-bound book. Add a faux “gold leaf” spine and write titles like “Hexes for Beginners” or “Potions & Poisons.”
Materials:
- Cork or felt sheets
- Black, brown, and gold acrylic paint
- Paintbrush
- Permanent marker
Timeframe:
20 minutes to cut and paint.
Cost:
$3–5 for a pack of cork or felt.
In my experience, these make great party favors. I’ve handed them out at our annual Halloween get-together and people still use them months later.
Final Thoughts
Here’s the thing Halloween decor is supposed to be fun, not a competition. In my years of hosting and helping friends, I’ve learned that the best spaces feel inviting and a little magical, not overproduced. The ideas here are ones I keep coming back to because they’re enjoyable to make, easy to set up, and genuinely make guests smile.
Pick a few that speak to you, involve the family, and don’t stress about perfection. Sometimes, a single glowing pumpkin and a haunted doorway garland are all you need to make October feel special.