
If you’ve ever dreamed of tearing down that wall between your kitchen and living room, then felt your heart race at the thought of what comes next, you’re not alone. I’ve helped dozens of homeowners like you make the leap some eager, some nervous, all wondering if they’ll love the result as much as they loved the idea. I get it. Opening up your kitchen isn’t just about following trends; it’s about reimagining how you live, cook, and entertain every day.
I’ve seen open kitchens transform cluttered homes into airy, social spaces where families actually spend time together. But I’ve also seen the flip side projects that leave people staring at a sea of cabinets and wires, wondering where it all went wrong. That’s why I want to share not just the shiny inspiration photos, but the real, practical steps that make the difference between “That looks amazing!” and “I actually love living here.”
By the end of this guide, you’ll have a clear plan tailored to your home’s quirks and your personal style. I’ll walk you through 16 open kitchen design ideas each backed by real-world experience covering everything from structural basics to decor tricks, lighting secrets, and common mistakes I’ve learned the hard way. Whether you’re just considering an open kitchen or you’re knee-deep in a remodel, I promise you’ll find actionable advice you can trust.
What Actually Defines an Open Kitchen?
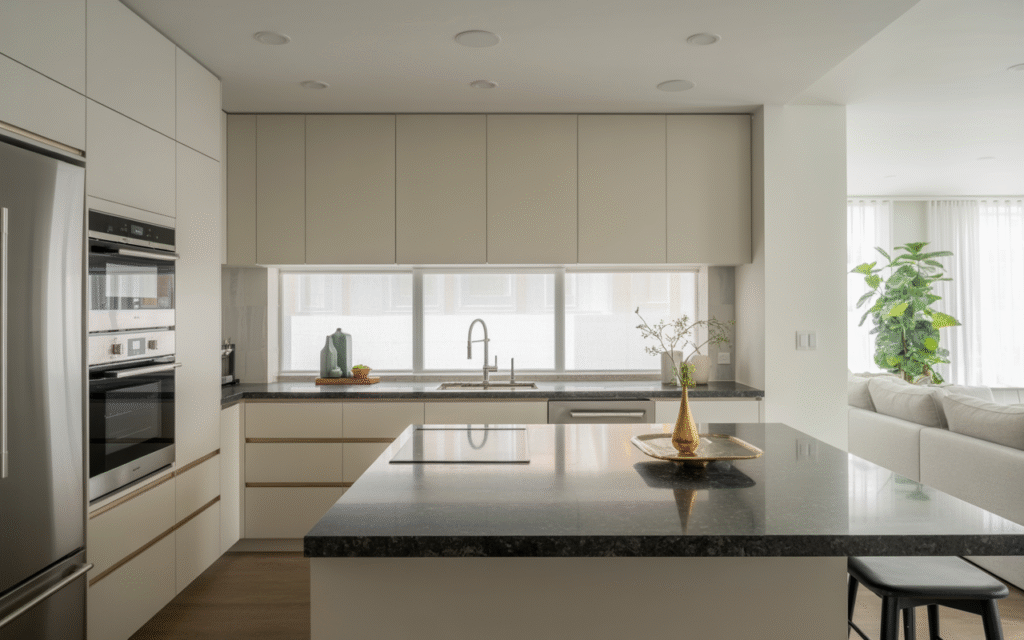
Let’s start simple. An “open kitchen” means your kitchen isn’t boxed in by walls it connects, either directly or visually, to your living or dining area. Sometimes, this is as easy as removing a single wall; other times, it’s a full remodel with new flooring, lighting, and cabinetry. I’ve found that knowing your goal helps focus the process. Are you after the “entertainer’s dream” where everyone chats at the island? Or a cozy, unified space where your kids can do homework while you cook?
Pro tip: Draw a rough scale sketch of your floor plan and use colored tape to mark where walls might come down. It’s a low-cost way to visualize the new flow before you commit.
Before You Tear Down That Wall: Essential Checks
- Check for load-bearing walls: Removing a wall is exciting, but make sure it’s not holding up your roof! I always recommend consulting a structural engineer or contractor before picking up a sledgehammer.
- Assess plumbing and electrical: Relocating sinks, stoves, or outlets is possible, but it adds cost and complexity. I once helped a client who didn’t realize her gas line ran through the wall she wanted to demolish—cue an unexpected expense.
- Think about odors and sound: Open kitchens mean frying smells and noisy appliances are now part of your living experience. If this worries you, consider a semi-open design with a half-wall or a bar counter as a buffer.
16 Open Kitchen Design Ideas You’ll Want to Copy
The magic of an open kitchen is in the details. Here are 16 approaches I’ve tested, with real project stories, material lists, and honest advice.
1. The “Cozy Connection” Layout
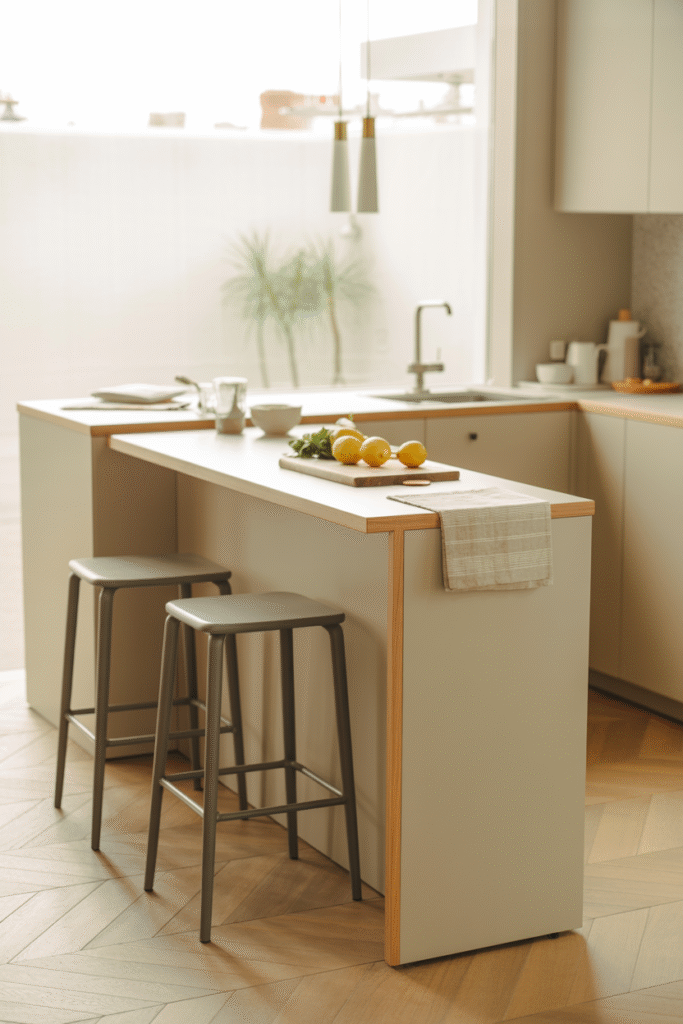
Instead of a huge, cold space, create a kitchen that feels connected but intimate. I like to use a peninsula (a U-shaped counter that juts into the living area) instead of a full island. This keeps the cook engaged with guests but offers a bit of separation. For a recent project, we used a 1.8 m (6 ft) peninsula with 30 cm (12 in) overhang for bar seating. Material list: Quartz countertop, walnut panels on the living side, and durable laminate on the kitchen side.
2. Multi-Level Counters for Zones
Mix counter heights to define “zones” without walls. For example, a 90 cm (36 in) prep area by the sink and a 105 cm (42 in) bar-height section for casual dining. This works wonders in small apartments. I’ve used Ikea SEKTION cabinets for the base, with custom plywood tops painted in a matte finish.
3. Smart Storage That Hides the Mess
Open kitchens demand tidy habits or smart storage. I swear by deep drawers (60 cm/24 in wide, 50 cm/20 in deep) for pots and pans, and pull-out trash bins blended into cabinetry. In my own kitchen, I added a slim 15 cm (6 in) cabinet next to the fridge for baking sheets and trays. Pro tip: Use frosted glass doors on upper cabinets for a light, airy look that still hides clutter.
4. Lighting Layers That Feel Like Home
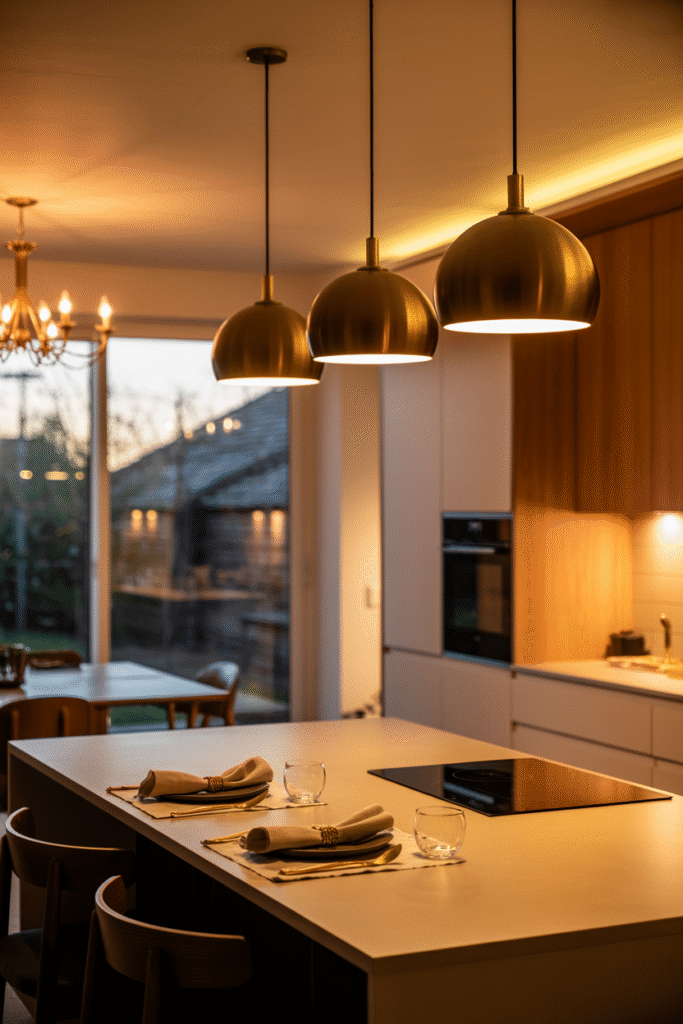
Overhead cans aren’t enough. I layer pendant lights over the island, under-cabinet LED strips, and a statement chandelier in the dining zone. For a small kitchen, even two carefully placed pendants make a huge difference. Warm white (2700K) LEDs feel cozy; daylight (5000K) is too harsh for cooking and relaxing.
5. The Magic of a Unified Color Palette
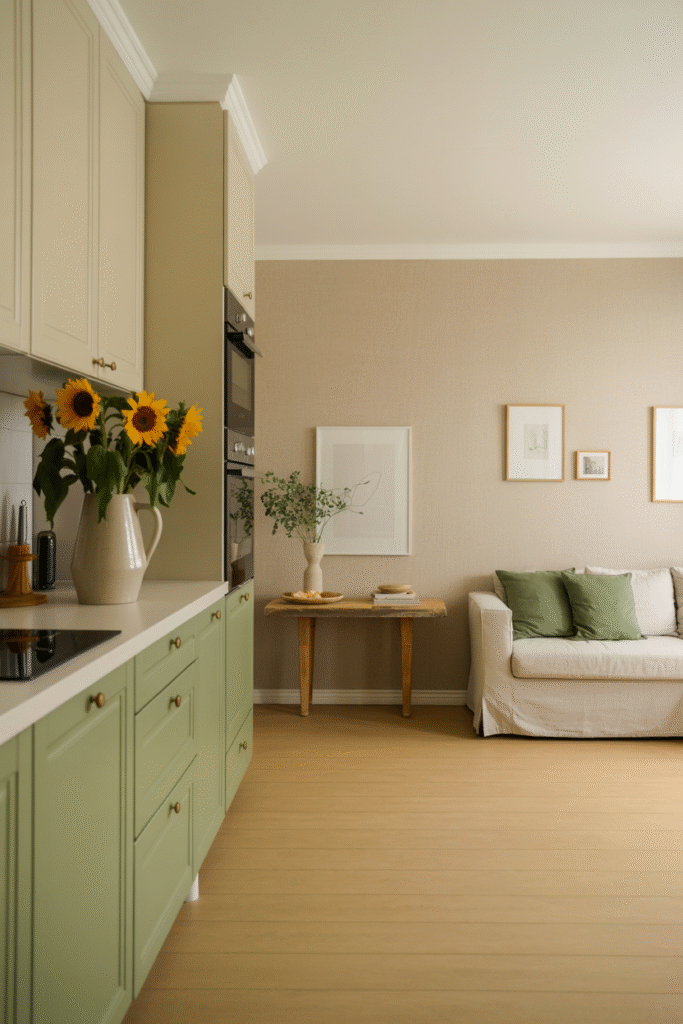
Pick three core colors: one for cabinets, one for walls, and an accent for hardware or a backsplash. I’ve seen too many kitchens that feel disjointed because the living room rug clashed with the island. In a recent makeover, we used sage green for lower cabinets, creamy white for uppers, and brass handles throughout. The living area repeated the green in throw pillows—instant cohesion.
6. Durable, Family-Friendly Flooring
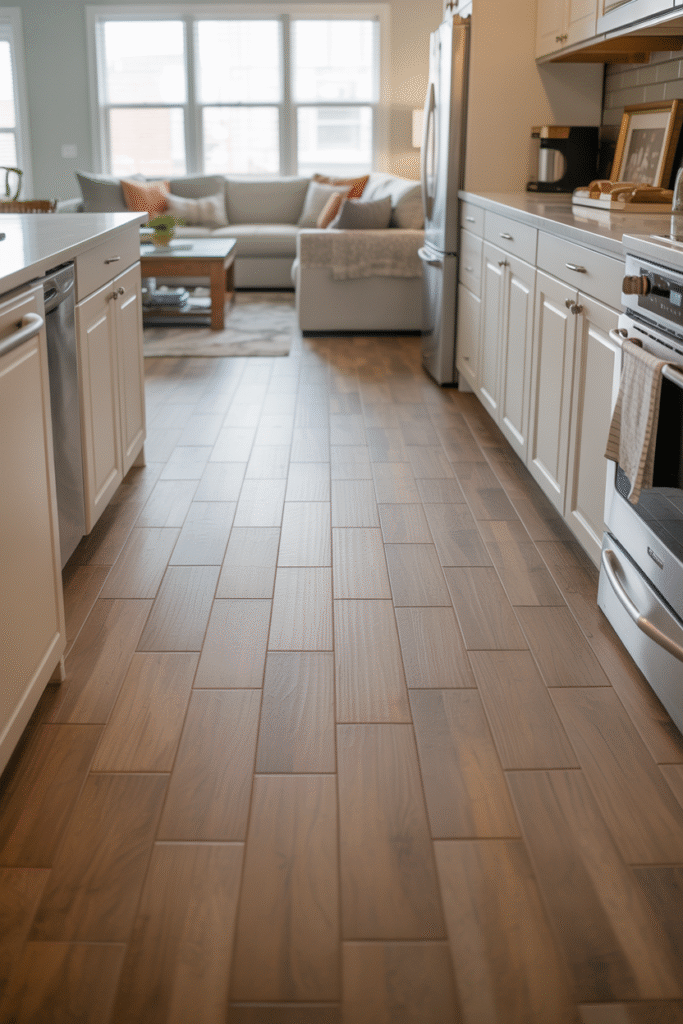
Open kitchens mean more foot traffic. I love luxury vinyl plank for its warmth and durability—it can handle spills better than hardwood. A client with three kids chose a wood-look tile that’s nearly indestructible and costs about ($30/sq ft). Pro tip: Run the same flooring throughout for a seamless look.
7. Thoughtful Backsplash Ideas
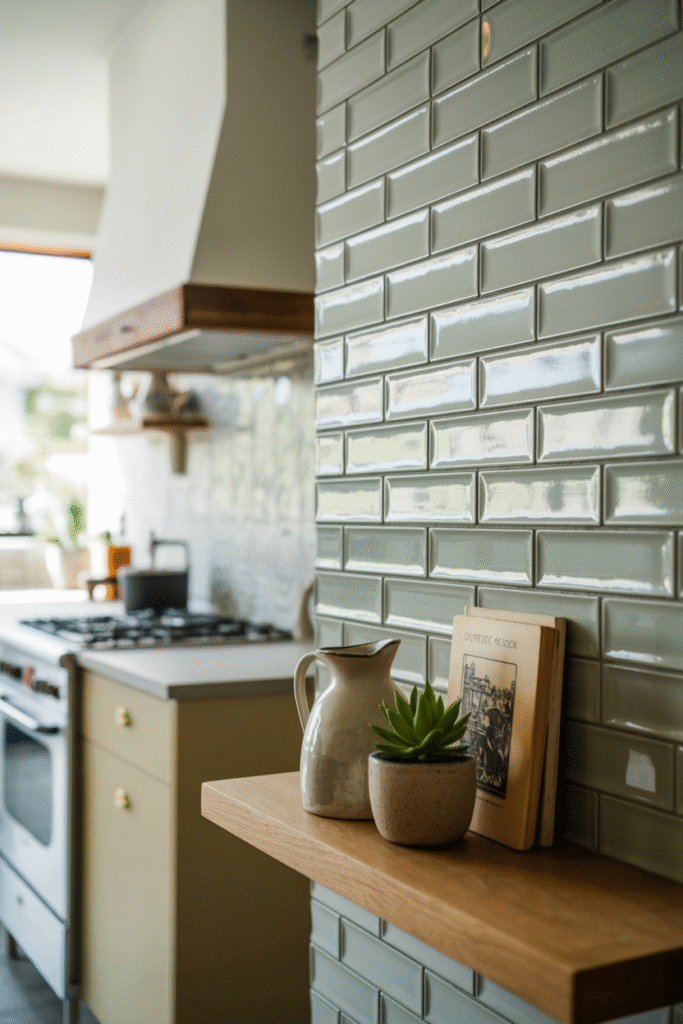
Skip the predictable subway tile. Try thin, elongated ceramic tiles in a herringbone pattern or painted beadboard for a cottage feel. In a budget-friendly project, we used peel-and-stick tiles behind the stove ($12/sq ft) and saved the real deal for the visible stretch.
8. The Open Shelving Debate
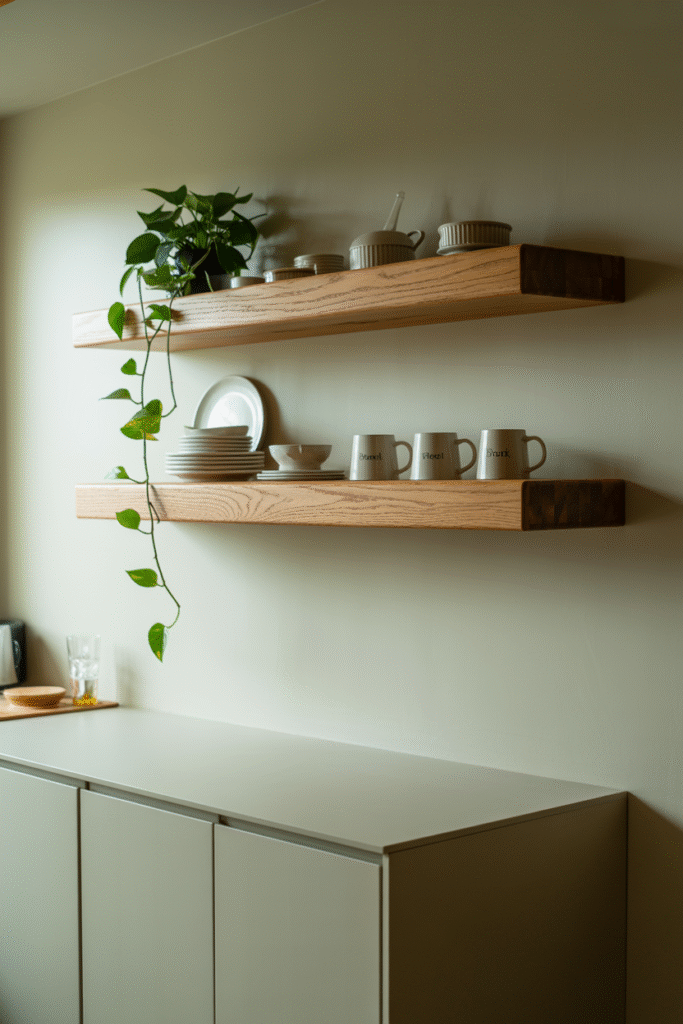
Open shelves look great—if you keep them curated. I reserve them for daily-use dishes, cookbooks, and a few plants. Anything else becomes dust magnet. In my kitchen, two 60 cm (24 in) oak shelves hold our favorite mugs and a trailing pothos. Avoid this: Overloading shelves with mismatched jars it’s visual chaos.
9. Integrating Appliances Seamlessly
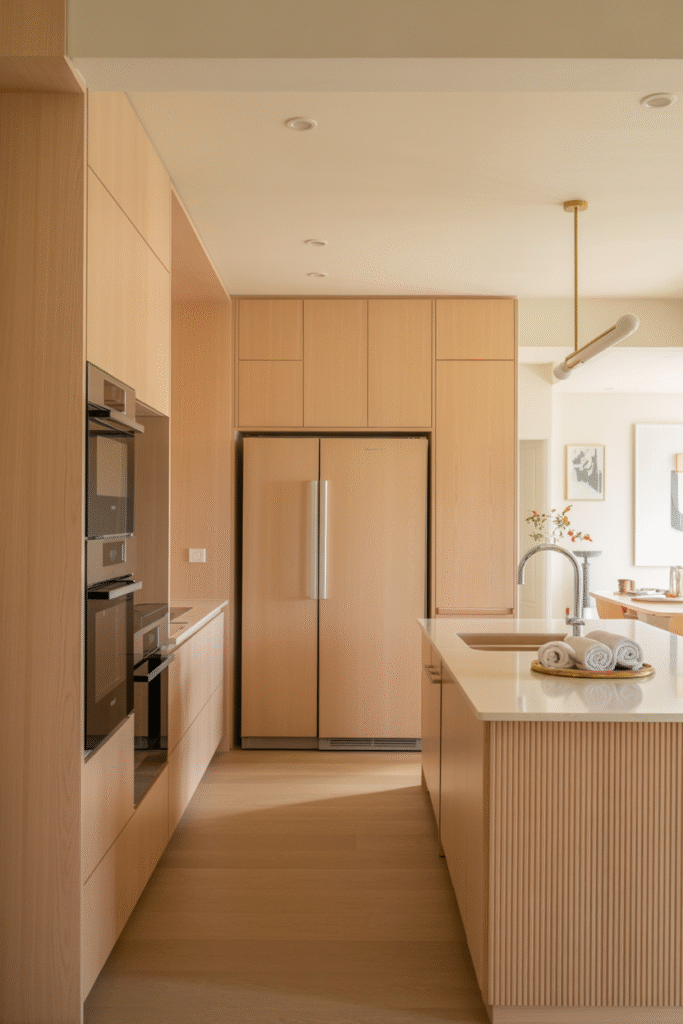
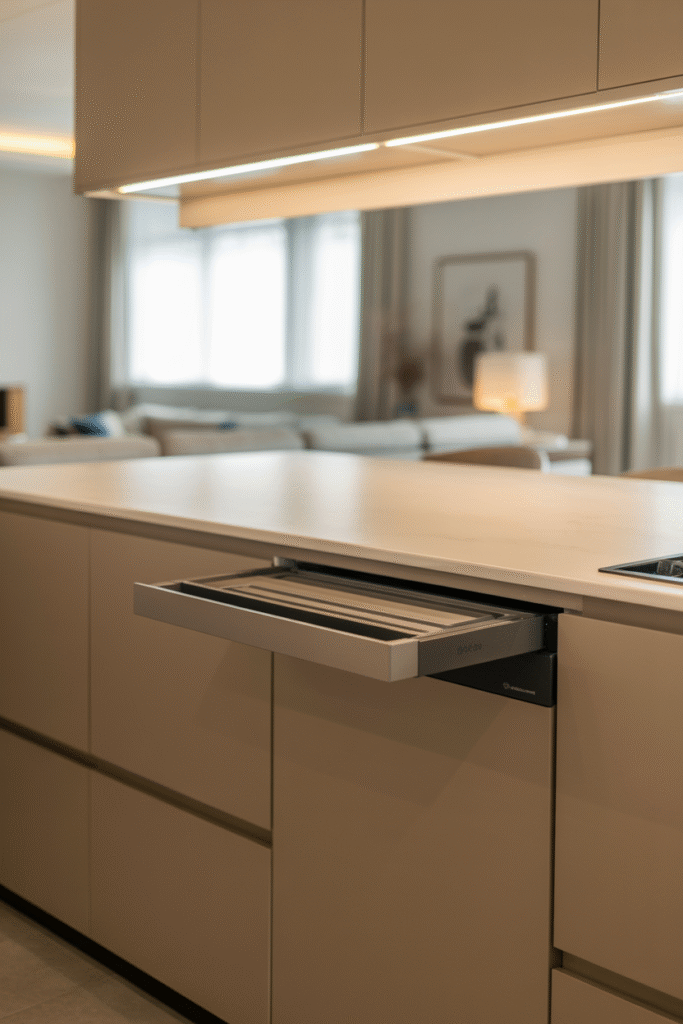
Built-in ovens and fridges look sleek but cost more. A panel-ready dishwasher is a smart upgrade, blending with your cabinetry. In a modern farmhouse project, we used a Bosch fridge with custom wood panels—no one guesses it’s there until it’s opened.
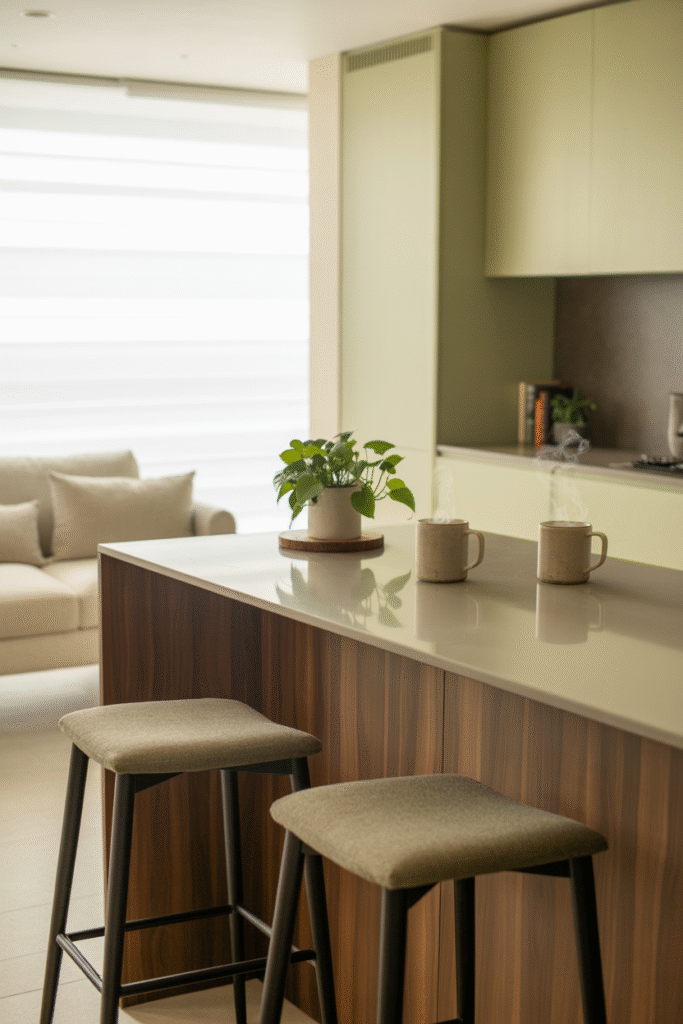
10. The “Nearly Open” Compromise
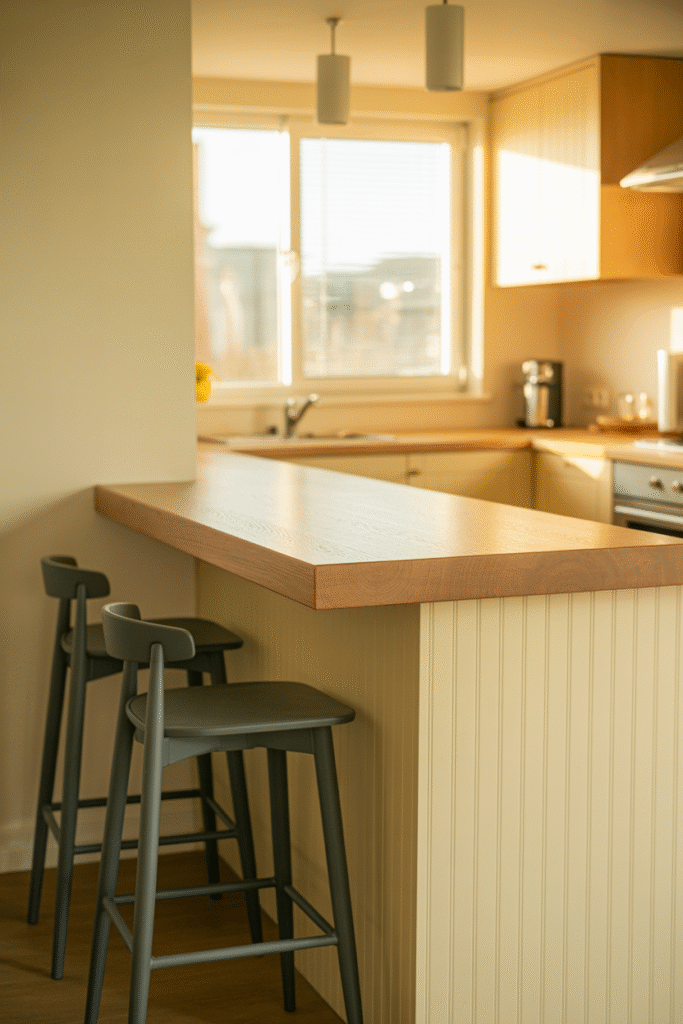
Not ready for total openness? Try a half-wall with open shelving or a bar counter with stools. In a compact flat, we left a 60 cm (24 in) pony wall, topped with a thick oak slab—a perfect spot for coffee and laptops.
11. Statement Range Hoods That Pull Double Duty

A sculptural range hood becomes a focal point. I’ve used copper hoods, plaster-coated domes, and even a reclaimed wood cover. One client splurged on a custom stainless hood with integrated lighting—it’s her favorite feature.
12. Mixing Materials for Warmth and Interest
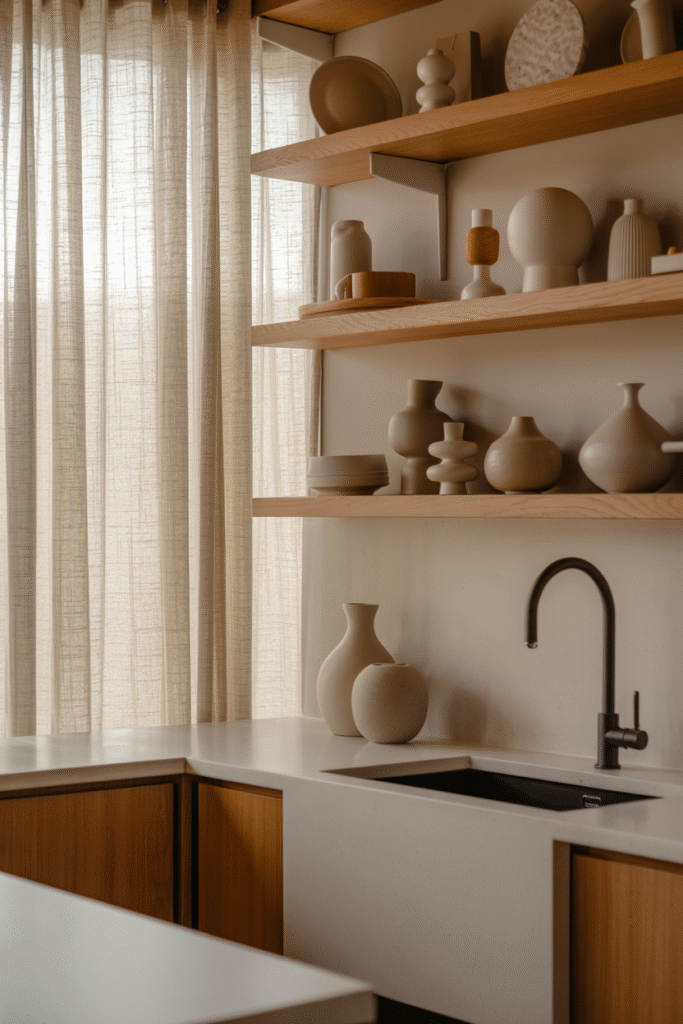
Combine wood, stone, and metal for depth. In a recent kitchen, we paired white oak floating shelves, a matte black faucet, and a white quartz counter—each material stands out but they all work together.
13. Clever Seating That Adapts
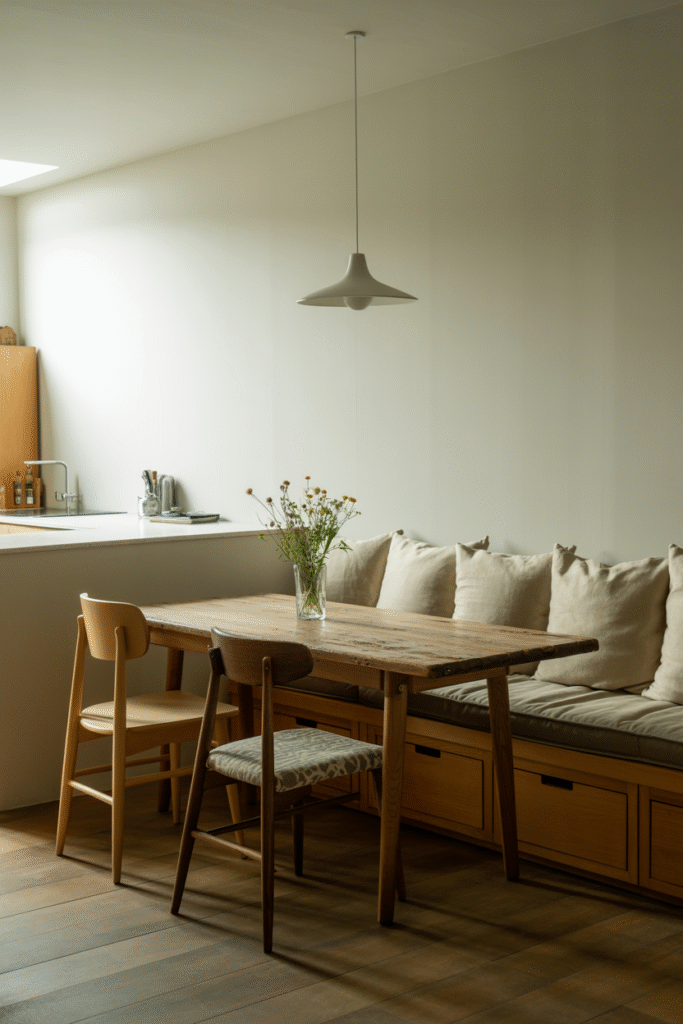
A fixed island with bar stools is classic, but I also love banquette seating tucked into a corner. For a family-friendly nook, we built a 1.2 m (4 ft) banquette with storage under the seat and a table from reclaimed teak.
14. Pet-Friendly Touches
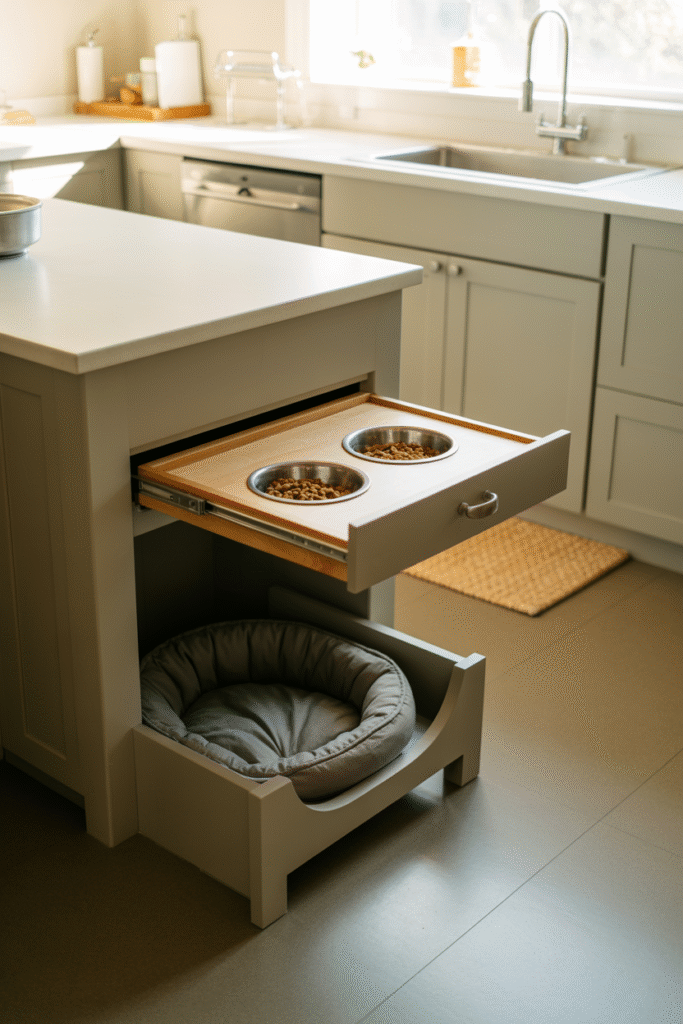
If you have pets, plan for them. I’ve added pull-out feeding drawers and a pet bed nook under the island. A client even built a tiny pet gate that folds down from the cabinet when needed.
15. Flexible Room Dividers
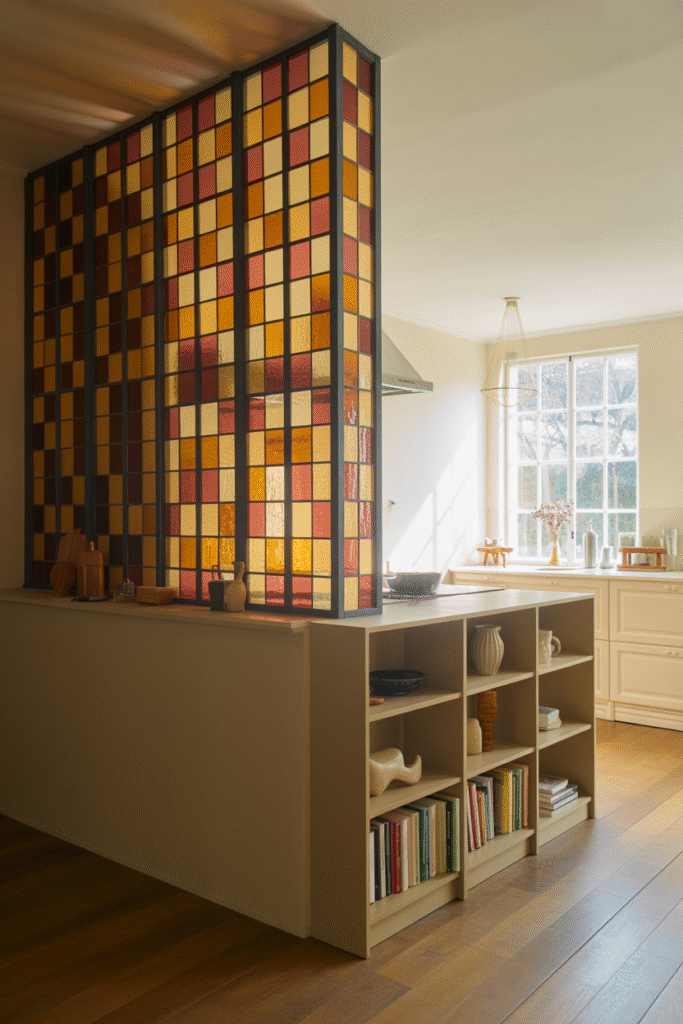
Need some separation? Try a sliding barn door, a room-height bookcase, or a folding screen. One couple used a vintage stained-glass partition—privacy without blocking light.
16. Personalizing with Unexpected Details
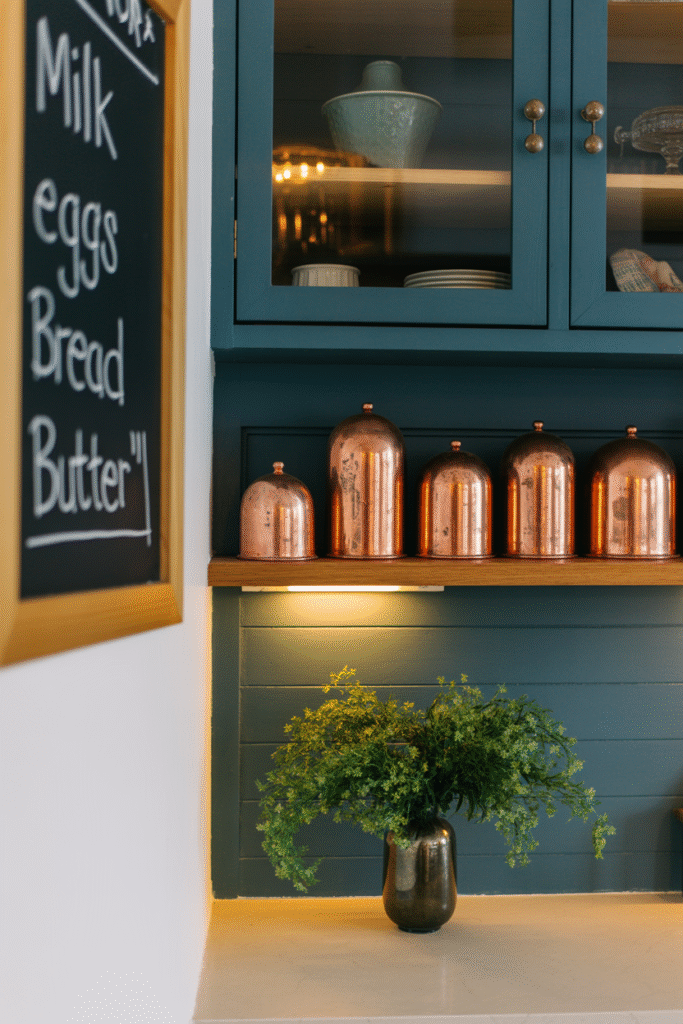
Finally, inject your personality. I’ve encouraged clients to hang a collection of vintage plates, display a row of copper molds, or paint the inside of glass-front cabinets a moody blue. In my kitchen, a chalkboard wall in the corner lists recipes and grocery needs—practical and fun.
Common Mistakes and How to Avoid Them
- Underestimating storage needs: Open kitchens mean more visible storage. Double your initial estimate for “hidden” cabinets.
- Ignoring the sightlines: When you walk in, what do you see first? Plan so the fridge door isn’t the first thing you notice.
- Forgetting about ventilation: Strong range hoods are not optional. A client skimped on this, and her living room smelled like curry for days.
- Overloading on trends: Bold colors and mixed metals are great, but make sure you can live with them long-term.
- Skipping the floor plan: Even a simple sketch helps you spot workflow hiccups before they’re built in.
FAQs
Q: How much does it cost to open up a kitchen?
A: If you’re simply removing a non-load-bearing wall, you might spend ($600–$1,800). Full remodels with new cabinets, counters, and flooring can easily reach ($6,000–$12,000), depending on finishes and appliances.
Q: What’s the best flooring for high-traffic open kitchens?
A: Luxury vinyl plank, porcelain tile, and stained concrete are all durable, easy to clean, and stylish. Avoid softwoods—they scratch easily.
Q: How do I keep my open kitchen from looking messy?
A: Daily tidying helps, but smart storage is key. Use deep drawers, pull-out bins, and closed cabinets for bulky items. Reserve open shelves for a few pretty, frequently used items.
Q: Can I have an open kitchen if I cook a lot of smelly or smoky food?
A: Yes, but invest in a powerful range hood (look for at least 400 CFM). I also recommend a small air purifier for lingering odors.
Q: What if I want some separation but like the open feel?
A: Try a peninsula, half-wall, or sliding partition. Even a tall bookcase or a row of bar stools can create a soft boundary.
Q: How long does a typical open kitchen project take?
A: Simple wall removals: 1–2 weeks. Full remodels: 6–12 weeks, depending on complexity and contractor availability. Always add a buffer for unexpected delays.
Wrapping Up
Opening up your kitchen is one of the most rewarding home projects if you plan carefully and focus on what makes your life easier, not just what looks good in photos. I’ve seen families rediscover their homes and guests linger longer when the space just feels right. Whether you start with a single wall or go all-in, remember: the goal isn’t perfection, but a kitchen that feels like home.
If you’re still on the fence, try living with a “removable” change hang curtains where a wall would go, or prop open the doors while you cook. Sometimes, the best solutions are the simplest. And if you ever have a question, drop me a note at artfullhouses.com I love hearing about real homes and real transformations. Here’s to kitchens that are as liveable as they are lovely.