
I’ll be honest when I first moved into my current house, I saw my backyard as little more than a patch of grass sandwiched between walls. Not exactly inspiring. If that sounds familiar, trust me, you’re not alone. Most homeowners with small yards feel resigned to their fate, thinking there’s only so much you can do with limited space. But after years of tackling client projects and experimenting in my own garden, I can tell you: small backyards are an untapped goldmine. What if I told you that with a few smart choices some as simple as rearranging furniture, others requiring a weekend’s DIY effort you could turn even the tiniest outdoor area into a place you genuinely love? That’s what I’ll show you here: 16 real, tested small backyard ideas for homeowners at every skill level. By the end, you’ll have a clear, step-by-step roadmap—and the confidence to start building your own inviting escape, no matter how small your starting point.
Understanding Your Space: Start Here
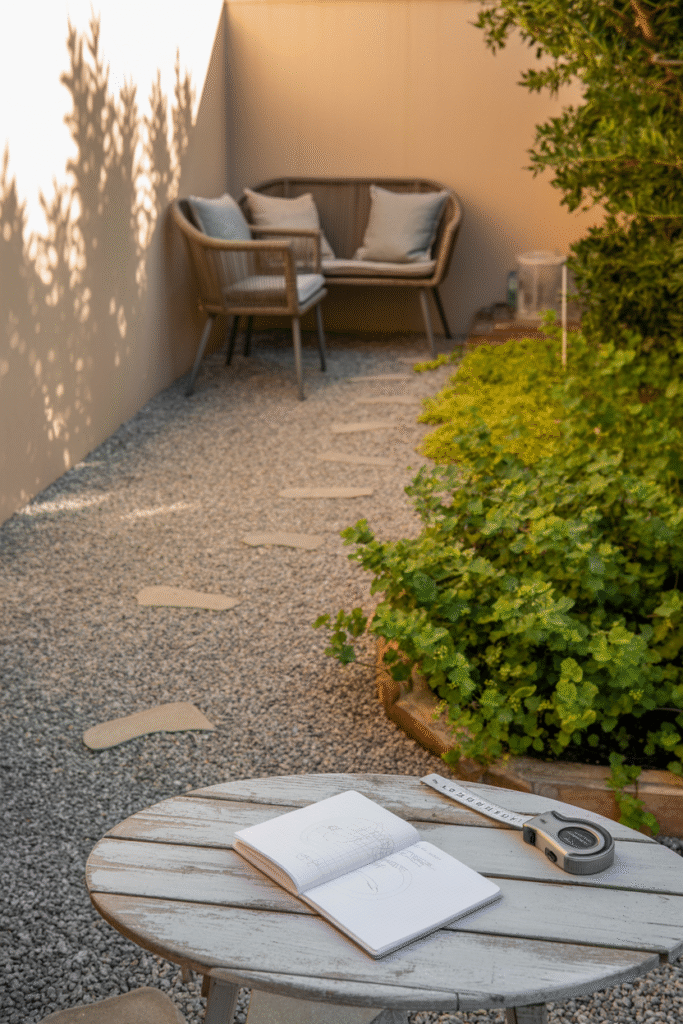
Before you buy a potted plant or a single paving stone, it’s worth spending a couple of afternoons really getting to know your backyard. In my experience, the most successful small-space transformations come from careful observation, not rushing in with trendy ideas. If you’re feeling stuck, go outside and just sit for a while notice how the sun moves, which spots get the best breeze, and where the view’s nicest (or needs screening). Sketch a rough plan on paper and jot down measurements. In metric, my own backyard is about 6m by 3m (that’s roughly 20ft by 10ft), and I’ve found that even a small notebook sketch helps avoid planning mistakes.
A mistake I made early on? Ignoring how much space activities really take. I once tried to cram a dining table, two lounge chairs, a barbecue, and a vegetable patch into 24 square meters (80 square feet)—it felt cluttered, not cozy. What works best is identifying one or two activities you actually want to do outside (reading, dining, growing plants), and building your plan around those.
Small Backyard Layout Smarts
When you’re short on space, zoning matters more than ever. Think of your yard in layers: a comfortable seating area, a play or dining zone, a green corner, and maybe a spot for storage. I’ve helped clients use half-rounds of paving slabs to subtly mark transitions between areas without bulky walls, a trick that keeps the whole yard feeling open.
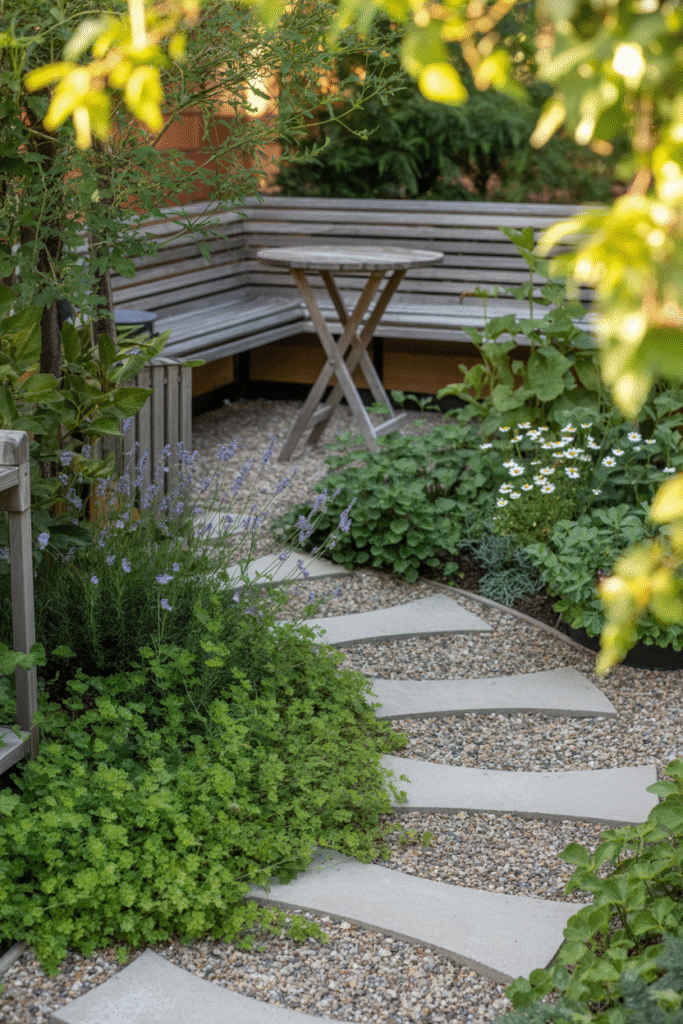
Pro tip: Curved lines (think gentle arcs for paths or planting beds) make tight spaces feel larger, while straight edges and right angles highlight boundaries and shrink the visual feel. I’ve always had the best results with a curved gravel walkway, about 40–50cm (16–20in) wide, winding through the yard it’s both practical and inviting.
Floors matter, too. Hard surfaces (stone, brick, concrete) are great for dining and lounging, but if you’re keen on a softer, greener look, wood deck tiles are easy to install and budget-friendly. I suggest keeping at least 2m (6.5ft) of clear central space for movement and flexible use.
Vertical Gardens: Green Walls, Big Impact
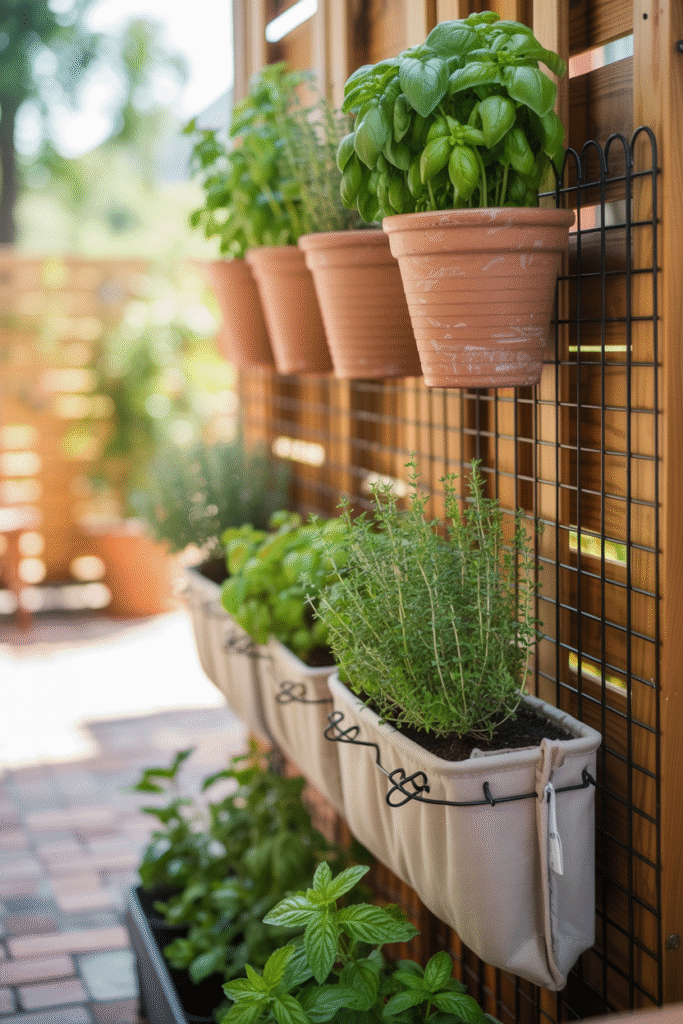
If you want to grow flowers, herbs, or even tomatoes but your floor area is tight, vertical gardens are your secret weapon. I’ve set up living walls using everything from basic wooden crates and metal grids to repurposed rain gutters, and the effect is always a game-changer for small yards. For example, a simple pallet wall with hooks for pots can hold up to a dozen plants in the space of a single patio tile—and you water from above, which helps avoid mess.
What you need:
- Wooden pallet (sand and seal before planting)
- Small pots or fabric pouches
- Quality planting soil
- Slow-release fertilizer
- Staple gun and heavy-duty hooks
Timeframe: Half a day
Cost: $30–$100 depending on materials
Skill level: Beginner
Caution: Make sure the wall is securely mounted, and avoid overloading with wet soil—that’s a mistake I learned from firsthand!
If you’re renting or want a quicker fix, hanging pouches or wall boxes work well. I once helped a client in a city apartment set up a vertical herb garden in terracotta wall pots, and you’d be amazed at what a fresh, fragrant difference that small project made.
Multi-Functional Furniture: Twice the Use, Half the Space
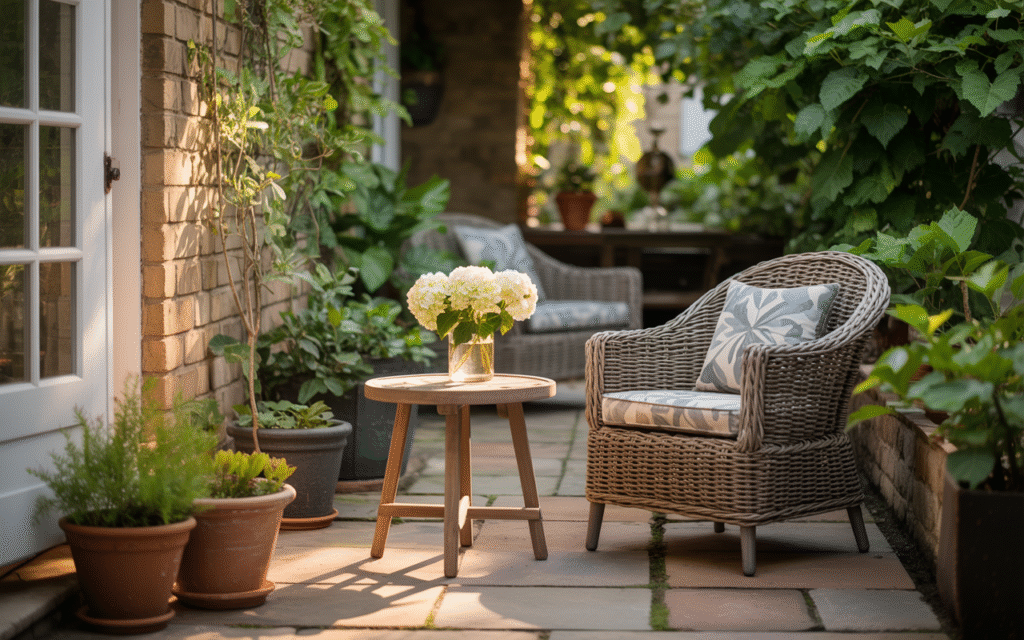
Furniture can be your biggest ally or your worst enemy in a small backyard. I’ve learned to look for pieces that tuck away, stack, or serve double duty. Foldable chairs and nesting tables are obvious, but my favorite is storage seating—benches with hidden compartments that hold cushions, toys, or garden tools.
Pro tip: If you’re handy, a DIY storage bench along a back fence is both simple and transformative. I built one for around $80 with painted plywood, a waterproof top, and storage tubs underneath. It seats three, holds all my cushions, and doesn’t eat into limited floor space.
Avoid this: Oversized furniture that can’t be easily moved. In my first yard, I inherited a bulky wooden table, and it instantly made the whole space feel cramped. A round bistro set (about 60–80cm/24–32in diameter) is a much better fit for most small backyards.
Plant Like a Pro: Miniature Canopies & Layered Blooms
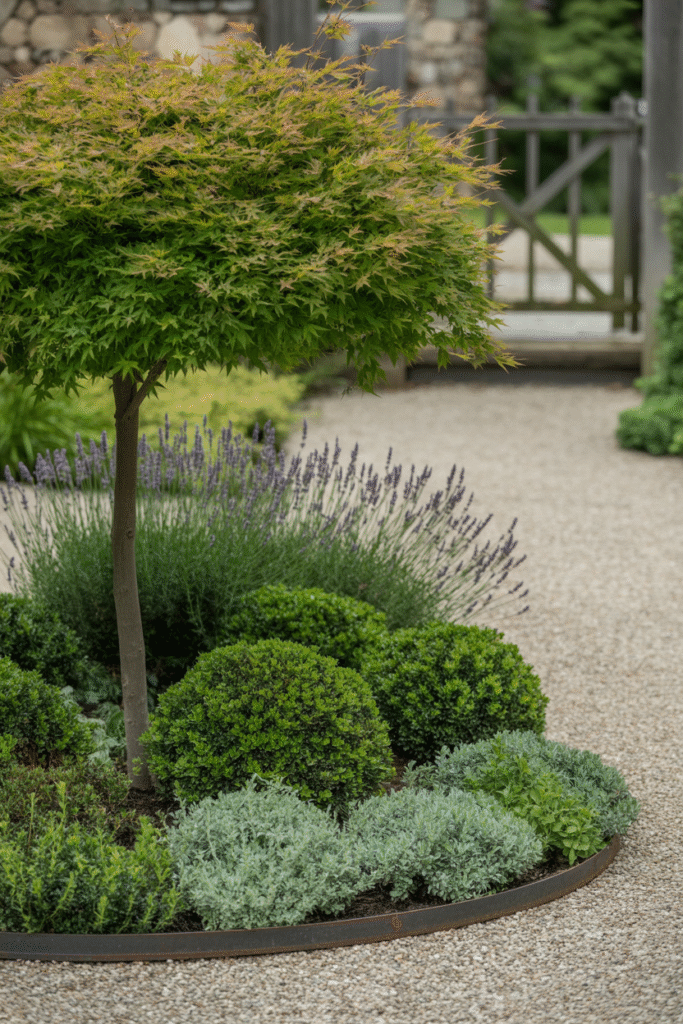
I’ll never forget the magic of seeing a client’s tiny yard go from flat to lush with a single miniature Japanese maple—the canopy casts delicate shade, and the trunk doesn’t overwhelm the space. Small trees are worth their price, and I recommend varieties like Dwarf Crape Myrtles, Japanese maples, or columnar crabapples.
Grow upward with narrow shrubs (boxwood, arborvitae), and tuck smaller flowering perennials at their feet. I usually plant in odd-numbered groups (three, five, or seven of a type) for a natural look.
What works best:
- Tall: Dwarf fruit trees, columnar evergreens (1.8–2.4m/6–8ft)
- Medium: Boxwood, lavender, spiky grasses
- Low: Creeping thyme, sedum, small hostas
Avoid this: Planting too close to fences or walkways. Leave at least 30cm (12in) between full-grown plants and paths to avoid constant maintenance headaches.
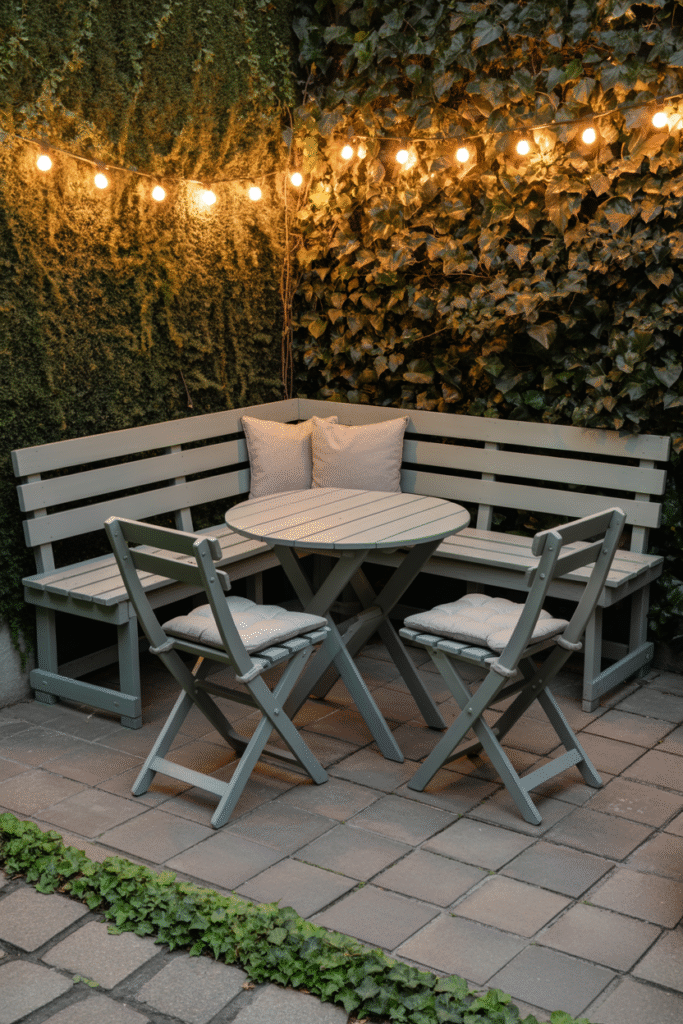
Lighting That Transforms: Cozy Evenings in Small Yards

The right lighting can stretch your outdoor enjoyment long after sunset. String lights never go out of fashion for a reason—they’re cheap, easy to install, and instantly cozy. I’ve set up lines of solar-powered LED bulbs along fences and pergolas, and the warm glow makes any space feel intimate.
But don’t stop there. I love using spotlights to highlight greenery or sculptures, uplighting a fence for a dramatic backdrop, or even laying a string of waterproof LEDs along a pathway for safety and charm.
Pro tip: Use timers or smart plugs so lights turn on automatically. This is especially helpful when you’re entertaining and don’t want to fuss with switches.
Timeframe: 1–2 hours
Cost: $15–$60 for a basic setup
Skill level: Beginner
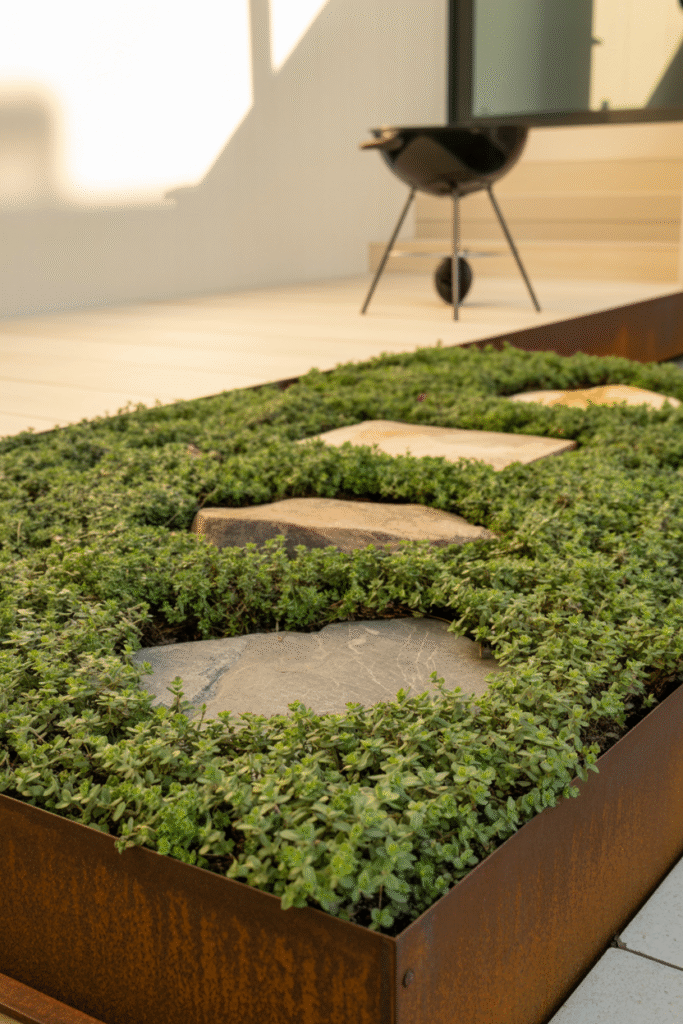
Get Creative with Floors & Paths
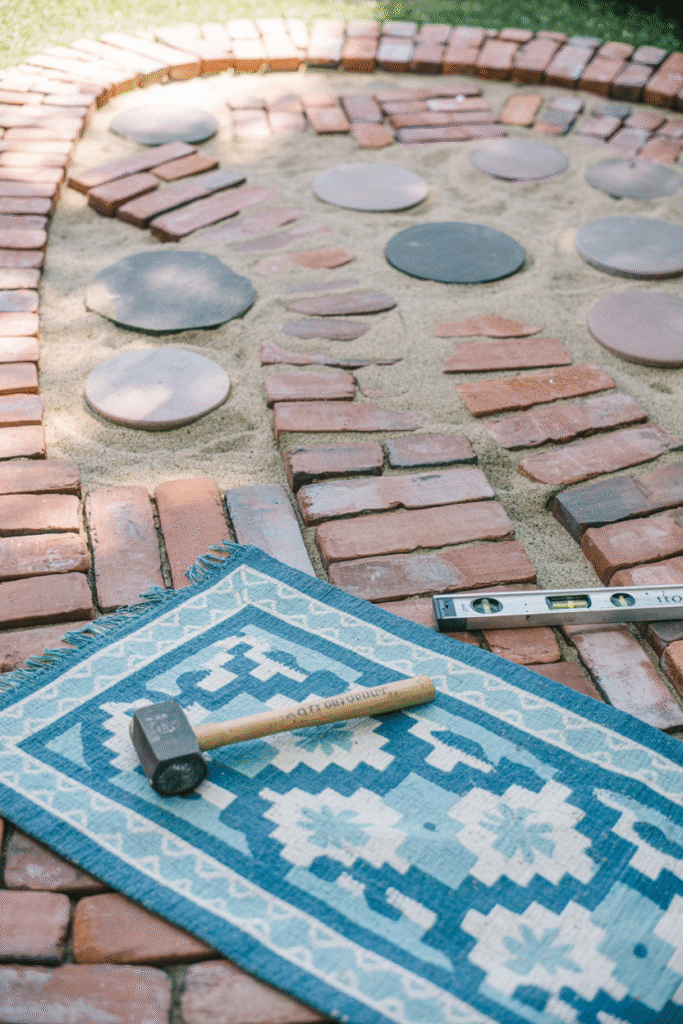
If your backyard is mostly grass or bare dirt, consider revamping your floors to define zones and add character. I’ve poured a simple concrete slab for a fire pit area, and I’ve seen clients use reclaimed brick, slate, or even painted outdoor rugs for pop. One memorable project involved laying down a patchwork of colorful ceramic tiles left over from a bathroom renovation instant personality, minimal cost.
For a DIY stone path, I find it easiest to outline the shape with string, dig down about 10–15cm (4–6in), fill with sand, and set flat stones or pavers. Leave a bit of space between them for creeping ground cover to fill in naturally.
Materials needed:
- Stones, pavers, or mosaic tiles
- Sand
- Tape measure, spray paint or string for marking
- Rubber mallet
Timeframe: Weekend project
Cost: $40–$200 depending on materials
Skill level: Intermediate
Small Water Feature Magic
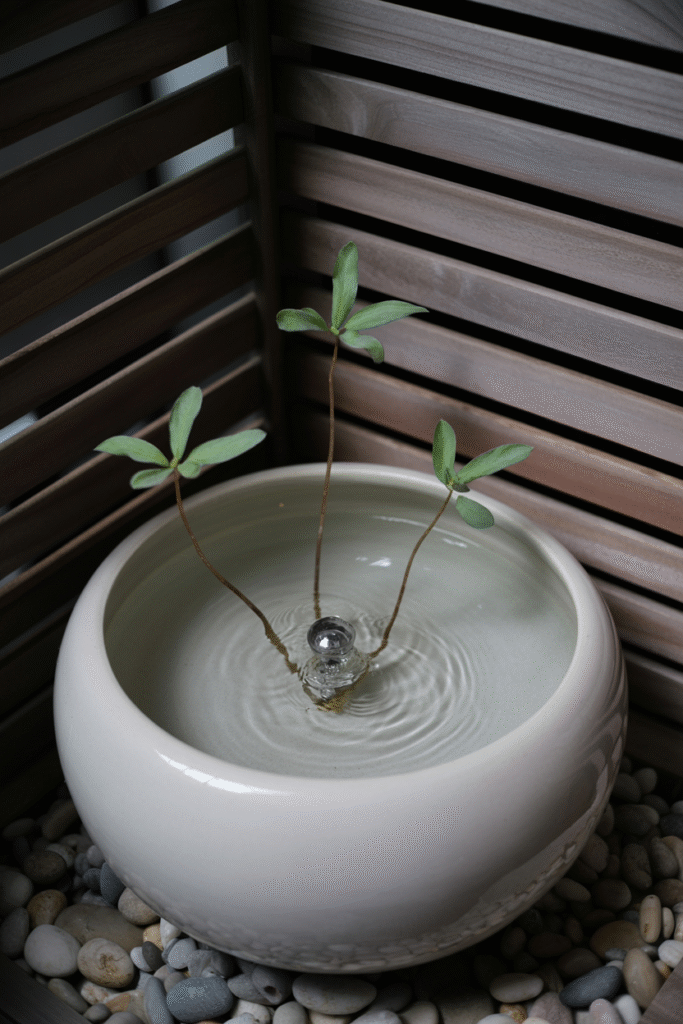
A water feature even a tiny one adds movement and calm to a small yard. I’ve made a rustic fountain from a ceramic pot and a small recirculating pump, and I’ve seen others use galvanized tubs or repurposed whiskey barrels. The trick is to keep it simple and shallow, with a cover to prevent debris.
What you need:
- Waterproof container (ceramic pot, barrel etc.)
- Small recirculating pump
- Decorative stones or pebbles
- Water plants (optional)
Pro tip: Place the water feature where you can both see and hear it from your main seating area.
Timeframe: 2–4 hours
Cost: $50–$150
Skill level: Beginner to intermediate
Safety: If you have young children or pets, always supervise around water, even shallow features.
DIY Pergola or Shade Sail: Instant Privacy & Style
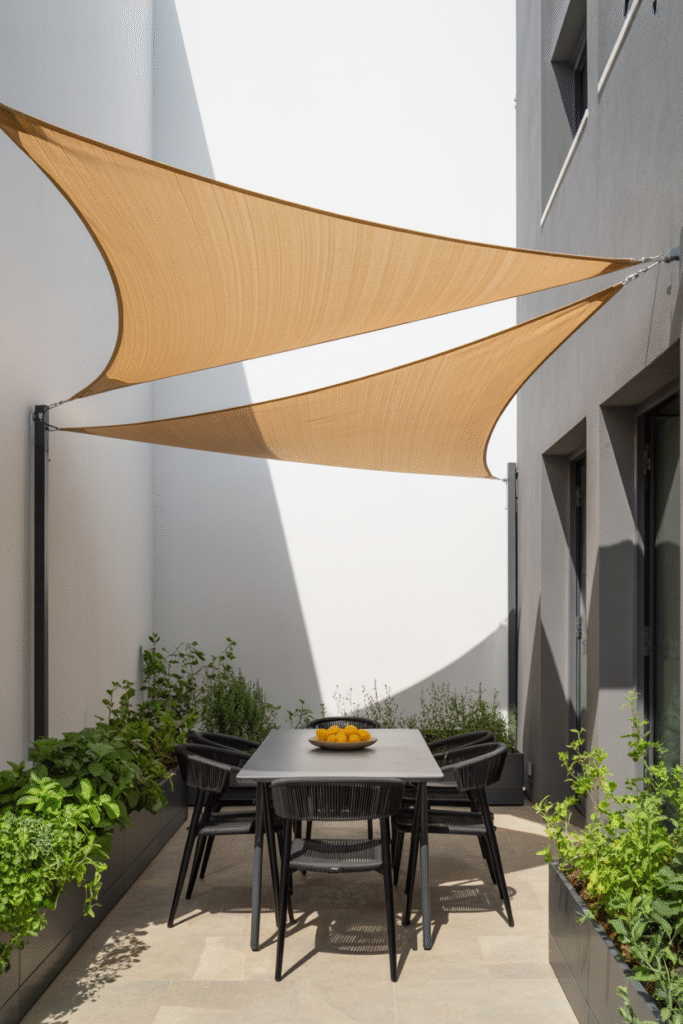
Overhead structures can provide shade, privacy, and visual interest. A pergola is a classic choice, and I’ve built one from treated lumber with overhead slats, adding string lights and climbing vines for atmosphere. For a quicker, less expensive option, shade sails are surprisingly effective. In one of my favorite projects, I used two triangular sails to define a dining zone—total transformation for about $100 and an afternoon’s work.
Materials for a basic pergola:
- Treated lumber posts (at least 10cm/4in wide)
- Crossbeams and slats
- Concrete for footings
- Drill, saw, level, wrench
Timeframe: Weekend for a pergola, 2–3 hours for a sail
Cost: $100–$800 depending on materials and size
Skill level: Intermediate to advanced for pergola, beginner for sail
Avoid this: Installing a pergola over an existing grass area you want to preserve—footings and shade will kill the grass beneath.
Container Gardening: Flexibility & Abundant Blooms
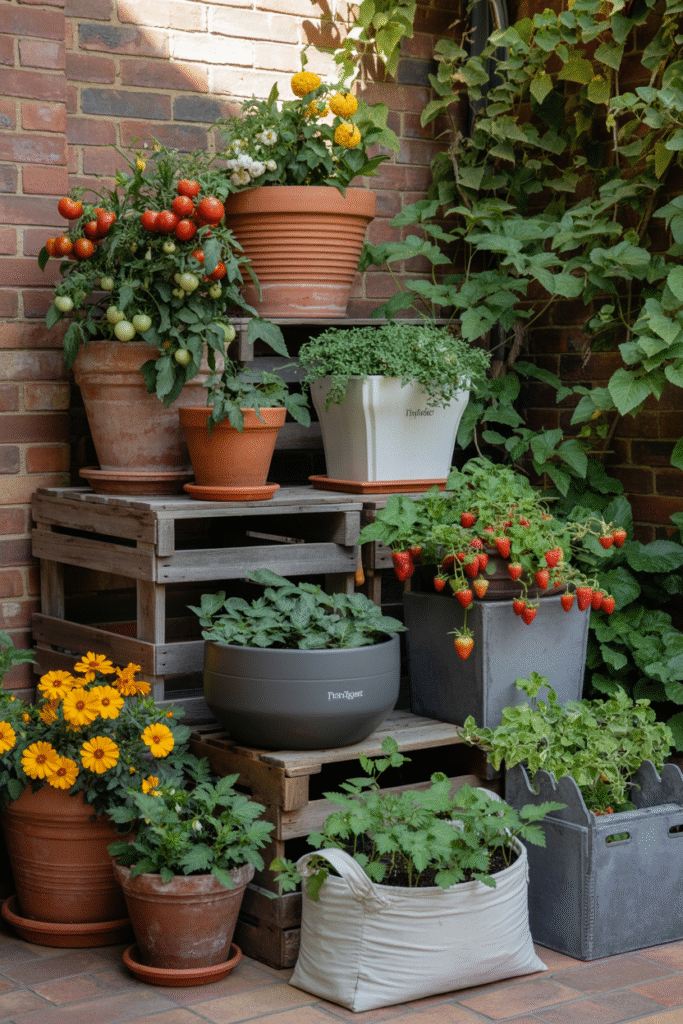
The first time I filled my modest backyard with pots of herbs, flowers, and strawberries, I finally got what all the container gardening hype is about. You can move plants as needed, experiment without commitment, and enjoy blooms even in the tiniest footprint.
I’ve found that terracotta pots, cedar planters, and fabric grow bags all work well. For vertical effect, use pots in graduated sizes on a pedestal or stack them on old wooden crates.
Pro tip: Choose self-watering containers for hot summers, and always use high-quality potting soil—I learned the hard way that cheap soil leads to poor growth.
Timeframe: Ongoing, but setup takes just an afternoon
Cost: $5–$50 per container
Skill level: Beginner
Outdoor Storage That Fits In
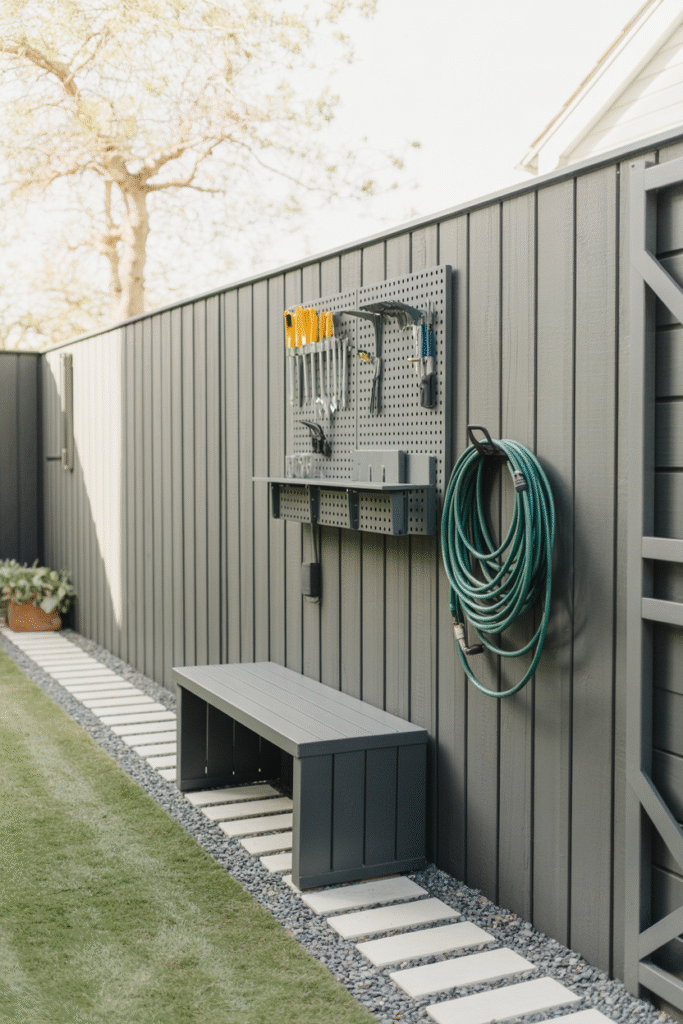
A major pain point for small backyards is where to stash all the “stuff”—tools, cushions, toys, grill accessories. I solved this by tucking a slim storage bench behind a folding bistro set, but I’ve also helped clients install vertical sheds (only 60cm/2ft deep) along a side fence. For extra cleverness, try a storage ottoman or build in cubbies under your deck.
Materials needed:
- Weatherproof storage bin or bench
- Pegboard for tool organization
- Shelving for vertical sheds
Timeframe: 1–3 hours
Cost: $40–$200
Skill level: Beginner to intermediate
Caution: Always secure storage units against wind and rain.
Fire Pits & Cozy Corners
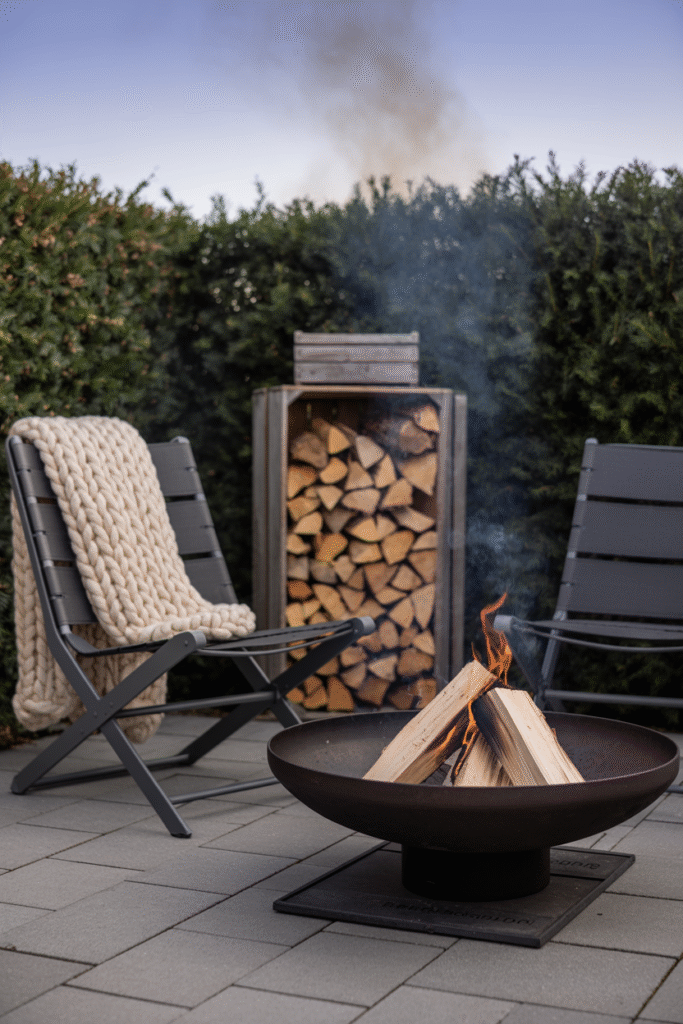
A fire pit makes evenings in the yard feel special, even when space is tight. I’ve built in-ground fire pits with stone surrounds, but for most small yards, a portable metal fire bowl is just as cozy and much easier. Set it on a 1m (3ft) square of pavers for safety, add a few foldable chairs, and you’ve got instant ambiance.
Pro tip: Use an old wheel rim as a heat shield for a brick fire pit ring. I saw this trick at a friend’s and the effect is both rustic and practical.
Materials needed:
- Portable fire bowl or bricks for a ring
- Pavers for base
- Folding chairs
Timeframe: 1–2 hours
Cost: $30–$150
Skill level: Beginner
Safety: Always follow local fire codes and keep a fire extinguisher handy.
Small Lawn Alternatives
If mowing a postage-stamp lawn feels like a chore, consider alternatives. I’ve laid down artificial turf for a low-maintenance “green” look, and I’ve seen clients use clover, moss, or creeping thyme for soft, walkable ground cover.
Pro tip: Artificial turf looks best in small, rectangular areas and needs occasional hosing down. For a natural look, try a mixed ground cover of clover, thyme, and miniature sedum.
Timeframe: Half a day
Cost: $5–$20/m² ($0.50–$2/sq ft)
Skill level: Beginner
Pergolas with Curtains: Privacy & Mystery
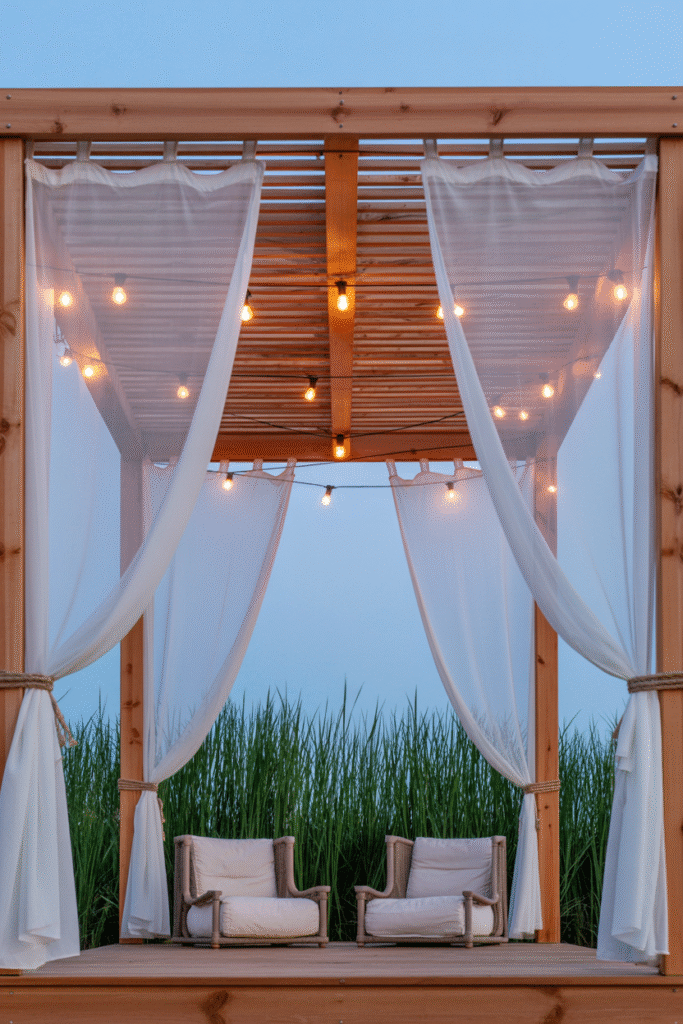
Want to make your little yard feel like a secret garden? Add outdoor curtains to your pergola or over a clothesline. I once helped a client use sheer white panels for a romantic, airy look, and another used thick canvas for a cozy nook. Draw them closed for privacy, tie them back for open-air dining—versatility is the name of the game.
Materials needed:
- Outdoor-rated curtain panels
- Curtain rods or rope
- Hooks or ties
Timeframe: 1–2 hours
Cost: $30–$120
Skill level: Beginner
Mini Play Zones for Kids & Pets
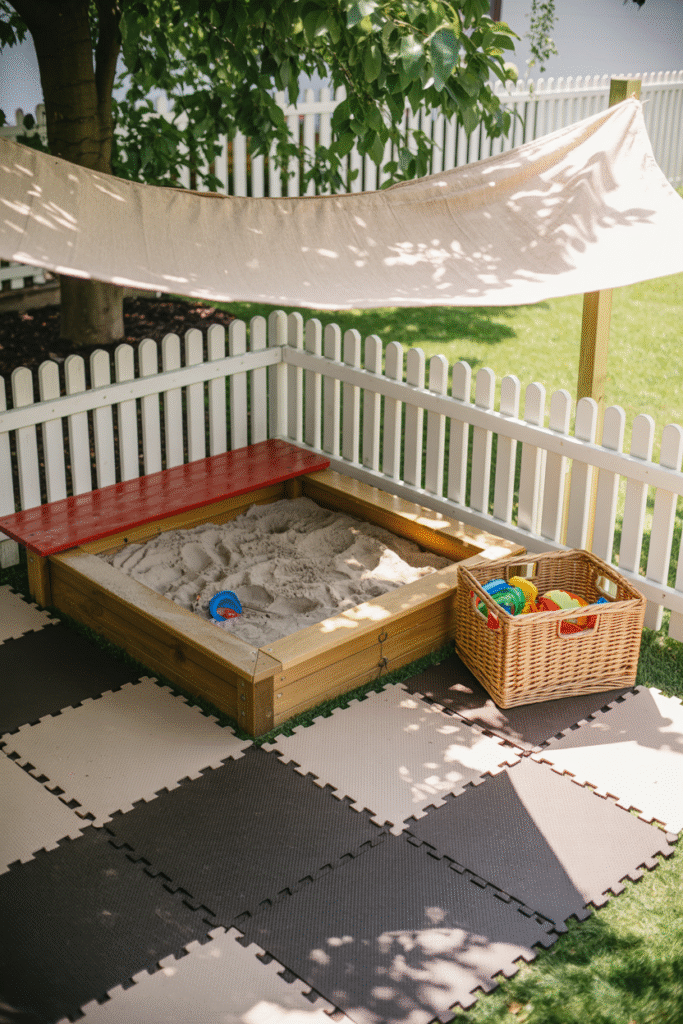
Even if your yard is small, carve out a corner for kids or pets. I’ve set up a sandbox using a tarp beneath, a simple wooden frame, and play sand, and I’ve helped clients install a mini obstacle course for dogs using PVC pipes and tunnels.
Pro tip: Use a sandbox with a lid to keep things tidy, and consider interlocking foam tiles for a soft play surface.
Materials needed:
- Wood, sand, tarp (for sandbox)
- PVC pipes, tunnels, cones (for dog course)
- Foam tiles (optional)
Timeframe: Half a day
Cost: $30–$100
Skill level: Beginner
Personal Touches: Art, Color, & Mood
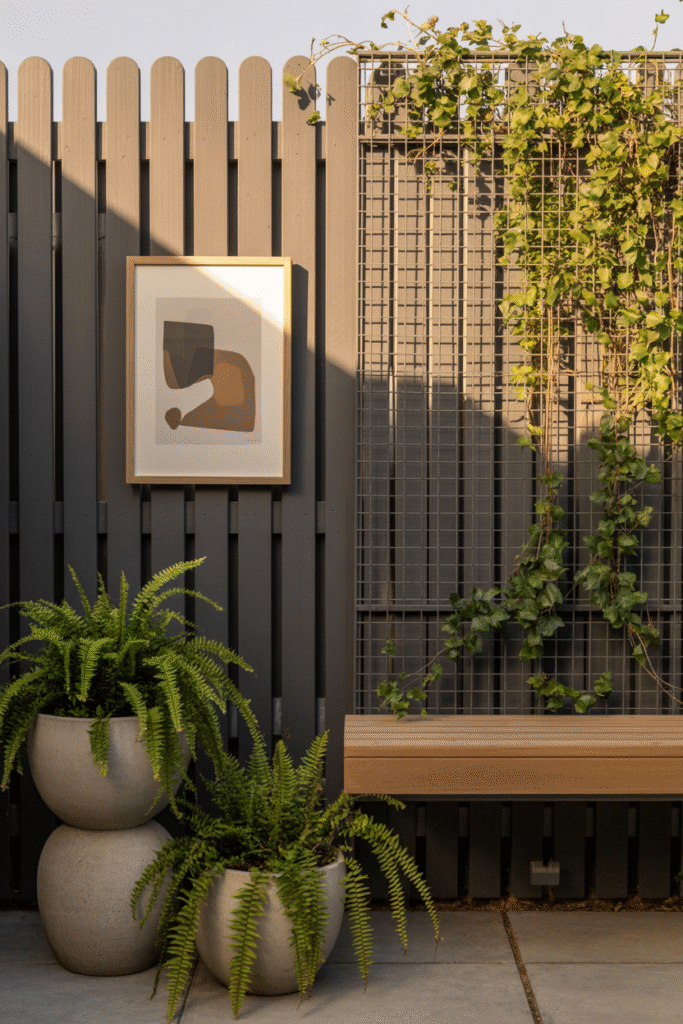
Your backyard should feel like yours. I’ve hung colorful outdoor-safe art on fences, used patterned pillows for seats, and painted a mural on a side wall—each time, it’s been the personality that made the space sing. Even something as simple as a birdbath or a quirky vintage mirror can add magic.
Pro tip: Don’t be afraid to change things up each season. I rotate cushions, swap out art, and add seasonal plants so that my small yard always feels fresh.
Timeframe: Ongoing, but easy weekend updates
Cost: $10–$100 per change
Skill level: Beginner
Wrap up
Small backyards don’t need grand budgets or endless weekends they need clear priorities, smart measurements, and a few hard-working ideas used in the right spots. In my experience, the wins come from stacking small decisions: a curved path to guide movement, vertical planting to free up floor space, a storage bench that hides clutter, and warm lighting that makes everything feel intentional after sunset.
If starting feels overwhelming, pick one zone and finish it fully—often a 2m x 2m dining nook (about 6.5ft x 6.5ft) or a cozy lounge corner is enough to change daily habits. What works best is building in layers over a month: week 1 for layout and paths, week 2 for seating and storage, week 3 for planting, week 4 for lighting and personal touches. Keep materials consistent—two wood tones, one metal, one stone—and repeat plants in threes for cohesion.
Avoid crowding, measure twice before buying furniture, and give plants their mature spacing so maintenance stays easy. Add one “moment” that feels special a tiny water bowl fountain, a fire bowl on a paver pad, or art on the fence and let that set the mood. I’ve found that once the first area is working, motivation snowballs. Finish that one spot, make a coffee, sit outside, and let the next right move reveal itself.