
Do you ever feel like your porch looks exactly the same as your neighbors’ every Halloween—just a couple of pumpkins and maybe a plastic spider web tossed on the railing? I’ve been there. For years, my decorations felt a little flat, like I was checking off a list rather than creating a mood. But over time, I’ve learned that a porch can set the stage for the entire neighborhood. It can be spooky, whimsical, or cozy—it just needs a few intentional touches. In this guide, I’ll share 12 Halloween porch decoration ideas I’ve personally tested, along with practical tips on cost, materials, and time needed to pull them off. By the end, you’ll be ready to create a porch that feels thoughtful, festive, and totally you.
Light First: A Porch’s Secret Weapon
When decorating for Halloween, lighting is 80% of the mood. I always start here.
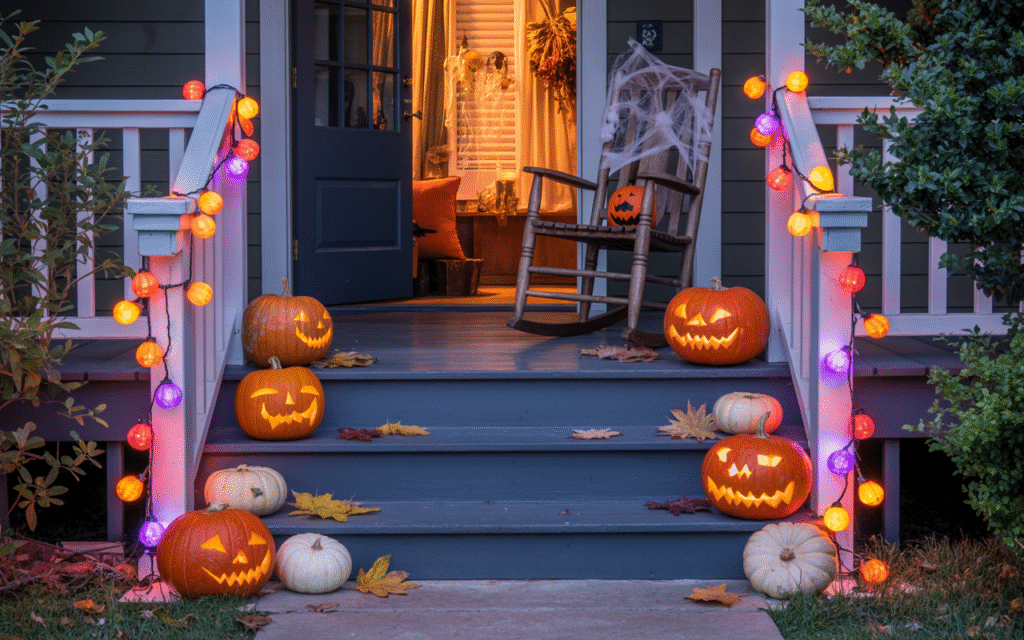
- String lights: Swap out your warm white fairy lights for orange or purple strands. I typically wrap them around porch railings or stair banisters. A set of 10 m (33 ft) costs around €15 ($16) and takes about 30 minutes to install.
- Lanterns and candles: Metal lanterns stuffed with faux LED candles give a warm flickering effect without worrying about wind. Avoid real flames here—it’s safer, especially with kids around.
- Floodlights: One of my favorite tricks is setting up a small floodlight with a colored gel filter (like red or green) pointing toward the doorway. It instantly transforms ordinary décor into something eerie.
Pro tip: Always test your light placement after dark—not just daytime. Things that look fun in sunlight can feel either too subtle or too overwhelming at night.
Haunted Entryway with Drape Fabrics
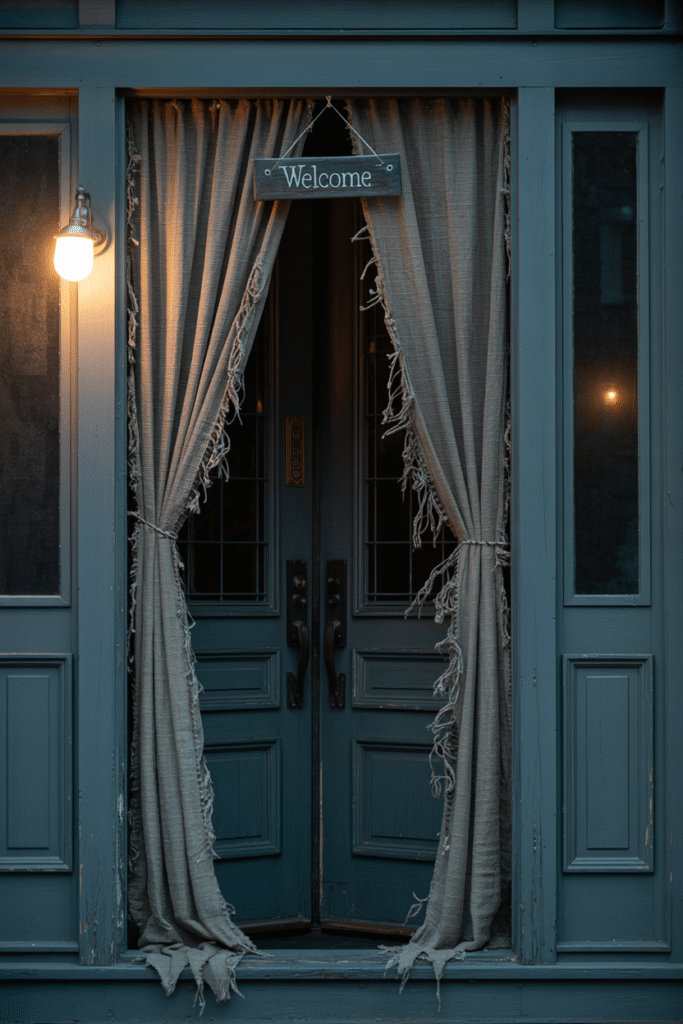
I’ve found that nothing makes an entry more dramatic than fabric. Try this:
- Buy 5 m of black cheesecloth or gauze (about €10 / $11).
- Tear it into strips so the edges look ragged—not neat.
- Hang them over the doorway or tuck panels into the top of your doorframe.
The movement when the breeze hits adds instant haunted-house vibes. For a variation, I’ve used plain white fabric soaked lightly in coffee to get a yellowed “aged” effect and then shredded it. A friend once told me it looked like something stolen from an old castle.
Oversized Pumpkin Planters
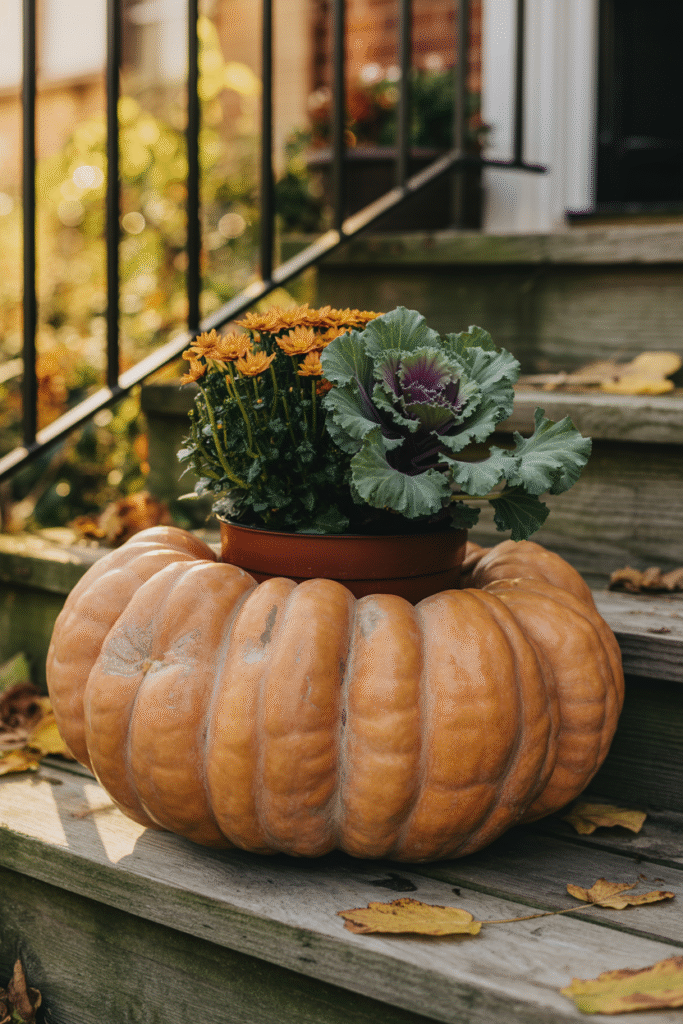
Every porch needs pumpkins, but think bigger. Literally.
Instead of scattering little ones everywhere, I buy one or two oversized pumpkins (30–40 cm / 12–16 in wide) and hollow them out to use as planters. Pop in autumn flowers like mums (chrysanthemums) or ornamental kale. Since the pumpkin will eventually soften, I place a small plant pot inside the hollowed cavity for easy swapping.
Avoid this: Don’t skip the liner. Otherwise, water will seep into the pumpkin and make it mushy in days.
Cost: Around €20–30 ($22–32) for pumpkin + mums
Time: 45 minutes
Skill level: Beginner
Creepy Silhouette Windows
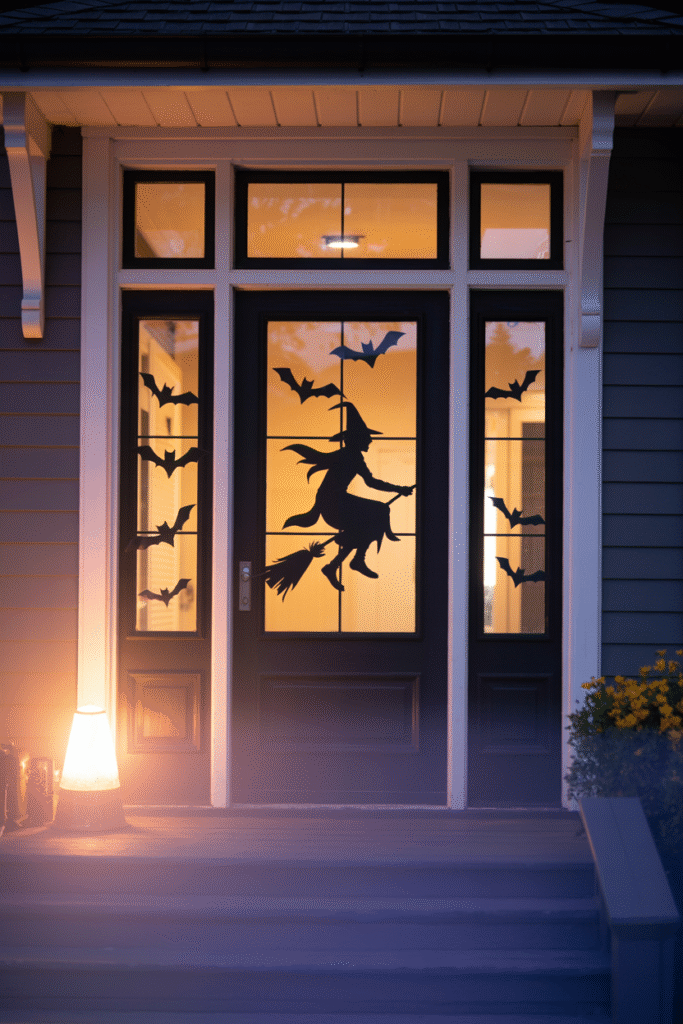
If your porch has sidelights, front windows, or even a glass-paneled door, try silhouette art. I once traced a giant black cat shape from cardboard and taped it against the inner glass. With a small lamp inside, the effect at night was incredible—just a glowing outline that looked like it was watching the street.
Ideas include:
- Witches on broomsticks
- Bats flying across panes
- Grim reaper with scythe
This project costs next to nothing (about €5 / $6 for sturdy black poster board) and takes under an hour.
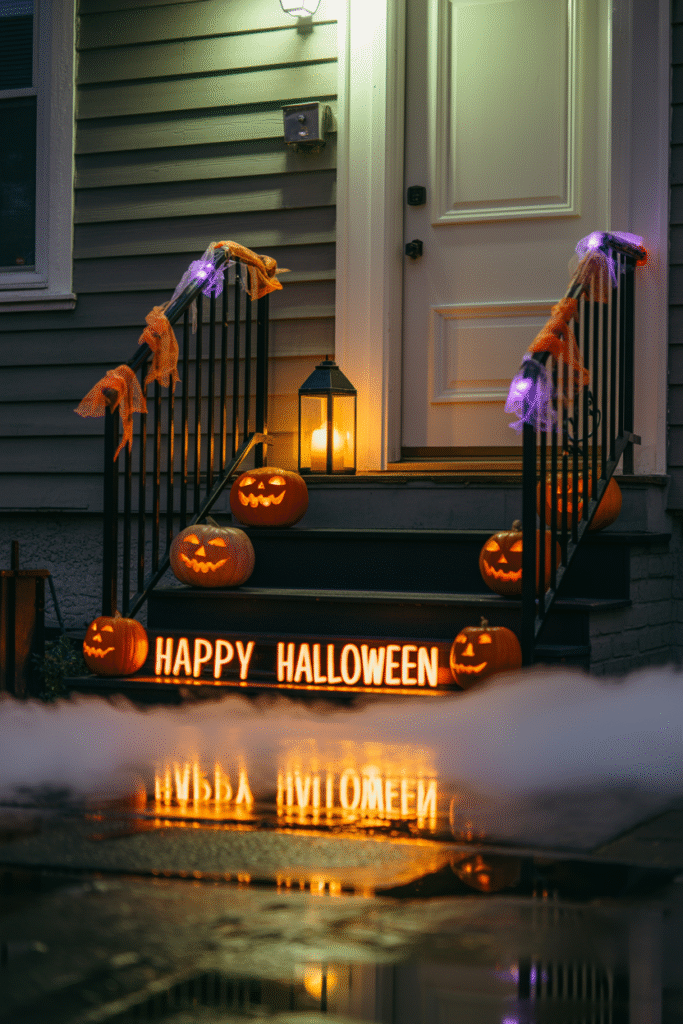
The Staircase Graveyard
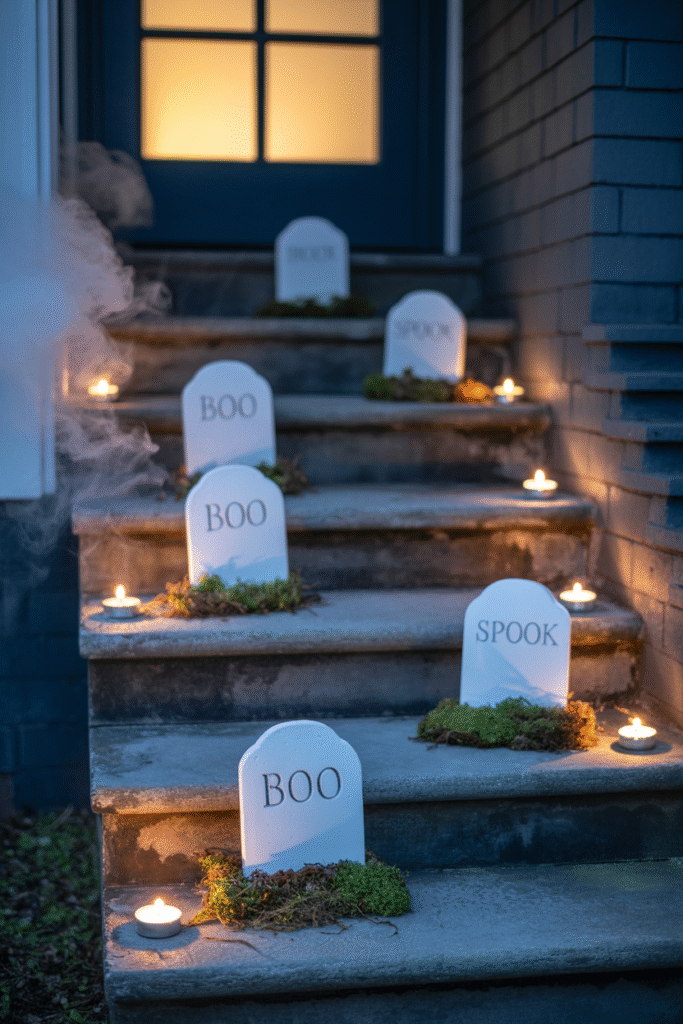
If you have steps leading up to your porch, transform them into a “mini graveyard.”
- Use foam tombstones (available at craft stores for €20–25 / $22–28 for a set).
- Anchor them using garden stakes so they don’t topple in wind.
- Add moss around the base (craft moss, €5 / $6).
I like arranging a line of LED tealights along the stair edges for a ghostly glow. It’s a safe option, since trick-or-treaters often use those steps.
Motion Trick: Hanging Ghosts That Rustle
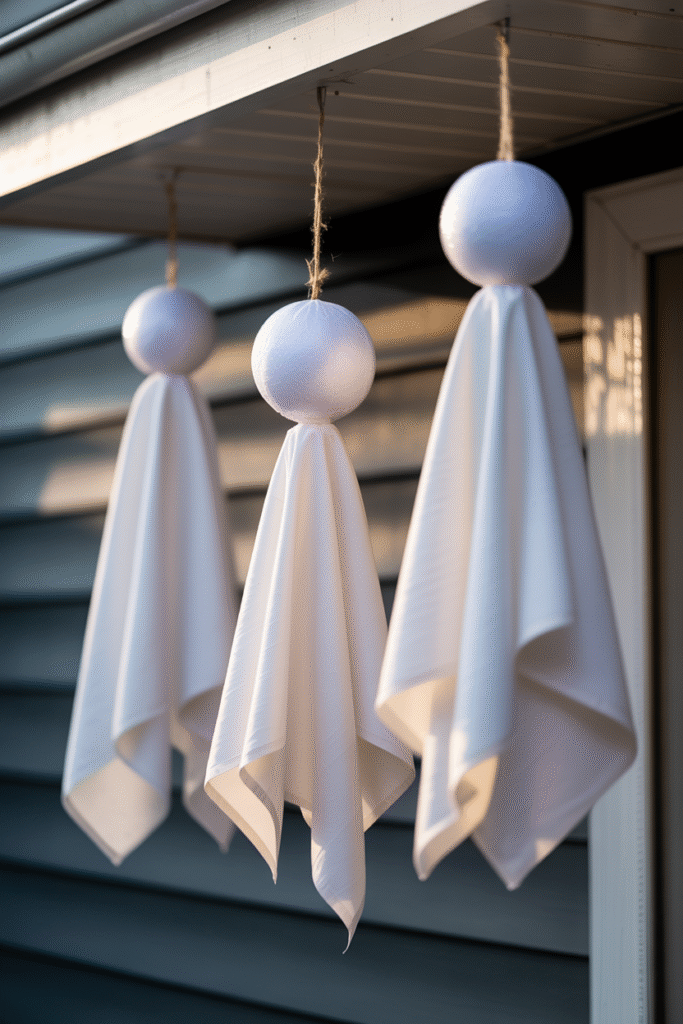
One year my kids begged for movement on our porch, so I made ghosts from simple supplies: white pillowcases, foam balls (15 cm / 6 in), and fabric strips. I hung them with fishing line from tree branches right near the porch edge. They swayed at every breeze, and it startled visitors in the best way.
Materials (for 3 ghosts):
- 3 foam balls (€15 / $16)
- 3 old white pillowcases (free if you’ve got extras)
- Fishing line (€5 / $6)
Difficulty: Super easy
Time: 20 minutes
Witch’s Corner with a Real Broom
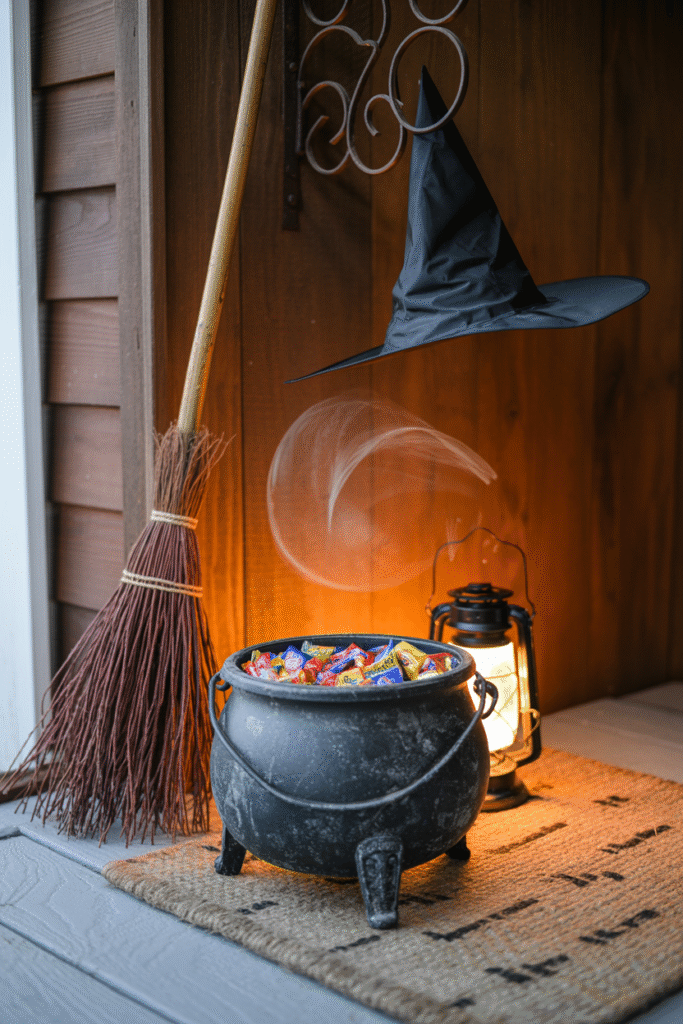
A porch feels cozy when you create little staged “moments.” My favorite is a witchy corner setup.
Here’s how I built mine:
- Old wooden broom propped against the wall
- A witch’s hat hanging from a wall hook
- A cauldron (plastic, €12 / $13) filled with wrapped candy
To make it stand out, I tucked a low LED light (battery-operated puck, €8 / $9) inside the cauldron. At night, the glow made kids believe “magic” was inside.
Netting and Webbing Done Right
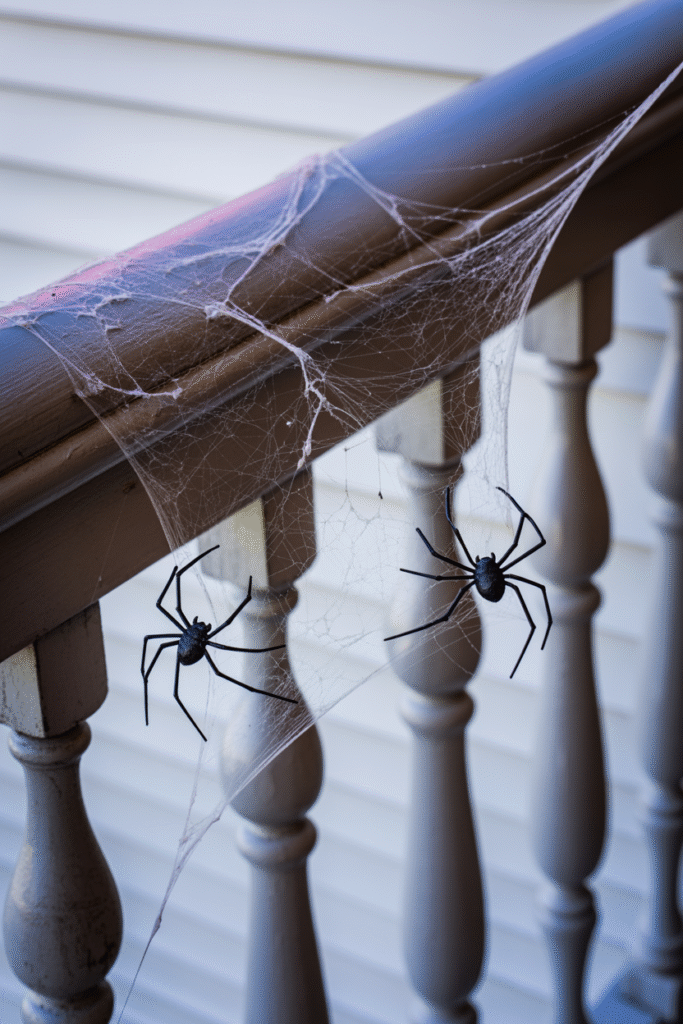
The most common Halloween porch mistake? Overdoing the fake webs until they look like cotton candy blobs. Less is more.
What works best is stretching spider web netting as thin as possible. Anchor just a few corners and pull until nearly transparent. Finish with 2–3 large plastic spiders (10–15 cm / 4–6 in size). When I leave one web slightly crossing the pathway, it always gets a reaction.
Cost: €8 / $9 for a stretchable bag of web and spiders
Time: 20 minutes
A Stack of Jack-o’-Lantern Towers
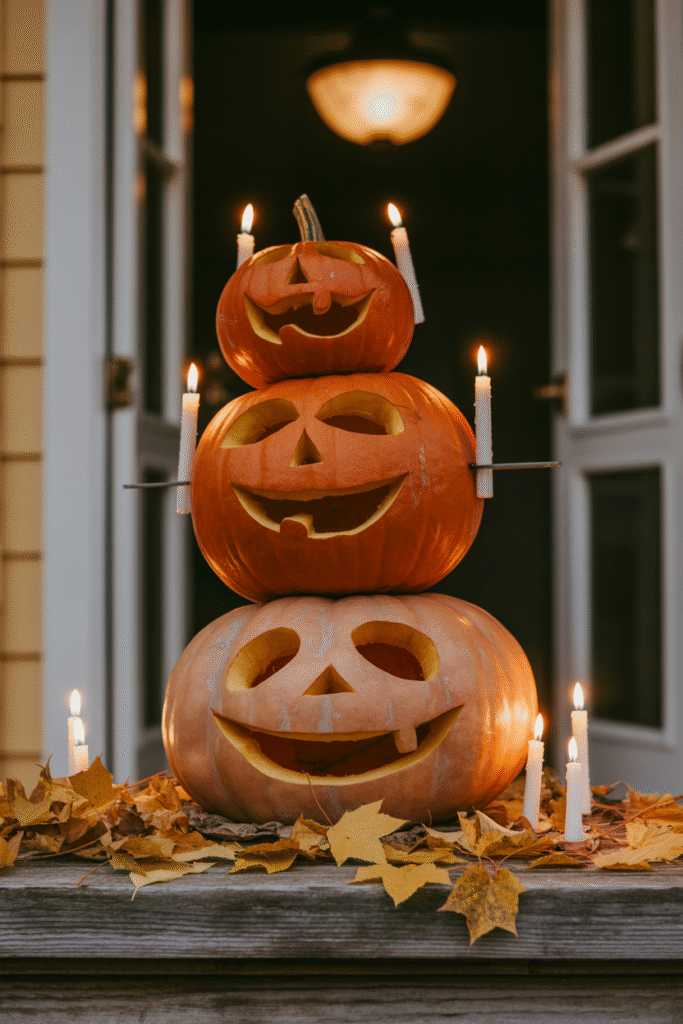
Instead of scattering pumpkins, I stack three at a time (biggest at the bottom, smallest at top) and secure them with skewers. Carve silly or spooky faces, or even paint them solid black for a gothic touch. When lit, the “pumpkin tower” becomes a centerpiece under the porch light.
Safety tip: I always use LED candles inside carved pumpkins for fire safety.
Rustic Hay Bale Backdrop
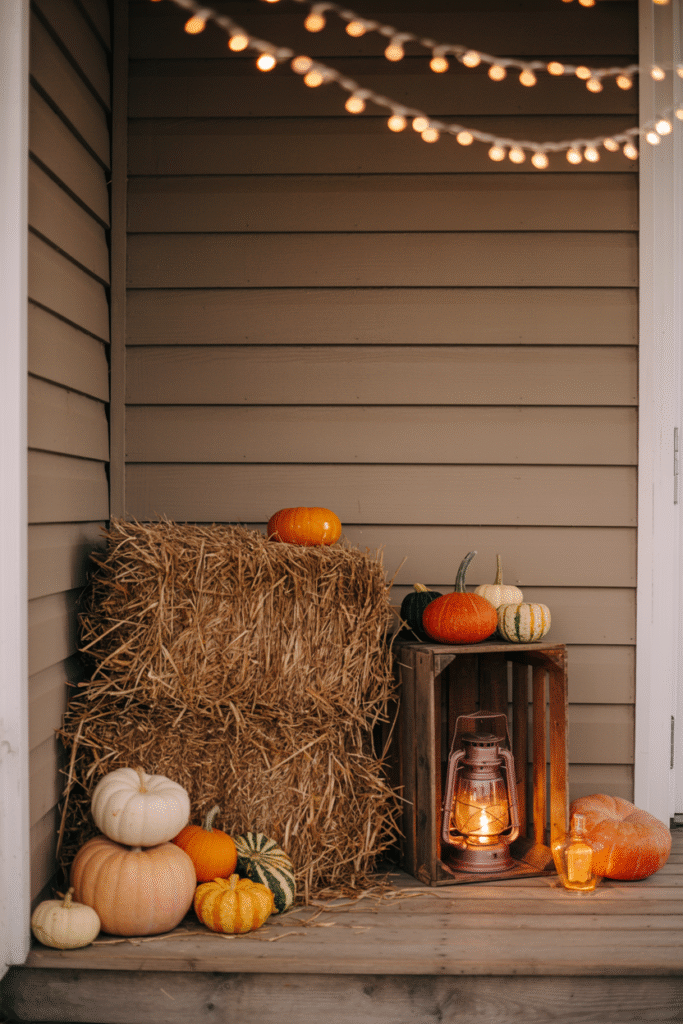
Hay bales are not only autumnal—they’re practical for building height. I once created a rustic backdrop on one side of the porch:
- Two square hay bales (€10 each / $11)
- Assorted pumpkins and gourds stacked at varied heights
- An old wood crate turned sideways as a shelf for lanterns
This works especially well if your porch is large and otherwise feels empty.
Sound Effects (But Keep It Subtle)
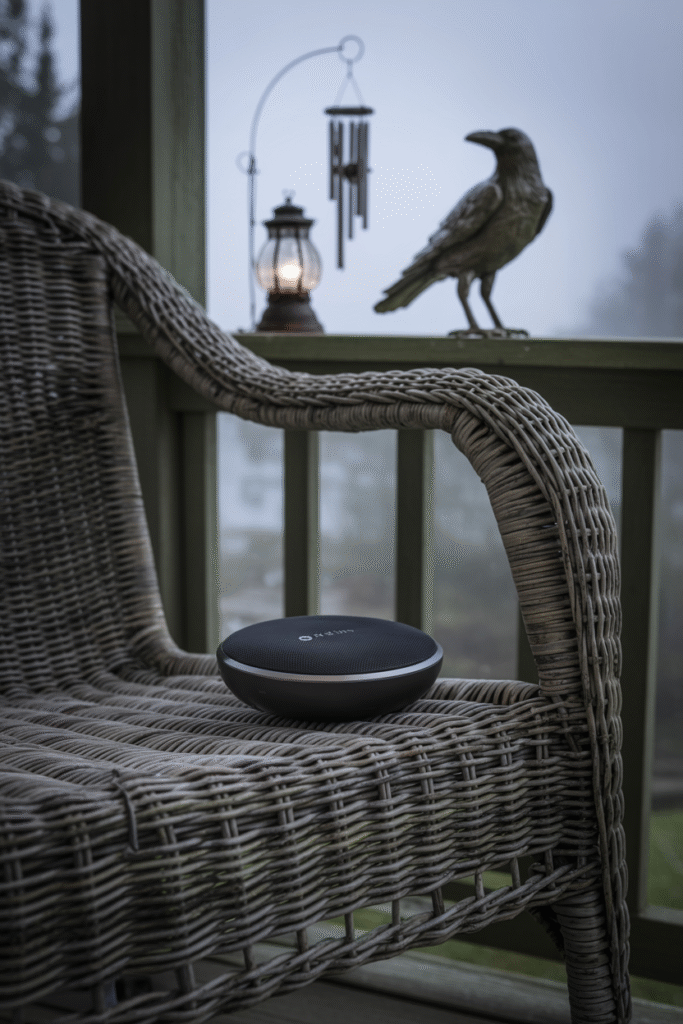
Decor is visual, but add a layer of sound and suddenly it’s immersive. I tested two approaches:
- A hidden Bluetooth speaker under a chair playing a subtle loop of wind howling and crows cawing.
- A motion-activated witch cackle by the doorway.
The key here is moderation. Keep volume low—otherwise it feels cheap rather than atmospheric.
A Surprise Seat Guest
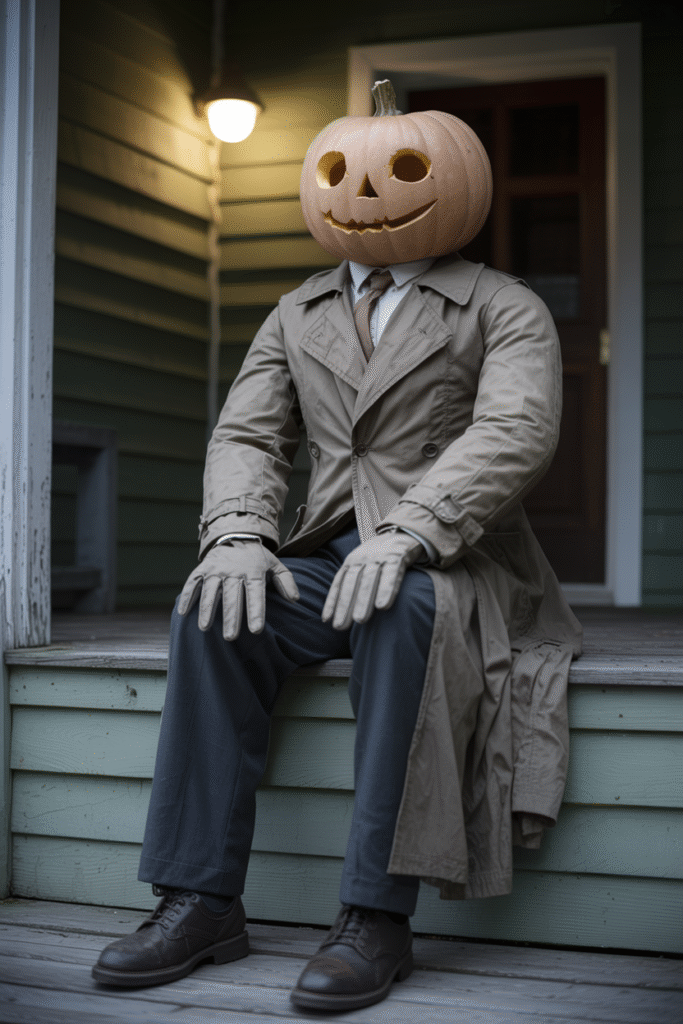
One of the most effective (and laziest) tricks I’ve done is placing a life-sized figure in a porch chair. One year, I stuffed an old trench coat with newspaper, topped it with a pumpkin head, and added gloves for hands. Trick-or-treaters weren’t sure if it was real until they got close. Watching their hesitation through the doorway was priceless.
Materials:
- Old clothes (free)
- Pumpkin or mask for a head (€8–12 / $9–13)
- Chair (use what you have)
Difficulty: Beginner
Time: 45 minutes
FAQs About Halloween Porch Décor
Do I need to spend a lot to decorate my porch for Halloween?
Not at all. I’ve pulled off entire porches for under €50 ($55) using DIY elements like cardboard silhouettes and repurposed old fabric. Invest only where you want longevity, like quality lanterns or floodlights.
How early should I set up decorations?
I usually start 1–2 weeks before Halloween. Pumpkins last longer in cooler weather, but carved ones should be done just 3–4 days before to avoid sagging.
What’s the safest way to light decorations?
Always go with LED candles and battery-powered lanterns. Avoid open flames—especially near paper, fabric, or areas kids might bump.
How do I keep decorations from blowing away in wind?
I use garden stakes, fishing line, or adhesive hooks. Anything lightweight needs anchoring. One time, I lost an entire ghost to a windy night—it ended up two houses down. Lesson learned.
Can I make it scary but still kid-friendly?
Yes. Stick to playful ghosts, glowing pumpkins, and purple/orange lights. Avoid gory or jump-scare props if your neighborhood has lots of younger kids.
Wrap-up
Halloween porches don’t need piles of props or a huge budget—just a clear mood, a few smart anchors, and thoughtful lighting. Start with one or two “heroes” like a jack-o’-lantern tower or hay-bale vignette, then layer fabric, silhouettes, and LEDs to build depth without clutter. Keep walkways safe, anchor anything lightweight, and always test the scene after dark to fine-tune brightness and shadows.
What works best is mixing textures (gauze, wood, straw, metal) and heights (lanterns low, webs mid, silhouettes high) so the eye travels naturally. If time is tight, pick three: lighting, one focal prop, and a doorway detail. If budget is tight, DIY silhouettes, pillowcase ghosts, and thin webbing create big impact for little cost. Most of all, have fun—Halloween décor is about playful suspense and neighborhood smiles, not perfection.