

You know that feeling when your kitchen just doesn’t spark like you want it to? Maybe everything melts together, or the whole space looks a bit flat, no matter how many plants, bowls, or shelves you add. I’ve been there more than once. A few years back, I was staring at my own kitchen, wondering why it felt so blah, when a friend casually said, “Have you thought about two-tone cabinets?” Honestly, I was skeptical at first. It sounded risky, maybe even trendy. But once I tried it carefully I was hooked.
Here’s the promise: by the end of this guide, you’ll have 18 specific two-tone kitchen cabinet color combinations that actually work in real homes. You’ll know exactly how to pair upper and lower cabinets (or island and perimeter), which colors play nice together, and how to avoid the most common pitfalls. I’ll share what I’ve learned from my own kitchen refreshes, client projects, and even a few “oops” moments that taught me more than any design magazine ever could. This isn’t about chasing trends or making your kitchen look like a showroom. It’s about creating a space that feels uniquely yours, with practical steps you can start this weekend. You’ll get honest advice on cost, time, and skill level for each idea no sugarcoating, just real talk from someone who’s been in your shoes. Let’s get into it.
Two-tone kitchen cabinets give your kitchen depth, contrast, and personality without a full remodel. In my experience, the best kitchens use two colors to break up the visual weight of a wall of cabinets and create a natural hierarchy dark lowers ground the room, while lighter uppers make the ceiling seem higher and the space more open. The island can be a contrasting “object” that anchors the room. It’s a technique that feels fresh but is rooted in classic design principles. And you can do this whether you’re updating an old kitchen, painting existing cabinets, or planning a brand new install.
Quick Note: What Two-Tone Doesn’t Mean
Some people worry that “two-tone” means “two loud, clashing colors in equal measure.” Not in my book. Think of it as a harmony a main color supported by a supporting hue. This could be a bold island with neutral perimeter cabinets, or a classic wood-and-paint mix. It’s about balance, not competition.
Here are 18 practical, tested, and homeowner-friendly two-tone kitchen cabinet color combinations, each with a bit of real-life context, tips, and ballpark estimates for cost and time. These aren’t generic lists they’re based on what I’ve seen and tried myself, plus current trends for real, lived-in kitchens.
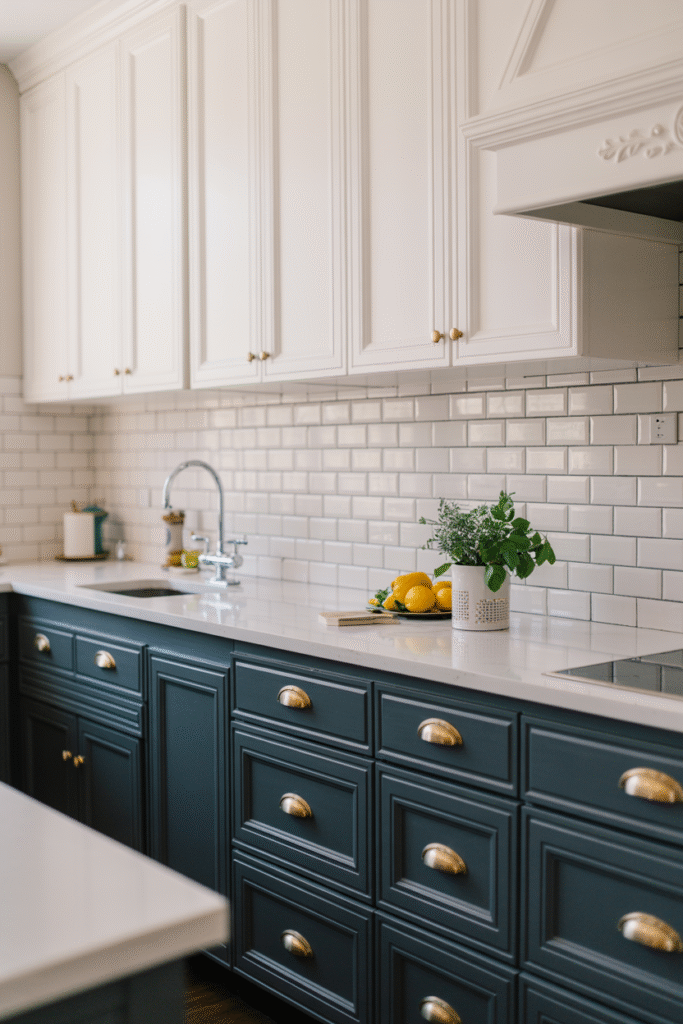
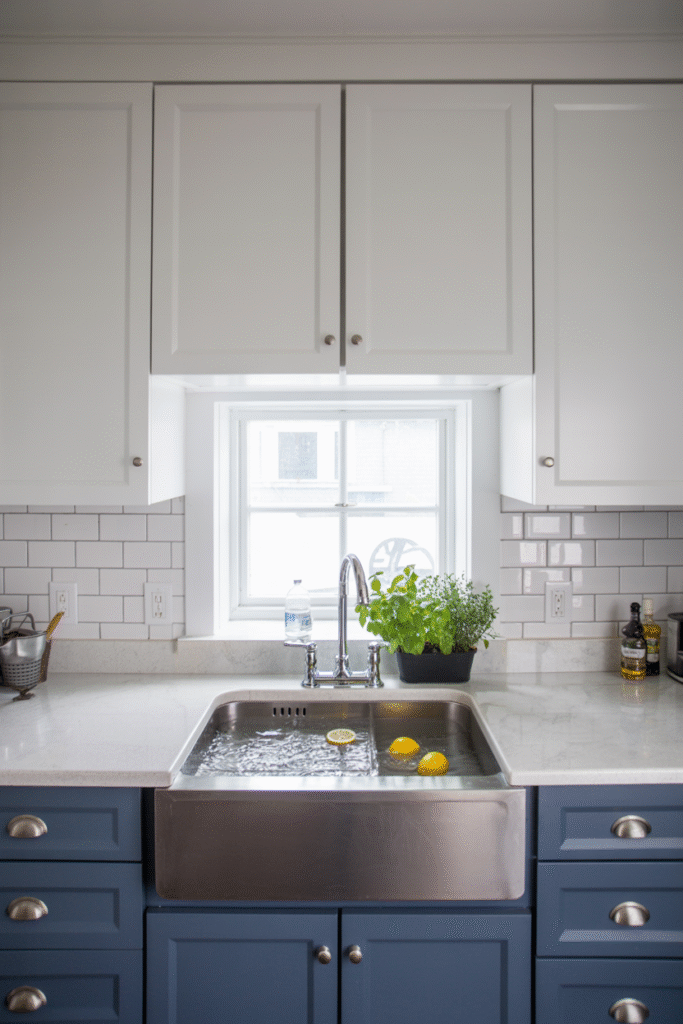
1. Classic White & Navy
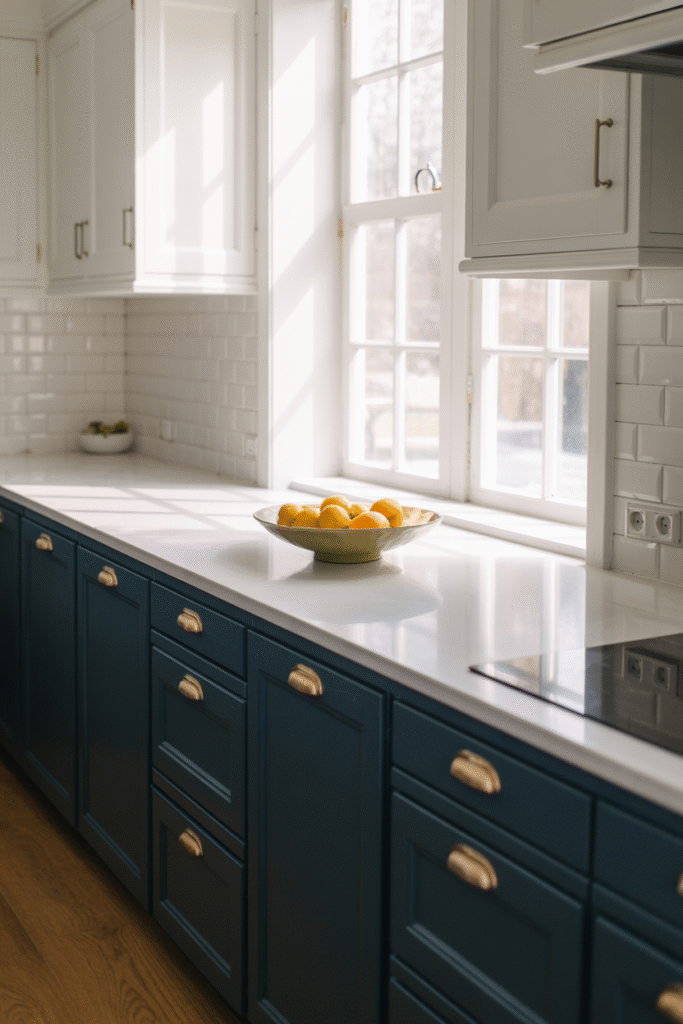
Crisp white upper cabinets paired with crisp navy blue lowers. This is a foolproof combo—bright, welcoming, and instantly classic. I once did this for a client who wanted a “forever” kitchen; after five years, she still loves it.
Tip: Use a warm white, not stark, for a cozier feel.
Cost: $300–$400
Time: 2–3 days
Good for: Beginners
2. Warm Wood & Soft Gray
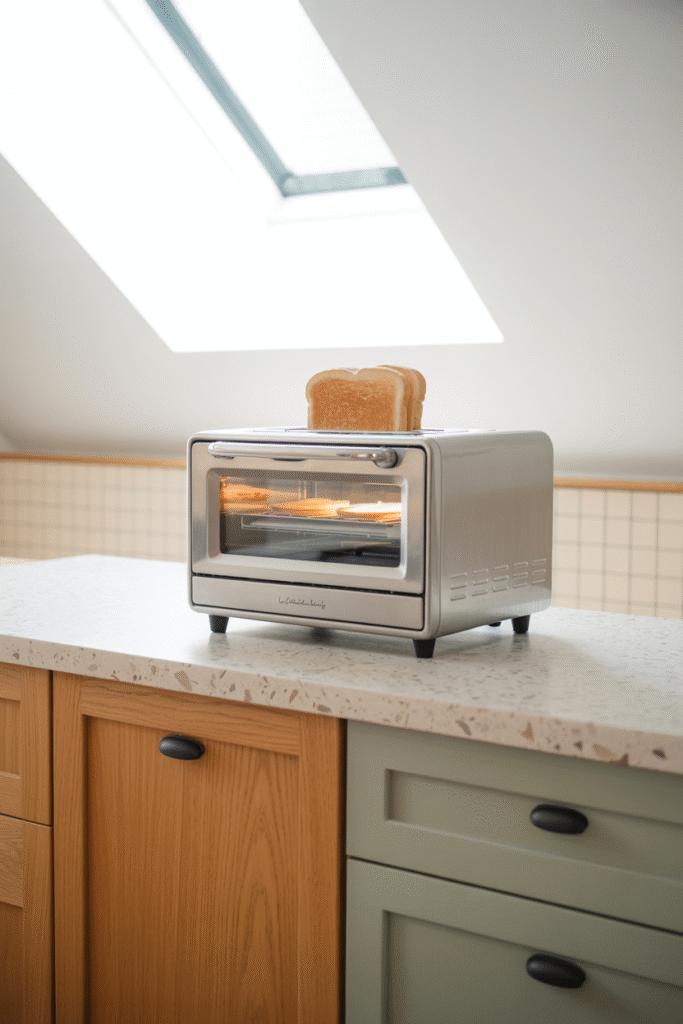
Natural wood (like oak or maple) lowers, sealed with a matte finish, and soft gray uppers. This brings natural texture and modern calm, especially in kitchens with lots of sunlight.
Tip: Pick a gray with warm undertones to prevent the space from feeling cold.
Cost: $400–$600 (more if refinishing wood is new)
Time: 3–4 days
Good for: Intermediate
3. Black & White
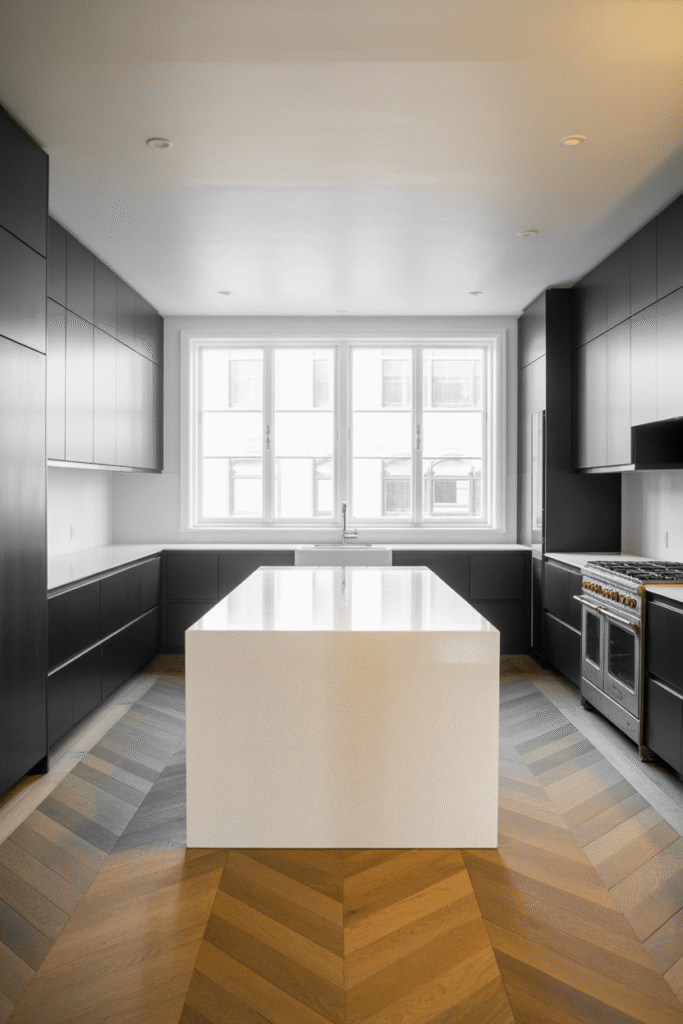
Matte black lowers with high-gloss white uppers. Dramatic, yes, but also surprisingly easy to maintain. This was my own kitchen for a while—black hides dirt, white keeps things fresh.
Tip: Use semi-gloss or satin for easier cleaning on lowers.
Cost: $350–$450
Time: 2–3 days
Good for: Intermediate
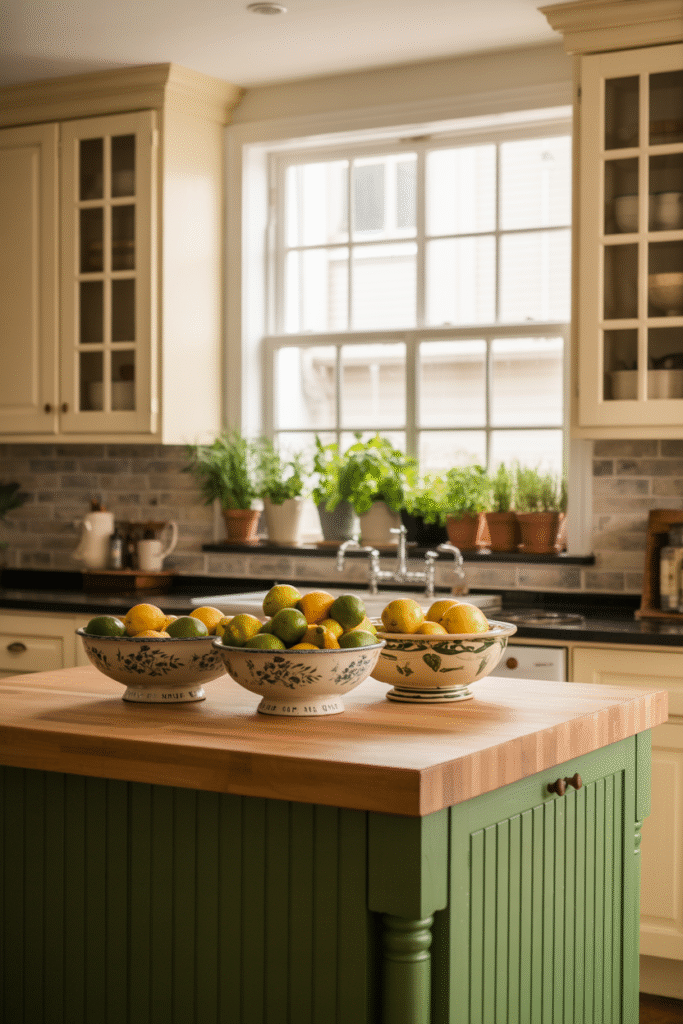
4. Sage Green & Cream
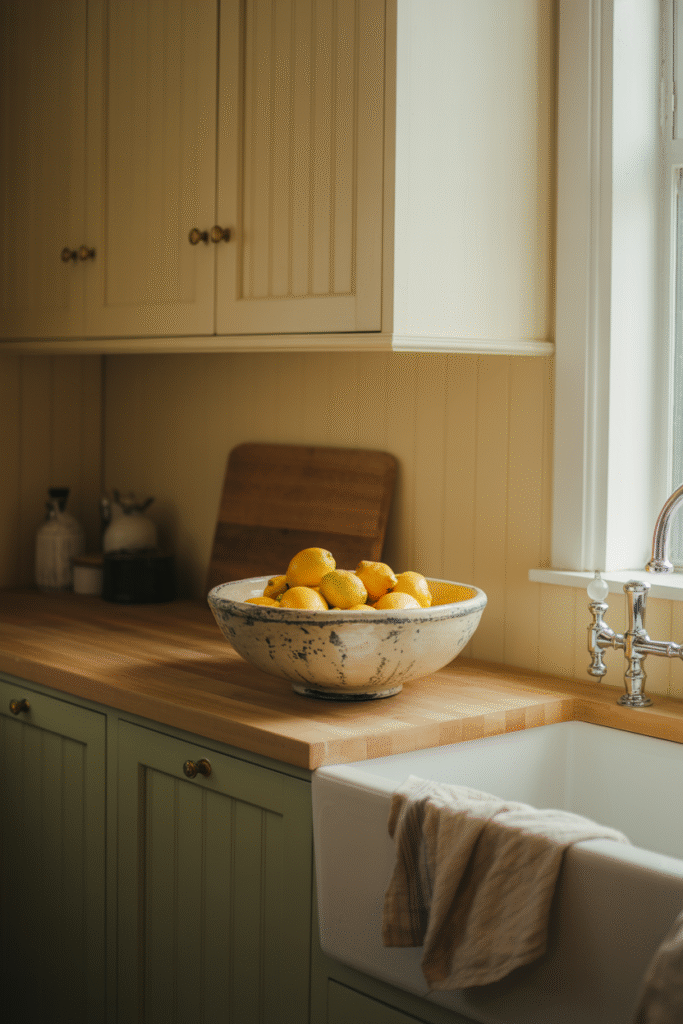
Sage green lowers with creamy off-white uppers. This is a calm, inviting look that works in almost any kitchen. I’ve used this in a few homes, and it never feels too trendy.
Tip: Sage looks best with warm whites, not cool.
Cost: $300–$400
Time: 2–3 days
Good for: Beginners
5. Charcoal Gray & Natural Oak
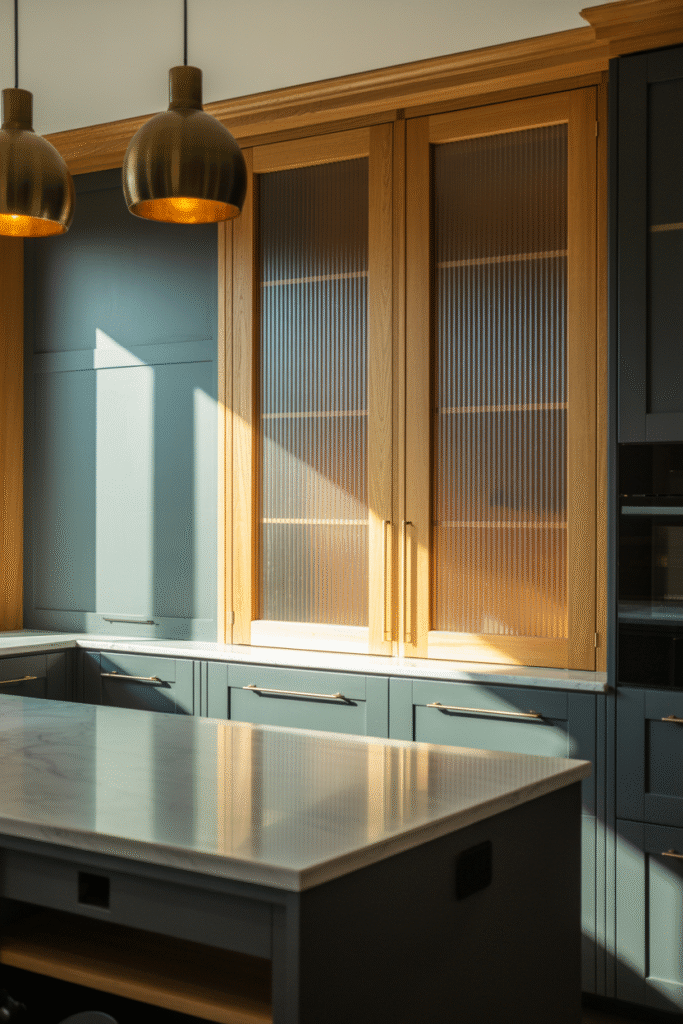
Charcoal lowers with natural oak uppers. Modern sleekness meets organic warmth. I tried this in a kitchen with a marble counter and gold hardware—gorgeous.
Tip: Let wood grain show through for best effect.
Cost: $450–$650
Time: 3–4 days
Good for: Intermediate
6. Navy & White
Deep navy blue lowers with clean white uppers. A step bolder than classic white and navy, but still timeless. Great for both modern and traditional spaces.
Tip: Pair with brass or black hardware for a polished look.
Cost: $300–$400
Time: 2–3 days
Good for: Beginners
7. Muted Blue & Soft Beige

Dusty blue lowers with beige/cream uppers. Soft, cozy, and a bit vintage. I did this in a small, north-facing kitchen—it made the room feel much warmer.
Tip: Add wooden open shelving for extra warmth.
Cost: $300–$450
Time: 2–3 days
Good for: Beginners
8. Bold Island (Deep Green) & Neutral Perimeter
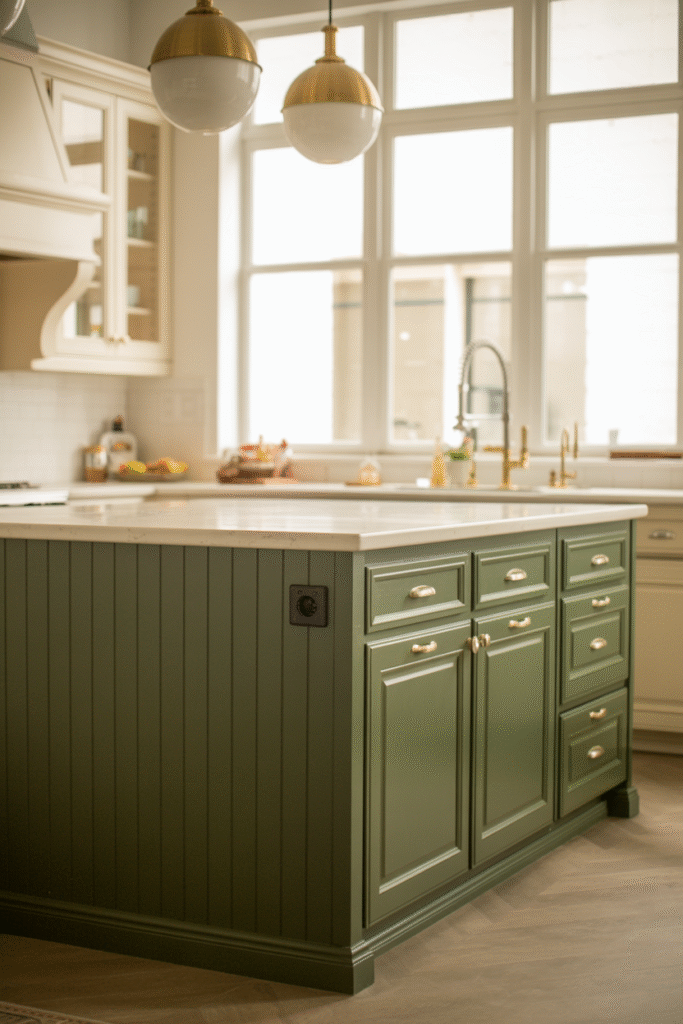
Dark green island (forest, emerald, or olive) with light gray or white perimeter cabinets. Perfect for adding a pop without overwhelming. This is one of the most popular requests I get from clients who like color but aren’t sure about commitment.
Tip: Green island + wooden countertop = instant farmhouse vibe.
Cost: $400–$550
Time: 3–4 days
Good for: Intermediate
9. Teal & Light Gray
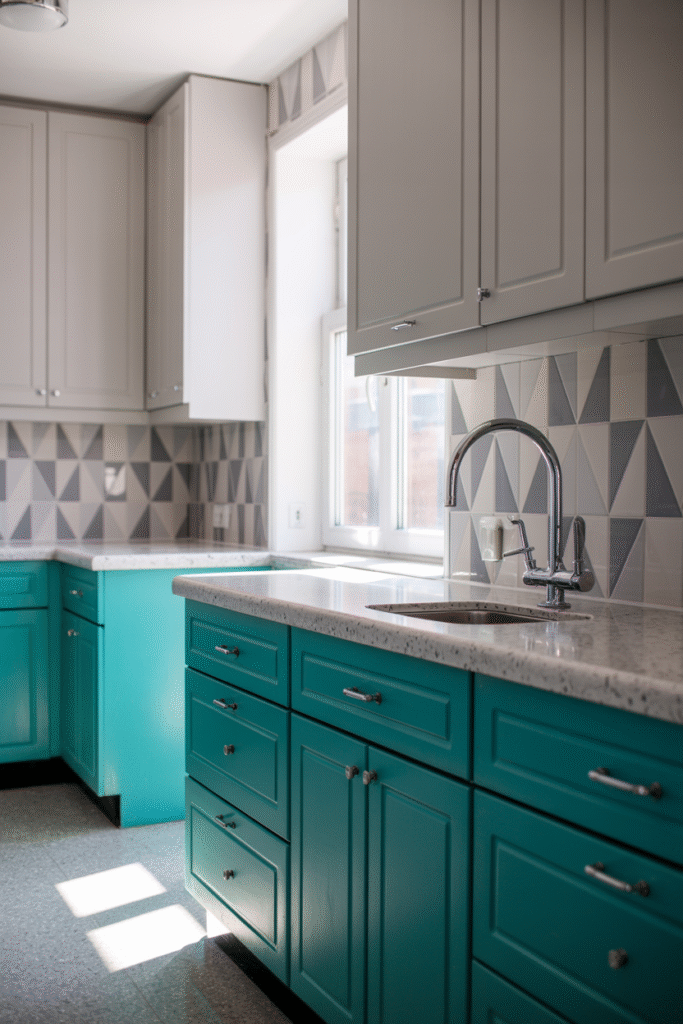
Teal lowers with pale gray uppers. Balanced, modern, and a bit retro. I tried this in a loft-style kitchen and it felt both fresh and classic.
Tip: Gray uppers help calm the teal’s brightness.
Cost: $350–$450
Time: 2–3 days
Good for: Intermediate
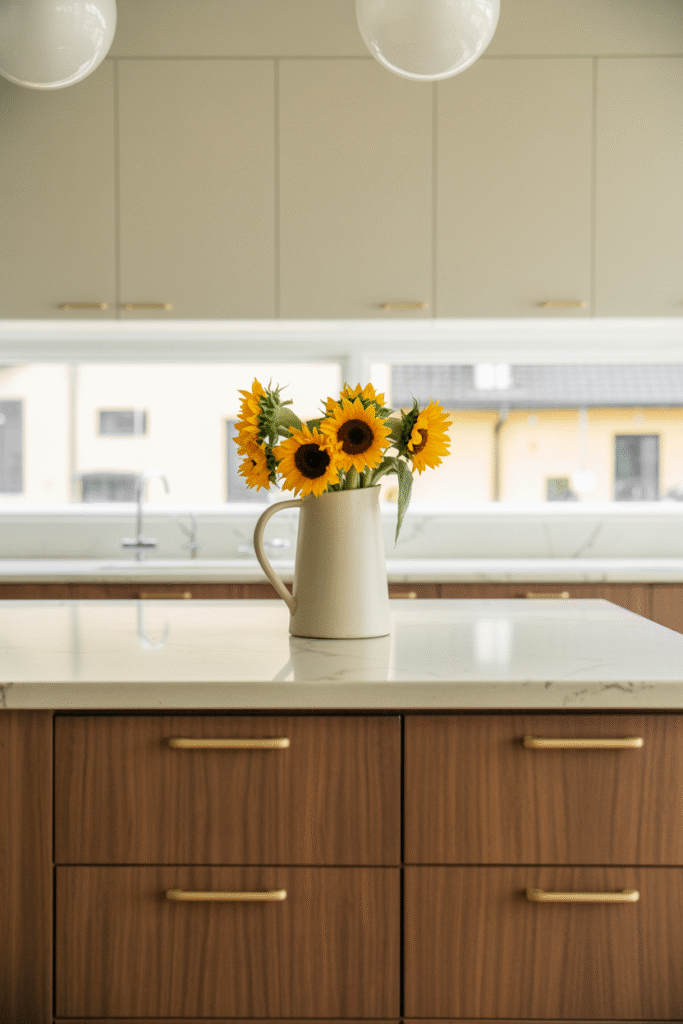
10. Soft Yellow & White
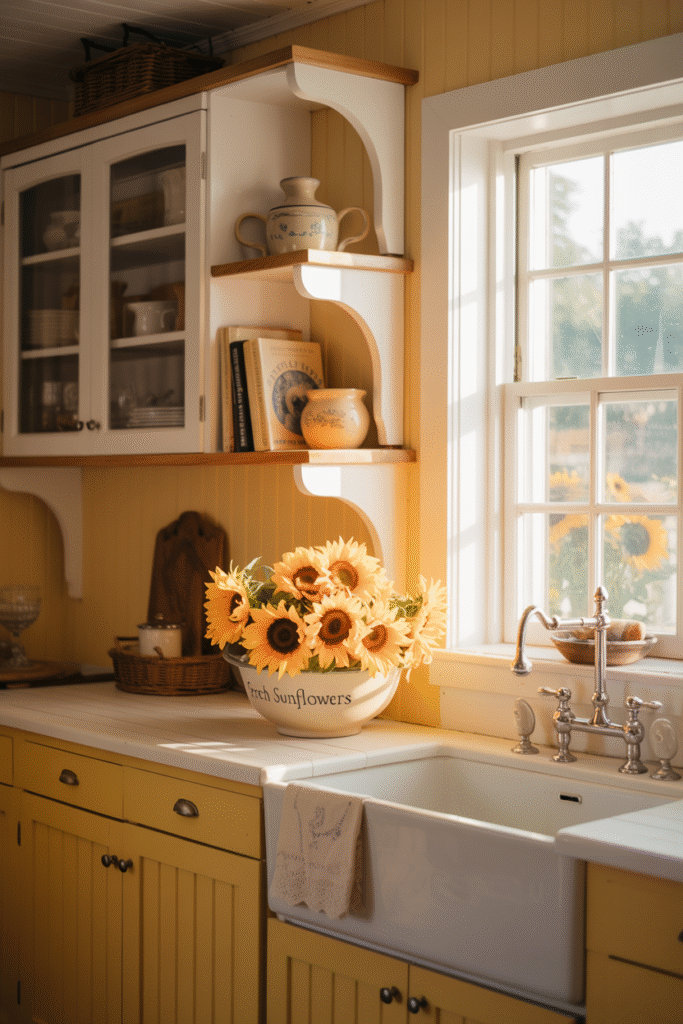
Buttercream yellow lowers with white uppers. Cheerful and light. I did this in a house where the kitchen faced a garden—the yellow echoed the flowers outside and kept things bright even in gray weather.
Tip: Stick to a muted yellow; neon yellow is hard to live with.
Cost: $300–$400
Time: 2–3 days
Good for: Beginners
11. Crisp White & Light Wood
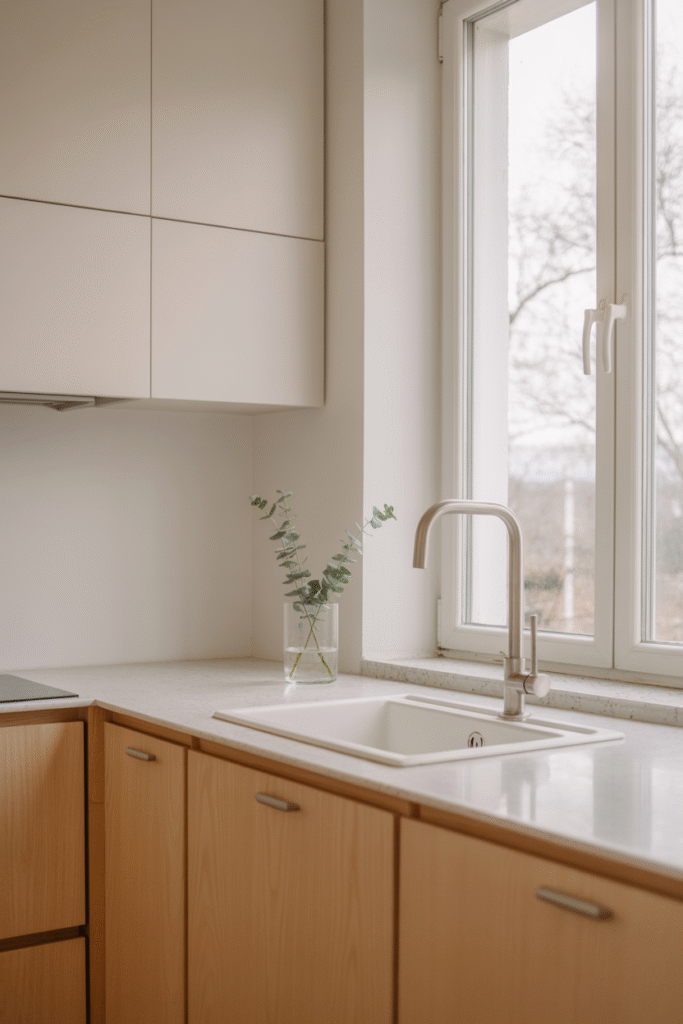
White uppers with light wood (like birch or maple) lowers. Scandinavian simplicity at its best.
Tip: Use the same wood for open shelving for harmony.
Cost: $450–$600
Time: 3–4 days
Good for: Intermediate
12. Black & Natural Wood
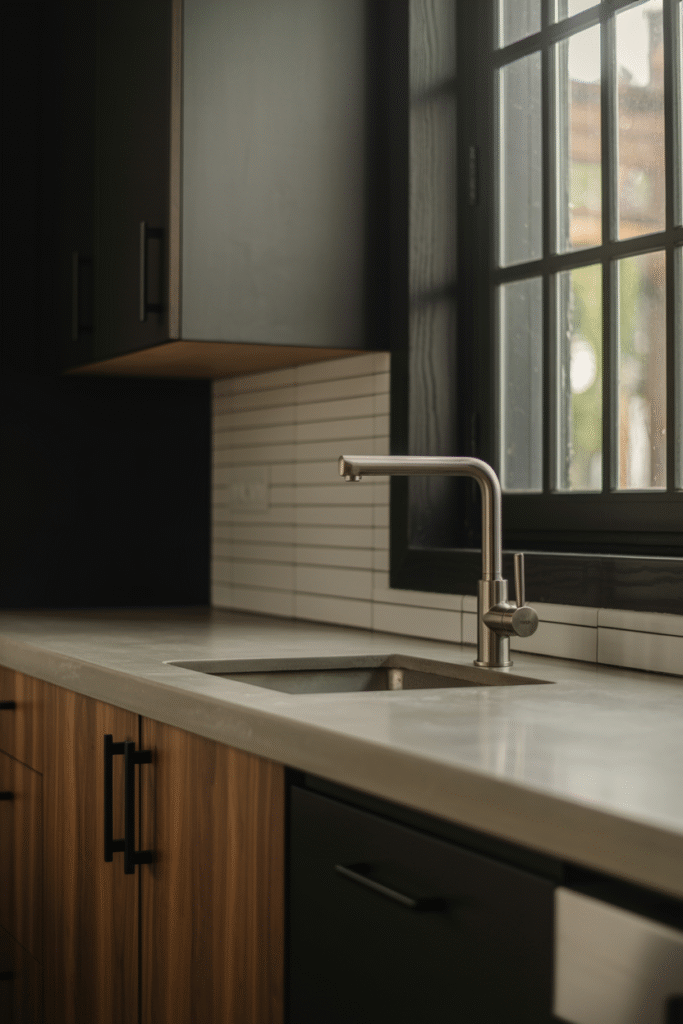
Black uppers with natural wood lowers. Industrial meets warm. I used this in a client’s loft; the black felt edgy, the wood kept things from getting too harsh.
Tip: Black hardware = dramatic, gold = luxe, matte black = modern.
Cost: $400–$600
Time: 3–4 days
Good for: Intermediate
13. Soft Gray & Navy
Light gray uppers with navy lowers. Elegant, cozy, and balanced. This was a favorite of a client who wanted traditional with a twist.
Tip: Use a gray with blue undertones for harmony.
Cost: $350–$450
Time: 2–3 days
Good for: Intermediate
14. Cream & Forest Green
Cream uppers with dark green lowers. Earthy, classic, and easy to live with. I did this in a house with lots of plants—it felt like the garden came inside.
Tip: Forest green works best with warm, not cool, whites.
Cost: $350–$450
Time: 2–3 days
Good for: Beginners
15. Off-White & Walnut
Off-white uppers with warm walnut lowers. Rich, elegant, and a bit midcentury. I love this in homes with original wood floors.
Tip: Unlacquered brass hardware adds a nice vintage touch.
Cost: $450–$650
Time: 3–4 days
Good for: Intermediate
16. Dusty Rose & Cream

Dusty rose lowers with cream uppers. Soft, pretty, and not as common, so it stands out. I tried this in a client’s house where they wanted something “different but not weird.”
Tip: Dusty rose looks best in warm, sunny kitchens.
Cost: $350–$450
Time: 2–3 days
Good for: Beginners
17. Slate Blue & Pale Gray
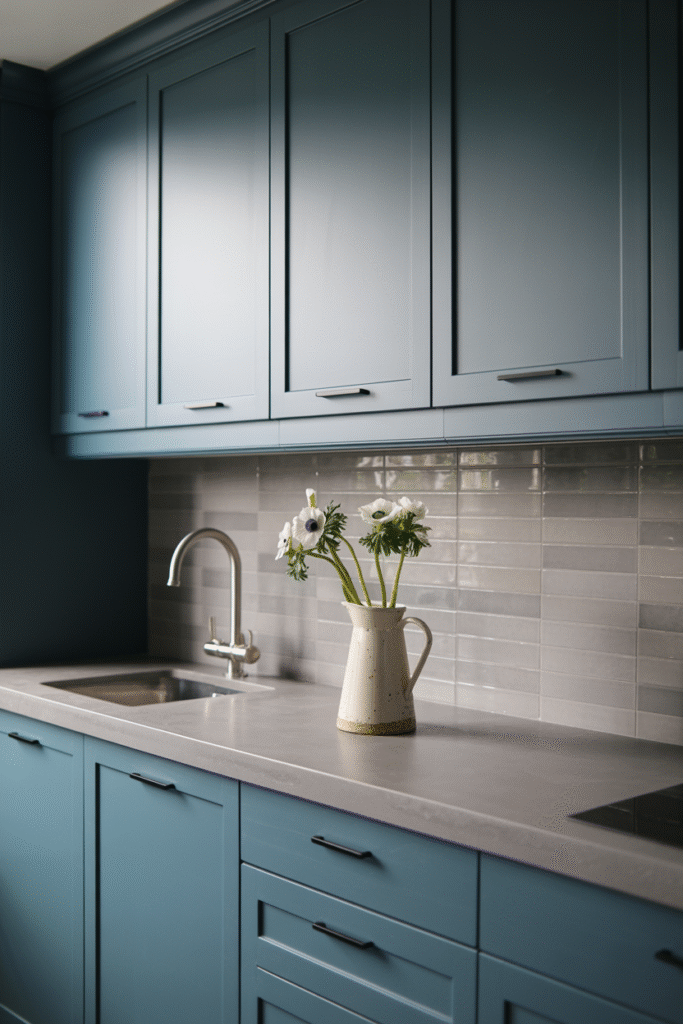
Slate blue lowers with pale gray uppers. Modern, muted, and subtle. I used this in a condo—it felt calm but not bland.
Tip: Matte finishes for both colors keep things soft.
Cost: $350–$450
Time: 2–3 days
Good for: Intermediate
18. Warm Taupe & White
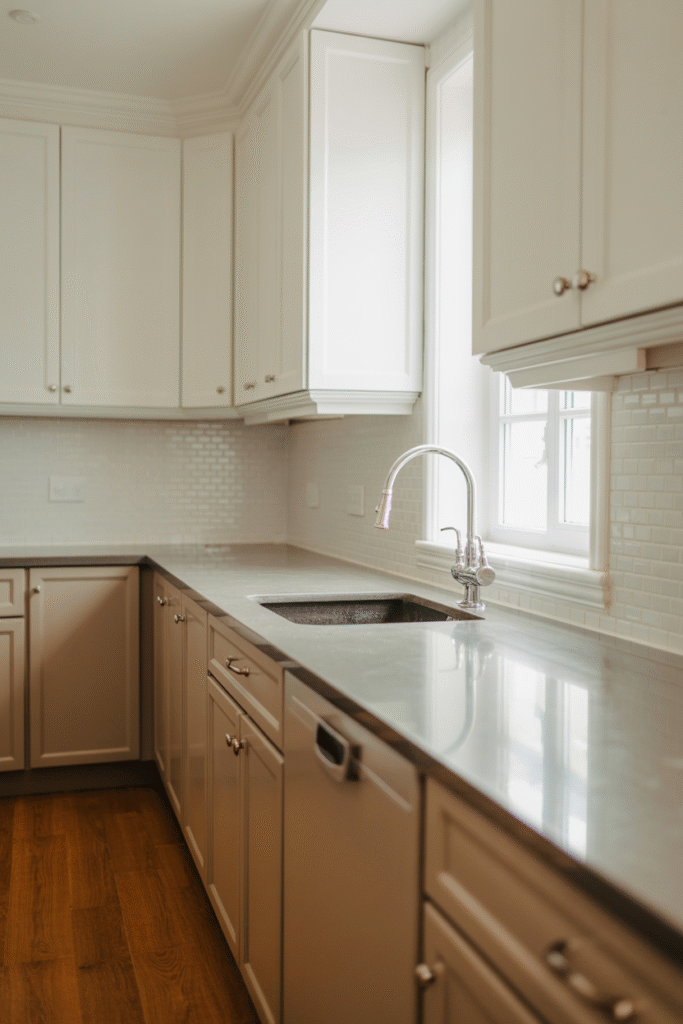
Warm taupe lowers with bright white uppers. Understated contrast, cozy but clean. I did this in a room that didn’t get much light—the taupe made it feel warmer, the white kept it bright.
Tip: Use satin or semi-gloss for durability.
Cost: $300–$400
Time: 2–3 days
Good for: Beginners
A Few Extra Notes
- Placement matters: Dark on the bottom, light on top looks best in most kitchens—it’s grounded but open.
- Island focus: Try a bold island and neutral perimeter for a lower-commitment pop of color.
- Texture counts: Mixing painted and wood cabinets is a subtle way to add interest without more color.
- Budget tips: Paint existing cabinets instead of replacing them for a dramatic change at a fraction of the cost.
- Safety: Always prep well, use quality primer, and consider hiring a pro for tricky finishes or large jobs.
Quick wrap-up
Two-tone cabinets work best when the darker shade grounds the lowers and a lighter tone lifts the uppers, or when a bold island becomes the focal point with neutral perimeters. In practice, what matters most is testing large swatches in real light, coordinating with countertops and backsplash, and keeping the palette simple two main colors, one supporting metal, and consistent sheen levels. Start with one confident choice (navy, forest green, or warm wood), pair it with a friendly neutral (cream, soft gray, or white), and the kitchen will feel intentional, not busy.