
Most bedrooms feel “almost there” until the walls get some love that’s where the mood, scale, and light really come together. In my experience, one intentional move a painted stripe, a slim shelf, or the right-sized artwork can make the whole room click in an afternoon. What works best is simple, measured steps: calm palette, good texture, and lighting that flatters at night, not just in daylight. The 15 ideas ahead are practical, renter-friendly where needed, and clear about the numbers so there’s no guesswork. if the budget is tighter, the materials are humble but chosen for texture and finish so they photograph beautifully and age well. And if renting is part of the equation, there are low-commitment options with hooks and peel-and-stick solutions that still look polished. The goal here isn’t to fill every inch; it’s to create a bedroom that feels restful and personal calm first, beautiful second, and practical always. By the end, there’ll be a clear, doable plan to take a wall from blank to finished without fuss, guesswork, or a contractor just a tape measure, a level, a handful of materials, and a couple of hours that actually change how the room feels when the lights go on at night. and watch the room go from blank to finished without a full makeover.
1. Paint a Patterned Strip with Masking Tape
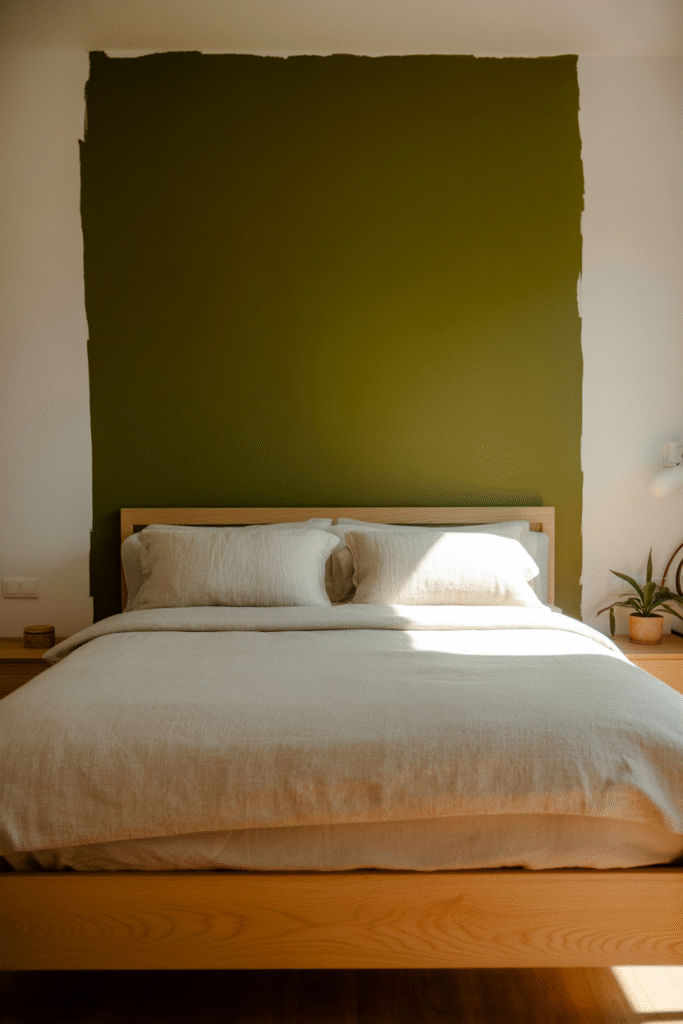
What I’ve found: One of the easiest ways to add drama without committing to wallpaper is painting a bold, clean stripe or geometric pattern directly onto your wall.
How to do it:
Choose a wall focal point behind the bed works great. Use low-tack masking tape to mark off your design. For best results, run a ruler along the tape edge and press firmly to prevent bleed. Paint your accent color I love a deep navy or moody olive then carefully peel the tape while the paint is still tacky. Allow at least 3 hours to dry between coats.
- Materials: Painter’s tape, paint, brush/roller, ruler
- Time: 6–8 hours (including drying)
- Cost: Low
- Difficulty: Beginner
Pro tip: Wipe away any bleed with a slightly damp cloth before it dries.
2. Hang a Lightweight Shelf for Display
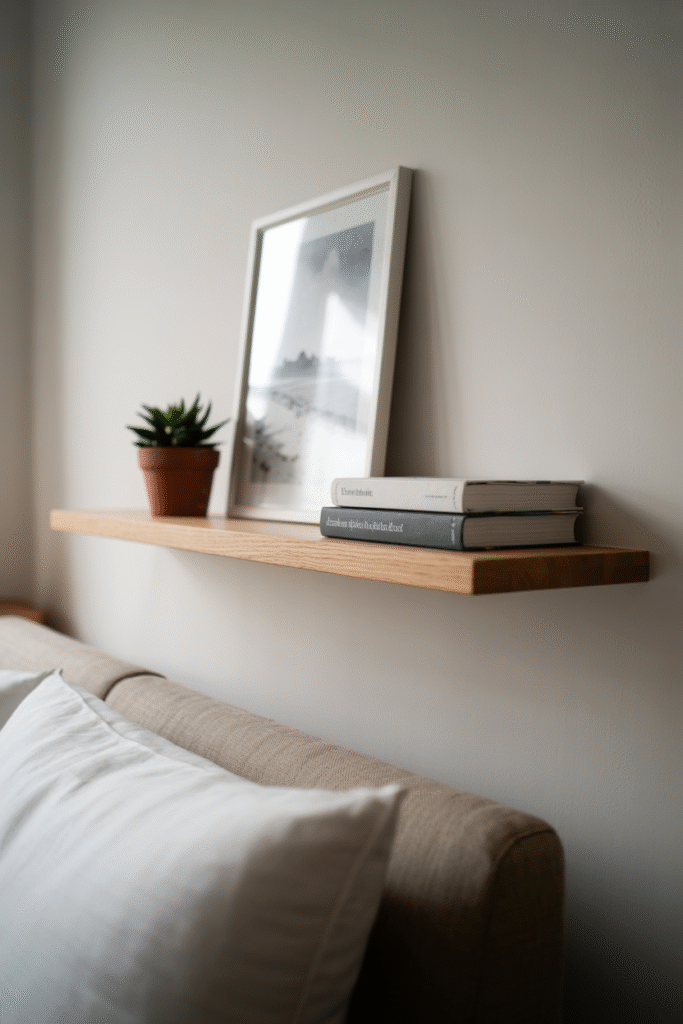
In my experience: A simple shelf adds both function and style. It’s perfect for displaying books, framed photos, small plants, or pretty finds from travels.
How to do it:
Measure 60 cm (about 24 inches) above your bed as a starting point. Anchor a floating shelf directly into wall studs, or use heavy-duty drywall anchors if necessary. Keep the shelf no wider than 90 cm (about 36 inches) for a balanced look.
- Materials: Floating shelf, screws, anchors, level, drill
- Time: 30 minutes–1 hour
- Cost: Low to medium
- Difficulty: Beginner
Avoid this: Overloading the shelf stick to a few curated items to keep the look intentional, not cluttered.
3. DIY a Textured Wall Panel
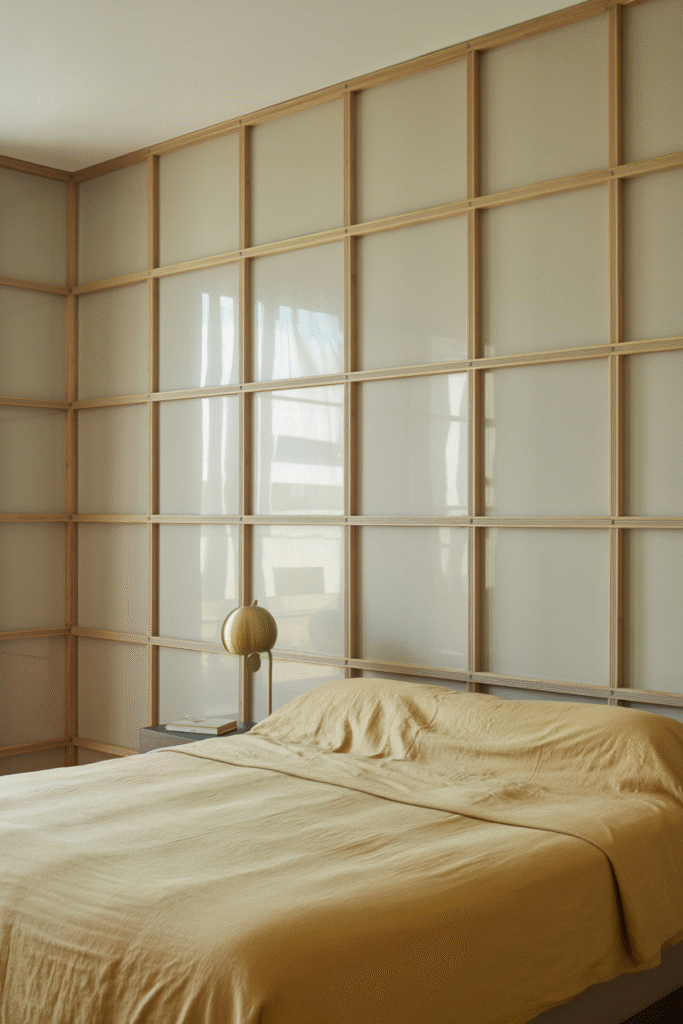
What works best: Wall panels add depth and don’t have to be expensive. I’ve used thin plywood strips, painted in a tone slightly lighter than the wall, to create a subtle grid effect.
How to do it:
Cut 5 cm x 1.2 m (2 inches x 4 feet) strips of thin plywood. Paint them before installation. Arrange them vertically or horizontally in a repeating pattern, using construction adhesive and small brad nails for security. Finish with a matching paint touch-up.
- Materials: Thin plywood, paint, adhesive, brad nails, saw
- Time: 4–6 hours
- Cost: Medium
- Difficulty: Intermediate
Personal anecdote: Last year, I did this in my guest room with walnut-stained strips the room went from “blah” to “wow” in a weekend.
4. Create a Soft Glow with String Lights
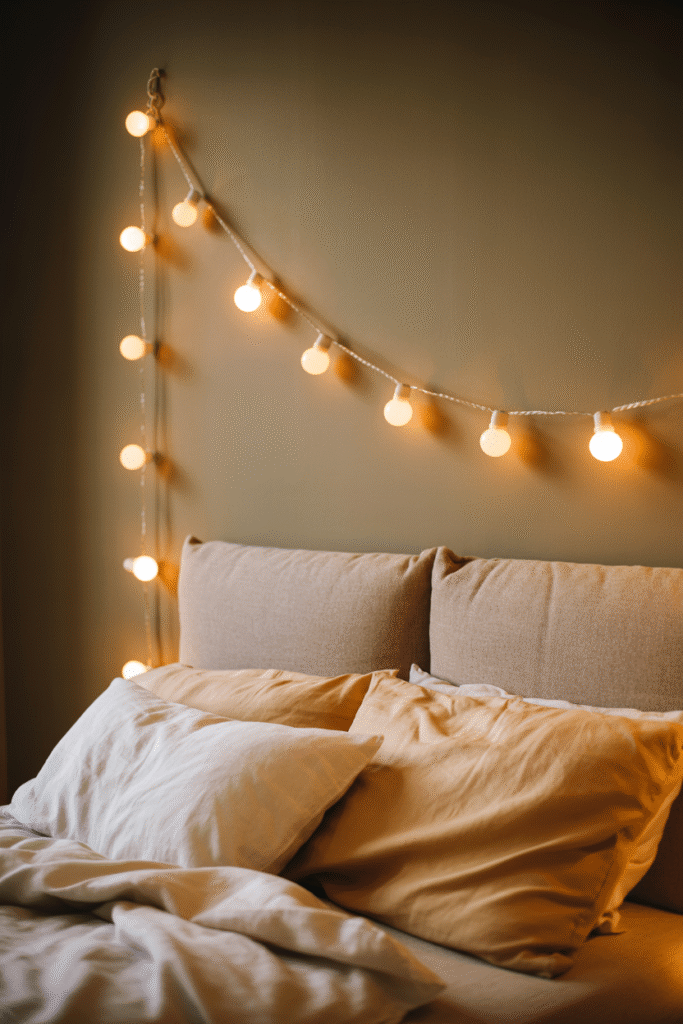
What I’ve found: String lights are more than just for dorm rooms. Hung along a headboard or draped from hooks in a gentle arc, they add a soft, cozy glow.
How to do it:
Use clear 3M Command hooks to avoid wall damage. Space hooks every 60 cm (24 inches) along your desired path. Drape the lights loosely for a relaxed vibe.
- Materials: String lights, Command hooks, scissors
- Time: 20 minutes
- Cost: Low
- Difficulty: Beginner
Pro tip: Stick to warm white bulbs for a bedroom avoid the harsh blue of cool LEDs.
5. Install a Headboard Alternative with Wood Slats
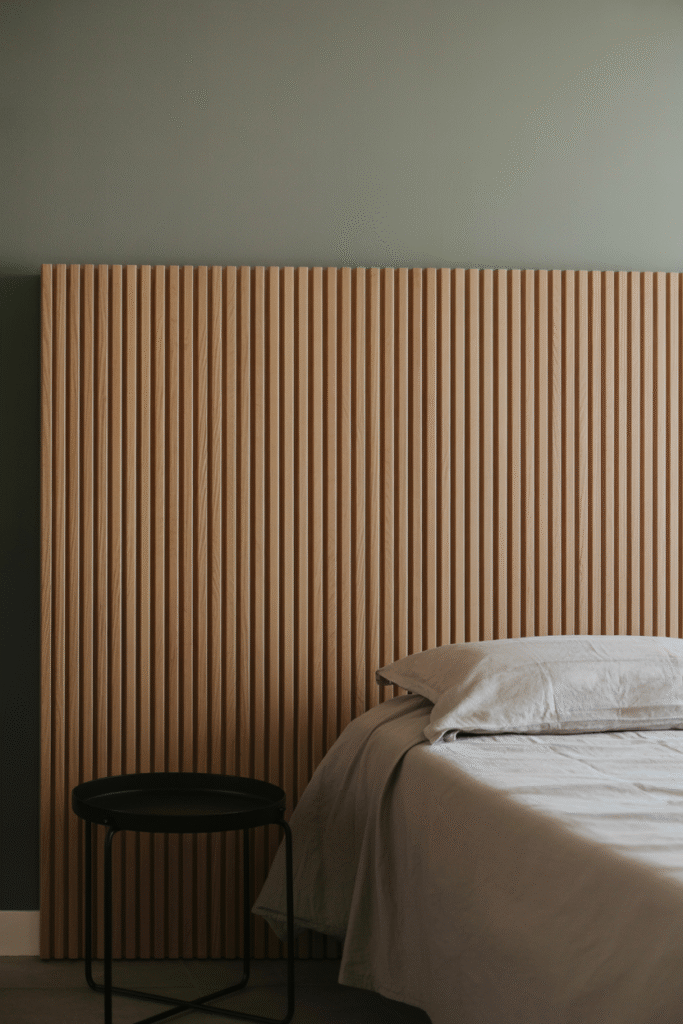
What works best: A headboard made of wood slats is modern, affordable, and surprisingly easy to DIY.
How to do it:
Cut 2.5 cm x 10 cm (1 inch x 4 inches) pine slats to mattress width. Sand, prime, and paint or stain. Mount to the wall using a hidden French cleat for a floating look, spaced 3–5 cm (1–2 inches) apart.
- Materials: Pine slats, paint/stain, French cleat, screws
- Time: 4–6 hours (including drying)
- Cost: Medium
- Difficulty: Intermediate
Avoid this: Skimping on sanding rushed prep shows in the finish.
6. Hang Curtains from Wall to Wall
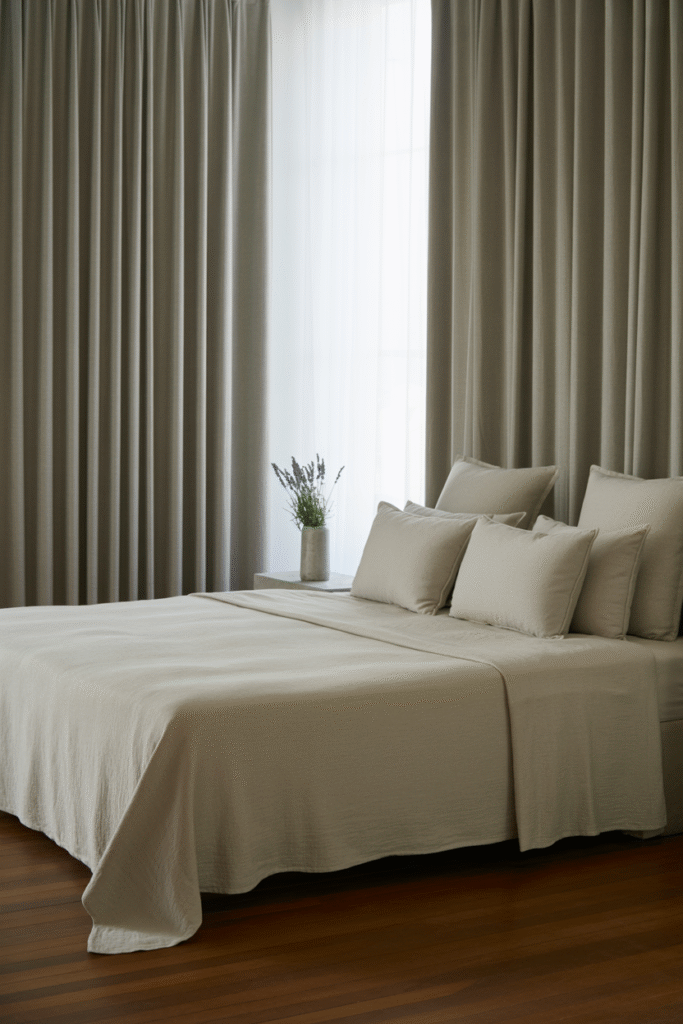
In my experience: Floor-to-ceiling curtains frame the bed and make the ceiling feel taller even if you don’t have windows there.
How to do it:
Mount a curtain rod at the ceiling (about 240–270 cm or 95–106 inches high) and let the panels pool slightly on the floor. Choose blackout fabric for a luxe, practical touch.
- Materials: Curtain rod, curtains, anchors/screws, drill
- Time: 1 hour
- Cost: Medium
- Difficulty: Beginner
Personal anecdote: I did this in my own bedroom last March, and the room instantly felt cozier and more put-together.
7. Paint a Simple Mural with Stencils
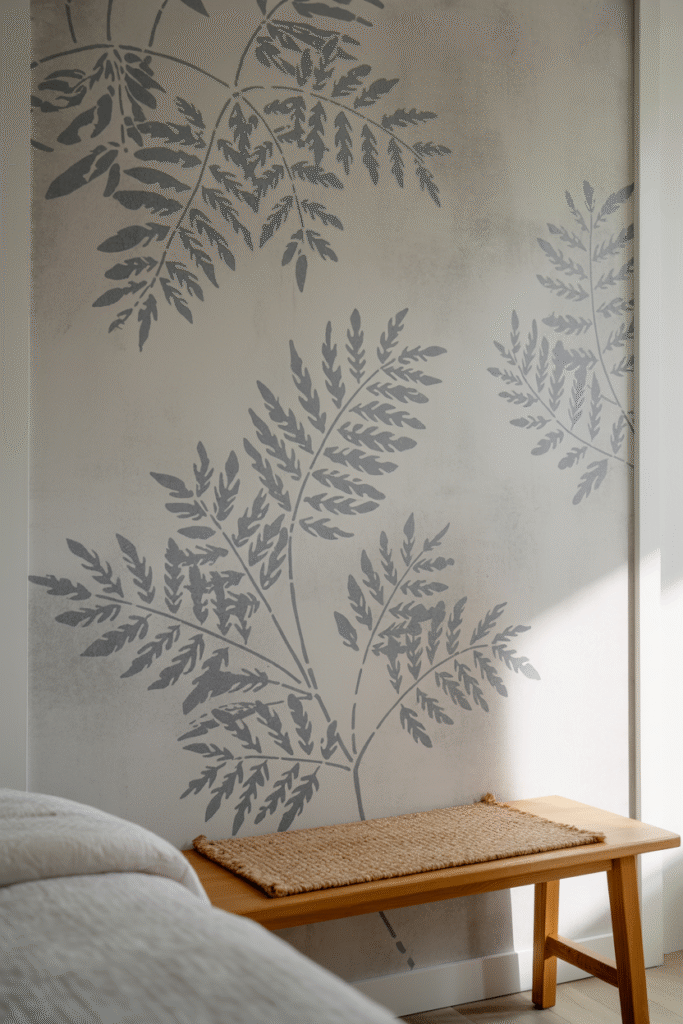
What works best: You don’t have to be an artist to add a mural. Use a stencil for geometric shapes, leaves, or abstract forms paint just inside the bedroom’s entry wall for a subtle pop.
How to do it:
Tape the stencil in place and use a dense foam roller for even coverage. Work in small sections and let each dry before moving the stencil.
- Materials: Stencil, paint, foam roller, tape
- Time: 3–4 hours (including drying)
- Cost: Low to medium
- Difficulty: Beginner
Avoid this: Oversized murals in small rooms—keep it subtle to avoid overwhelm.
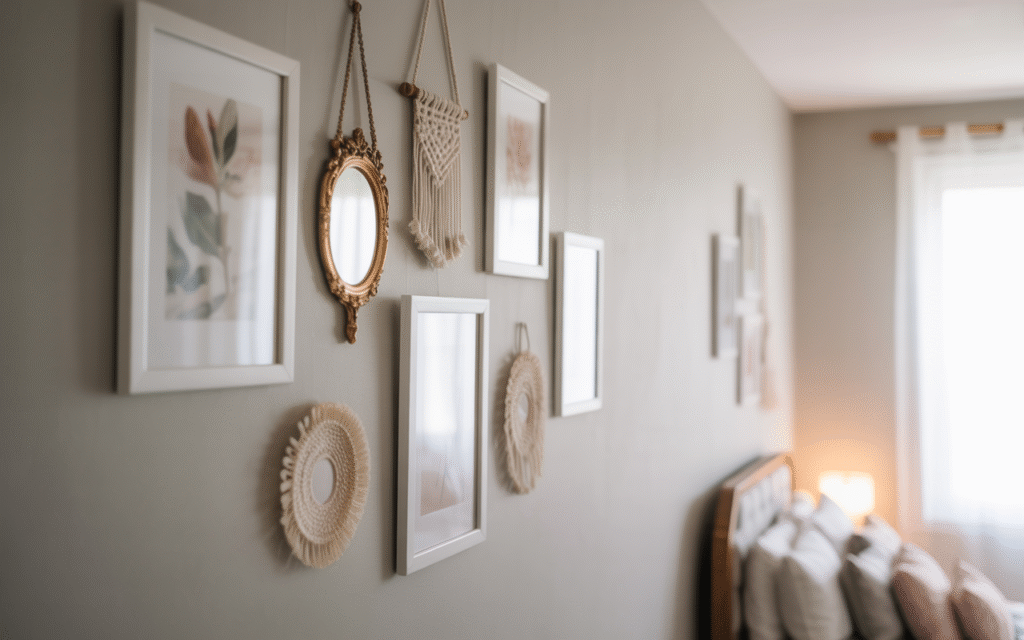
8. Hang a Large-Scale Artwork
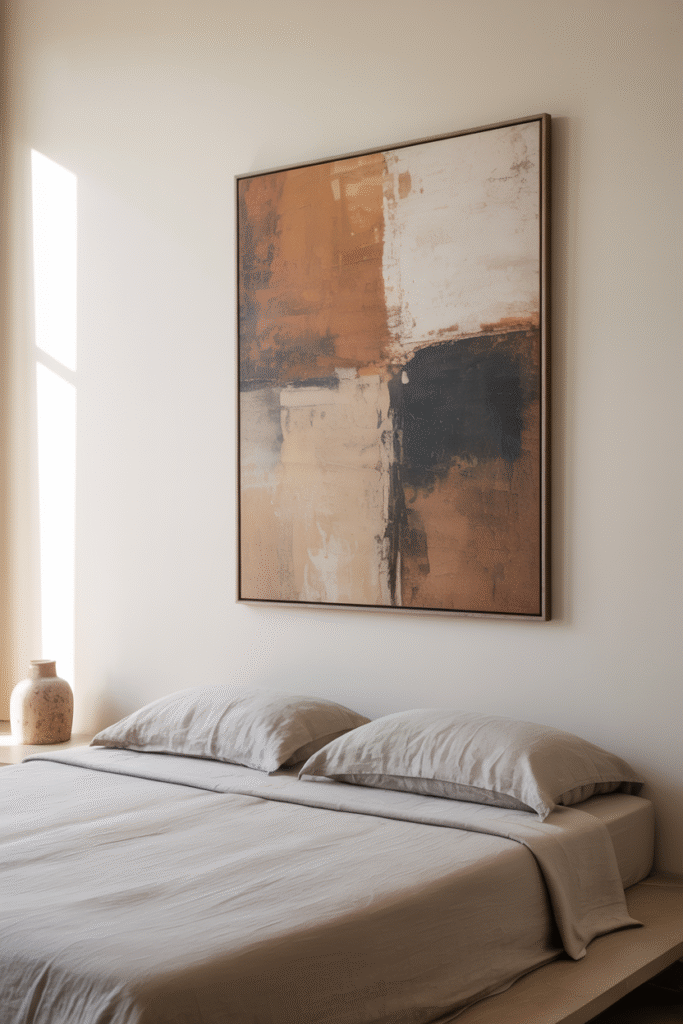
What I’ve found: One large piece is often more striking than a cluttered gallery wall.
How to do it:
Choose a print or canvas about 60–90 cm (24–36 inches) wide mount it centered at 150 cm (59 inches) from the floor for optimal viewing. Use a hanging system that suits your wall type.
- Materials: Artwork, hanging hardware, level
- Time: 20 minutes
- Cost: Medium to high
- Difficulty: Beginner
Pro tip: If you’re on a budget, frame a high-quality printed fabric or wallpaper sample for a custom look.
9. Install a Pegboard for Function and Style
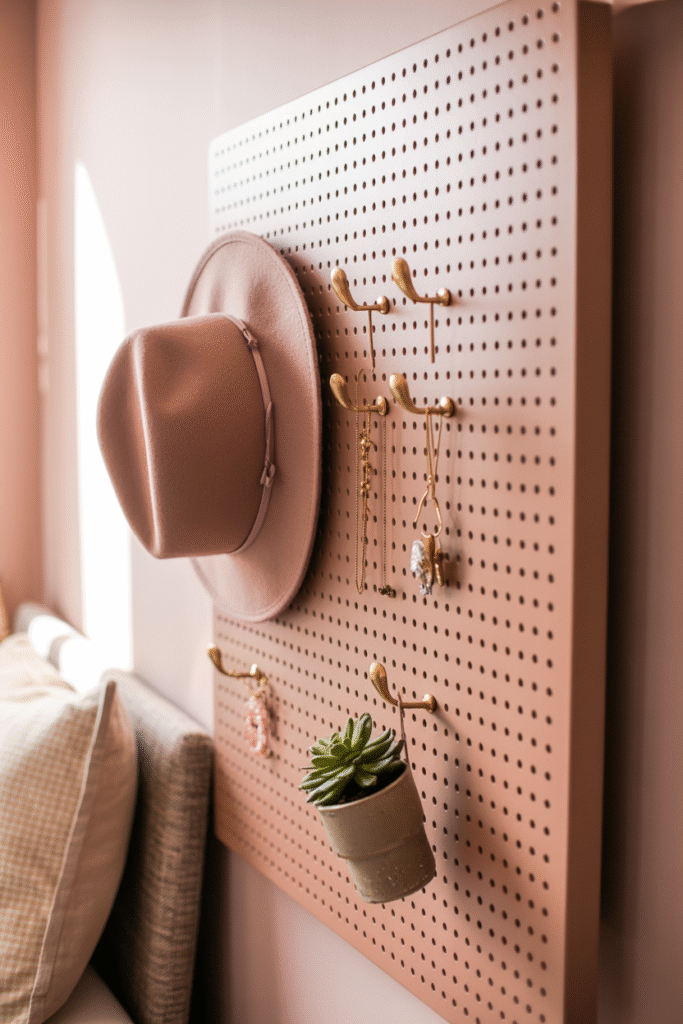
In my experience: Pegboards aren’t just for garages. Paint one in a soft hue and use it to hang jewelry, hats, or scarves it’s practical and adds a modern edge.
How to do it:
Cut a pegboard panel to your desired size, paint, and mount with brackets. Add hooks and shelves as needed.
- Materials: Pegboard, paint, brackets, hooks
- Time: 2 hours
- Cost: Low to medium
- Difficulty: Beginner
Personal anecdote: I installed a blush pink pegboard in a client’s closet—now her accessories are both organized and on display.
10. Add a Floating Nightstand Shelf
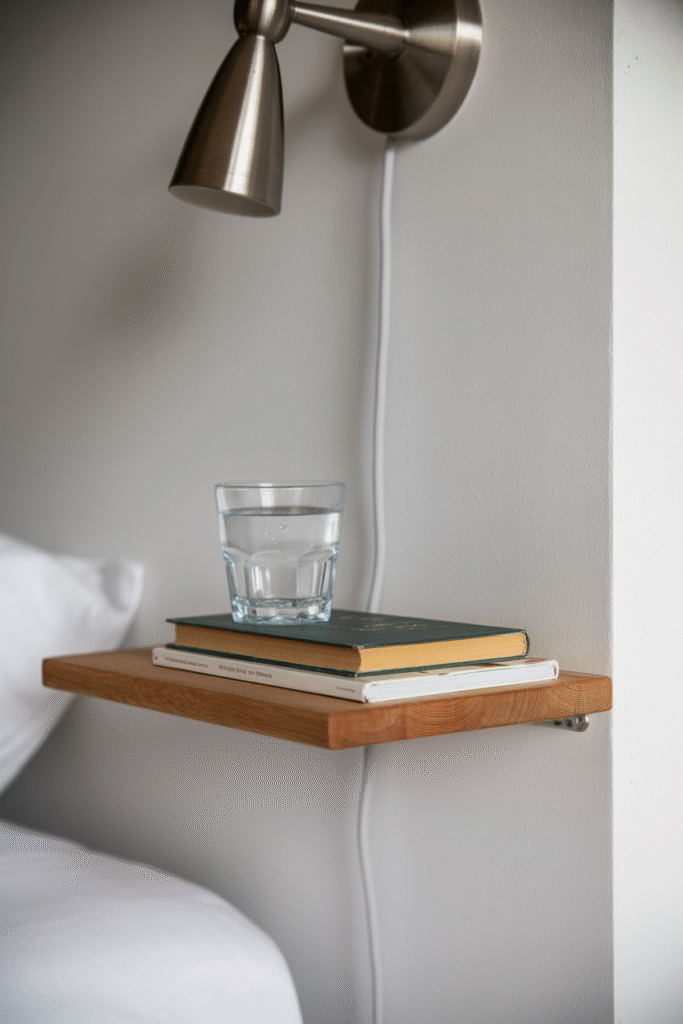
What works best: A narrow shelf beside the bed is a sleek, space-saving alternative to a bulky nightstand.
How to do it:
Mount a 20 cm x 40 cm (8 inches x 16 inches) shelf at bedside height about 60–65 cm (24–26 inches) from the floor. Stain or paint to match your decor.
- Materials: Wood shelf, brackets, screws, level
- Time: 30 minutes
- Cost: Low
- Difficulty: Beginner
Avoid this: Overloading the shelf keep it minimal for best effect.
11. Hang a Vintage Mirror
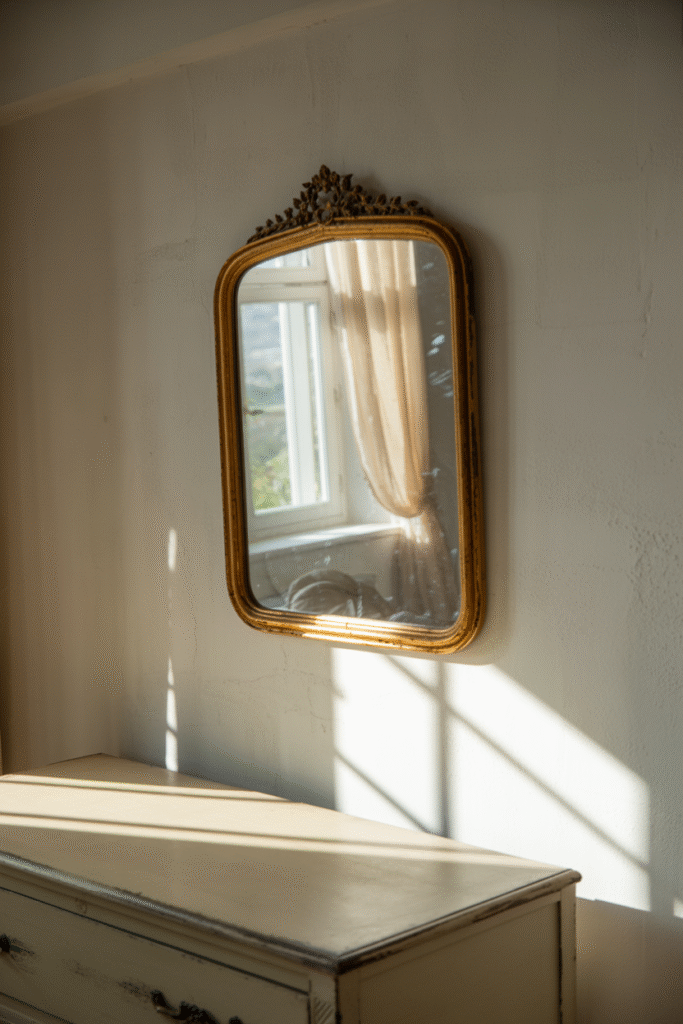
What I’ve found: An antique mirror adds patina and light, especially across from a window.
How to do it:
Choose a mirror with a frame that speaks to your style. Hang it at eye level about 150 cm (59 inches) from the floor—or lean it casually against the wall if the frame is sturdy.
- Materials: Mirror, hanging hardware
- Time: 20 minutes
- Cost: Medium to high
- Difficulty: Beginner
Pro tip: Spray paint a thrifted frame in a bold color for a custom look.
12. Drape a Tapestry or Quilt
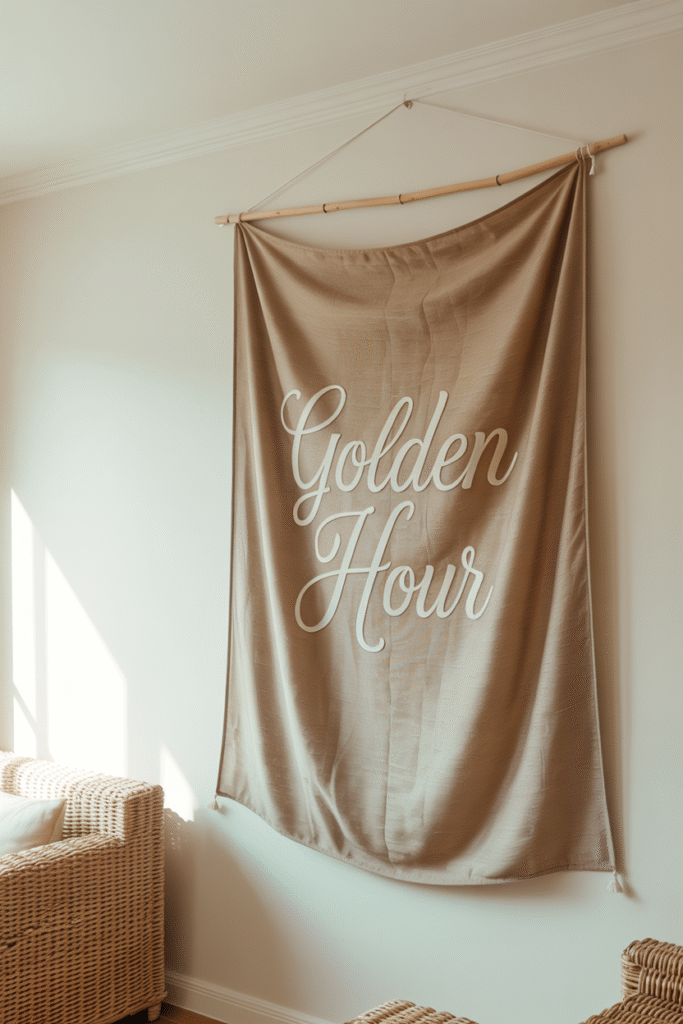
What works best: A large textile hung as a focal point adds warmth and texture perfect if you’re renting and can’t paint.
How to do it:
Use a decorative rod or wooden dowel to hang fabric from ceiling hooks. Let it drape softly for a relaxed vibe.
- Materials: Tapestry/quilt, rod/dowel, ceiling hooks
- Time: 30 minutes
- Cost: Low to medium
- Difficulty: Beginner
Avoid this: Heavy fabrics stick to lightweight cotton or linen for easy hanging.
13. Install Wall-Mounted Sconces
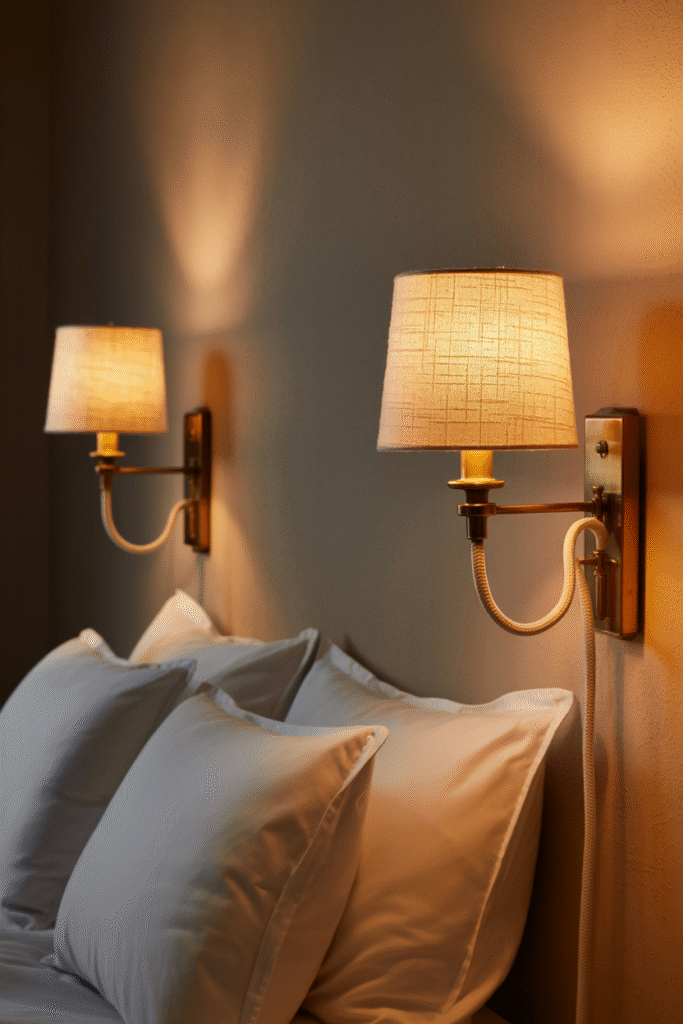
What I’ve found: Sconces save bedside table space and create a hotel-like glow.
How to do it:
Mount sconces on either side of the bed, about 60–70 cm (24–28 inches) apart, at shoulder height when sitting. Choose plug-in or hardwired options based on your comfort with wiring.
- Materials: Wall sconces, hardware, possibly an electrician
- Time: 1–2 hours (or more if hardwiring)
- Cost: Medium
- Difficulty: Intermediate
Personal anecdote: I added plug-in sconces to my own bedroom no more cluttered nightstands.
14. Hang a Vertical Herb Garden
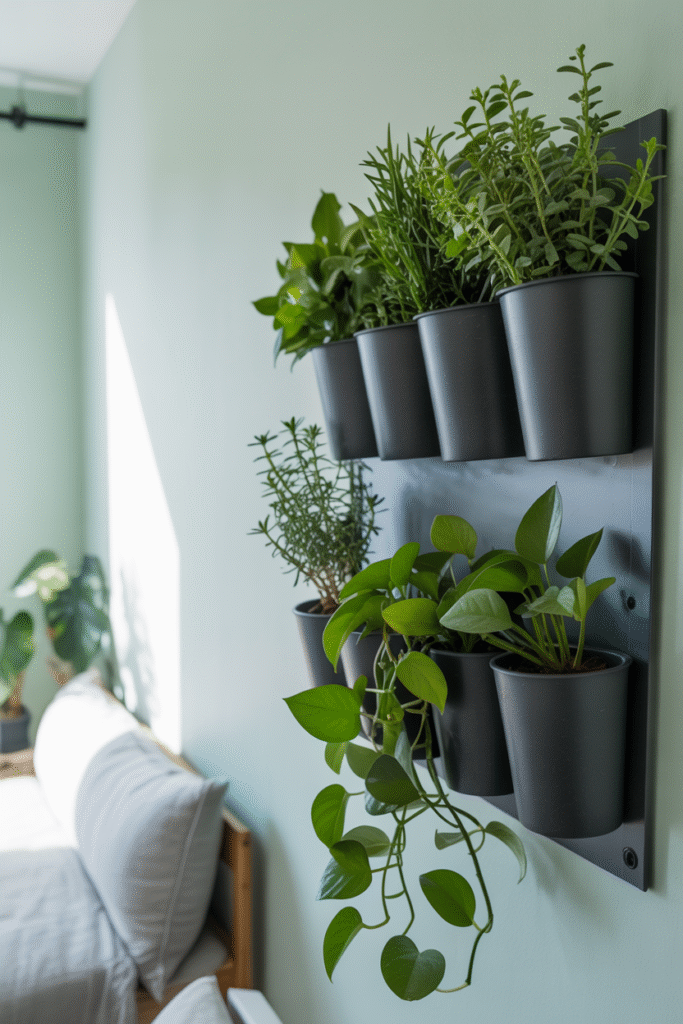
What works best: A wall-mounted planter with herbs or easy-care succulents brings life and fragrance and is surprisingly low-maintenance.
How to do it:
Mount individual pots or a vertical planter system in a sunny spot. Use drip trays to protect your wall.
- Materials: Wall planters, plants, drip trays, hooks
- Time: 1 hour
- Cost: Low to medium
- Difficulty: Beginner
Pro tip: Stick to mint, basil, or pothos for foolproof greenery.
15. Create a DIY Fabric Wall Hanging

What works best: If you have extra fabric or vintage scarves, turn them into a one-of-a-kind wall hanging no sewing required.
How to do it:
Cut fabric into strips, layer them over a wooden dowel, and hang from ceiling hooks. Play with lengths and textures for a boho touch.
- Materials: Fabric, dowel, scissors, ceiling hooks
- Time: 1 hour
- Cost: Low
- Difficulty: Beginner
Avoid this: Overlapping fabrics that block each other keep the layers visible.
Addressing Common Wall Decor Mistakes
A few slip-ups can derail even the best intentions. Here’s what I’ve seen—and how to avoid them:
- Too Many Small Frames: A gallery wall can feel busy if the frames are all tiny. Mix in a few large pieces for balance.
- Ignoring Scale: The right art or shelf should be proportional to your wall and furniture—measure first, hang second.
- Skimping on Prep: Wipe down walls before painting or hanging anything. Dust and grime show through fresh paint.
- Forgetting Lighting: A beautifully styled wall looks flat in poor light. Add a lamp or sconce nearby.
- Rushing the Layout: Place items on the floor first, arrange, photograph, and then hang. It saves nail holes.
Alternatives for Every Budget and Skill Level
Not every project is for everyone. Here are simple swaps:
- Low Budget: Use washi tape for removable stripes instead of paint; frame postcards or album covers as DIY art.
- Renters: Stick to damage-free hooks and peel-and-stick wallpaper samples.
- Advanced: Try a DIY limewash paint finish for texture, or build a full wall unit with integrated lighting.
Safety First
Always use appropriate hardware for your wall type drywall anchors for most homes, masonry screws for brick or concrete. If you’re not confident about wiring, hire an electrician for sconces. Ladders should be steady and never overloaded.
FAQs on Bedroom Wall Decor
Q: How do I choose art that won’t look dated in a year?
A: Go for classic subjects (landscapes, abstracts, botanicals) or personal photos. Avoid trendy phrases.
Q: Can I mix different wall decor styles in one room?
A: Absolutely—just repeat one color or material to tie everything together. I often mix modern shelves with vintage art, anchored by the same wood tone or finish.
Q: What’s the best way to hang things without damaging walls?
A: For lightweight items, 3M Command strips are great. For anything heavy, use anchors or find a stud.
Q: How much wall space should be bare?
A: There’s no magic number, but leave some breathing room—at least one wall minimalist, especially in small bedrooms.
Q: How often should I refresh my bedroom wall decor?
A: Every 2–3 years, or when you’re craving a change. Small tweaks (new pillow, swapped art) can do wonders.
Q: Any tips for small bedrooms?
A: Lean toward light colors, minimal patterns, and multifunctional pieces (like a shelf nightstand). Vertical lines (stripes, tall art) help stretch the space.
Ready to Transform Your Bedroom Walls?
These 15 ideas are just the start pick the one that excites you most and give it a try. Remember, the goal isn’t “perfection.” It’s a bedroom that feels like you, functions for your life, and makes you smile when you walk in. I can’t wait to hear how it goes! If you have questions as you work, I’m always here—just drop me a line at artfullhouses.com.