
Your laundry room is probably the size of a broom closet, and you’re stuck doing the awkward sideways shuffle just to reach the dryer. Been there, washed that. But here’s the thing small laundry rooms don’t have to feel like you’re doing chores in a phone booth. I’ve spent way too much time figuring out how to make these cramped spaces actually work, and I’m about to share the genius tricks that’ll have you wondering why you didn’t try them sooner.
Whether you’re dealing with a tiny corner in your apartment or a narrow strip between your kitchen and garage, these ideas will transform your laundry situation from frustrating to functional. And honestly? Some of them are so simple, you’ll be kicking yourself for not thinking of them earlier.
Title Page Separator Site title
Stack Your Washer and Dryer (Seriously, Just Do It)
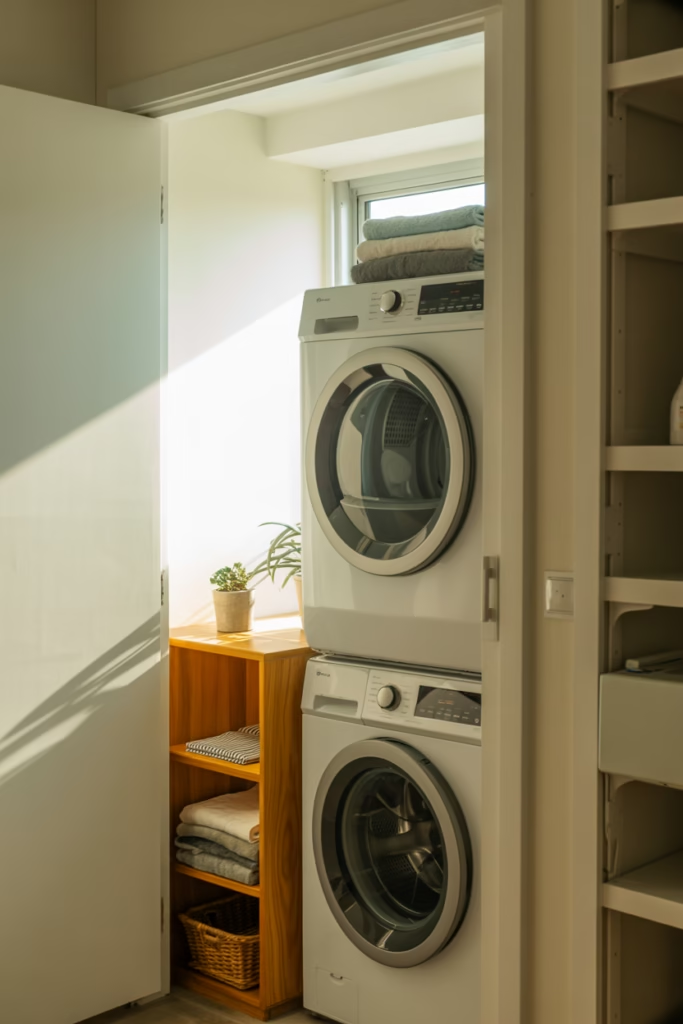
This one’s a no-brainer, but you’d be surprised how many people resist it. Stacking your washer and dryer instantly frees up floor space that you can actually use for storage or a folding station. I finally did this last year, and the difference was immediate—I suddenly had room to breathe.
You’ll need a stacking kit (they’re like $20-30), and make sure your dryer is compatible for top mounting. Front-loaders work best for this setup. Once you’ve got them stacked, you can install shelves or cabinets where your dryer used to sit. That’s prime real estate you just unlocked.
The only downside? You might need a step stool to reach the dryer controls if you’re on the shorter side. Small price to pay for all that extra space, IMO.
Install Floating Shelves Above Everything
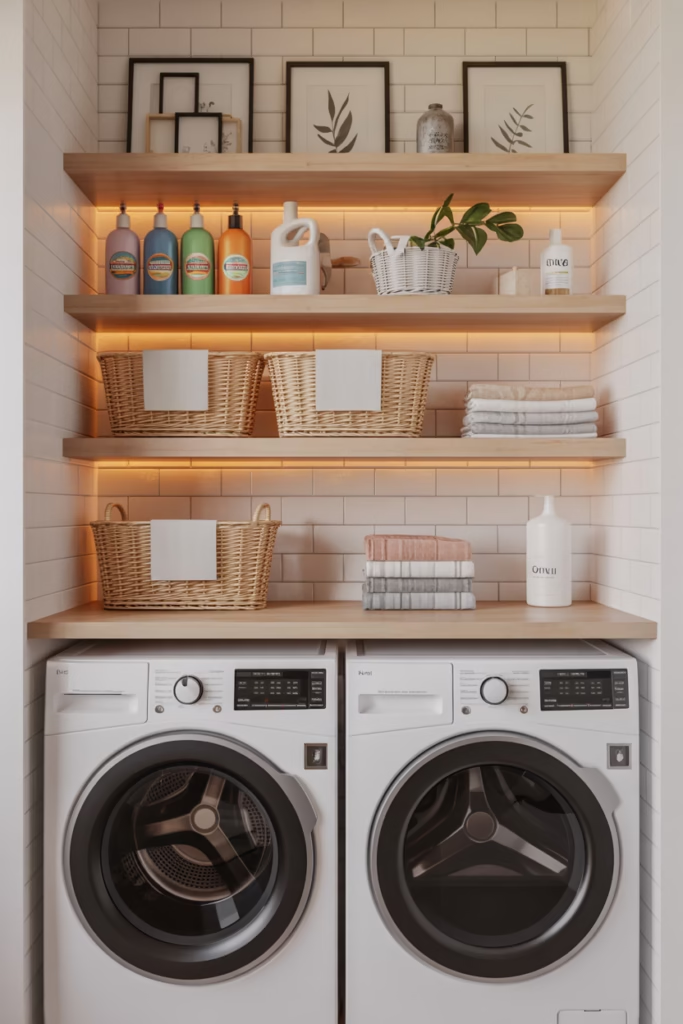
Here’s where things get interesting. That wall space above your washer and dryer? It’s basically free storage that’s just sitting there, waiting for you to claim it. Floating shelves are your best friend in a tiny laundry room because they don’t take up any floor space and give you somewhere to stash detergent, fabric softener, and all those random cleaning supplies.
I went with three shelves in my space—one for detergents, one for stain removers and specialty products, and one for extra supplies like dryer sheets and clothespins. The key is keeping everything you use regularly within arm’s reach. Trust me, you don’t want to be climbing on top of your washer to grab the bleach every time you need it.
Go for shelves that are at least 8-10 inches deep so you can fit larger bottles. And here’s a pro tip: use small baskets or bins on the shelves to group similar items together. Keeps everything organized and prevents the “avalanche effect” when you grab something from the back.
Add a Fold-Down Drying Rack
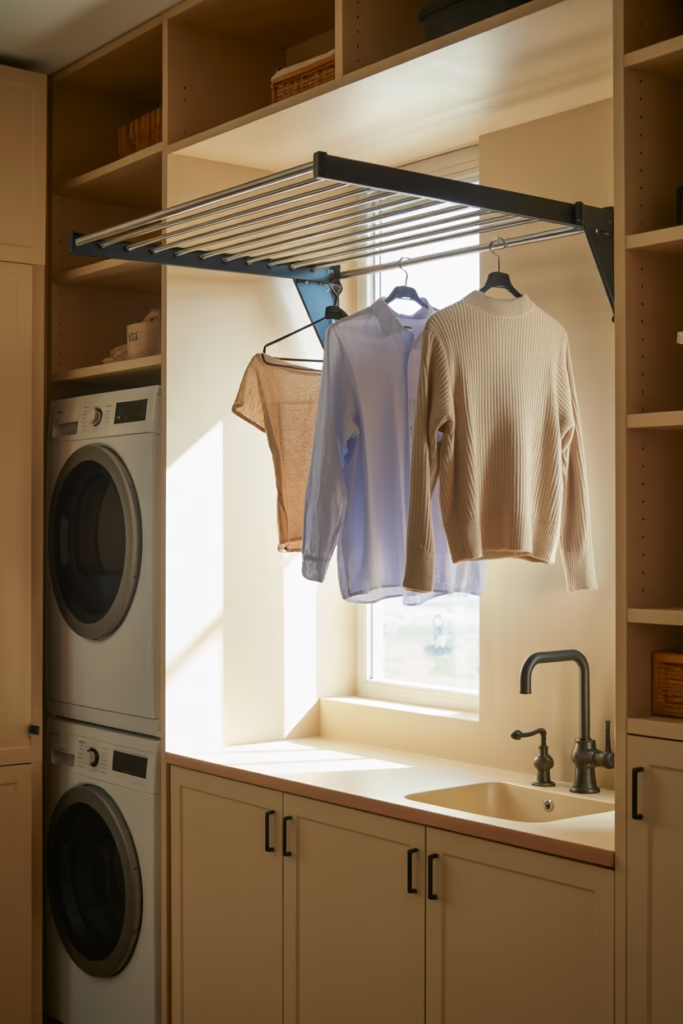
Ever wonder why laundry rooms never seem to have enough space for air-drying? Yeah, me too. That’s why fold-down drying racks are absolute game-changers. They mount to the wall, fold up when you’re not using them, and give you a proper spot to hang delicates without sacrificing precious floor space.
I installed mine on the side wall, and it’s been a lifesaver for sweaters, workout gear, and anything that can’t go in the dryer. When I’m done, it folds flat against the wall—totally out of the way. Some models even come with multiple bars so you can dry several items at once.
Look for racks that can support at least 20-30 pounds to handle heavier items like jeans or towels. The last thing you want is your drying rack collapsing under the weight of a wet hoodie. FYI, stainless steel racks hold up better than plastic ones, especially in humid environments.
Utilize the Inside of Cabinet Doors
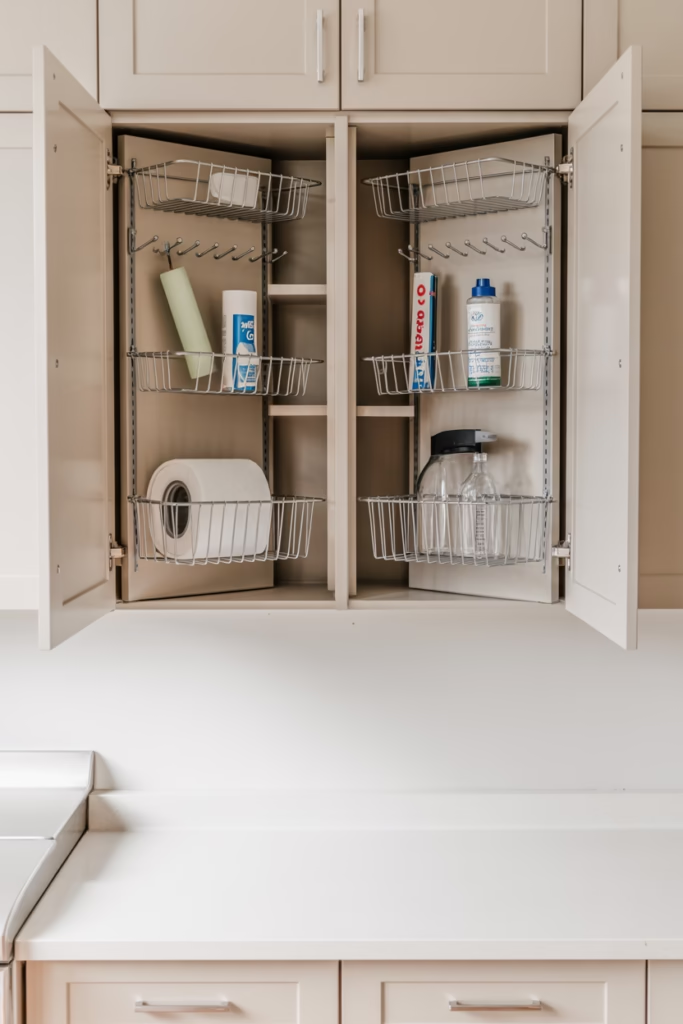
This trick changed my entire storage game. The inside of your cabinet doors is basically hidden storage space that most people completely ignore. Stick some adhesive hooks or small wire baskets on there, and boom—you’ve got spots for dryer sheets, lint rollers, stain sticks, and all those little items that usually clutter your counters.
I use mine to hang my measuring cup for detergent, a small brush for cleaning lint traps, and even a tiny spray bottle of stain remover. Everything’s right there when I need it, but completely out of sight when I don’t. It’s like having a secret weapon against clutter 🙂
Command hooks work great for this, or you can go with those over-the-door organizers designed for spices—they work perfectly for laundry supplies too.
Install a Tension Rod for Hanging Clothes
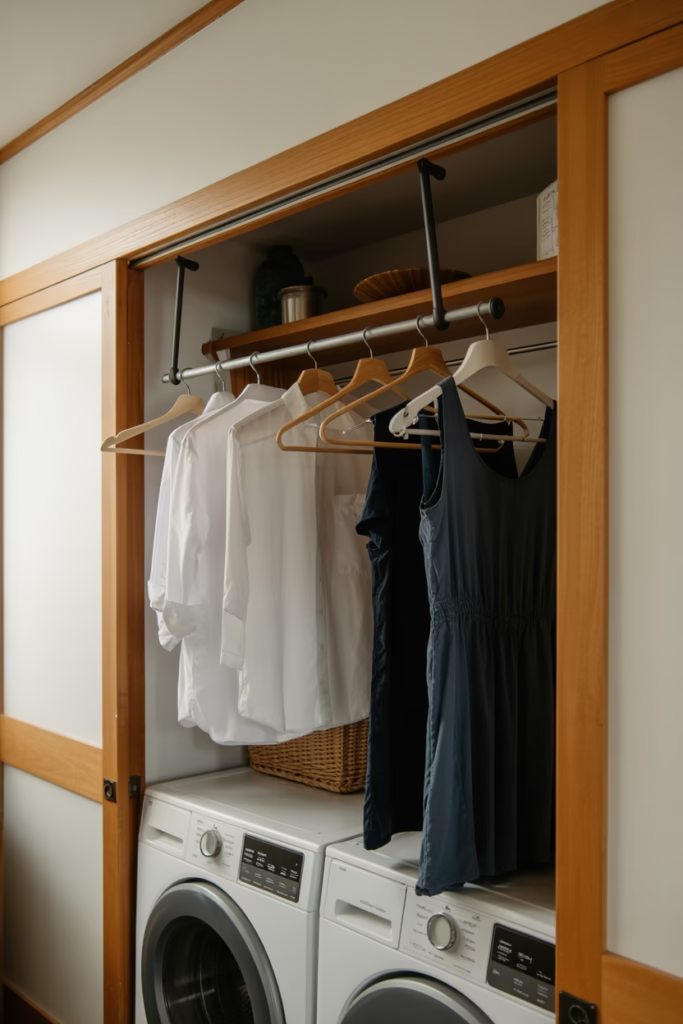
Here’s something I stumbled on by accident that turned out to be brilliant. A tension rod installed between two walls (or inside a cabinet) gives you an instant hanging spot for clothes fresh out of the dryer. No more throwing dress shirts over the door or draping them on furniture while they wait to be ironed.
I put mine right above my washer and dryer, spanning the width of the space. Now when I pull something out that needs to be hung immediately, I’ve got a spot ready to go. It’s also perfect for hanging clothes that need to air dry a bit more after coming off the drying rack.
Make sure you get a heavy-duty tension rod—the cheap ones will sag or fall if you load them up with hangers. Spend the extra few bucks for one that can actually handle the weight.
Create a Rolling Cart Station
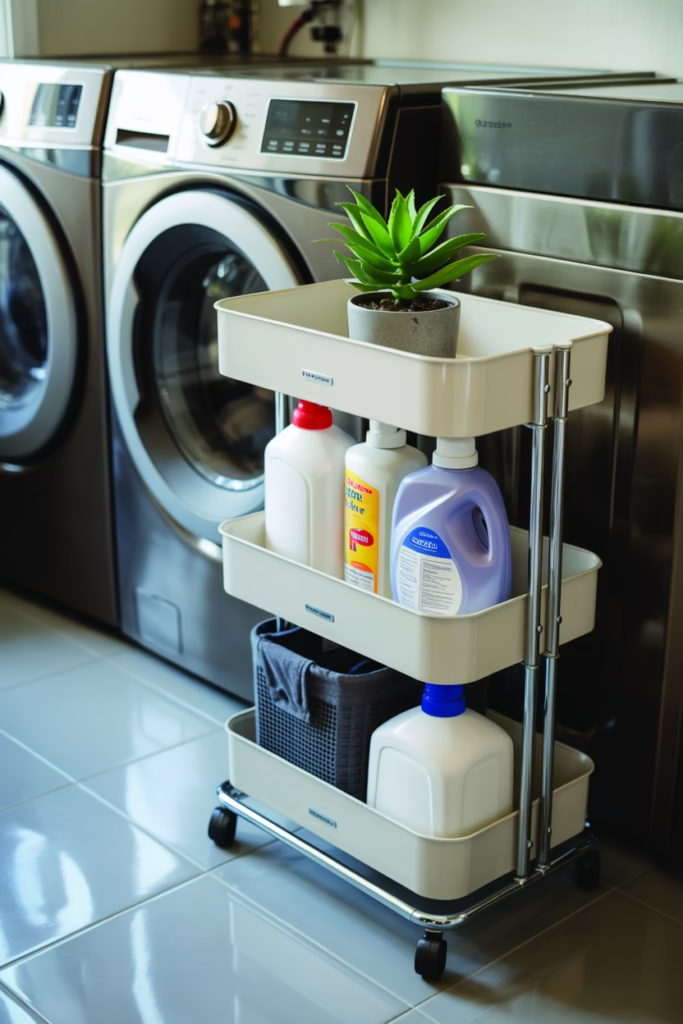
Rolling carts are basically magic for tiny spaces. You can tuck them into corners, roll them out when you need them, and use them to corral all your laundry essentials in one portable spot. I’ve got a three-tier cart that holds detergent on the bottom, fabric softener and dryer sheets in the middle, and stain removers and specialty products on top.
The best part? I can wheel the whole thing over to wherever I’m working—next to the washer when I’m loading, or over to my folding area when I’m sorting. No more walking back and forth a million times because I forgot the stain stick.
Look for carts with wheels that lock so they don’t roll away on you mid-laundry session. And narrow carts (12-15 inches wide) fit into those awkward gaps between appliances or beside doors where nothing else will.
Add Pegboard for Ultimate Flexibility
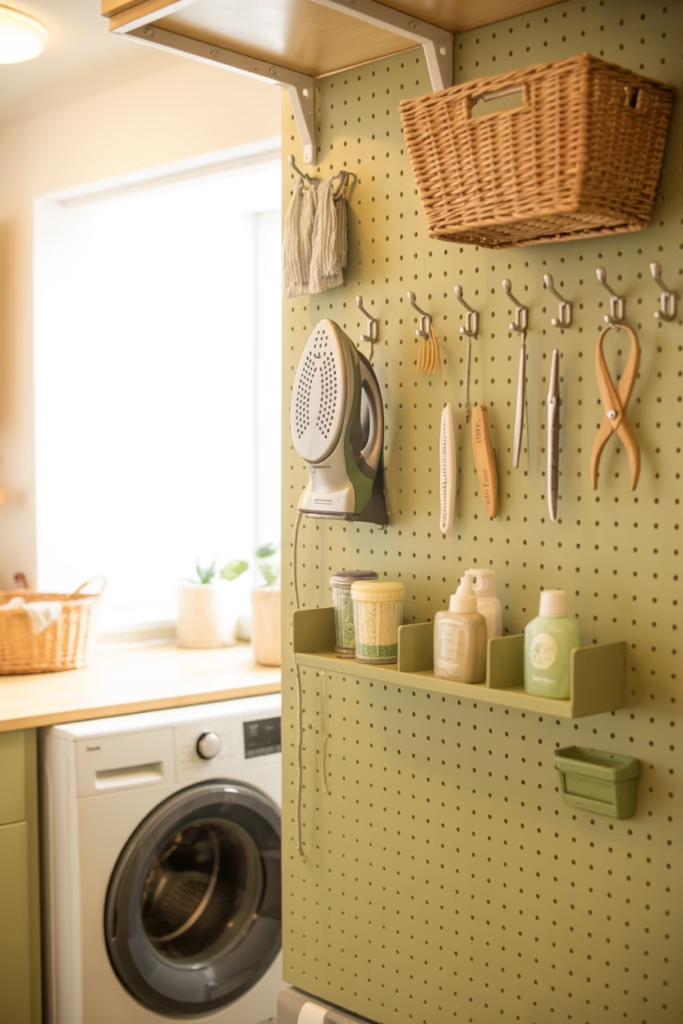
Pegboard isn’t just for garages anymore. This stuff is incredibly versatile and lets you customize your storage exactly how you want it. You can hang baskets, hooks, small shelves—whatever you need, wherever you need it. And when your needs change? Just rearrange the pegs.
I installed a pegboard on one entire wall of my laundry room, and it’s become my command center. I’ve got hooks for my iron and ironing board, a basket for clothespins, a small shelf for my sewing kit (for quick button fixes), and even a spot for my lint roller. Everything’s visible and accessible, which makes the whole laundry process so much smoother.
Paint your pegboard a fun color to add some personality to the space—mine’s a cheerful mint green that makes doing laundry slightly less boring.
Use the Space Between Washer and Dryer

If your washer and dryer sit side by side, there’s probably a narrow gap between them that’s currently collecting lint and lost socks. Stop wasting that space! Slide-out rolling carts designed specifically for this gap are total game-changers. They’re usually only 3-6 inches wide but can hold a surprising amount of stuff.
I use mine for extra dryer sheets, stain removers, and those random bottles of specialty detergent that I don’t use often enough to keep on my main shelves. It slides out when I need something, then disappears completely when I don’t. Plus, no more fishing out lost items from behind the washer with a yardstick.
These organizers are super cheap (like $15-25) and genuinely make a difference in how functional your space feels.
Install a Wall-Mounted Ironing Board
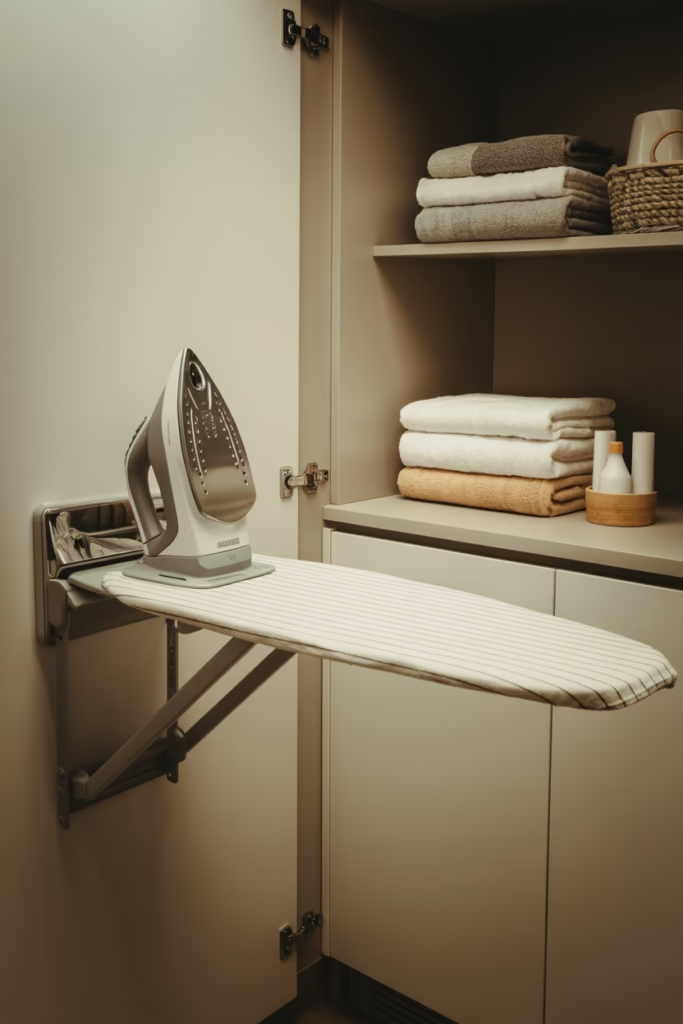
Ironing boards are bulky, awkward, and always in the way. Know what’s not? A wall-mounted ironing board that folds down when you need it and disappears when you don’t. I resisted getting one for way too long because I thought they’d be flimsy or annoying to install. Wrong on both counts.
Mine mounts inside a cabinet door and swings out when I need to iron something. When I’m done, it folds right back up and the cabinet closes like nothing’s there. It’s sturdy, saves a ton of space, and honestly just makes ironing less of a hassle because the board is always ready to go.
Look for models with a built-in iron holder so you can store everything together in one spot.
Maximize Vertical Space with Tall Cabinets
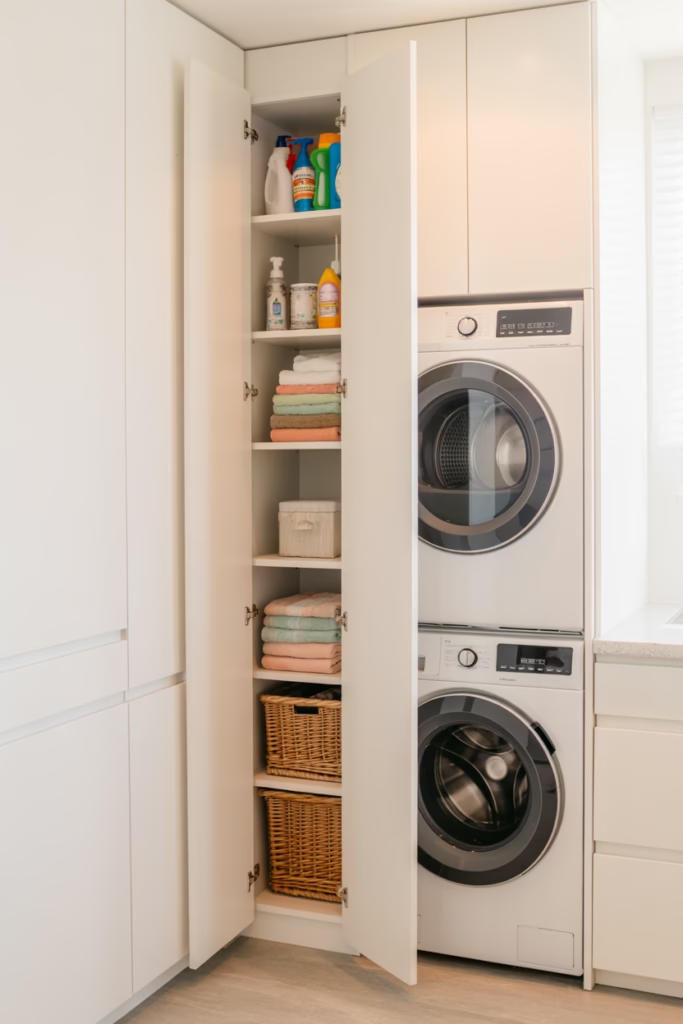
When you can’t go wide, go tall. Tall, narrow cabinets make perfect sense in tiny laundry rooms because they give you tons of storage without eating up floor space. I installed a floor-to-ceiling cabinet in one corner, and it holds everything from cleaning supplies to extra towels to all my backup stock of detergent.
The top shelves are for stuff I don’t use often (like seasonal items or backup supplies), the middle shelves are for everyday products, and the bottom has a pull-out hamper. Everything has a home, and my laundry room actually feels organized for once.
If you can’t do built-in cabinets, those freestanding tall storage units work just as well. Just make sure to anchor them to the wall so they don’t tip over when you’re reaching for something on a high shelf.
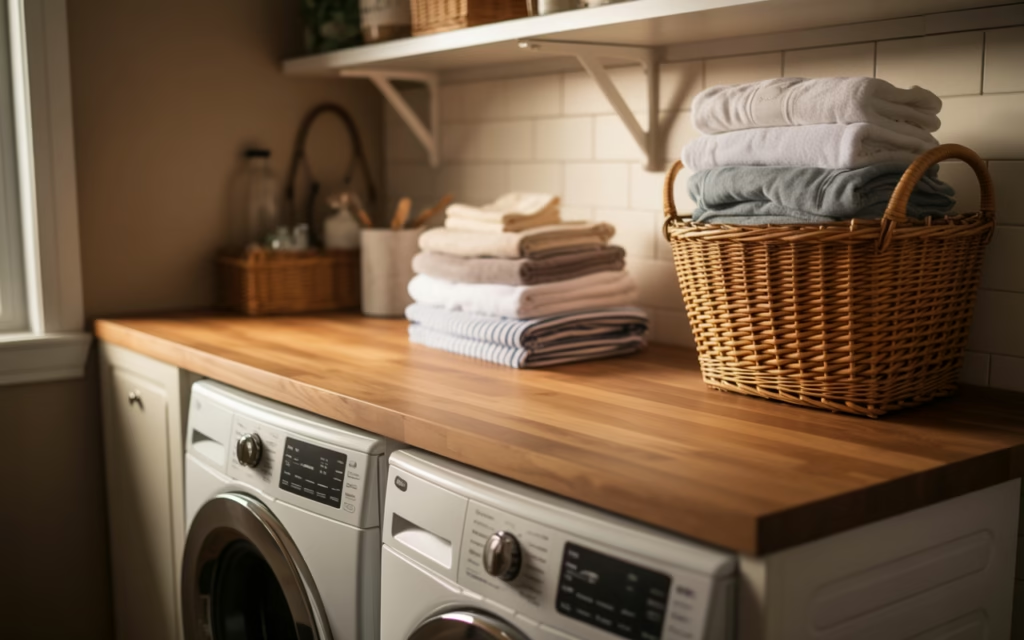
Add a Countertop for Folding
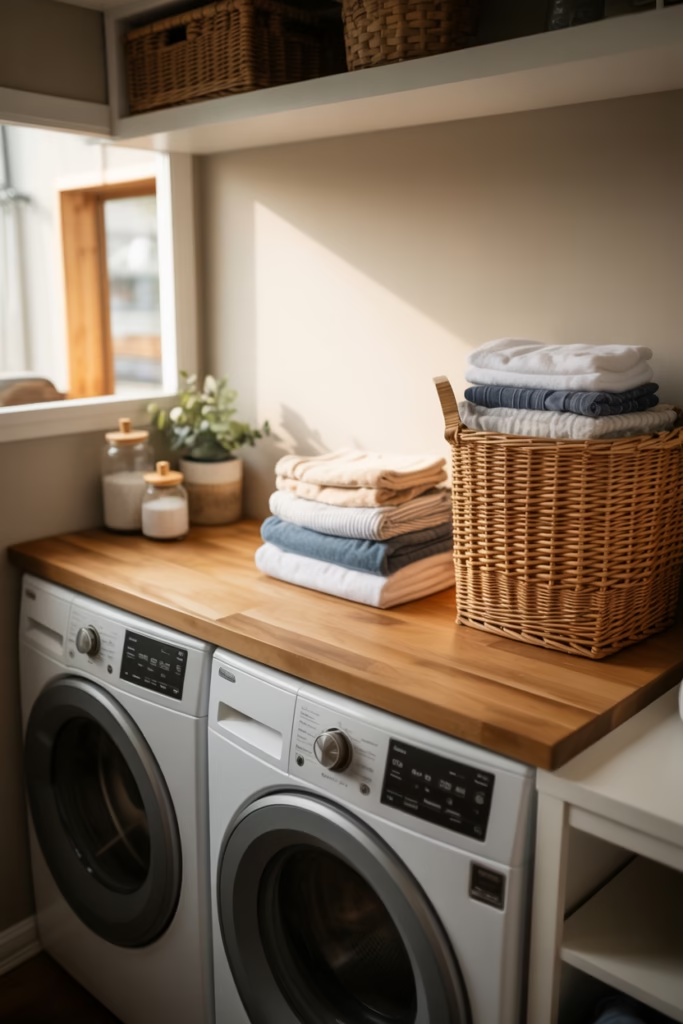
This was hands-down the best upgrade I made to my laundry room. Having an actual surface to fold clothes on instead of hunching over the dryer or carrying everything to the couch makes laundry so much less painful. If you’ve got any space at all—even just 2-3 feet wide—you can create a folding station.
I put a simple butcher block countertop over my stacked washer and dryer, and it’s been a total game-changer. Now I’ve got a dedicated spot to sort, fold, and organize clothes right where I’m doing the laundry. No more piles on the floor or wrinkled clothes from lazy folding.
You can also install a fold-down counter that attaches to the wall if you really don’t have any floor space to spare. It works the same way—gives you a surface when you need it, then gets out of the way when you don’t.
Install Pull-Out Hampers
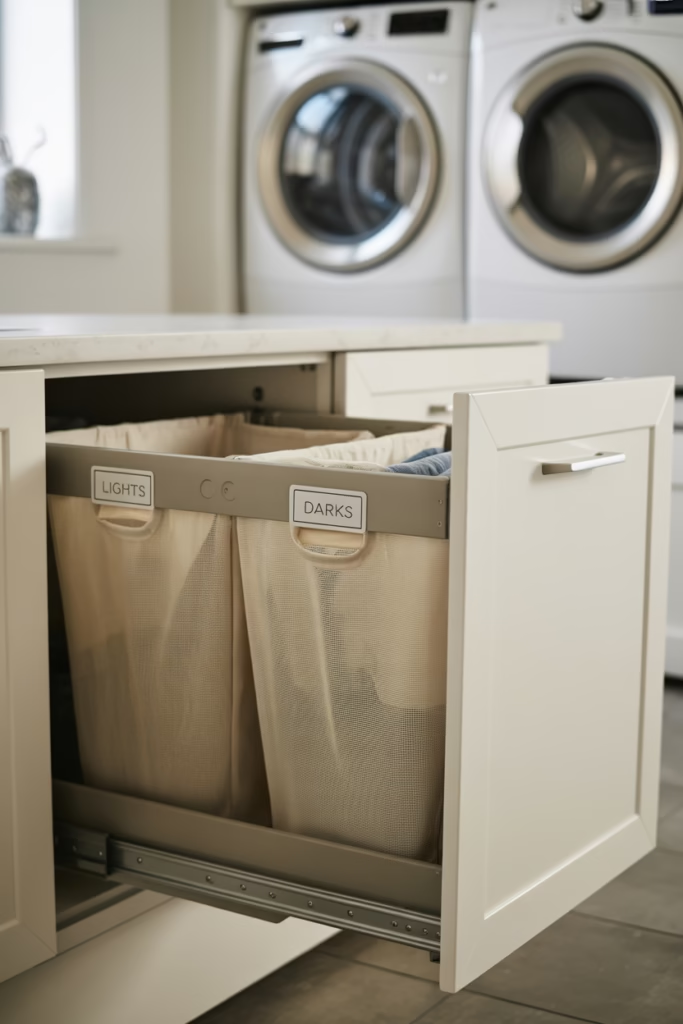
Built-in hampers that slide out from cabinets or closets are seriously underrated. They keep dirty laundry contained and out of sight, plus they make sorting colors and whites way easier if you get a dual or triple hamper system. I’ve got a double hamper setup—one side for darks, one for lights—and it’s made my laundry routine so much more efficient.
No more sorting through a giant pile on laundry day or having random clothes scattered around because there’s nowhere to put them. Everything goes directly into the right hamper, and when it’s time to wash, I just pull out the bin and dump it straight into the washer.
Look for hampers with removable bags so you can carry them directly to the washer without having to transfer clothes by hand.
Use Magnetic Strips for Small Metal Items

This is one of those tiny tricks that makes a surprising difference. Stick a magnetic strip on your wall or the side of your washer, and you’ve got instant storage for scissors, safety pins, tweezers, and all those little metal tools that always seem to disappear when you need them. I’ve got one right next to my folding counter, and it holds my scissors for cutting off tags, safety pins for quick repairs, and even some small clips I use for keeping sock pairs together.
It’s such a simple solution, but it keeps all those tiny items organized and accessible instead of rattling around in a drawer somewhere.
Magnetic knife strips work perfectly for this—they’re strong, cheap, and easy to install.
Add Under-Shelf Baskets
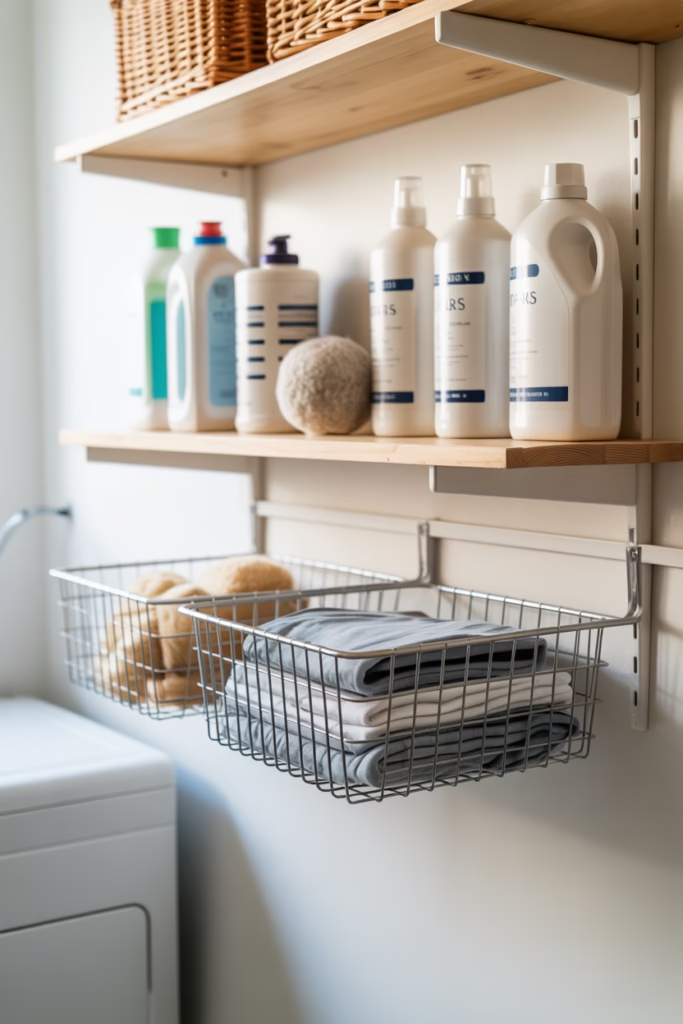
Got shelves that aren’t quite full from top to bottom? Under-shelf baskets are genius for squeezing extra storage out of existing shelves. They clip onto the shelf and hang underneath, creating a whole new level of storage without taking up any additional space. I use them under my floating shelves to store smaller items like dryer balls, mesh laundry bags, and those little pods of scent boosters.
They’re also great for keeping things separated and organized—like having one basket for stain treatments and another for fabric care items. Everything’s visible and easy to grab, but not cluttering up your main shelf space.
These baskets are super affordable (usually under $10 each) and work with most standard shelves.
Install a Retractable Clothesline

Sometimes you just need to hang stuff up to dry, but permanent clotheslines can make a small space feel even more cramped. That’s where retractable clotheslines come in clutch. They mount to the wall, extend when you need them, and retract completely out of the way when you’re done. I installed one across my laundry room for those times when I need to air-dry multiple items at once—like after hand-washing a bunch of delicates or when the drying rack is already full.
You can extend it, clip up your clothes, let them dry, then retract it and reclaim your space. It’s simple, functional, and doesn’t require any permanent commitment to where your drying line lives.
Look for models that can handle at least 40-50 feet of line and support 30+ pounds for maximum versatility.
Final Thoughts
Transforming a tiny laundry room doesn’t require a massive renovation or a huge budget it just takes some creative thinking and smart use of every available inch. The ideas I’ve shared here have legitimately made my laundry routine easier and my space way more functional. And honestly, when your laundry room actually works for you instead of against you, the whole chore feels less terrible.
Start with one or two of these ideas and see what works for your specific space. You might surprise yourself with how much functionality you can squeeze out of even the tiniest laundry area. Your future self (the one who’s not doing the sideways shuffle past the dryer anymore) will definitely thank you.