
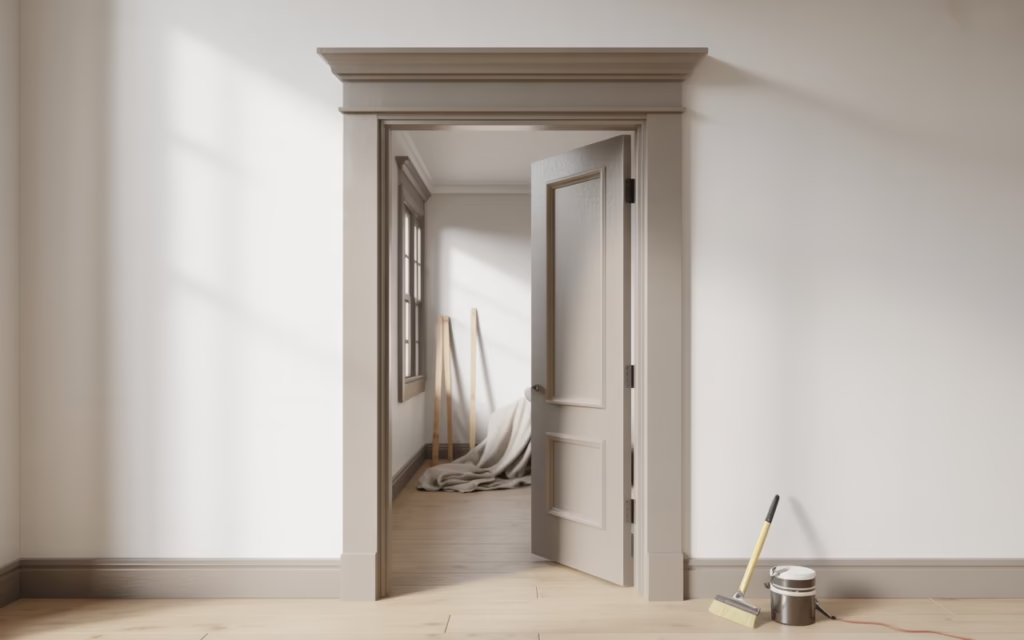
You hate your door frames. Maybe they are that weird, honey-orange oak from the 90s that screams “builder grade,” or maybe they are chipped, yellowing white monstrosities that have seen better days. You look at them, they look at you, and nobody is happy. But the thought of ripping out the entire door unit? Hard pass. Hanging a new door slab is an absolute nightmare of shims, levels, and inevitable cursing.
I have been there. I stared at my hallway doors for three years, paralyzed by the fear of ruining structural integrity or blowing my budget. Then I realized something crucial: you don’t need to replace the door to change the vibe.
You can completely transform the look of your room by focusing solely on the frame and casing. This guide isn’t some theoretical, AI-generated fluff. These are the exact steps I used to turn my boring hallway into something that looks custom-built. We are going to tackle this DIY Door Frame Makeover Without Replacing the Door together. Grab your coffee (or something stronger), and let’s get to work.
Why Bother With Just the Frame?
Why focus on the frame? Because the frame frames the view (pun intended). In interior design, we often ignore the “eyeliner” of the room. A crisp, bold frame makes even a cheap hollow-core door look expensive.
Plus, consider the math. A decent pre-hung solid core door costs hundreds of dollars. Multiply that by the eight doors in your hallway, and you are looking at a vacation’s worth of money just to swing some wood back and forth. Refinishing or upgrading the frame costs a fraction of that. We love saving money here.
Also, ripping out a jamb often damages the drywall. Do you want to mud and tape drywall this weekend? I didn’t think so.
Phase 1: The Prep Work
I know you want to grab the paintbrush immediately. Resist that urge. If you paint over grease, dust, or glossy varnish without prep, that paint will scratch off if you look at it wrong. Trust me, I learned this the hard way on a bathroom door in 2018. It wasn’t pretty.
Clean It Like You Mean It
Your door frames are grosser than you think. Fingerprints, dog nose smudges, and mysterious dust bunnies collect there.
- Use a TSP Substitute: Degreasers cut through the grime that soap misses.
- Wipe Down Thoroughly: Ensure no residue remains.
- Let It Dry: Paint hates moisture.
The Sanding Situation
You don’t need to strip it down to bare wood unless you are a glutton for punishment. You just need “tooth.” The paint needs something to grab onto.
- Use 120-grit sandpaper: Scuff up the shiny surfaces.
- Liquid Sandpaper: If you have detailed moulding with tiny crevices, liquid deglosser is a miracle. You wipe it on, wait the specified time, and it chemically etches the surface.
FYI: If your house was built before 1978, test for lead paint before you start sanding anything. We want a makeover, not a hazmat situation.
Phase 2: The “Farmhouse” Chunky Trim Hack
This is my favorite method for a DIY Door Frame Makeover Without Replacing the Door. If you have that skinny, curved “clamshell” moulding, painting it might not be enough. It still looks cheap; it’s just a different color.
The solution? Rip off the casing and replace it with flat stock lumber. This gives you that high-end Craftsman or Farmhouse look for pennies.
Ripping Off the Band-Aid
Take a utility knife and score the paint line between the trim and the wall. This prevents the paint from peeling the drywall paper when you pull.
- Use a Trim Puller: These wide pry bars spread the pressure.
- Go Slow: Yanking creates holes. Gentle wiggling releases nails.
The Craftsman Build
You don’t need complex miter cuts (those 45-degree angles) for this. That’s the beauty of it. Miter saws lie, and 45-degree cuts often end up looking like 47-degree gaps anyway. :/
Here is the recipe for the Craftsman look:
- The Legs: Use 1×4 primed MDF or pine boards for the sides. Run them from the floor up to the top of the door jamb.
- The Header: Use a 1×6 board for the top piece. It sits right on top of the legs.
- The Cap (Optional): Add a small 1×2 strip on top of the header for extra dimension.
You literally just square-cut the boards and nail them up. It’s impossible to mess up unless you hold the tape measure upside down. This instantly makes the door look wider and more substantial.
Phase 3: The Paint Transformation
Maybe you like your current trim profile, or you rent and can’t rip boards off the wall. Paint is your best friend. But please, for the love of DIY, do not use wall paint on your trim.
Choosing Your Weapon (Paint Type)
Wall paint (usually eggshell or satin) is too soft. It stays tacky (sticky) for a long time. This causes “blocking,” where the door sticks to the frame and peels the paint off when you open it.
- Urethane Alkyd Enamel: This is the gold standard. It behaves like an oil-based paint (levels out smoothly) but cleans up with water.
- Cabinet & Trim Paint: Look for cans specifically labeled for this. Brands like Sherwin Williams (Emerald Urethane) or Benjamin Moore (Advance) are worth the extra cash.
The Color Theory
You have two main paths here:
- Classic White: Clean, crisp, timeless. It makes the space feel larger.
- High Contrast (Black/Charcoal): This is trendy right now and looks incredible. Painting the frame black (while leaving the door white or wood) frames the view like a piece of art.
IMO, if your door is boring, a black frame makes it look intentional. It hides imperfections really well, too.
Application Technique
Brush marks are the enemy.
- Use a high-quality angled sash brush: Don’t buy the dollar store brushes. They shed bristles into your paint.
- Floetrol is magic: Add a little bit of this conditioner to your latex paint. It slows down the drying time, allowing the brush marks to settle and flatten out.
- Two thin coats: Never try to cover it in one thick coat. It will drip, and you will cry.
Phase 4: Dealing with Gaps and Hardware
You sanded, you built new trim, or you painted. You aren’t done. The difference between a “DIY project” and “Professional Work” is in the finishing touches.
Caulk is Your Best Friend
I cannot stress this enough: Caulk hides a multitude of sins.
- Run a bead of paintable latex caulk where the trim meets the wall.
- Run a bead where the trim meets the jamb.
- Smooth it with your finger and a wet rag.
That black gap between the wood and the wall makes the job look amateur. Caulk seals it up and makes the trim look like it grew out of the wall. Make sure it says “Paintable.” If you use 100% silicone, paint will bead up and roll off it, and you will have a bad time.
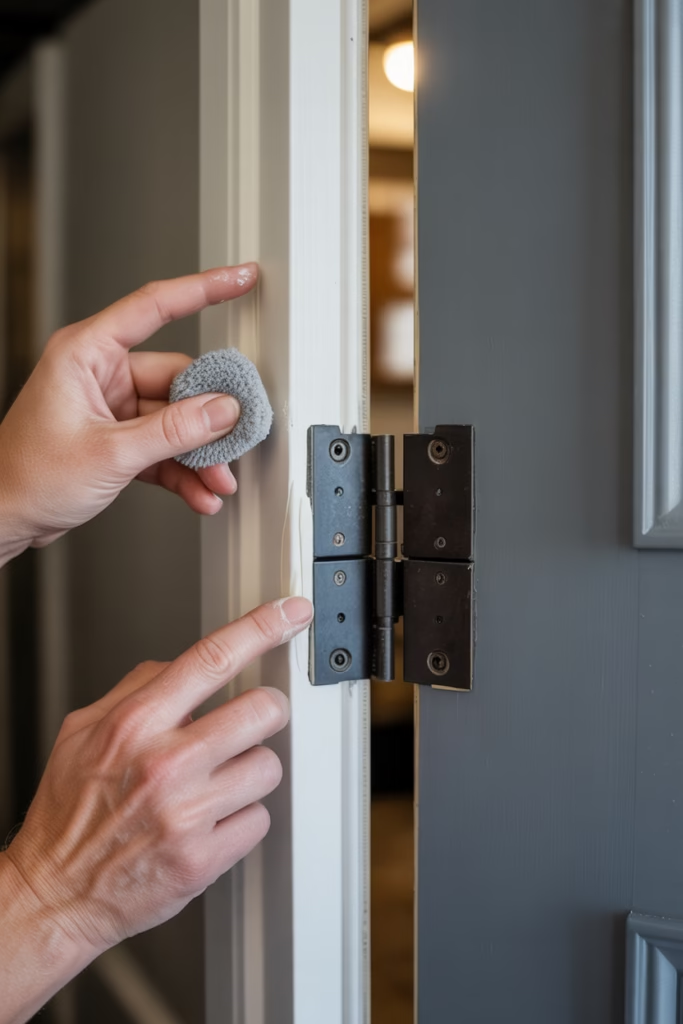
The Hardware Swap
You painted the frame pristine white, but you left those crusty, brass hinges covered in old paint drips? No.
- Replace the Hinges: For about $3 a hinge, you can swap them for matte black or satin nickel.
- The “One at a Time” Trick: Do not take the door off. Replace one hinge, screw it in, then move to the next. The door stays hung the whole time. Easy peasy.
- Strike Plates: Don’t forget the little metal plate on the jamb where the latch goes. Swap that to match.
Phase 5: The “Faux Wood” Look
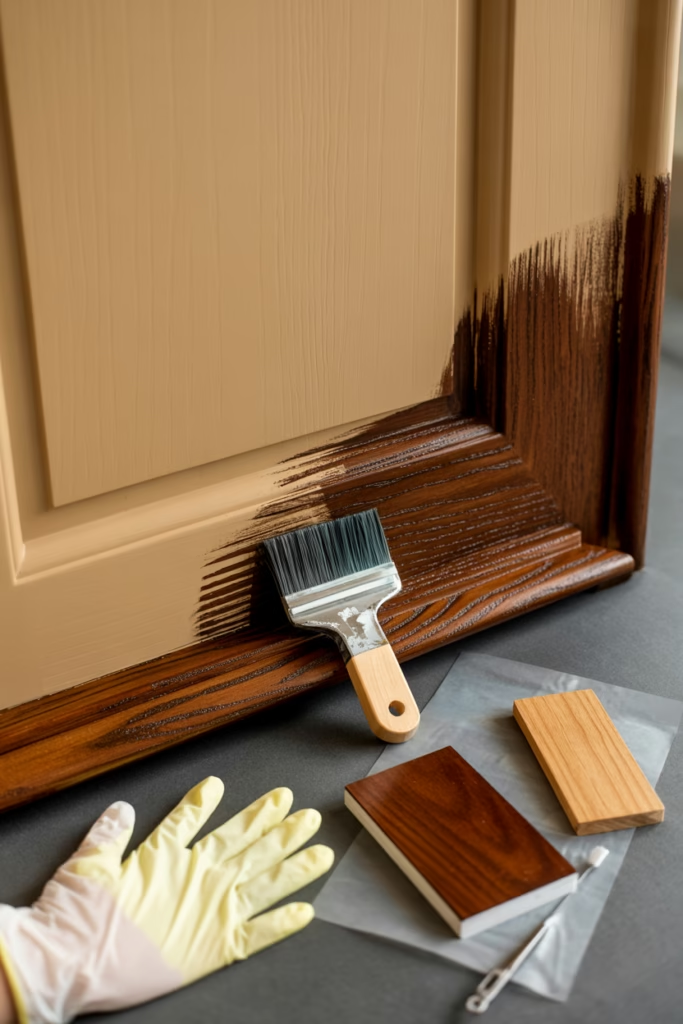
What if you want the look of wood but have painted white frames? Or worse, metal frames?
You don’t need to veneer them. Gel Stain acts more like paint than traditional stain. It sits on top of the surface.
The Process
- Base Coat: Paint the frame a tan or caramel color (often called a “base glaze”).
- Apply Gel Stain: Brush on a thick layer of Gel Stain (like Minwax or General Finishes).
- The Wood Grain Tool: While it’s wet, drag a wood graining rocker tool through it, or use a dry brush to create drag lines that mimic grain.
This requires a bit of artistic flair, so test it on a scrap piece of wood first. But when done right, it looks surprisingly like rich mahogany or walnut.
Common Mistakes (Learn From My Failures)
I want your DIY Door Frame Makeover Without Replacing the Door to go smoothly, so let’s talk about where people mess up.
1. Painting the Latch Mechanism
Do not paint the little metal plunger that moves in and out. If you paint it, it will stick, and you will get locked in the bathroom. Ask me how I know. (Actually, don’t ask).
2. Rushing the Flip
You painted the frame inside the jamb. It feels dry to the touch after an hour. You close the door.
STOP.
Paint takes weeks to fully “cure” (harden). If you close the door tightly against fresh paint, it will glue shut. Leave the door cracked open for at least 24 hours. Put a sticky note on it so your family doesn’t close it out of habit.
3. Ignoring the Reveal
When you install new trim, don’t flush it perfectly with the inside of the door jamb. Step it back about 1/8th or 1/4th of an inch. This little step is called the “reveal.” It creates a shadow line and allows the hinges to operate without binding against the trim.
Cost Breakdown: Is It Worth It?
Let’s look at the numbers.
- New Pre-hung Door: $150 – $400 + installation materials + frustration.
- DIY Makeover:
- Quart of Trim Paint: $25
- Caulk: $5
- Sandpaper/Supplies: $10
- New 1×4 Boards (for one door): ~$20
- Total: Around $60.
You save hundreds per door. If you do the whole house, you saved enough for a nice piece of furniture or a weekend getaway. That’s a win in my book.
Styling Your New Frames
Now that the construction dust has settled, how do you style this?
The “Invisible” Look
Paint the trim, the door, and the walls the exact same color. This “color drenching” technique is massive in interior design right now. It makes low ceilings look higher because the eye doesn’t stop at the trim line.
The “Picture Frame”
Use a dark color (Navy, Black, Forest Green) on the trim and door, but keep walls white. This turns your architectural elements into the focal point.
FAQ: Quick Hits
Can I do this to metal door frames?
Yes! But you must use a primer specifically designed for metal (like a bonding primer) before you paint. Otherwise, the paint will scratch right off.
How do I fix rot at the bottom of the frame?
If the bottom of the jamb is rotting (common in bathrooms), you don’t need to replace the whole thing. Dig out the rot, fill it with Bondo wood filler (yes, the car stuff), sand it smooth, and paint. It’s rock hard and waterproof.
What if my door rubs against the frame now?
If you added too many layers of paint, the clearance might be tight. You might need to sand down the edge of the door (the actual door slab, not the frame) just a hair to get it to close smoothly again.
Final Thoughts
Look, a DIY Door Frame Makeover Without Replacing the Door isn’t just about saving cash. It’s about taking control of your space. It’s about looking at that ugly, dated builder-grade nonsense and saying, “Not today, Satan.”
You don’t need to be a master carpenter. You just need patience, some good caulk, and the willingness to get a little paint on your hands. The satisfaction you get every time you walk through that doorway? That is worth way more than the $60 you spent on materials.
So, go to the hardware store. Buy the good paint. Rip off that ugly clamshell trim. You’ve got this. And hey, if you mess up a cut? That’s what wood filler is for. 🙂