
So your teen has been gaming on a beat-up desk with a flickering lamp since forever, and you’re both finally ready to do something about it. Trust me, I get it. A great gaming room isn’t just about aesthetics, it changes the whole vibe of how you play, how long you can grind, and honestly, how much your friends secretly envy you. Whether you’re working with a small bedroom or a dedicated space, these 15 teen boy gaming room ideas will help you build something seriously epic.
Let’s get into it. 🙂
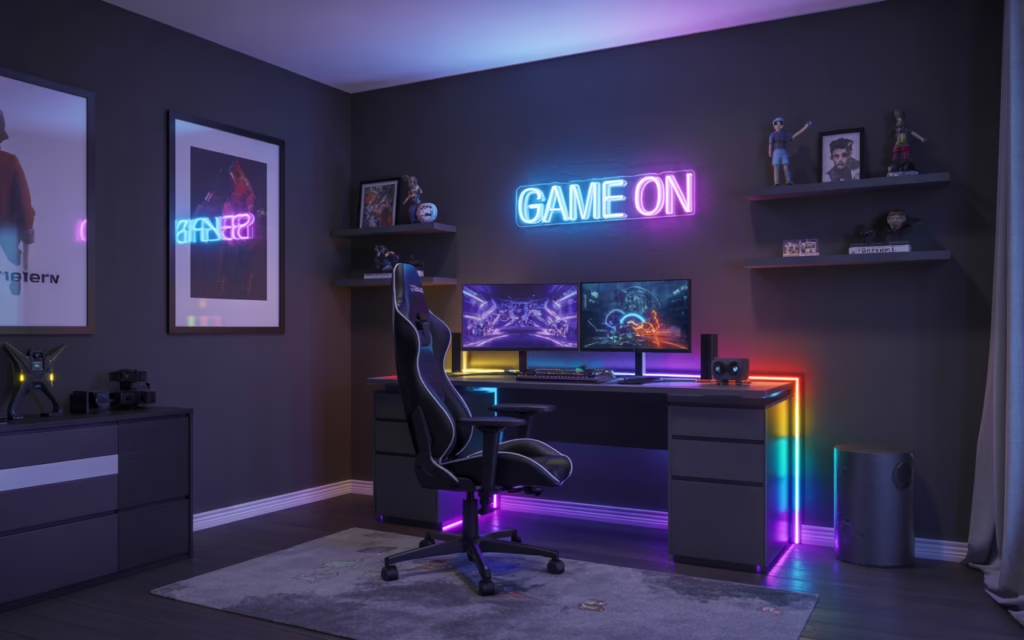
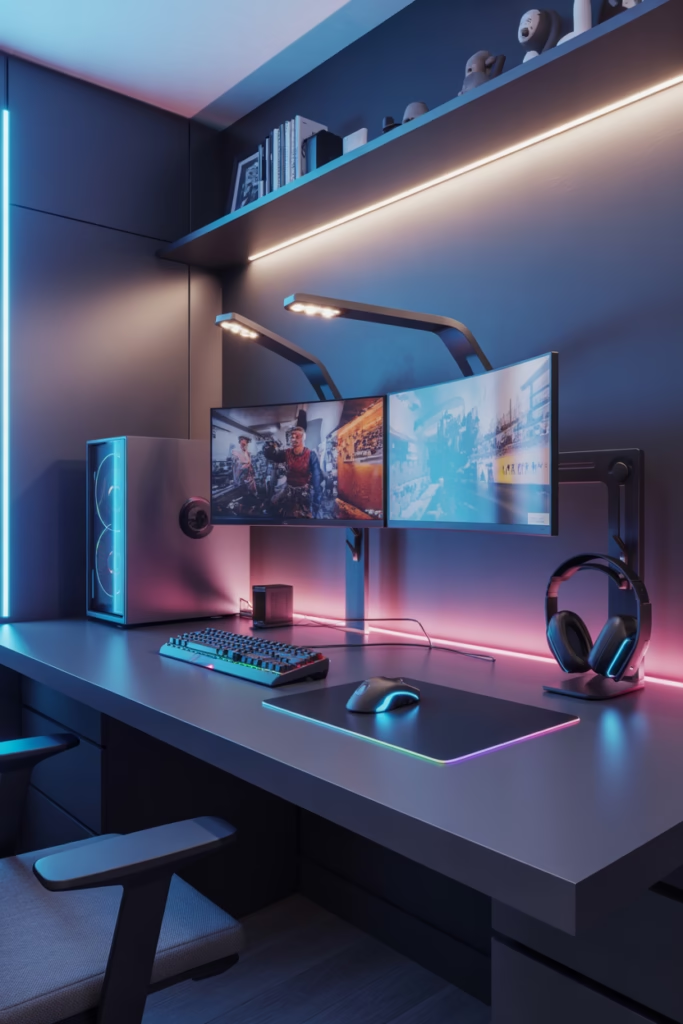
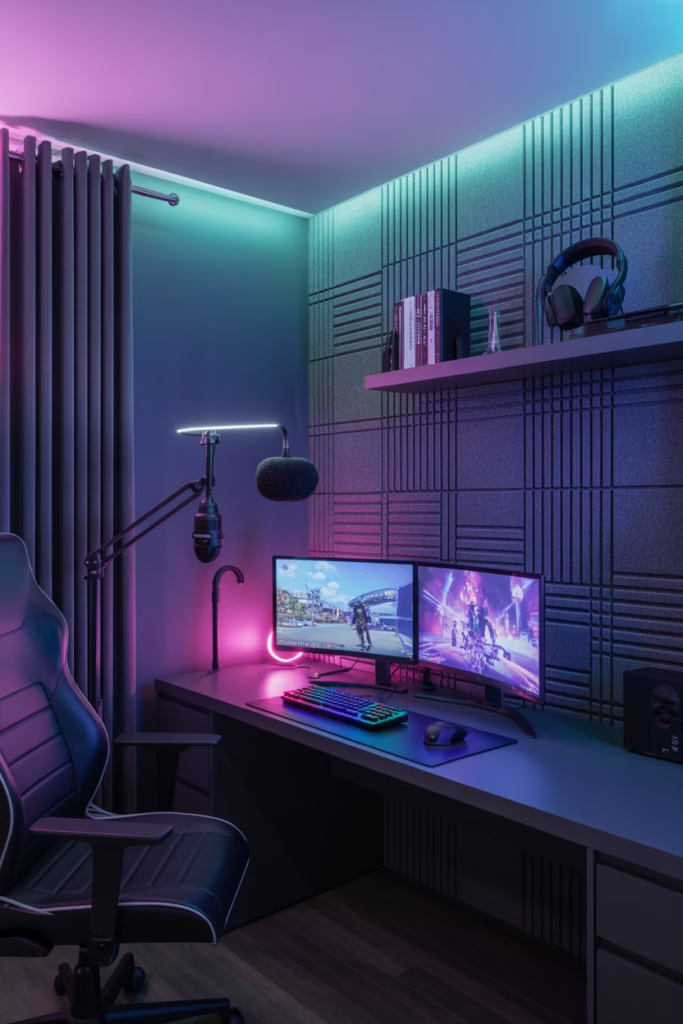
1. Go All-In on RGB Lighting
If there’s one thing that separates a regular bedroom from a legit gaming den, it’s RGB lighting. Seriously, this is the single easiest upgrade you can make, and it makes the biggest visual impact for the least amount of money.
RGB LED strips are cheap, customizable, and insanely easy to install. You can run them behind your monitor, under your desk, along your shelves, or around the entire perimeter of your room. Most of them sync with your PC or console, so the lights pulse and change color with your gameplay.
Pro tips for RGB lighting:
- Behind the monitor — reduces eye strain and creates a gorgeous backlit halo effect
- Under the desk — gives the whole room a floating, futuristic look
- Along ceiling edges — transforms the entire room atmosphere at night
- Inside shelf cubbies — highlights your collectibles and gear like a museum display
Don’t just slap them anywhere randomly though. Plan out the layout first so everything flows cohesively.
2. Build the Ultimate Gaming Desk Setup
Your desk is mission control. Everything starts and ends there, so you need to get this right.
A wide gaming desk — ideally 55 inches or more — gives you room for dual monitors, a keyboard, mouse pad, and still leaves space for snacks (priorities, right?). Look for desks with built-in cable management holes and USB hub ports. That way, your setup looks clean instead of looking like a spaghetti explosion behind your monitor.
What to look for in a gaming desk:
- Sturdy steel frame for stability during those rage-quit moments
- Spacious surface — at least 55 inches wide for a proper dual-monitor setup
- Built-in shelves or monitor risers to maximize vertical space
- Adjustable height if possible — a sit-stand desk is a game-changer for long sessions
IMO, the desk is worth spending money on. Cheap desks wobble, and wobbling is the last thing you want when you’re in the middle of an intense match.
3. Invest in a Proper Gaming Chair
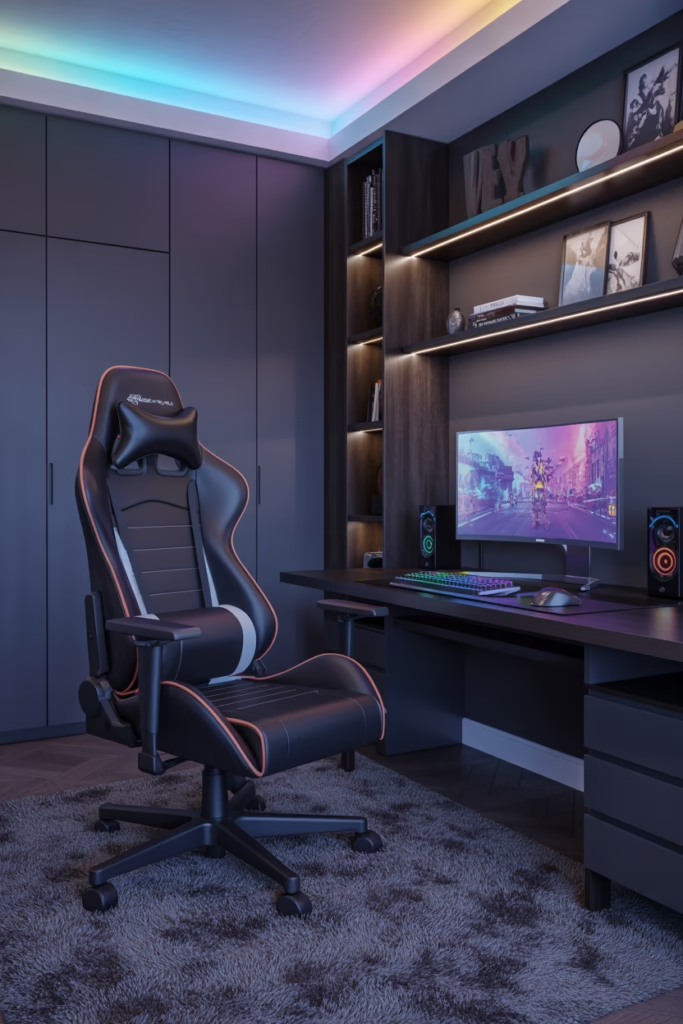
Here’s the thing — a gaming chair isn’t just about looking cool (though, yeah, it does look cool). It’s about your posture and your health during those 5-hour gaming marathons.
A good ergonomic gaming chair supports your lower back, lets you adjust the armrests, and has enough lumbar support to keep you comfortable for hours. Don’t just buy the flashiest one you see on Amazon. Look for adjustable features and proper lumbar cushioning.
Features worth paying for:
- Adjustable lumbar support — your back will thank you in 10 years
- 4D armrests — adjustable in all directions for proper elbow support
- Recline function — because sometimes you need a 20-minute power nap between matches
- Breathable mesh or faux leather — mesh keeps you cooler in summer
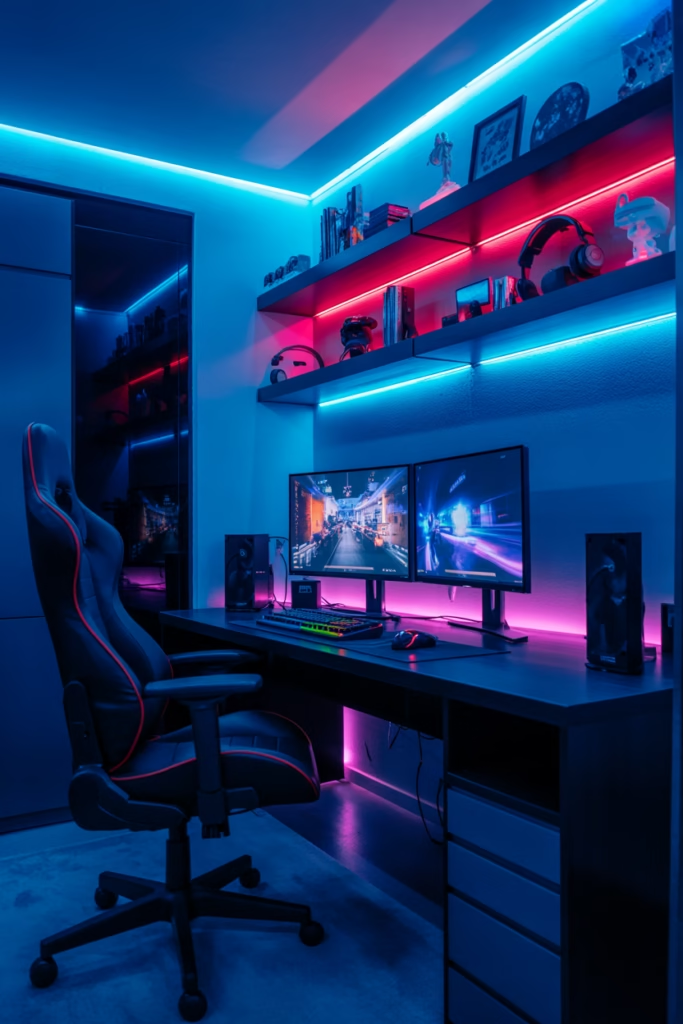
4. Set Up a Dual (or Triple) Monitor Station
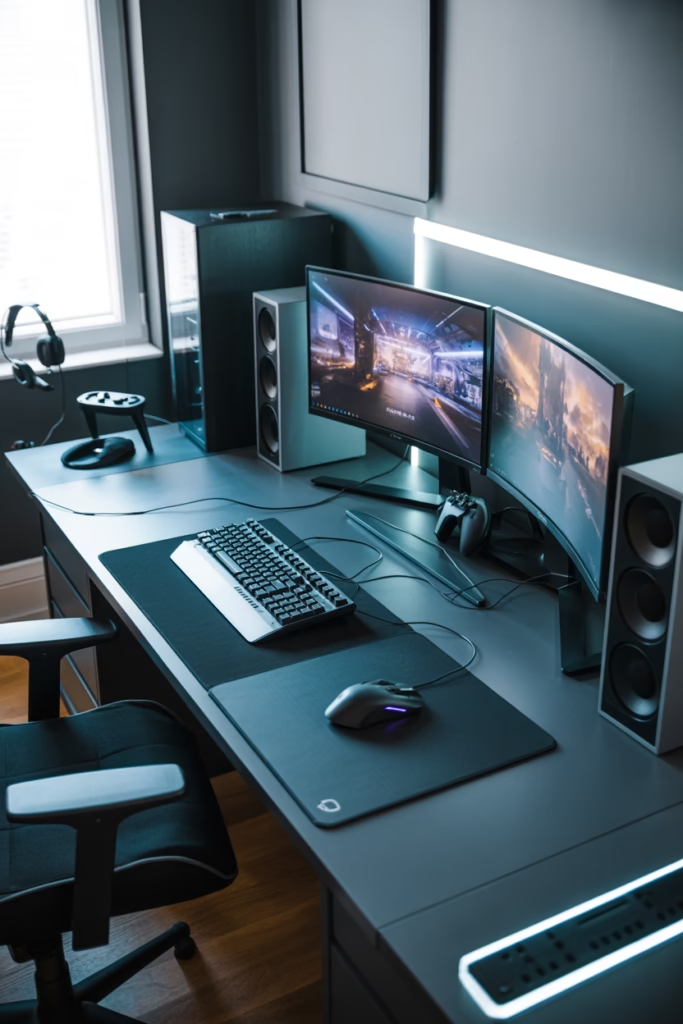
One monitor? In this economy? Come on. A dual monitor setup transforms your gaming experience — you can game on one screen and keep Discord, YouTube, or a walkthrough open on the other.
Triple monitors take it even further. You get a panoramic view in racing games and first-person shooters that feels genuinely cinematic. Pair this with a quality monitor arm stand (instead of individual bases) and your desk instantly looks 10x cleaner and more professional.
Quick monitor setup tips:
- Use a monitor arm to free up desk space and position screens at eye level
- Keep monitors at arm’s length to protect your eyes
- Match refresh rates across monitors for a smoother overall experience
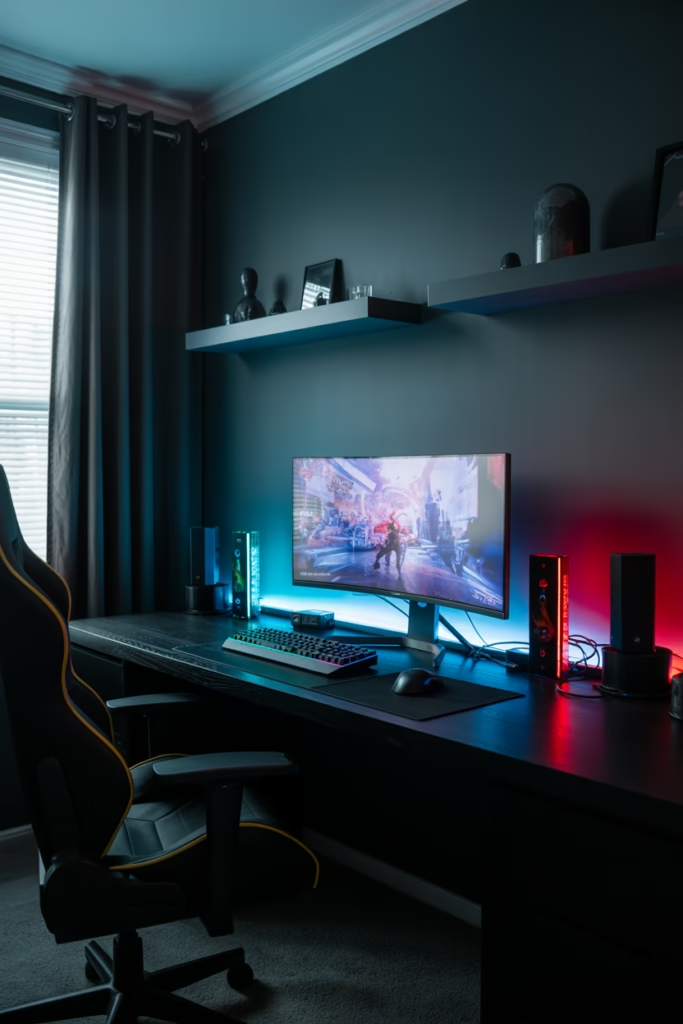
5. Go for a Dark Color Scheme
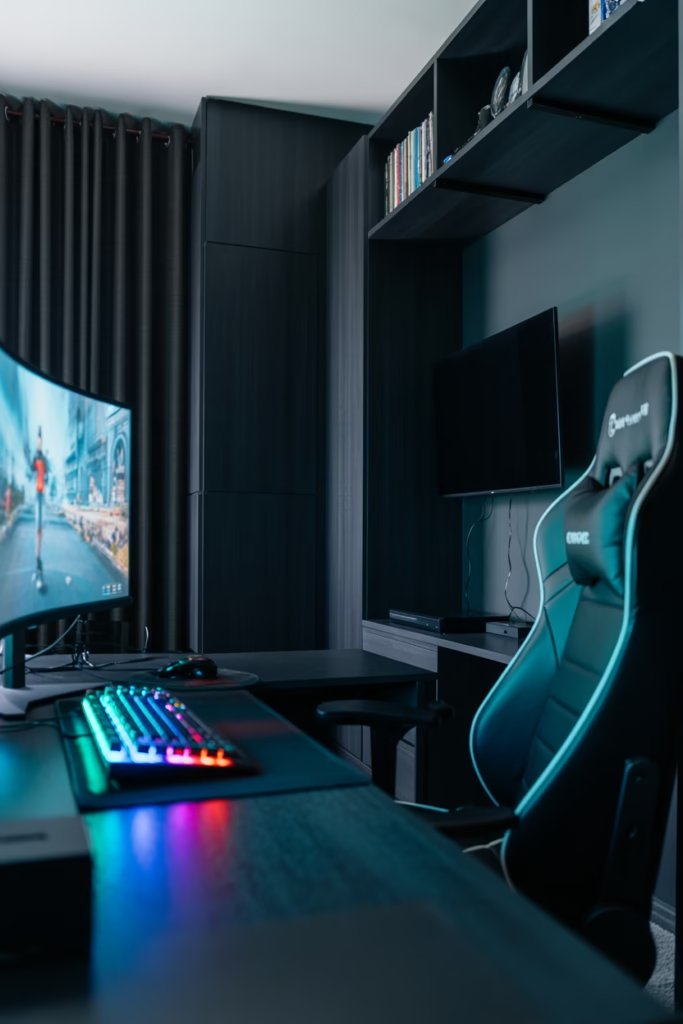
Light walls are great for home offices. Gaming rooms? Not so much. A dark color scheme — think deep navy, charcoal, dark grey, or even matte black — makes RGB lighting pop and creates that immersive, cave-like atmosphere that every serious gamer secretly wants.
Dark walls also reduce glare during nighttime gaming sessions, which means less eye strain. Pair dark walls with light-colored furniture if you don’t want the room to feel too claustrophobic, and you’ve got a solid balance.
Color combos that work:
- Charcoal grey walls + white desk — clean and sharp
- Navy blue + warm wood furniture — surprisingly stylish
- Matte black + neon RGB accents — pure cyberpunk energy
6. Add a Loft Bed to Maximize Space
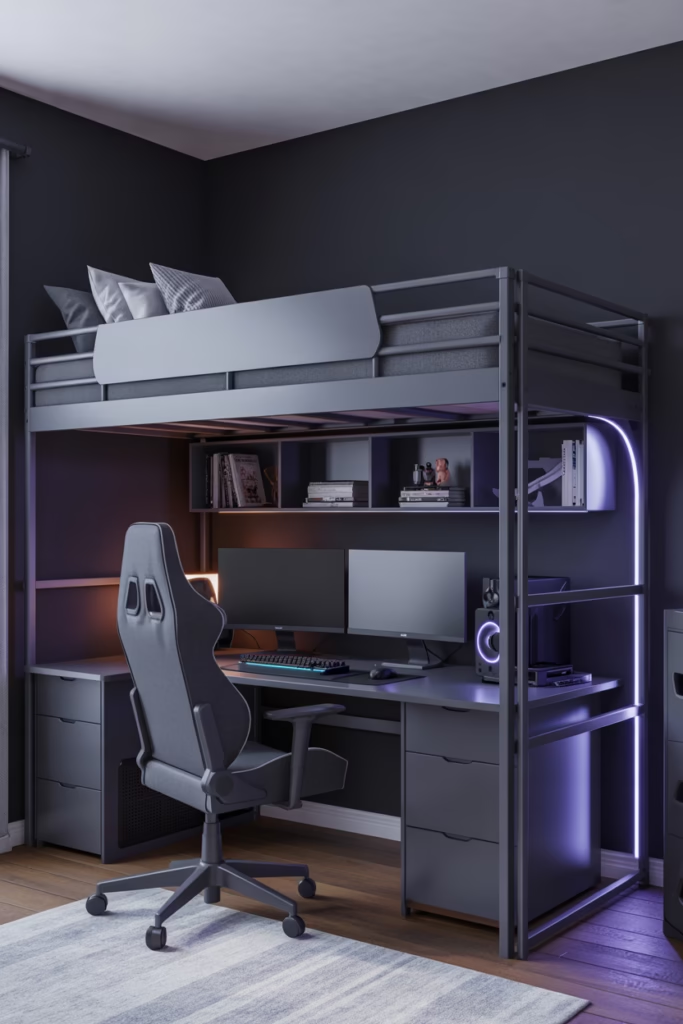
Small bedroom? No problem. A loft bed is one of the smartest space solutions you can use in a teen gaming room. By raising the bed up high, you free up the entire floor area underneath for your gaming desk, a couch, or extra storage.
It’s a two-for-one deal — you get your bed AND a dedicated gaming zone in the same footprint. Some loft bed frames even come with built-in desks, shelves, and ladder storage. Honestly, it’s the closest thing to a gaming spaceship that a bedroom can become.
7. Mount Your Console or PC on the Wall
Floor space is premium real estate in a teen bedroom. Instead of letting your console or PC tower sit on the floor collecting dust, wall mount it using a dedicated console bracket or custom shelf.
Wall-mounted setups look incredibly clean and professional. They also keep your gear off the floor, away from accidental kicks and spills. Plus, you free up desk and floor space for other things — like a mini fridge (we’re getting there).
8. Create a Dedicated Streaming Corner
Ever dreamed of becoming the next big streamer? Even if you’re just starting out, setting up a dedicated streaming corner gets you in the right headspace. You don’t need a Hollywood budget for this.
A ring light, a decent USB microphone, and some acoustic foam panels on the wall behind you are honestly all you need to level up your stream quality. The acoustic panels serve double duty — they reduce echo for better audio AND they look genuinely cool as a wall treatment.
Streaming corner essentials:
- USB or XLR microphone — Blue Yeti or HyperX QuadCast are solid picks
- Ring light or key light — Elgato Key Light is a popular choice
- Acoustic foam panels — check Amazon or local audio stores for affordable packs
- Green screen — optional but great for background effects
9. Build a Collectibles Display Wall
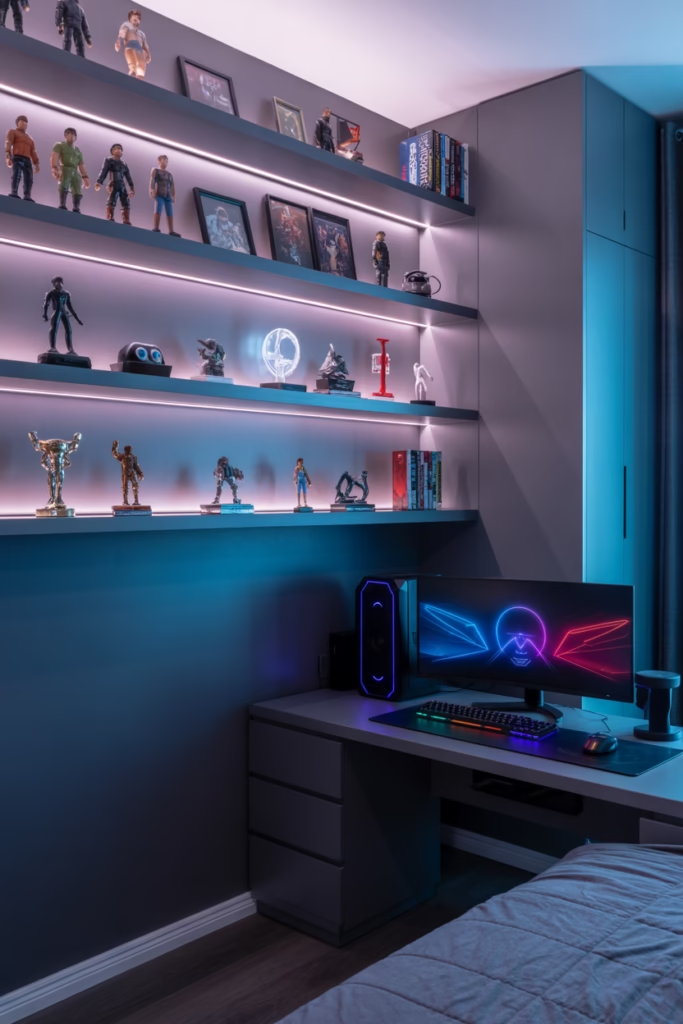
Gaming isn’t just about the screen time — it’s a culture. A collectibles display wall is where you show off that culture. Stack your favorite Funko Pops, limited edition figures, gaming merch, and memorabilia on floating wall shelves.
The trick is good lighting. Use small LED spotlights or LED strip lighting inside the shelves to make your collection look like it belongs in a gallery. This setup also gives the room serious personality — it tells anyone who walks in exactly what kind of gamer you are.
10. Add a Mini Fridge

Okay, this one is non-negotiable. A mini fridge in a gaming room is the peak of civilization. You don’t have to pause mid-game to make a trip to the kitchen. Your drinks are cold, your snacks are close, and life is good.
Look for a compact countertop mini fridge that fits under or beside your desk. Some models even come with a small freezer section for ice cream emergencies. FYI — you can find solid ones for under $100, and it is absolutely worth every rupee.
11. Use a Gaming-Themed Wall Mural or Wallpaper
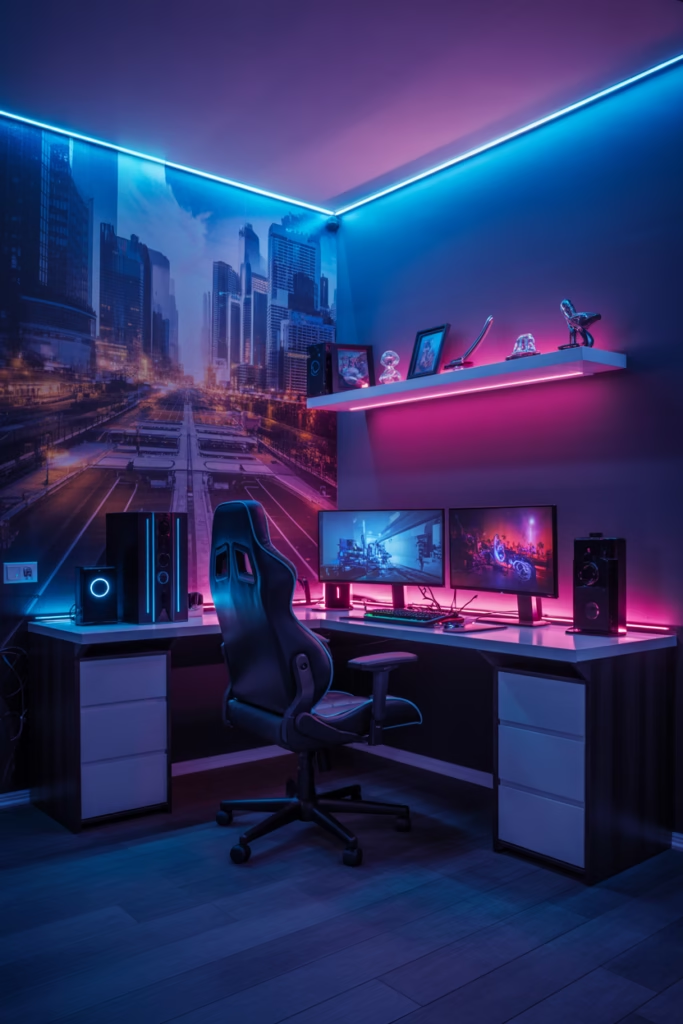
Blank walls are a missed opportunity. A gaming-themed wall mural or peel-and-stick wallpaper can completely transform the vibe of a room without a full renovation.
Choose designs that match your favorite game franchise, a cyberpunk cityscape, an outer space theme, or a retro pixel art pattern. Peel-and-stick options are great for renters or teens who’ll change their taste in a year (no judgment — it happens). The visual impact is massive, and installation is surprisingly easy.
12. Go Glow-in-the-Dark

Want a room that literally glows? Glow-in-the-dark decor is a massively underrated option for teen gaming rooms. Think UV-reactive paint on one accent wall, glow-in-the-dark star ceiling decals, or neon UV posters.
When the lights go off and the UV black light flips on, the room transforms into something that looks like a sci-fi movie set. During the day, it looks like a normal room. At night? It’s a whole different dimension. Pair it with a UV/black light strip and you’ve got something nobody else on the block has.
13. Add a Projector for Cinematic Gaming
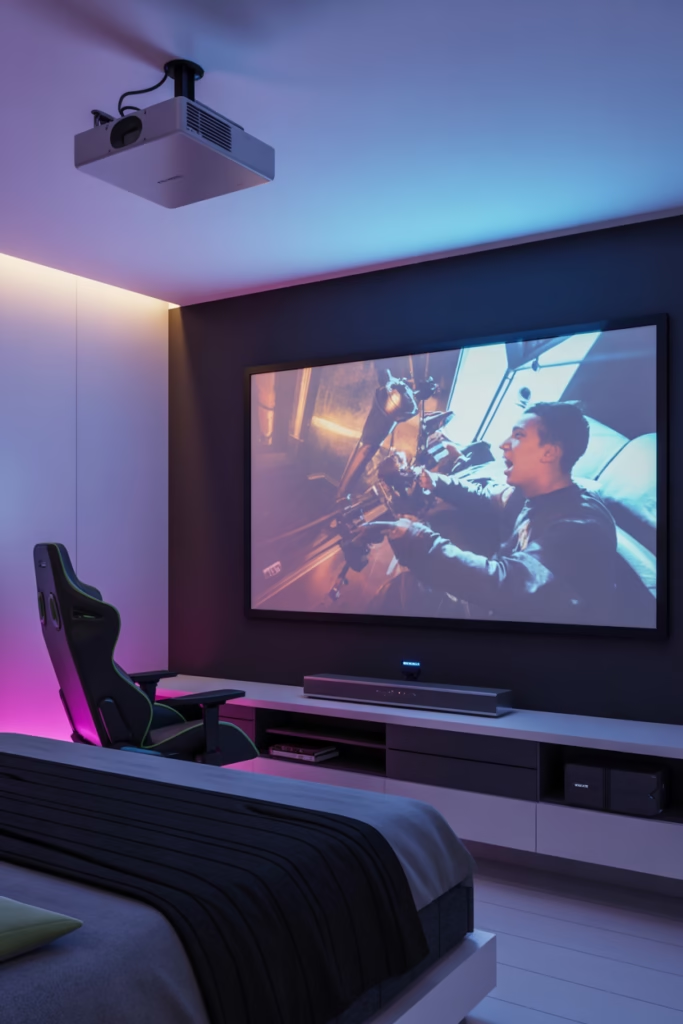
Monitors are great. But a gaming projector hits different. Projecting onto a clean white wall or a pull-down projector screen gives you a screen size that no monitor can match — think 100 inches or more. latency well, so you won’t notice any frustrating lag during fast-paced games. Pair it with a soundbar or surround sound speakers, and you’ve basically built a home theatre that also happens to be a gaming station. :/
What to look for in a gaming projector:
Short-throw option — works in small rooms where you can’t place the projector far back
Low input lag — under 16ms is ideal for competitive gaming
At least 1080p resolution — 4K if your budget allows
High brightness (lumens) — especially important if the room gets any daylight
14. Soundproof (or At Least Sound-Treat) the Room
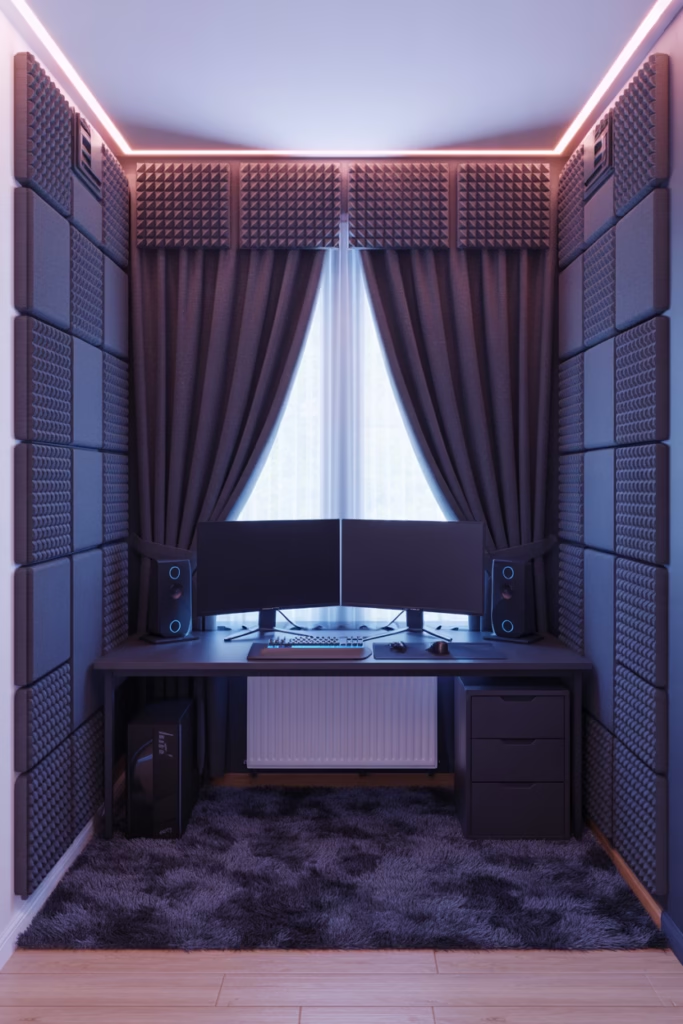
Your parents will appreciate this one more than you. But honestly, soundproofing a gaming room is a genuinely smart move for your own experience too. Better acoustics mean cleaner audio from your speakers, less outside noise bleeding in, and way more immersive gameplay.
You don’t need to go full recording-studio mode. Start with thick curtains, a plush rug, and acoustic foam panels on the walls — these three things alone dramatically reduce echo and outside noise. A solid door draft stopper also helps keep sound in and distractions out during late-night sessions.
Budget-friendly soundproofing ideas:
- Thick blackout curtains — block both sound and light
- A large area rug — absorbs floor-level sound reflection
- Acoustic foam tiles — great for walls behind and beside your setup
- Bookshelves with stuff in them — yes, seriously, filled bookshelves absorb sound naturally
15. Personalize It With Custom Neon Signs
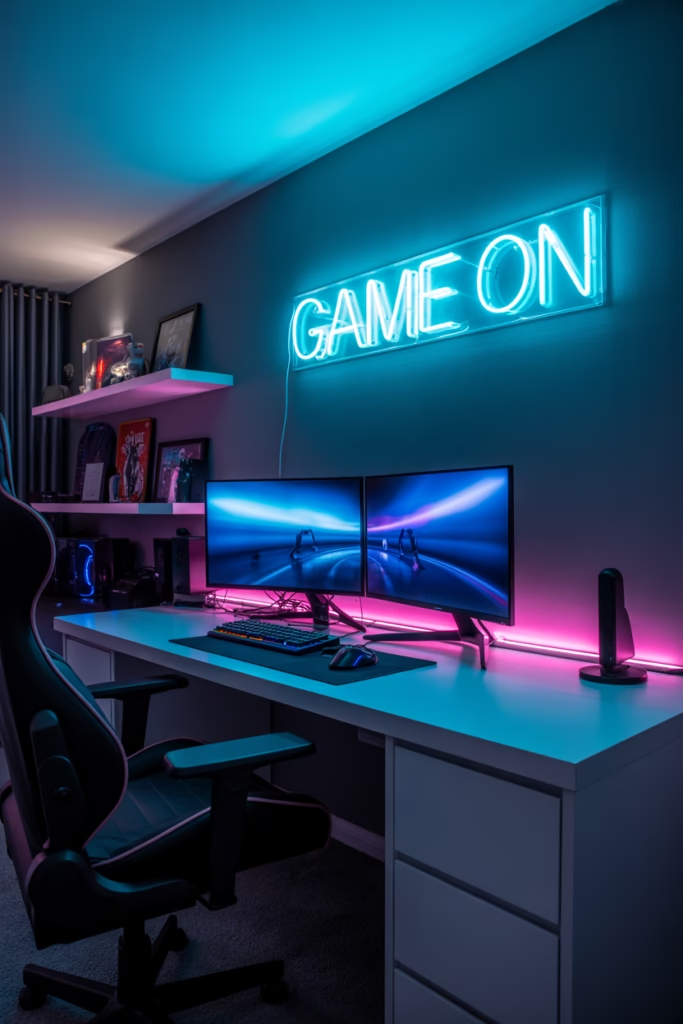
Last but absolutely not least — custom neon signs. These things have exploded in popularity, and honestly, it’s easy to see why. A neon sign with your gamertag, your favorite quote, or a gaming icon (think a controller silhouette or a lightning bolt) makes your room look like a professional esports lounge.
You can order custom LED neon signs online for surprisingly reasonable prices — anywhere from $40 to $150 depending on size and complexity. They’re energy-efficient, come in every color imaginable, and they photograph beautifully if you ever want to post your setup online. Your future streaming background will never look the same.
Pulling It All Together
Here’s a quick cheat sheet of all 15 ideas so you can plan your build:
| # | Idea | Budget Level |
|---|
| # | Idea | Budget Level |
|---|---|---|
| 1 | RGB Lighting Strips | $ Low |
| 2 | Gaming Desk Setup | $$ Mid |
| 3 | Ergonomic Gaming Chair | $$ Mid |
| 4 | Dual/Triple Monitor Station | $$$ High |
| 5 | Dark Color Scheme | $ Low |
| 6 | Loft Bed | $$ Mid |
| 7 | Wall-Mounted Console/PC | $ Low |
| 8 | Streaming Corner | $$ Mid |
| 9 | Collectibles Display Wall | $ Low |
| 10 | Mini Fridge | $ Low |
| 11 | Gaming Wall Mural/Wallpaper | $ Low |
| 12 | Glow-in-the-Dark Decor | $ Low |
| 13 | Gaming Projector | $$$ High |
| 14 | Sound Treatment | $ Low |
| 15 | Custom Neon Signs | $$ Mid |
Final Thoughts
You don’t have to do all 15 of these at once nobody has that kind of budget or patience (or a parent that permissive). Start with the high-impact, low-cost upgrades: RGB strips, a dark color scheme, a collectibles shelf, a neon sign — and build from there. Over time, you layer in the bigger stuff like the chair, the desk, and the dual monitors.
The best gaming rooms aren’t built in a weekend. They’re built piece by piece, each upgrade reflecting your personality a little more. So pick two or three ideas from this list that excite you the most, start there, and enjoy the process of making your space truly yours.