
Summer’s here, and if you’re anything like me, you’re itching to turn your outdoor space into something Instagram-worthy without emptying your wallet. I get it you want that vacation-villa vibe, but your budget screams “let’s just hang a wind chime and call it done.” Well, guess what? You can absolutely transform your patio, balcony, or backyard into a summer oasis with some creativity and elbow grease.
I’ve spent the last few summers experimenting with outdoor decor (some wins, some epic fails), and I’m here to share what actually works. No fancy tools required, no contractor needed just you, some free time, and a willingness to get a little crafty.
Why DIY Outdoor Decor Is Worth Your Time
Look, I could tell you to just buy everything from a home store, but where’s the fun in that? DIY outdoor decor gives you something store-bought stuff never will—personality. Your space becomes uniquely yours, not a cookie-cutter catalog page.
Here’s why I’m all about the DIY route:
- Budget-friendly: You’ll save serious cash by repurposing and creating instead of buying
- Customization: Make everything fit your exact style and color scheme
- Satisfaction factor: There’s something ridiculously satisfying about guests asking “Where’d you get that?” and answering “I made it”
- Eco-conscious: Repurposing old items keeps them out of landfills
Plus, DIY projects are perfect for those lazy Sunday afternoons when you want to be productive but not too productive, you know?
Mason Jar Magic: Lanterns That’ll Light Up Your Nights
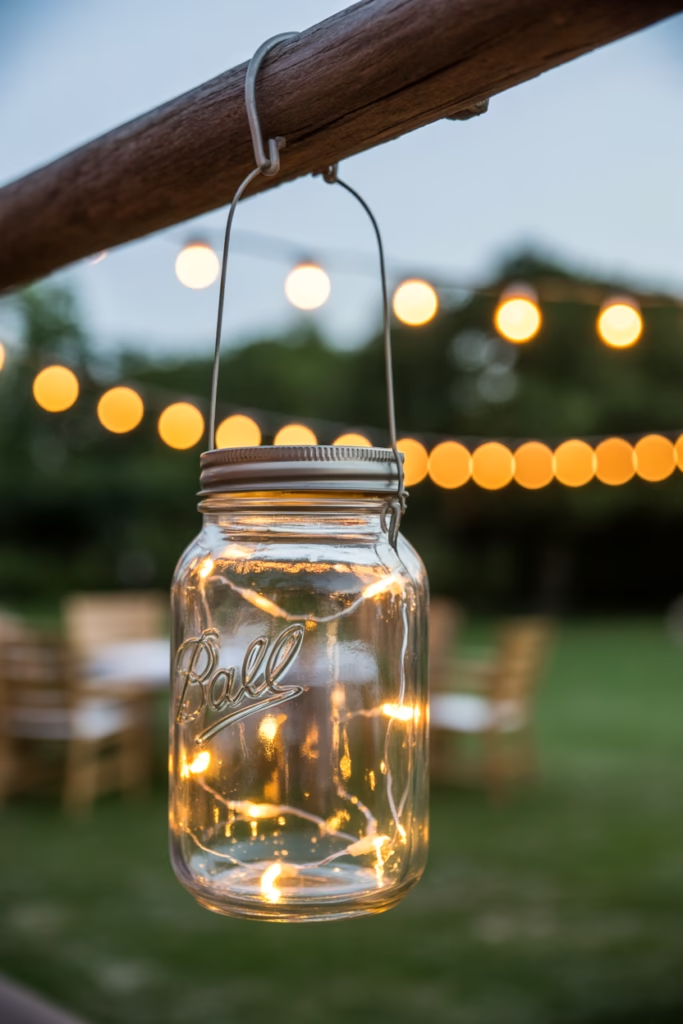
Okay, I know mason jars are everywhere, but hear me out—they’re popular for a reason. I made a dozen of these last summer, and they’ve become my absolute favorite evening decor.
How to Make Hanging Mason Jar Lanterns
Grab some mason jars (any size works), wire, and tea lights or battery-operated fairy lights. Wrap wire around the jar’s neck to create a handle, then hang them from tree branches, your pergola, or shepherd hooks. Pop a light inside, and boom—instant ambiance.
Pro tips from my trial-and-error phase:
- Use battery-operated lights if you’re lazy like me (no flame-watching required)
- Paint the jars with glass paint for colored light effects
- Hang them at different heights for visual interest
- Add a bit of sand or small pebbles at the bottom for stability
The best part? Each jar costs maybe a dollar if you’re buying new, but I bet you’ve already got some lurking in your kitchen cabinet.
Pallet Furniture: Free Wood Never Looked So Good
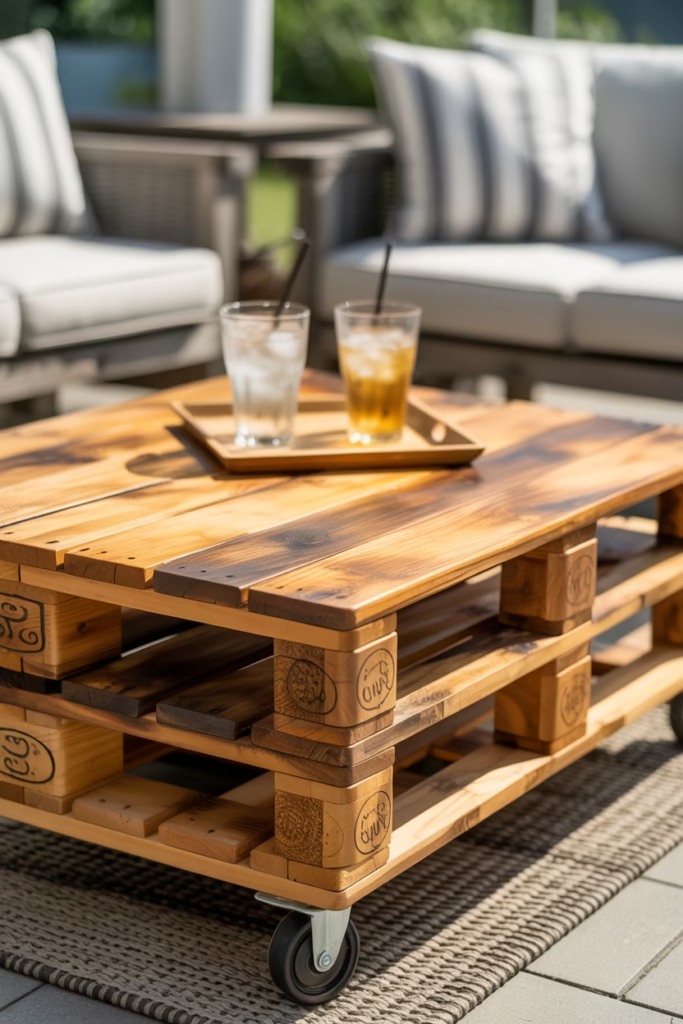
Ever wondered why everyone’s obsessed with pallet furniture? Because pallets are often free and surprisingly versatile. I snagged a few from behind a grocery store last year (with permission, FYI—don’t go stealing pallets :/) and built a coffee table and planter boxes.
Simple Pallet Coffee Table Project
Sand down your pallet to avoid splinters—trust me, I learned this the hard way. Stack two pallets for height, secure them with wood screws, then either stain them or paint them to match your outdoor aesthetic. Add casters to the bottom if you want it mobile.
What you’ll need:
- 2 wooden pallets (check local stores or warehouses)
- Sandpaper or electric sander
- Wood stain or outdoor paint
- Wood screws
- Optional: casters or furniture feet
The whole project takes maybe two hours, and you’ve got a conversation piece that cost you almost nothing. Plus, you can brag about your “reclaimed wood furniture” like you’re running a trendy café.
Vertical Pallet Garden
Turn a pallet on its side, add some landscape fabric to the back, fill the slats with soil, and plant herbs or succulents. Lean it against a wall or fence, and you’ve got yourself a living wall garden that’s both functional and gorgeous.
I planted basil, mint, and trailing flowers in mine. Now I can grab fresh herbs while grilling, and it looks like I know what I’m doing with plants (spoiler: I barely do).
Painted Rock Garden Markers and Decorations
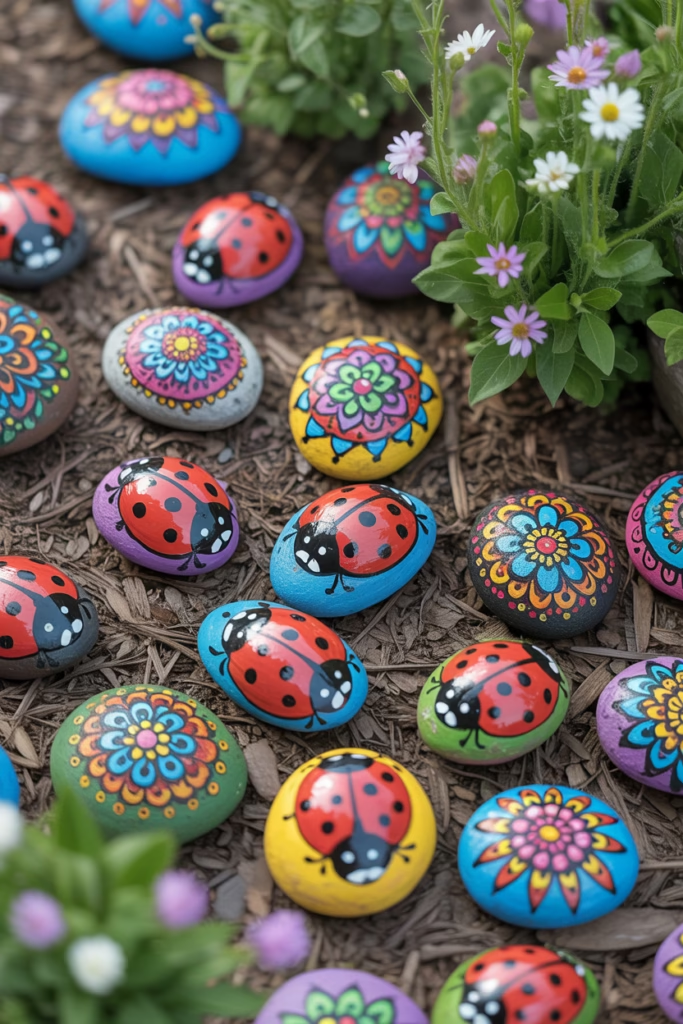
This one’s so simple it almost feels like cheating. Head to a riverbed, park, or even your driveway and collect smooth, flat rocks. Wash them, let them dry, then go wild with acrylic paint.
Ideas that actually look good:
- Paint them as ladybugs, bees, or butterflies for whimsy
- Create garden markers with herb or veggie names
- Make mandala patterns for zen vibes
- Paint inspirational quotes for that motivational poster energy
Seal everything with outdoor mod podge or clear acrylic sealer, and these babies will last through summer storms. I scattered mine throughout my flower beds, and they add pops of color even when my actual plants are looking sad.
DIY Outdoor Curtains for Privacy and Style
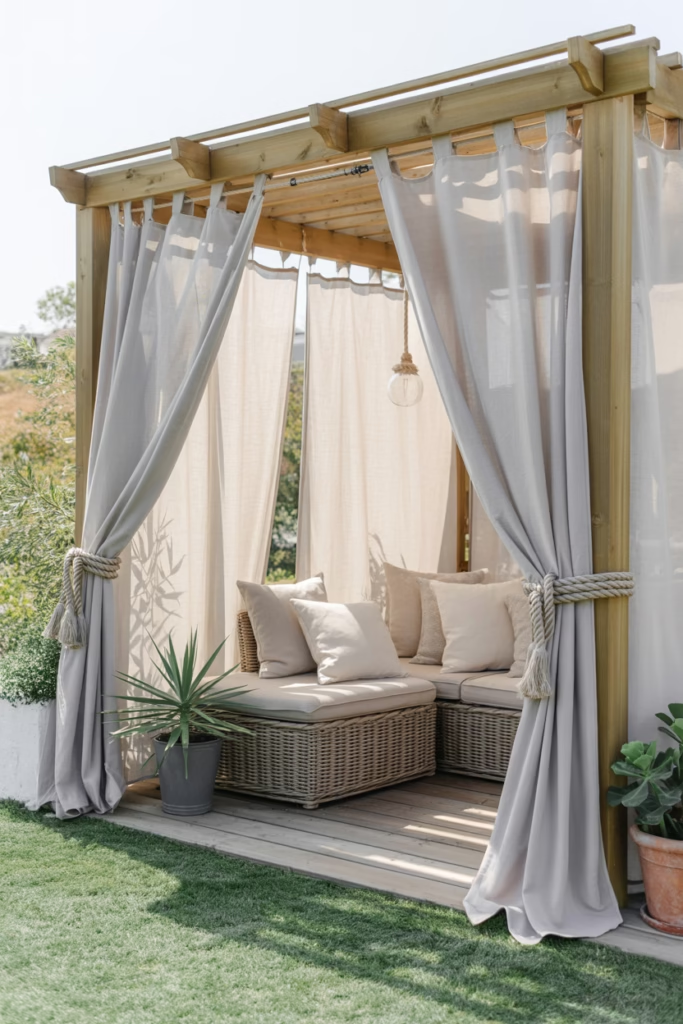
Want to create a cozy, resort-style cabana feeling? Outdoor curtains are your answer, and they’re way easier to make than you’d think.
No-Sew Outdoor Curtain Hack
Buy outdoor fabric (it’s weather-resistant and won’t fade) or even drop cloths from a hardware store. If you don’t sew, use fabric glue or iron-on hem tape to create a pocket at the top for your curtain rod. Hang them from a pergola, gazebo, or between posts.
My favorite styling tricks:
- Use rope or nautical cord instead of traditional rods for a beachy vibe
- Mix patterns—stripes with solids work surprisingly well
- Add tiebacks made from rope or ribbon
- Choose light, breezy fabrics that move with the wind
IMO, nothing transforms an outdoor space faster than curtains. They instantly make everything feel more intentional and designed, even if the rest of your space is still a work in progress.
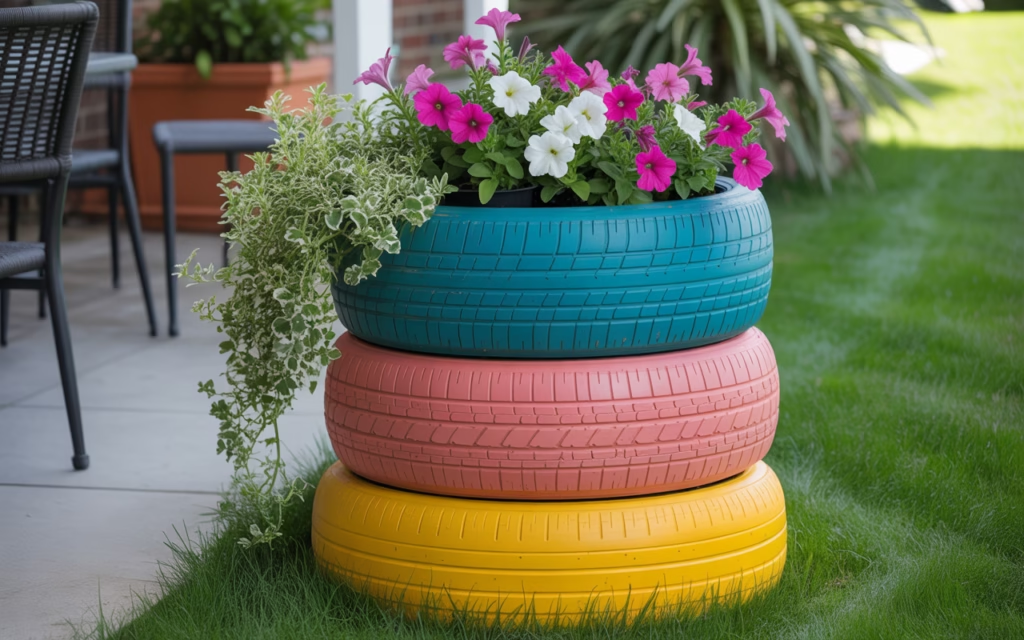
Tire Planters: Upcycling at Its Finest
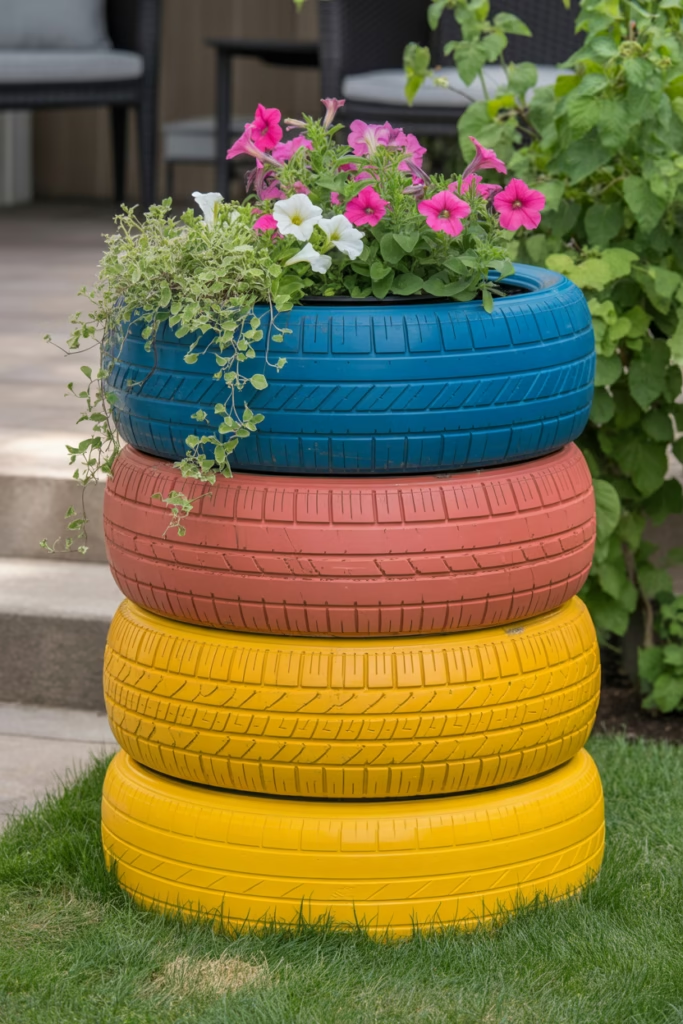
Before you judge—painted tire planters can actually look amazing. I was skeptical too until I saw how vibrant and fun they could be.
Grab an old tire (check tire shops—they often have discarded ones), clean it thoroughly, then paint it with outdoor spray paint in bold colors. Stack multiple tires for a tiered planter effect, or cut them in half for hanging planters.
Fill them with potting soil and plant trailing flowers, succulents, or even herbs. The rubber retains heat, which some plants love during summer. Plus, you’re keeping tires out of landfills, so you get to feel environmentally responsible while decorating. Win-win.
String Light Magic Beyond the Basics
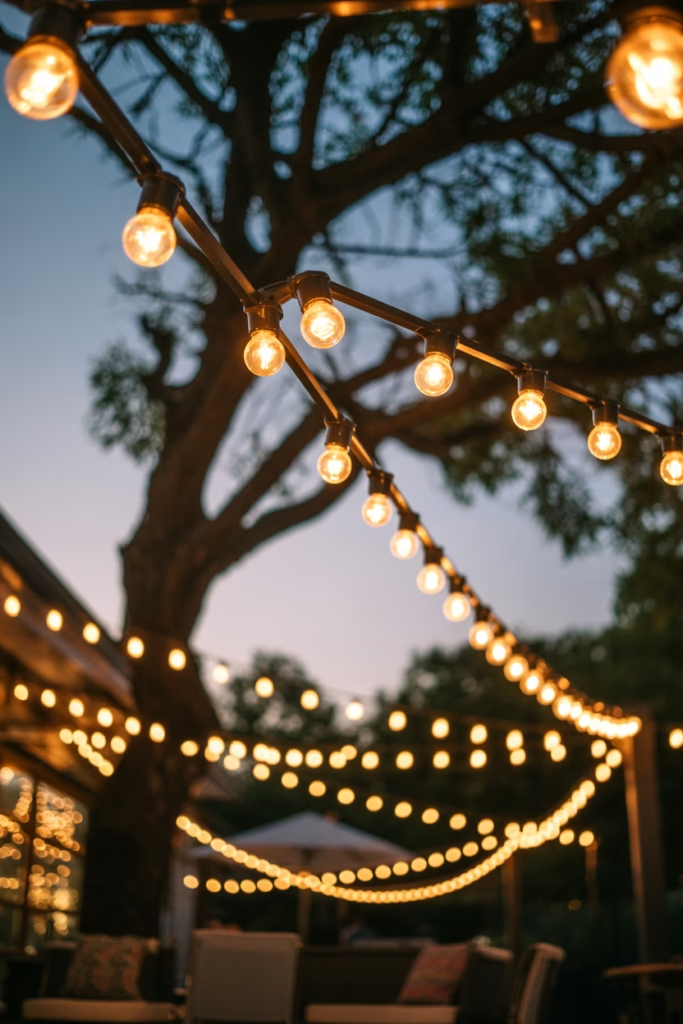
Everyone knows about string lights, but let’s talk about creative ways to use them that go beyond stringing them across your patio railing.
Creative String Light Ideas
Create a canopy effect: Drape lights in a crisscross pattern above your seating area. Attach them to posts, trees, or your house at different points to create depth.
Globe light chandelier: Wrap string lights around a hula hoop or embroidery hoop to create a DIY outdoor chandelier. Hang it above your dining table for instant elegance.
Bottle lights: Thread fairy lights through colored glass bottles and arrange them on tables or hang them from hooks.
I spent an entire afternoon setting up a string light canopy last summer, and it’s now my favorite feature. Every evening feels like a party, even when I’m just reading a book alone. 🙂
Cinder Block Seating and Planters
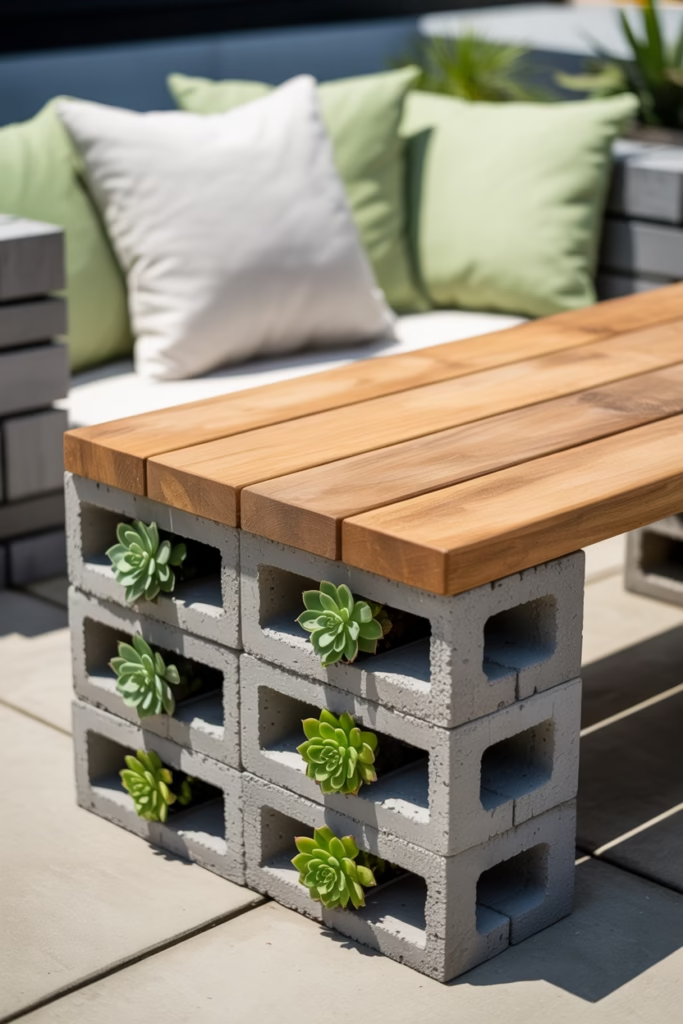
Cinder blocks are ridiculously versatile and cheap. Stack them to create modern-looking benches, side tables, or multi-level planters.
Simple Cinder Block Bench
Stack cinder blocks in two columns (three high works well), then lay wooden planks across the top. Add outdoor cushions, and you’ve got instant seating that cost maybe $30 total.
Bonus ideas:
- Paint the cinder blocks in bright colors
- Fill the block holes with plants or candles
- Stack them horizontally to create shelving
- Use them as table bases
The industrial look actually works surprisingly well in outdoor spaces, especially if you mix them with softer elements like cushions and plants.
Tin Can Lanterns: Rustic Charm on a Budget
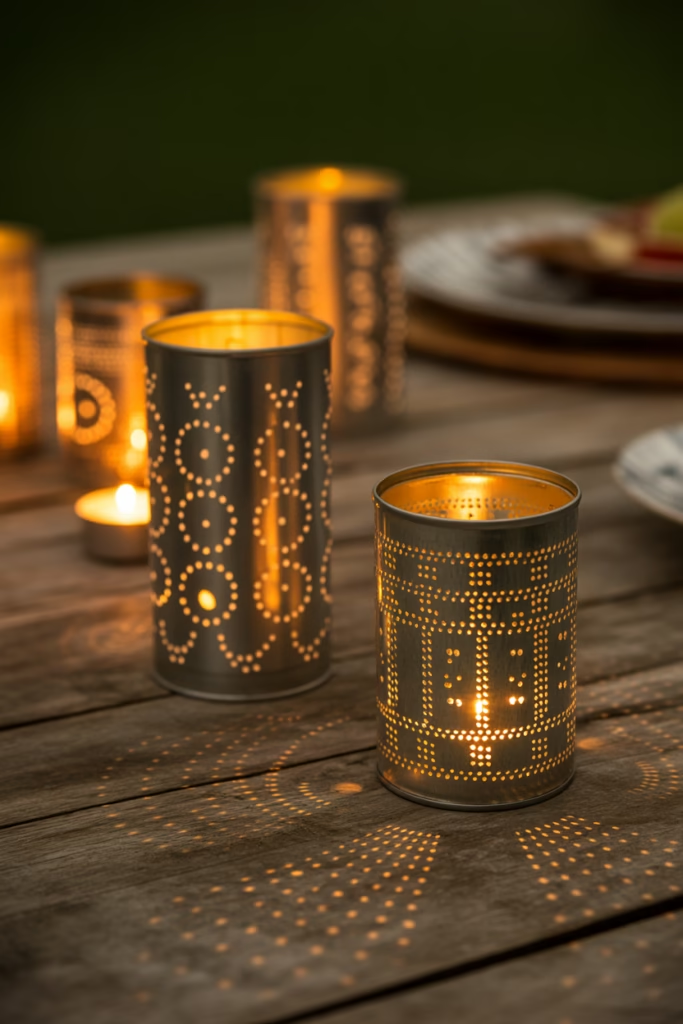
Save your tin cans (soup cans, coffee cans, whatever), remove labels, and punch holes in patterns using a hammer and nail. Fill them with sand and a tea light, or spray paint them and use them as utensil holders for outdoor dining.
I made a dozen of these one rainy afternoon, and they’ve become my go-to gift for friends. They cost literally nothing and look intentional and crafted. Sometimes the simplest projects have the biggest impact.
Fabric Scrap Bunting for Festive Vibes
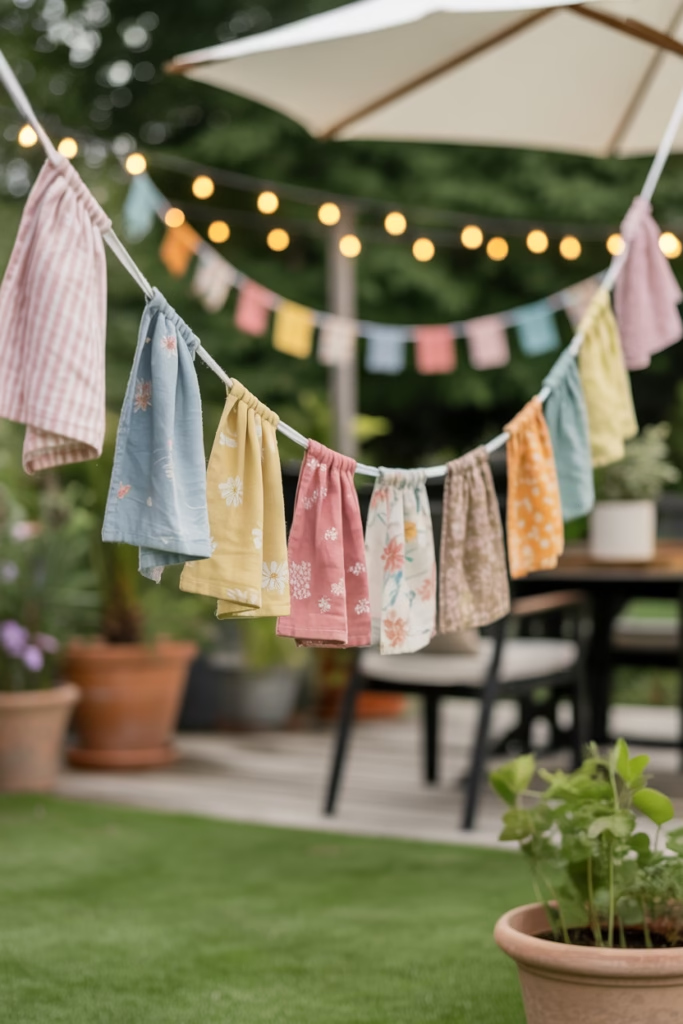
Got leftover fabric from other projects? Cut triangles, fold the top edge over a rope or twine, and secure with fabric glue or a few stitches. Hang your bunting across your patio, fence, or between trees for instant festivity.
Pattern mixing that works:
- All solids in a cohesive color palette
- Mix of florals and stripes in complementary colors
- Nautical theme with blues, whites, and stripes
- Boho vibe with bright, mismatched patterns
Bunting adds color and movement without being permanent. Plus, you can switch it out whenever you want a new look.
Succulent Arrangements in Unexpected Containers
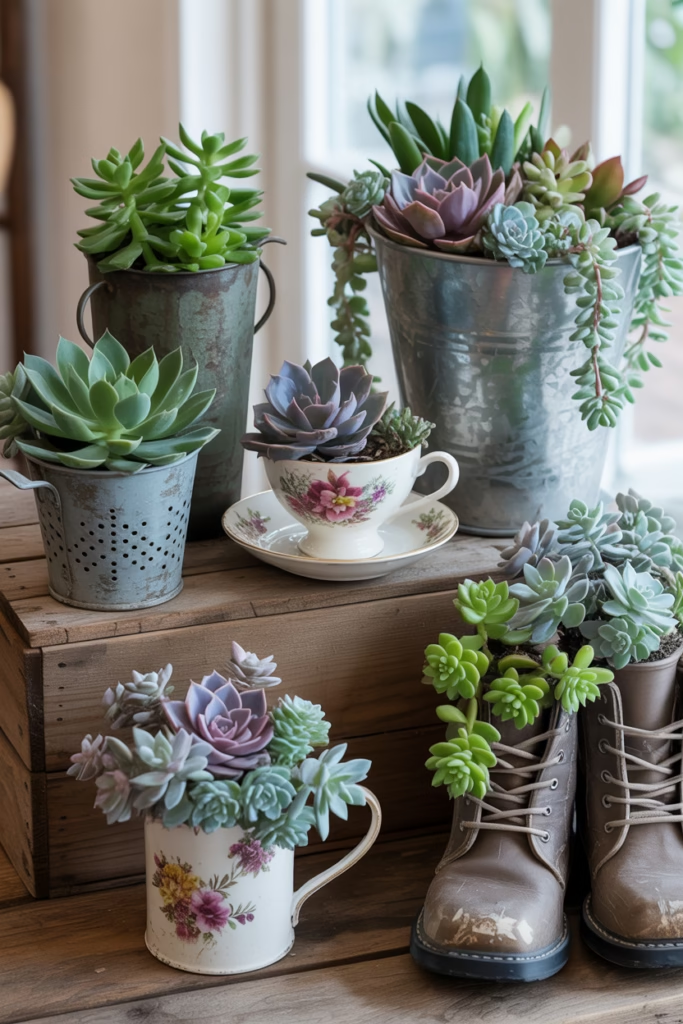
Succulents are having a moment, and for good reason—they’re nearly impossible to kill. But forget boring terracotta pots. Get creative with your containers.
Unexpected succulent planters I’ve tried:
- Old colanders or strainers (drainage built-in!)
- Vintage teacups and teapots
- Wooden boxes lined with plastic
- Concrete blocks filled with soil
- Even old boots or shoes (yes, really)
Arrange multiple small containers together for a collected, eclectic look. Succulents love summer heat, so they’ll thrive with minimal care while you’re busy enjoying your newly decorated space.
DIY Outdoor Rug with Painted Drop Cloth
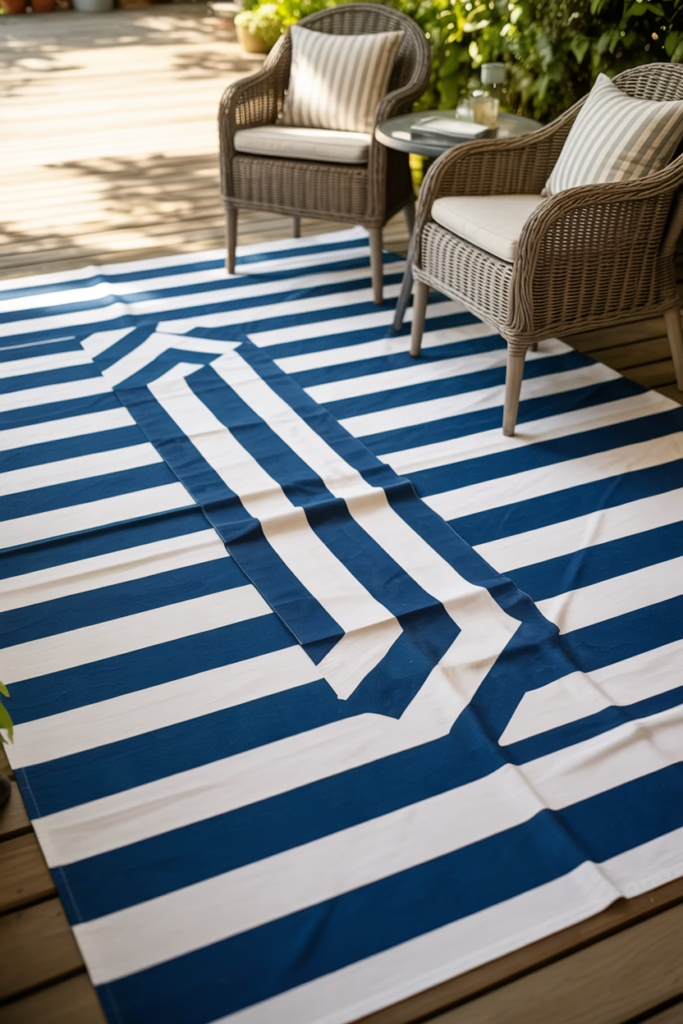
Outdoor rugs are pricey, but you can make your own for a fraction of the cost. Buy a canvas drop cloth, tape off a pattern using painter’s tape, then paint with outdoor acrylic paint or fabric paint.
I created a geometric pattern on mine—triangles in navy and white—and it looks like I spent hundreds. The entire project cost under $25 and took one afternoon. Seal it with outdoor fabric sealer, and it’ll last the whole summer (and beyond).
Wind Chimes from Found Objects

This project lets you get really creative. Collect driftwood, old keys, shells, beads, or even vintage silverware from thrift stores. Drill holes where needed, then string everything onto fishing line or wire and hang from a piece of driftwood or a embroidery hoop.
The sound won’t be as refined as store-bought chimes, but there’s something satisfying about hearing something you created with your own hands tinkling in the breeze.
Final Thoughts: Your Outdoor Space, Your Rules
Here’s the thing about DIY outdoor decor: there are no rules. If you want to paint tires hot pink and fill them with petunias, do it. If your aesthetic is more “rustic farmhouse meets beachy boho,” lean into that weird mix.
The best outdoor spaces reflect the people who use them. They’re not catalog-perfect; they’re lived-in and personal. Some of my favorite decor pieces came from projects that initially “failed” but ended up looking cool in unexpected ways.
Start with one or two projects that genuinely excite you. Don’t try to transform your entire space in a weekend (trust me, that leads to burnout and half-finished projects mocking you from the corner). Build your outdoor oasis gradually, enjoying the creative process along the way.
Summer’s short, but the memories you make in your thoughtfully decorated outdoor space? Those stick around. So grab some supplies, put on your favorite playlist, and start creating. Your dream summer setup is waiting and it doesn’t require a designer budget or professional skills. Just you, some creativity, and a willingness to get your hands dirty (literally).
Now get out there and make something awesome. Your neighbors are going to be so jealous. 😊