

You can buy a beautiful comforter, nice sheets, and a pile of decorative pillows and still end up with a bed that somehow looks… unfinished. I’ve seen this happen plenty of times. The individual pieces are perfectly nice, but together they don’t have that relaxed, layered look you see in well-designed bedrooms.
Usually, the problem isn’t that you need more bedding. It’s actually the opposite.
Learning how to layer bedding for a designer-looking bed is mostly about getting the proportions, textures, and placement right. Designer beds have depth without looking buried under pillows. They look soft without being messy and polished without feeling like nobody is allowed to sleep there.
And you definitely don’t need a luxury bedding budget to get there.
Here’s the thing: a few thoughtfully chosen layers will almost always look better than six different blankets and twelve pillows competing for attention. Once you understand what each layer is doing visually, making your bed becomes much simpler.
Why Some Layered Beds Still Look Wrong
Most people get this wrong because they assume layering means adding more stuff.
It doesn’t.
Good layering is about creating visible depth. Each piece should contribute something different—color, texture, volume, or shape. If everything looks identical, adding another layer doesn’t accomplish much.
Too Many Decorative Pillows
A mountain of pillows might photograph well in a bedding catalog, but it gets annoying fast in a real bedroom.
If you have to spend five minutes removing pillows every night, the setup probably isn’t practical enough.
For a queen bed, two sleeping pillows, two larger decorative or Euro pillows, and one lumbar or accent pillow can be plenty. A king bed may comfortably handle three larger pillows across the back.
The goal is to create height toward the headboard and gradually bring the bedding forward.
Everything Is the Same Texture
Imagine white cotton sheets, a smooth white duvet, smooth white pillowcases, and a smooth white blanket.
Technically, everything coordinates. Visually, though, the bed can look flat.
Instead, combine subtle differences: crisp cotton sheets, a fluffy duvet, a linen pillow, and a chunky or woven throw. Even when everything stays within a neutral palette, those texture changes create dimension.
Start With a Simple Bedding Color Palette
Before worrying about pillow arrangements, decide on your colors.
What actually works is choosing one main color, one supporting neutral, and possibly one restrained accent.
For example, you might combine warm white bedding with oatmeal linen pillows and a muted olive throw. Another bedroom could use soft gray sheets, an ivory duvet, and dusty blue accents.
You don’t need every layer to match exactly.
In fact, slight variations usually make a bed look more collected and expensive. Cream, ivory, oatmeal, beige, and warm white can sit together beautifully because they create gentle contrast without making the bed busy.
If your bedroom already has patterned wallpaper, a colorful rug, or dramatic curtains, keep the bedding quieter. Let the room tell you how much visual activity the bed needs.
How to Layer Bedding for a Designer-Looking Bed Step by Step
You don’t need every bedding layer available in the store. Instead, build from functional pieces and add visual layers intentionally.
Step 1: Begin With Well-Fitted Sheets
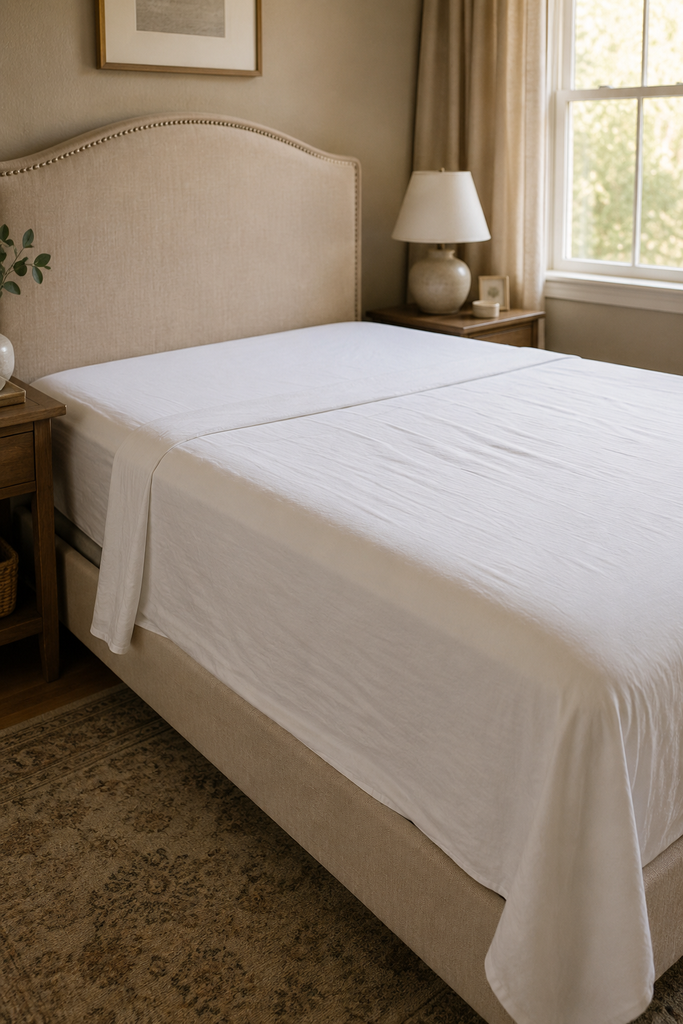
Start with your fitted sheet and top sheet if you use one.
The sheets aren’t always the star visually, but they affect how neat everything above them looks. Smooth the fitted sheet and straighten the top sheet before adding heavier bedding.
I like letting a little of the top sheet show when it has an attractive finished edge. Folding it over the duvet creates that subtle hotel-bed effect without adding anything unnecessary.
Step 2: Add Your Main Duvet or Comforter
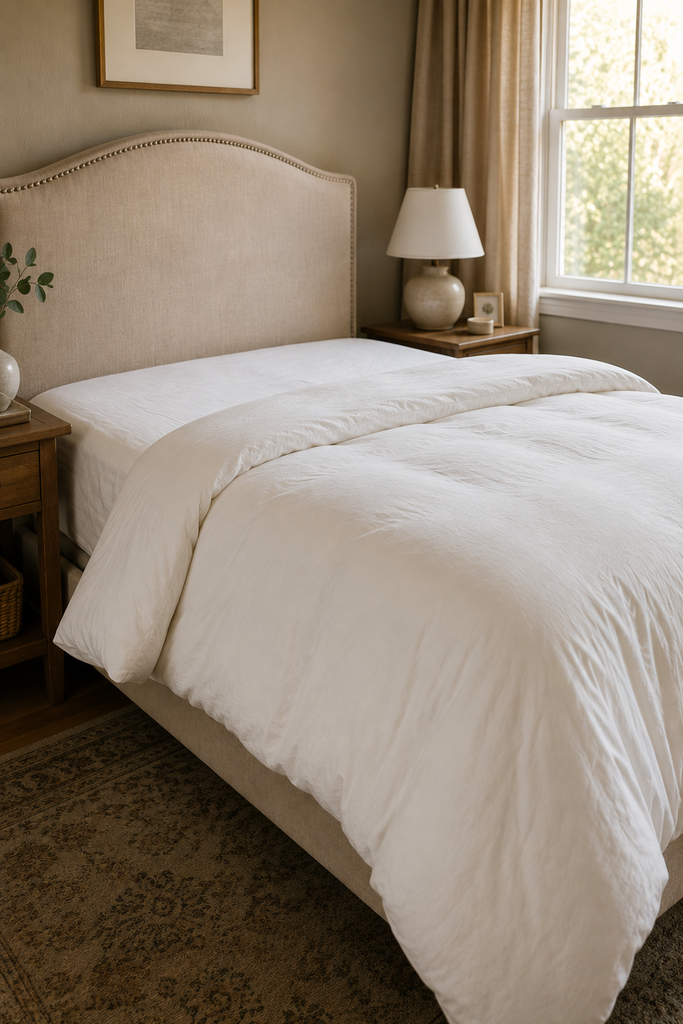
Your duvet or comforter creates most of the bed’s volume, so don’t underestimate its importance.
A thin, undersized comforter can make even expensive bedding look disappointing.
Choose one that covers the mattress generously rather than barely reaching the sides. A fluffy duvet insert also gives you those soft folds associated with professionally styled beds.
Instead of pulling the duvet completely flat toward the headboard, fold the upper portion back slightly. That immediately exposes another layer and makes the bed look deeper.
Step 3: Build Height With Pillows
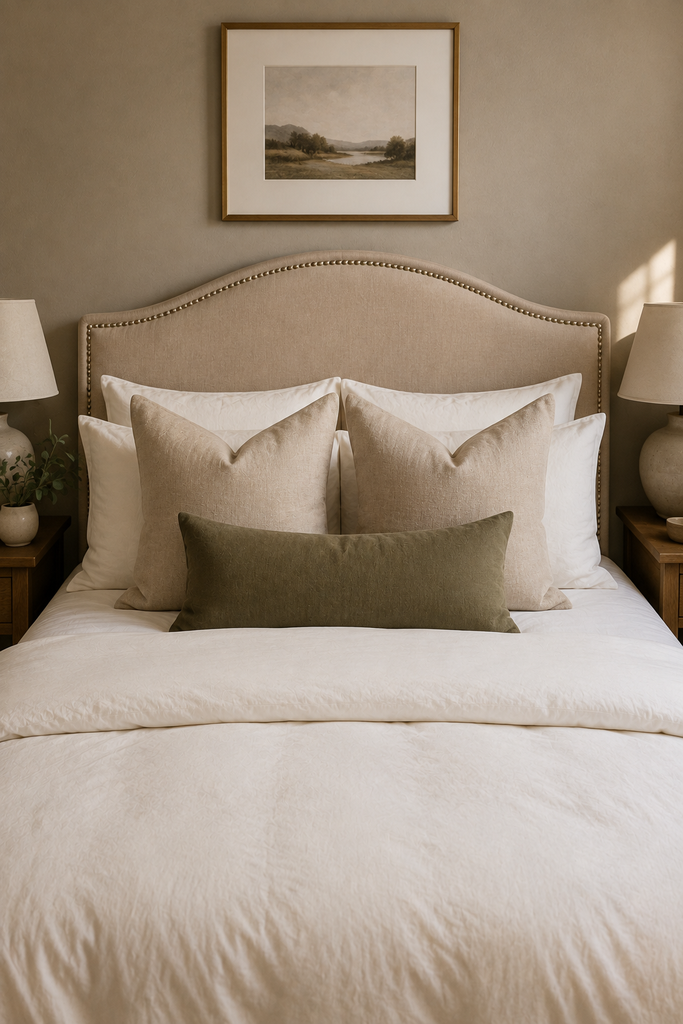
Place your sleeping pillows against the headboard first. Then add Euro shams or larger decorative pillows in front.
Finish with one smaller lumbar or accent pillow.
This creates a simple large-to-small progression.
For example, on a queen bed you could use two standard sleeping pillows, two 26-inch Euro pillows, and one approximately 14-by-36-inch lumbar pillow.
That’s enough.
You don’t need seven different pillow shapes to prove that the bed has been styled.
Step 4: Add a Quilt or Coverlet
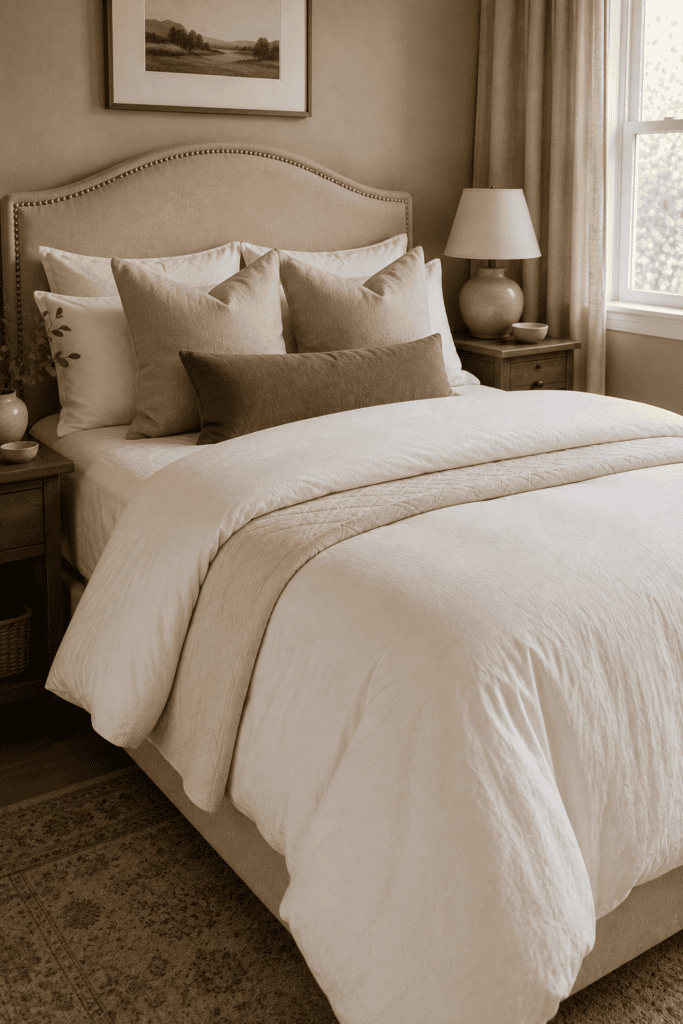
This is the layer that can make an ordinary bed suddenly look much more intentional.
Place a lightweight quilt or coverlet underneath your duvet, allowing part of it to remain visible when the duvet is folded back.
Why does this work?
Because you now have distinct visual levels: sheets, quilt, duvet, and pillows. The eye can actually see the layering instead of interpreting everything as one large block of fabric.
A quilt is especially useful if you like neutral bedding because its stitching introduces texture without introducing another color.
Step 5: Finish With a Throw
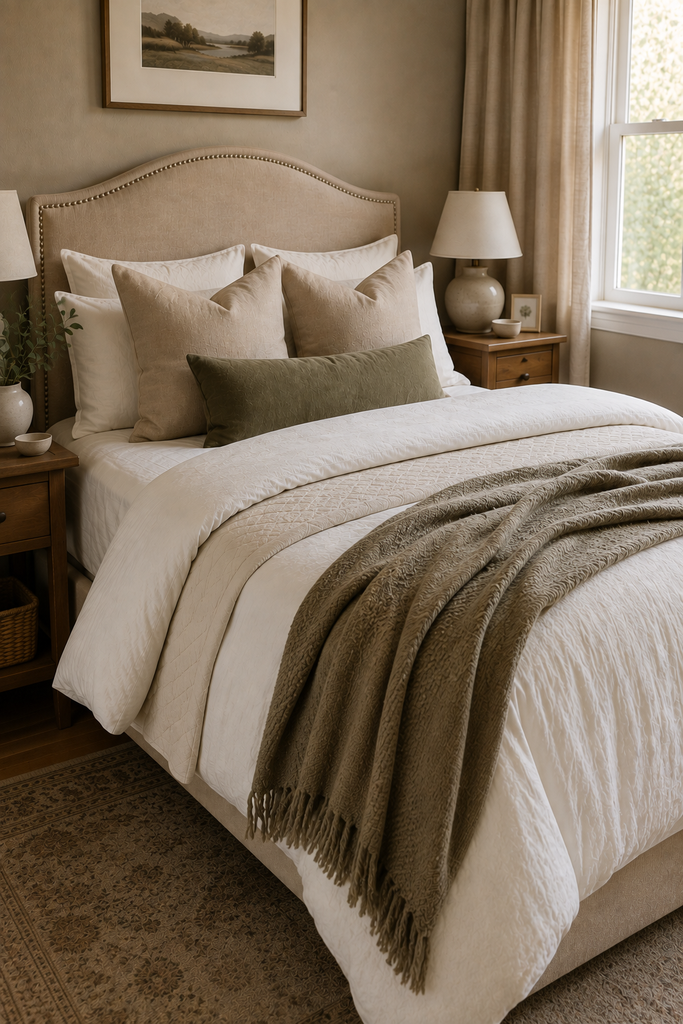
Don’t automatically spread a throw perfectly across the entire foot of the bed.
That can sometimes look stiff.
Try folding it loosely across the lower third of the mattress or casually draping it over one corner. The slight asymmetry helps soften all the straight lines created by the mattress and headboard.
Choose a throw with a texture different from your duvet—a knit, woven cotton, boucle-style fabric, or lightweight linen works well.
Mix Textures Instead of Adding More Patterns
When a bed feels boring, people often reach for patterned pillows.
Texture is usually the safer solution.
A linen duvet next to crisp cotton sheets, quilted cotton, and a woven throw creates plenty of visual interest without overwhelming the bedroom.
If you do want pattern, choose one main patterned element.
Maybe it’s a striped lumbar pillow. Maybe it’s a subtle floral quilt. Let that piece stand out instead of repeating unrelated patterns everywhere.
This is especially helpful in smaller bedrooms, where an overly complicated bed can visually dominate the entire room.
Make the Bed Look Full Without Making It Impractical
A designer-looking bed should still be a bed you actually want to sleep in.
Keep the functional layers closest to you and decorative pieces easy to remove.
You might sleep with the sheets, quilt, duvet, and regular pillows while removing only one lumbar pillow and folding the throw onto a nearby chair.
That’s realistic.
Also, don’t obsess over perfect symmetry. Straighten the pillows and duvet, but allow natural folds in the fabrics. Bedding that is pulled completely flat can actually look less inviting.
The sweet spot is tidy structure with a little softness.
A Simple Formula You Can Copy
If you’re standing in your bedroom wondering where to begin, keep the formula straightforward:
Sheets + lightweight quilt + fluffy duvet + large pillows + one accent pillow + textured throw.
Then stop.
You can always add something later if the bed genuinely feels incomplete.
The best layered beds aren’t necessarily the ones with the most expensive bedding. They’re the ones where every visible piece has a reason to be there.
Final Thoughts
Learning how to layer bedding for a designer-looking bed isn’t really about copying a luxury hotel or buying an entirely new bedding set. It’s about creating contrast between layers while keeping the overall arrangement simple.
Start with good sheets and a generously sized duvet. Add a quilt for depth, use pillows to build height, and finish with one textured throw. Then pay attention to what the bed actually needs instead of automatically adding more.
And remember, your bedroom isn’t a showroom. If the bed looks gorgeous at 10 a.m. but takes ten minutes to dismantle at night, you’ve probably gone too far.