
There’s a certain kind of room that isn’t technically bad, but somehow still feels unfinished. The furniture works. The walls are painted. Maybe you even added a decent rug. And yet the floor is sitting there doing absolutely nothing for the space.
That’s where a DIY painted checkerboard floor can completely change the mood.
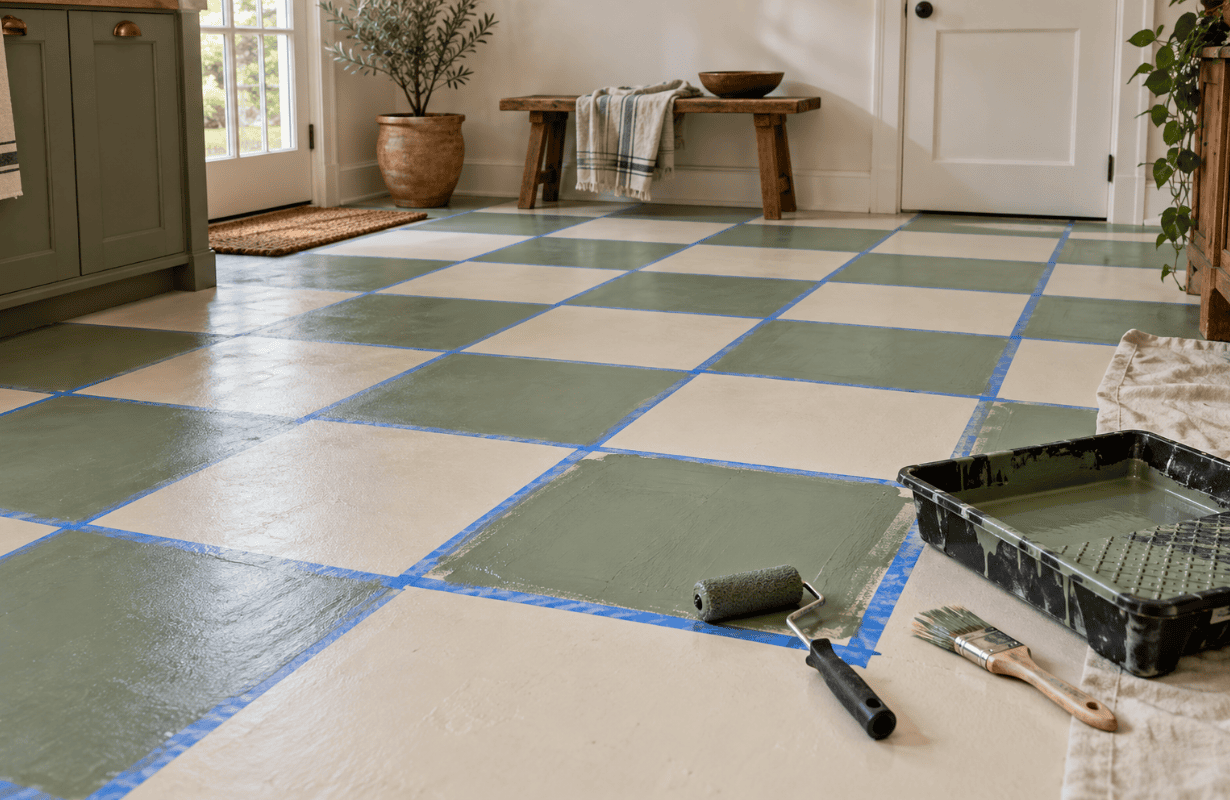
Checkerboard flooring has a lot of personality, but you don’t need to rip out your existing floor or install expensive tile to get the look. With the right surface prep, paint, layout, and color choices, you can create a painted version that feels intentional and surprisingly polished.
The catch? This is one of those DIY projects where the final result depends heavily on what happens before you start painting squares.
Most people get this wrong because they rush into measuring and taping without thinking about scale, floor condition, or how the pattern will sit in the room.
Here’s how to do it properly.
Why a Painted Checkerboard Floor Works So Well
A checkerboard pattern gives a room something many plain floors don’t have: movement.
The alternating squares naturally pull your eye across the space, which can make a small kitchen, laundry room, mudroom, bathroom, or entryway feel more designed without adding furniture or clutter.
It also works because the pattern is familiar. Checkerboard floors have been used for generations, so even when you paint one yourself, the finished result can feel established rather than trendy.
The key is choosing colors that fit the house.
Black and white is classic, but it can feel harsh in some homes. Cream and warm beige, soft gray and white, muted green and ivory, or even dusty blue and warm white can be much easier to live with.
What actually works is treating the floor as part of the room’s overall palette instead of making it the loudest thing in the space.
First, Make Sure Your Existing Floor Can Be Painted
Not every floor is automatically a good candidate.
Painted checkerboards work especially well over properly prepared wood, plywood, concrete, and some older resilient flooring. Slick tile, highly flexible vinyl, or heavily damaged surfaces can be more difficult because adhesion becomes a problem.
Check for Movement and Damage
Walk around the room and pay attention to loose boards, cracks, peeling finishes, soft spots, and uneven transitions.
Paint does not hide structural problems.
In fact, a geometric checkerboard tends to make irregularities more noticeable because the straight lines give your eye something to compare them against.
Repair what you reasonably can before painting.
Clean More Aggressively Than You Think You Need To
Here’s the thing: floors collect grease, cleaning products, waxes, dust, and residue that walls usually don’t.
That residue can stop primer from bonding properly.
A basic vacuum-and-mop usually isn’t enough for a high-traffic floor. Use an appropriate degreasing cleaner for your flooring material, rinse away residue if required, and let everything dry completely.
Choose the Right Checkerboard Scale
This is probably the most underrated part of the entire project.
Square size dramatically changes how the finished floor feels.
Smaller Squares Feel Busier
Small squares can be charming in a tiny powder room or vintage-inspired kitchen, but they create a lot of visual activity.
Use them carefully in rooms that already contain patterned wallpaper, colorful cabinetry, open shelving, or heavily veined countertops.
Larger Squares Feel More Relaxed
For many average-size rooms, larger squares tend to look more updated and intentional.
A larger-scale pattern also means fewer tape lines, fewer opportunities for alignment mistakes, and usually a faster painting process.
Before committing, use painter’s tape or pieces of cardboard to mock up several squares directly on the floor.
You might discover that the size you imagined looks completely different once you’re standing in the room.
Plan the Layout Before You Touch the Paint
This is where patience saves you from having a weird three-inch strip of checkerboard along one wall.
Find the Most Visible Sightline
Don’t automatically begin the pattern in the least visible corner.
Instead, consider where people first see the floor.
In an entryway, that may be the front doorway. In a kitchen, it might be the opening from the living room. In a bathroom, it may be the doorway facing the vanity.
You generally want the pattern to look balanced from the room’s strongest viewpoint.
Measure the Entire Space
Measure the room length and width, then divide those dimensions by your preferred square size.
You may need to adjust the square dimensions slightly so the pattern lands more evenly.
A half-inch change across several squares can sometimes prevent awkward cuts at the perimeter.
It doesn’t need to be mathematically perfect. It needs to look visually balanced.
How to Paint a DIY Checkerboard Floor
Once the prep and layout are handled, the actual painting becomes much easier.
Step 1: Sand or De-Gloss the Surface
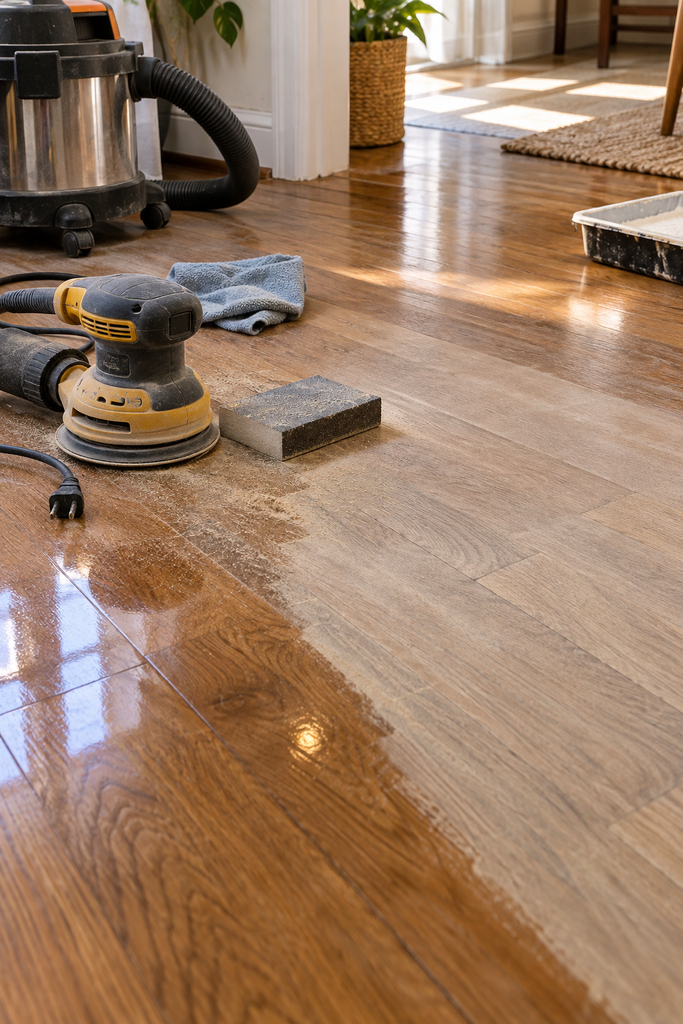
If the floor has a glossy finish, lightly sanding or de-glossing it gives the primer something to grab onto.
You are usually not trying to strip the floor completely. The goal is simply to remove the slick surface.
Vacuum carefully afterward and wipe away fine dust.
Step 2: Apply a Compatible Primer
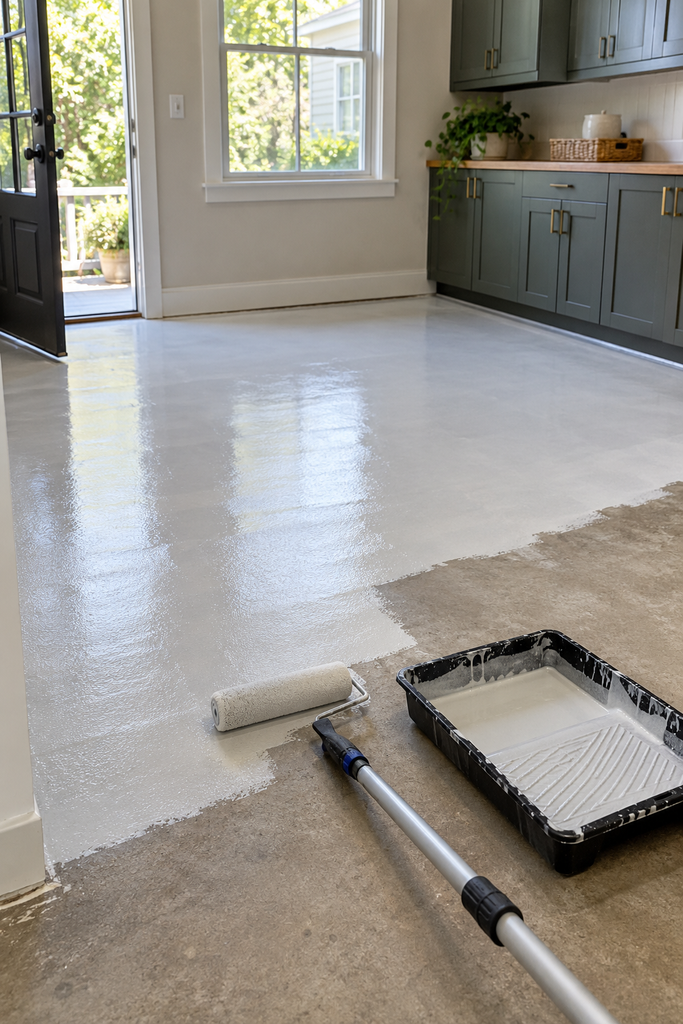
Use a bonding primer intended for your specific flooring material.
This is not the place to grab whatever half-used wall primer is sitting in the garage.
Floor paint takes much more abuse than wall paint, so adhesion matters.
Allow the primer to cure according to the manufacturer’s instructions.
Step 3: Paint the Base Color
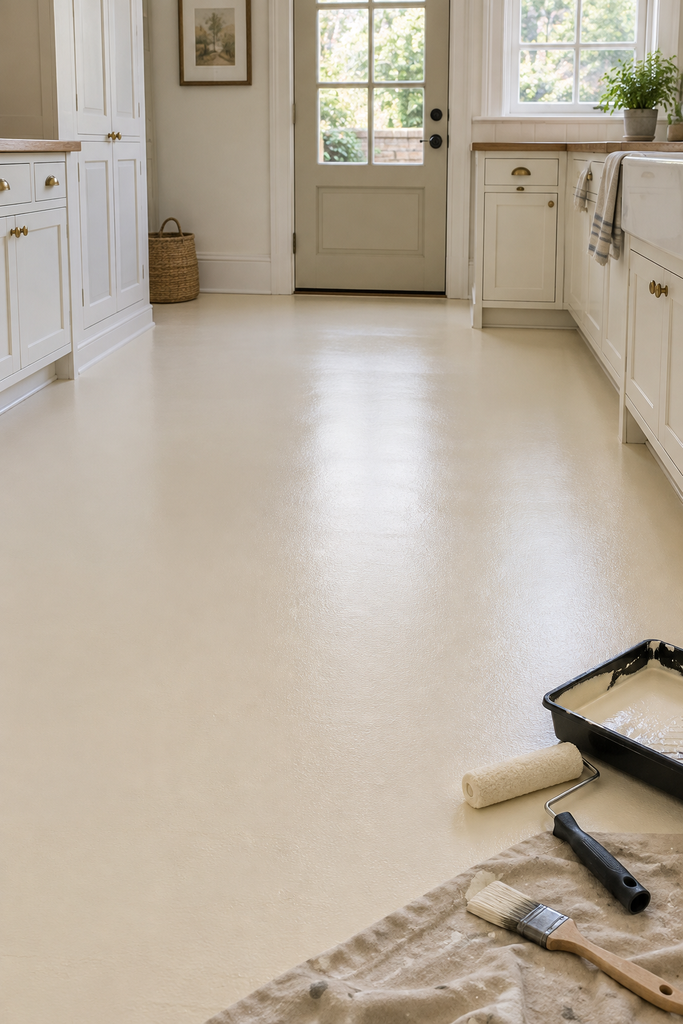
Paint the entire floor in the lighter or more dominant checkerboard color.
Two thin coats are usually better than one heavy coat.
Thin coats cure more evenly and are less likely to stay soft underneath.
Let the base fully dry before taping. If you tape too early, you can pull the finish right back up.
Step 4: Mark the Grid Carefully
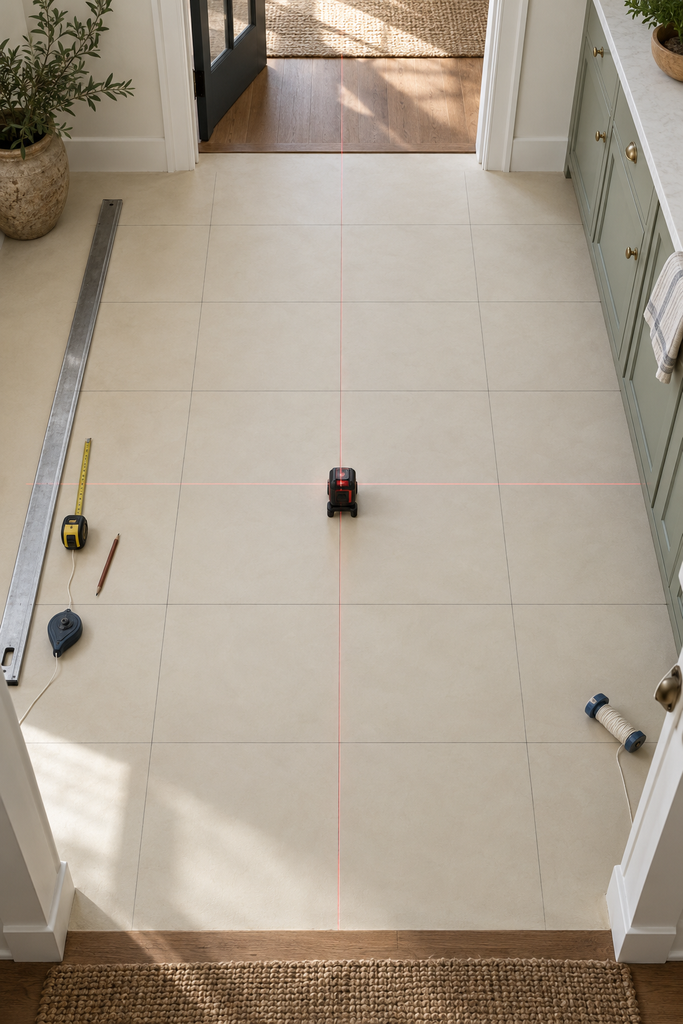
Measure and mark your grid using a pencil, chalk line, straightedge, or laser level.
Do not trust the walls to be perfectly square. Older houses are especially good at proving they are not.
Work from your planned reference lines instead.
Step 5: Tape Every Other Square
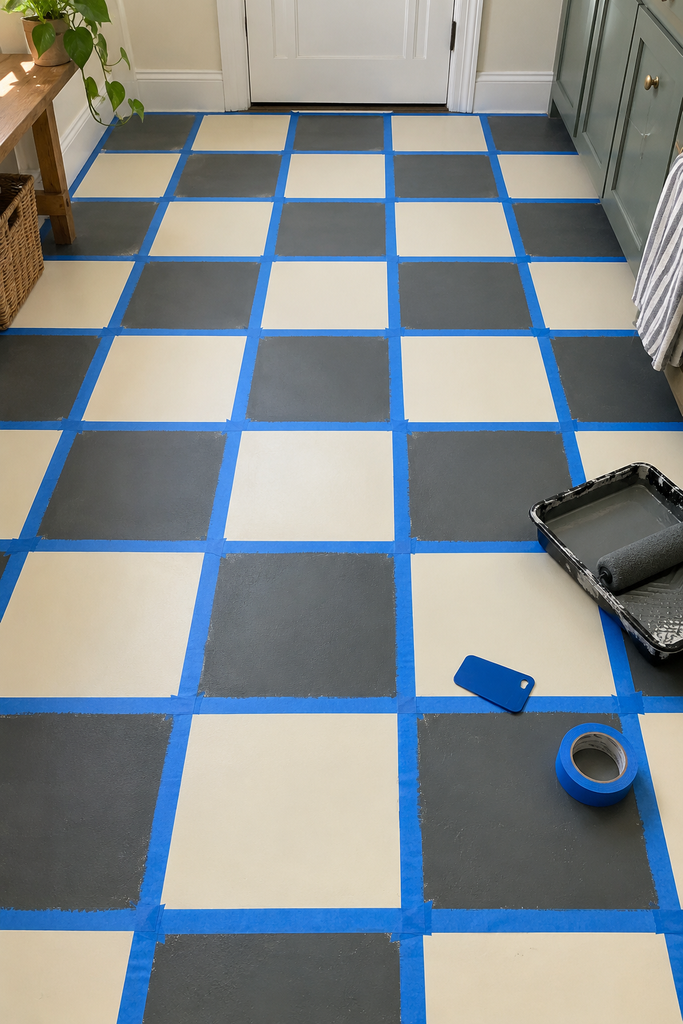
Apply painter’s tape around the squares that will receive the second color.
Then press the tape edges down firmly.
For cleaner lines, one useful trick is sealing the tape edge with a thin coat of the existing base color first. If any paint seeps underneath, it will be the same color already on the floor.
Once that dries, apply the contrasting color.
Step 6: Paint the Second Color
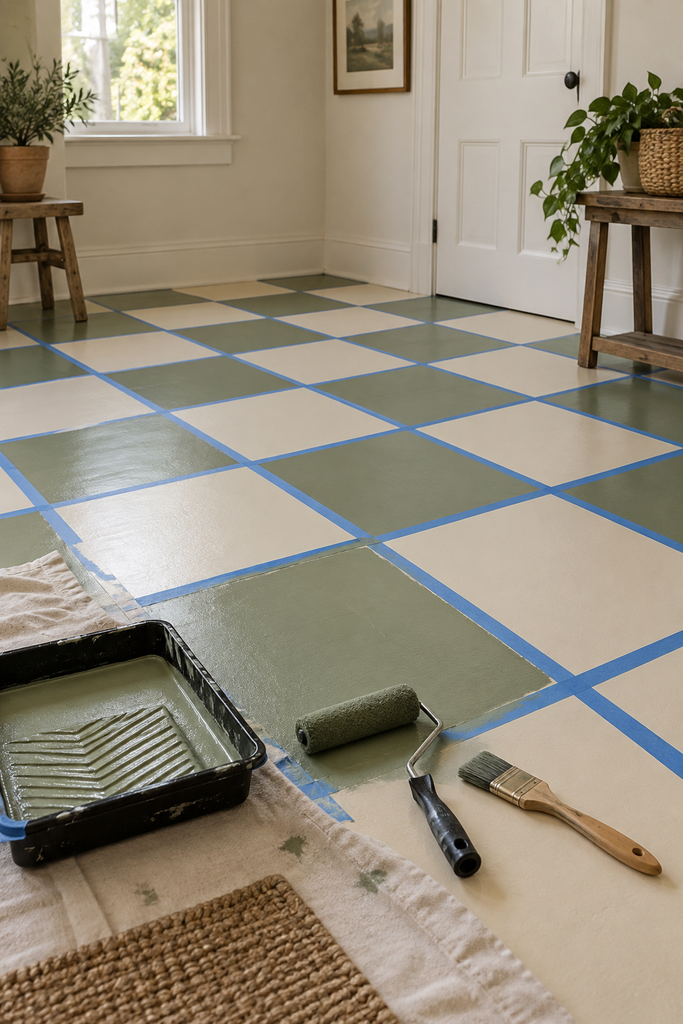
Use a small roller for larger sections and a brush for tight edges.
Again, avoid thick coats.
Remove the painter’s tape while the final coat is still slightly soft rather than waiting until everything becomes rock hard. This can reduce tearing along the edge.
Common Checkerboard Floor Mistakes
A painted floor can look fantastic, but a few mistakes immediately make it feel DIY in the wrong way.
Using Too Much Contrast
Pure black and bright white can dominate a room.
Sometimes that’s exactly what you want. But in a softer home with warm woods and neutral furniture, charcoal and cream may look much more natural.
Ignoring Cure Time
Dry paint and cured paint are not the same thing.
Your floor may feel dry enough to touch while still being vulnerable to furniture legs, shoes, rugs, and pet claws.
Follow the product’s full cure recommendations before returning the room to normal use.
Putting Rugs Down Too Soon
A rug can trap moisture and interfere with curing.
Wait until the finish is completely cured before covering any section of the painted floor.
Expecting Permanent Perfection
Painted floors are durable when prepared properly, but they are still painted floors.
Eventually, heavily traveled areas may show wear.
Personally, I don’t think that’s always a bad thing. A slightly worn checkerboard can actually look more relaxed and established than one that looks freshly printed.
How to Make the Finished Floor Last Longer
Use products designed for floors rather than standard interior wall paint.
If the paint system recommends a compatible protective topcoat, use one. Some floor paints are meant to stand alone, while others benefit from additional protection.
Add felt pads underneath furniture and avoid dragging heavy pieces across the surface.
For cleaning, skip harsh abrasives. A gentle floor-safe cleaner and damp mop are usually enough.
And keep a small amount of your paint.
Being able to touch up one damaged square is much easier than trying to color-match it two years later.
Conclusion
A DIY painted checkerboard floor is one of those projects that can make a surprisingly ordinary room feel completely different without replacing the floor itself.
The biggest lesson is not to rush the decorative part.
Good prep, a carefully planned grid, the right square size, and enough drying time matter far more than perfectly steady brushwork.
Choose colors that already make sense with your home, mock up the pattern before committing, and accept that a painted floor may develop a little character over time.
If you have an outdated wood, concrete, or paintable floor that you’re already tired of looking at, this can be a genuinely worthwhile weekend project.
Just spend more time measuring than you think you need.
You’ll be very glad you did.