

Okay, real talk, small dining spaces are either a source of constant frustration or a surprisingly cozy design opportunity. I’ve personally gone back and forth on this. When I first started rethinking my own cramped kitchen corner, I thought, “There’s no way I can make this look good and functional.” Spoiler alert: I was completely wrong.
A banquette that built-in bench seating you see in cute cafés and Pinterest-worthy kitchens, is honestly one of the smartest solutions for tight dining spaces. It tucks neatly into corners, stores things underneath, and makes even the most awkward nook feel intentional and inviting. So if you’ve been staring at a sad, empty corner wondering what to do with it, this list is for you.
1. The Classic L-Shaped Corner Banquette
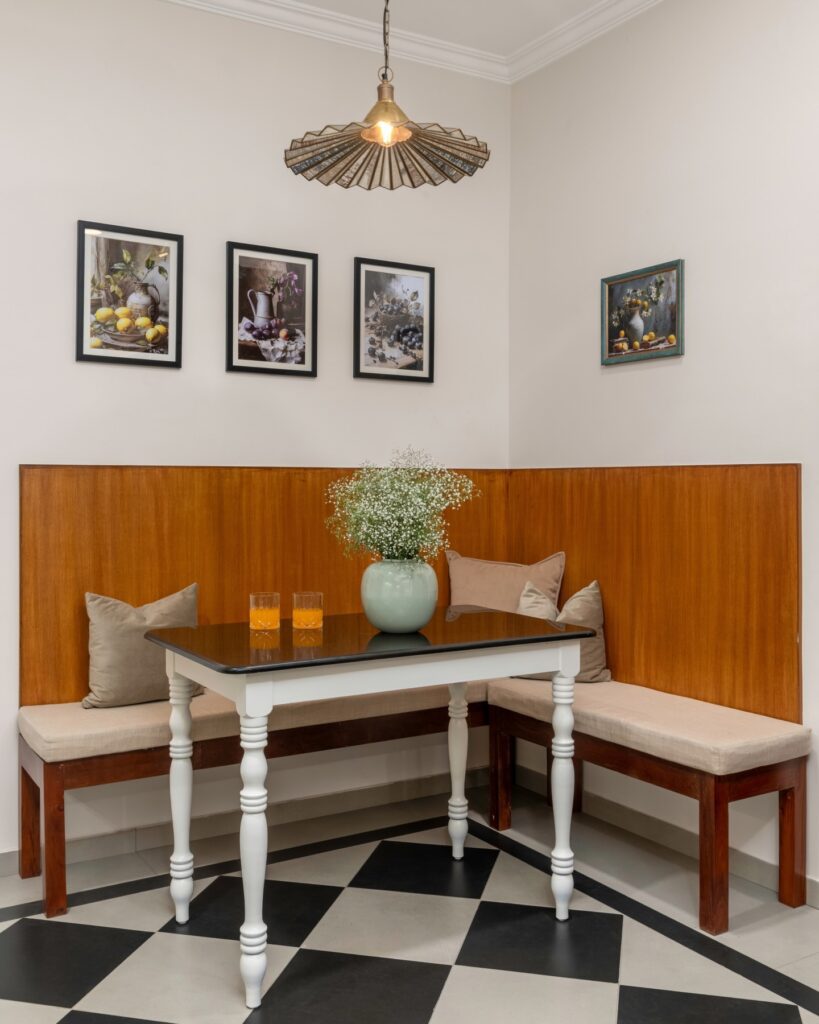
If there’s one banquette style that never, ever goes out of style, it’s the L-shaped corner build. You’ve seen it a thousand times — and for good reason. It maximizes seating capacity in the smallest possible footprint.
Think about it: a corner is usually dead space in a dining area. You can’t really fit a chair there comfortably. But a custom L-shaped banquette turns that awkward zone into a cozy seating nook for four to six people without pushing into the rest of the room.
Key benefits of L-shaped banquettes:
- Uses corner space that chairs can’t access
- Seats more people per square foot than traditional dining chairs
- Creates a natural, enclosed feeling that makes meals feel more intimate
Pair it with a round or oval table to soften the hard angles, and you’ve got a combo that looks professionally designed even on a budget.
2. Built-In Storage Banquette (The Overachiever of Seating)
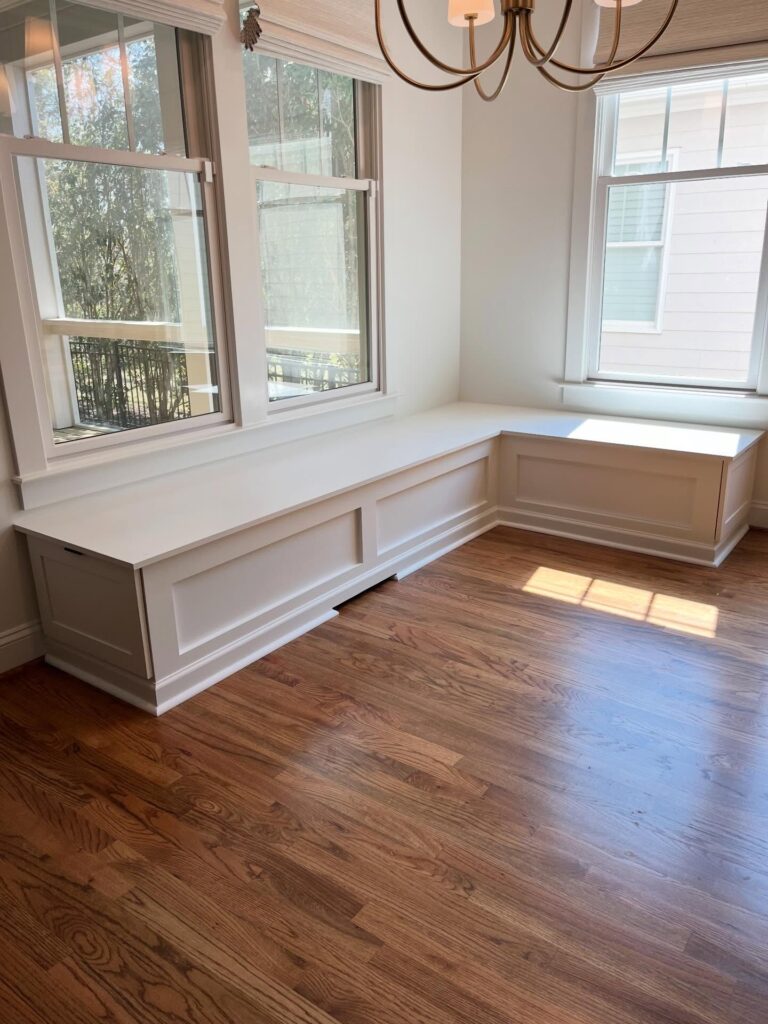
Here’s a little secret: the space under your banquette bench is gold. Wasted storage space is practically a crime in a small home, and a built-in storage banquette solves that problem beautifully.
You can go with lift-up seat lids, pull-out drawers, or even open cubbies depending on your style. IMO, the lift-lid design is the most practical — you can toss seasonal items, extra linens, or even kids’ art supplies in there without anyone knowing the difference.
Storage ideas for banquette benches:
- Hinged seats with deep storage bins inside
- Pull-out drawers for everyday items like placemats and napkins
- Open basket cubbies for a more relaxed, casual look
If you’re already building or remodeling, adding storage here costs very little extra and saves you from buying additional furniture. Win-win.
3. Floating Bench Banquette for Renters
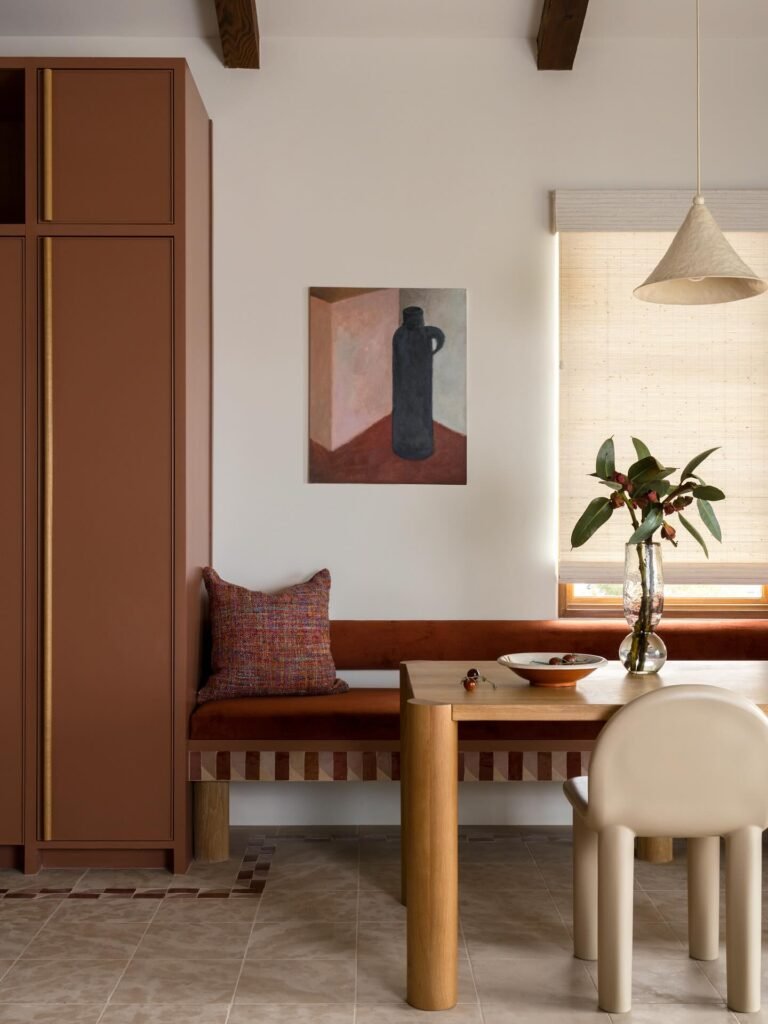
Not everyone can build custom cabinetry into their walls — especially if you’re renting. But that doesn’t mean you’re stuck with boring dining chairs forever. A floating bench banquette setup uses freestanding benches positioned against a wall to mimic the built-in look without any permanent commitment.
The trick is choosing benches with a finished back (so they look intentional against the wall) and pairing them with a well-chosen dining table. Add a few throw pillows and a wall-mounted shelf above it, and suddenly it feels curated instead of improvised.
This approach also works really well in apartments where the dining area bleeds into the living room. The bench acts as a subtle room divider while still functioning as seating. Clever, right?
4. Upholstered Banquette in a Bay Window
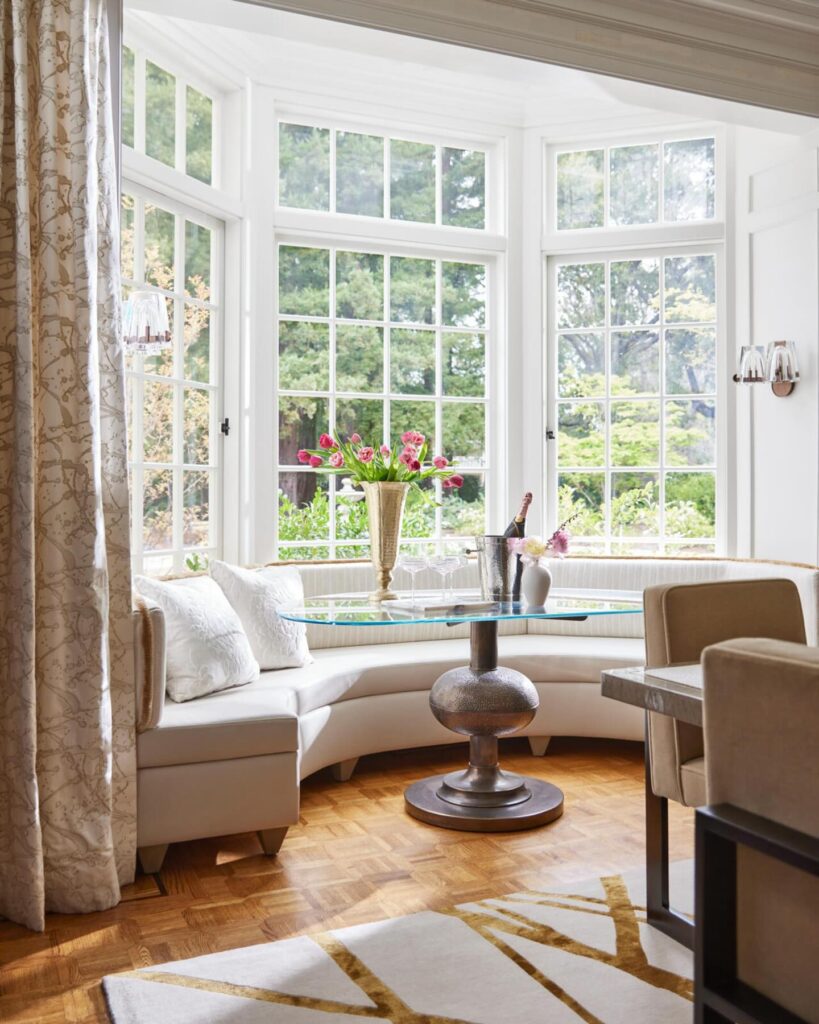
If your home has a bay window in or near the kitchen or dining area, please — please — don’t waste it on a generic window seat. A bay window banquette is one of the most charming small-space dining setups you can create.
The bay window naturally creates a slightly enclosed nook, which makes meals feel like a private little retreat. You get natural light flooding in from three sides, which is basically the dream scenario for a breakfast or brunch setup.
Tips for bay window banquettes:
- Measure carefully — bay windows vary in angle and depth
- Use light, moisture-resistant upholstery fabric since sun exposure is heavy
- Add thin seat cushions with removable covers for easy cleaning
- A round pedestal table works best here to navigate the angles
The result? A dining nook that looks like it belongs in a boutique hotel, not a regular house. 🙂
5. Narrow Galley-Style Single Bench Banquette
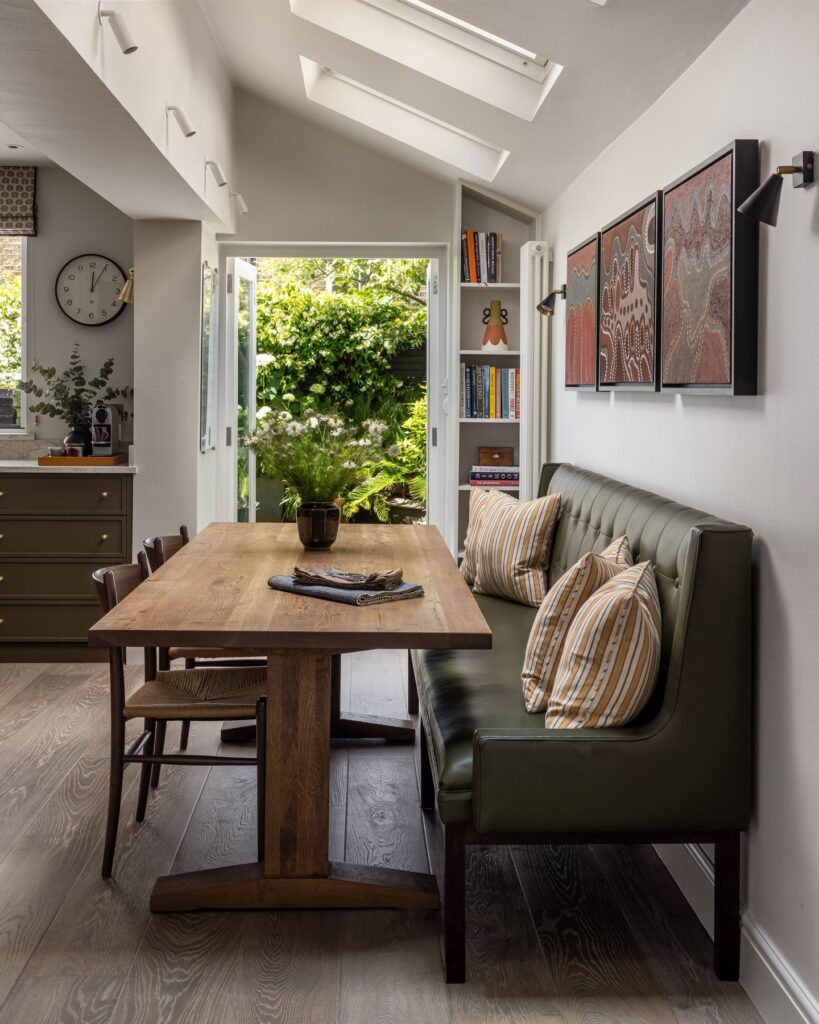
ottadesign
Got a long, skinny dining space — like the kind you find in townhouses or apartments where the kitchen and dining area share one narrow strip of floor space? A single-side banquette running along one wall with chairs on the opposite side is your best friend.
This layout keeps the traffic flow open (important in tight galley spaces) while still maximizing seating. The bench side can double as storage, and the chair side stays flexible — you can pull chairs out when you need the space for something else.
Why this works in galley layouts:
- Keeps one side of the room clear for movement
- Feels less cramped than chairs on both sides
- The long bench visually stretches the room horizontally
Bold move: paint the bench in a contrasting color to the wall to make it feel intentional and designed rather than just “shoved against the wall.”
6. Farmhouse-Style Banquette with Shiplap Backing
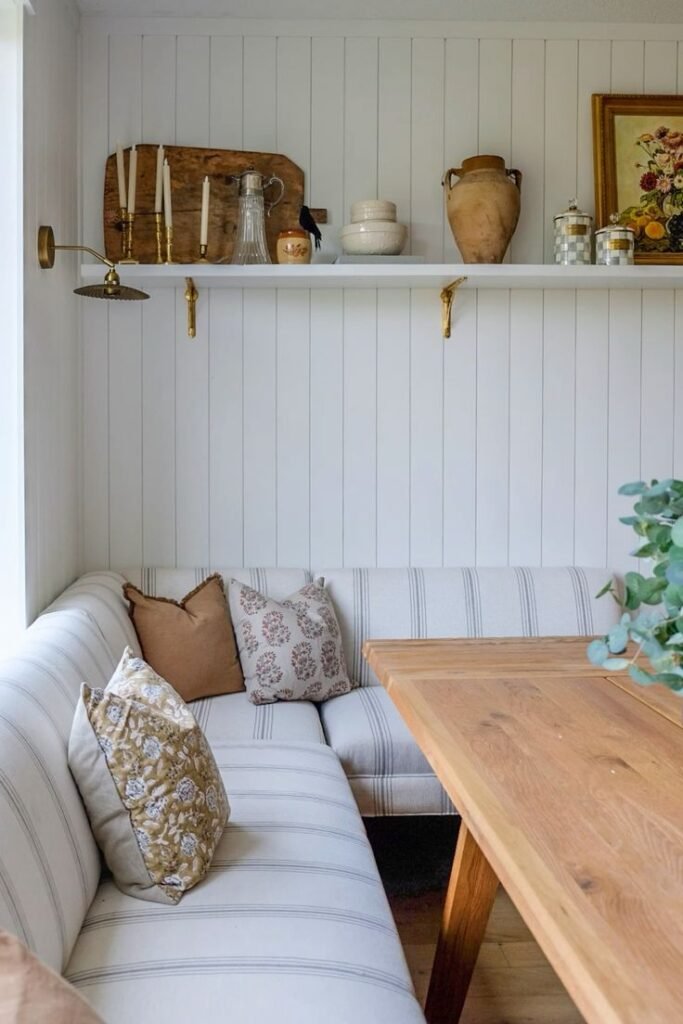
Farmhouse style and banquettes were basically made for each other. The shiplap-backed banquette is one of those looks that photographs beautifully and also happens to be very livable in real life. The shiplap adds texture and visual interest without taking up any floor space.
A simple bench built from pine or MDF, painted in a creamy white or warm greige, with shiplap running up the wall behind it — this is achievable even on a modest budget. Add a few linen cushions and a wooden farmhouse table and you’re basically living in a Joanna Gaines mood board.
FYI, shiplap doesn’t have to be actual wood — peel-and-stick shiplap panels exist now and work surprisingly well for renters or anyone on a tight timeline.
7. Banquette with Built-In Shelving Above
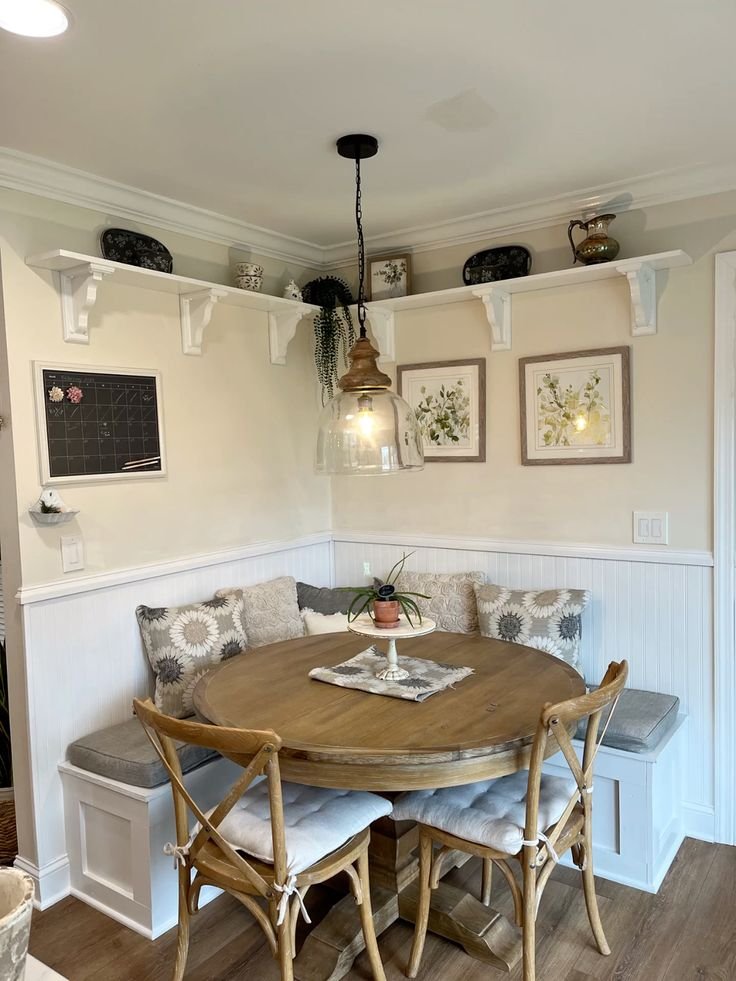
Why stop at the bench? A banquette with built-in shelving running above it turns the whole wall into a functional design feature. This works especially well in dining rooms that double as casual home offices or in kitchen-dining combos where you need to store cookbooks, plants, or decorative objects nearby.
The shelving doesn’t have to be complicated. Even a couple of floating shelves mounted above the banquette at varying heights creates that layered, designer look that’s all over Pinterest right now.
What to display on shelving above a banquette:
- Cookbooks and small potted herbs (near a kitchen)
- Framed art prints or family photos
- Candles, small vases, and decorative objects
- A wall-mounted light or sconce to add ambiance
The key is keeping the shelving from feeling cluttered. Edit ruthlessly — less is genuinely more here.
8. Curved Banquette for a Booth-Style Feel
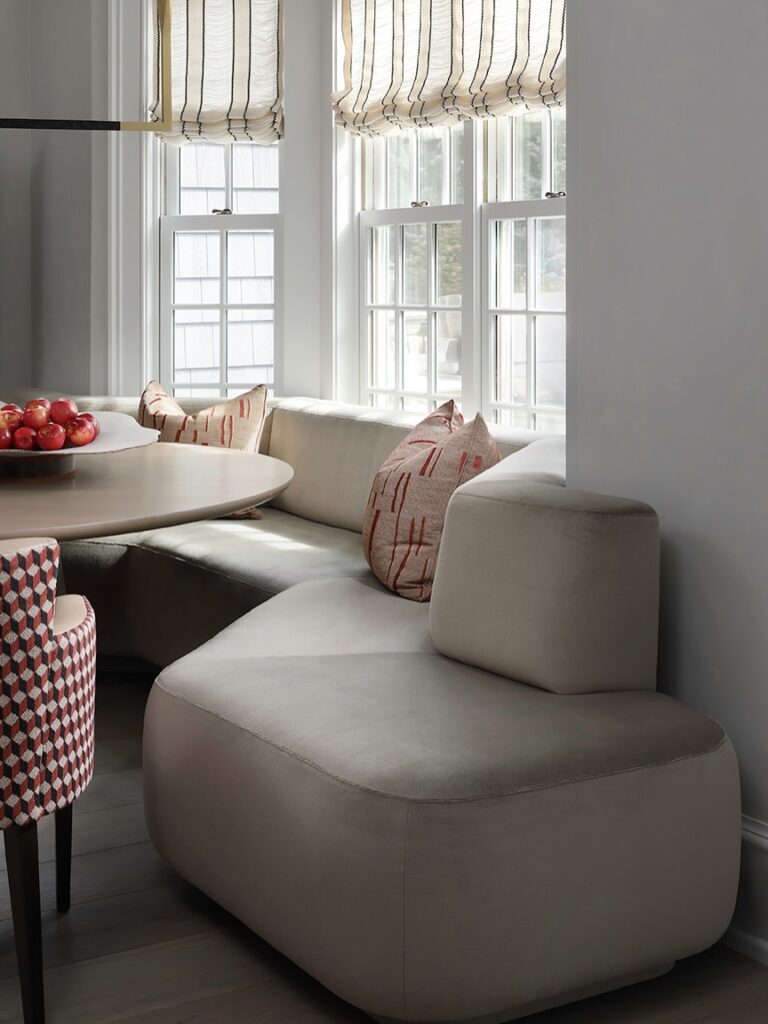
Ever sat in a curved restaurant booth and thought, “I never want to leave”? You can recreate that feeling at home with a curved banquette design. It’s a little more complex to build than a straight bench, but the payoff in terms of comfort and visual drama is significant.
A curved banquette works beautifully in a round or semi-circular nook. It creates a natural gathering spot that feels warm and social — great for households that love hosting. The curved shape also softens the overall look of the room, which is a nice contrast if you have lots of straight lines elsewhere.
If custom carpentry feels too ambitious, some furniture brands now offer curved upholstered benches that you can buy off the shelf and position against a curved wall or in a corner.
9. Monochromatic Banquette for a Sleek, Modern Look
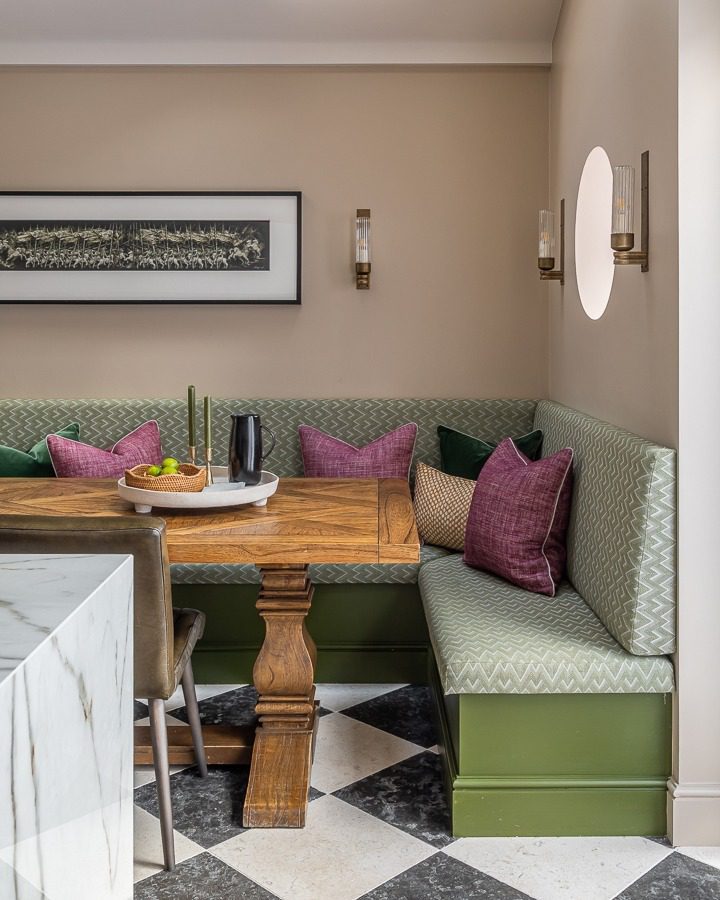
Sometimes the best thing you can do in a small space is keep everything in the same color family. A monochromatic banquette — where the bench, cushions, table, and even the wall behind it share a cohesive palette — makes the whole area feel larger and more intentional.
Think a deep forest green bench with green velvet cushions, a dark walnut table, and green-toned artwork above. Or a soft, chalky white setup with warm wood accents. The lack of visual contrast means your eye doesn’t get “interrupted” as it scans the room, which creates the illusion of more space.
This approach pairs beautifully with minimalist or Scandinavian-inspired interiors where clutter is avoided and clean lines dominate.
10. Outdoor Banquette for a Small Patio or Balcony
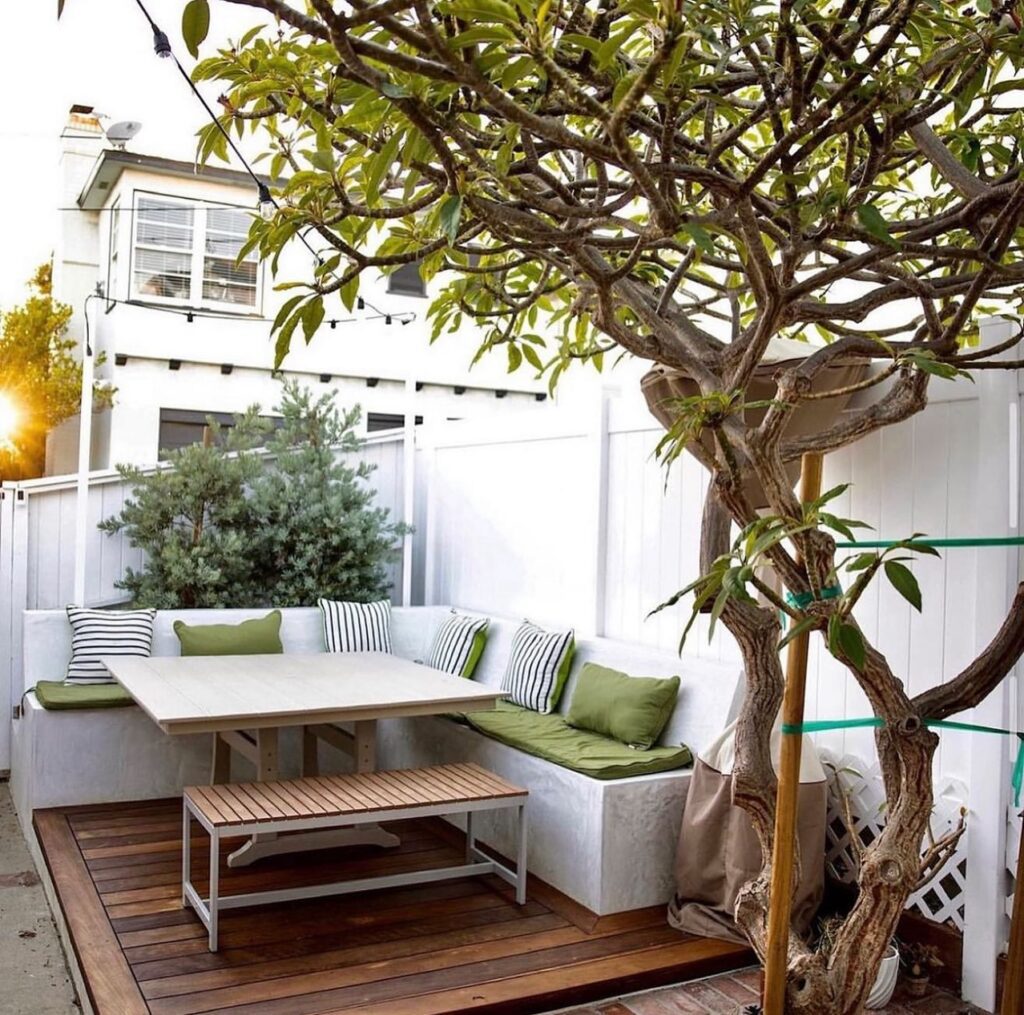
Who said banquettes only belong inside? A small outdoor banquette on a patio, balcony, or even a covered porch is one of the best ways to extend your usable living space without adding a single square foot to your home.
Built from weather-treated wood or composite materials, an outdoor banquette functions just like the indoor version — but it also has to handle the elements. Use outdoor foam cushions with removable, waterproof covers. Store them inside when not in use if your space gets heavy rain or sun exposure.
Outdoor banquette materials to consider:
- Teak or cedar — naturally weather-resistant and beautiful
- Pressure-treated pine — affordable and paintable
- Composite decking material — low maintenance and durable
Add string lights above the bench and a small bistro table in front, and your tiny balcony becomes the most relaxing spot you own. :/ (Yes, that face is jealousy of your own future setup.)
11. Bench-Only Banquette at a Kitchen Island
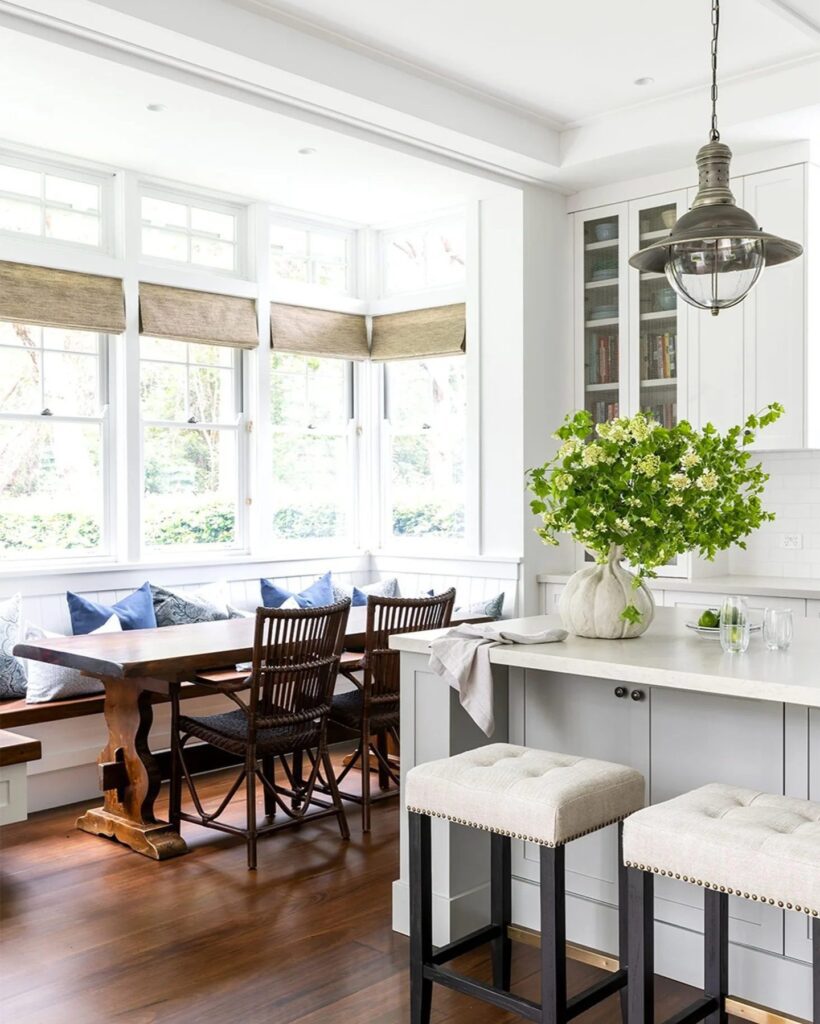
No dedicated dining nook? No problem. If you have a kitchen island, you can create a banquette-style setup by positioning a built-in or freestanding bench against the wall opposite the island overhang. People sit on the bench, pull up to the island, and suddenly you have informal dining seating without needing a separate table at all.
This works especially well in open-plan kitchens where a full dining table would feel too heavy. The bench keeps the space feeling light and flexible — you can push it against the wall when you need the floor space back.
Bonus tip: add a cushion and some throw pillows to the bench so it doubles as extra seating when guests arrive. Multi-functional furniture is everything in small spaces.
12. DIY Banquette from IKEA Cabinets (Budget-Friendly Hack)
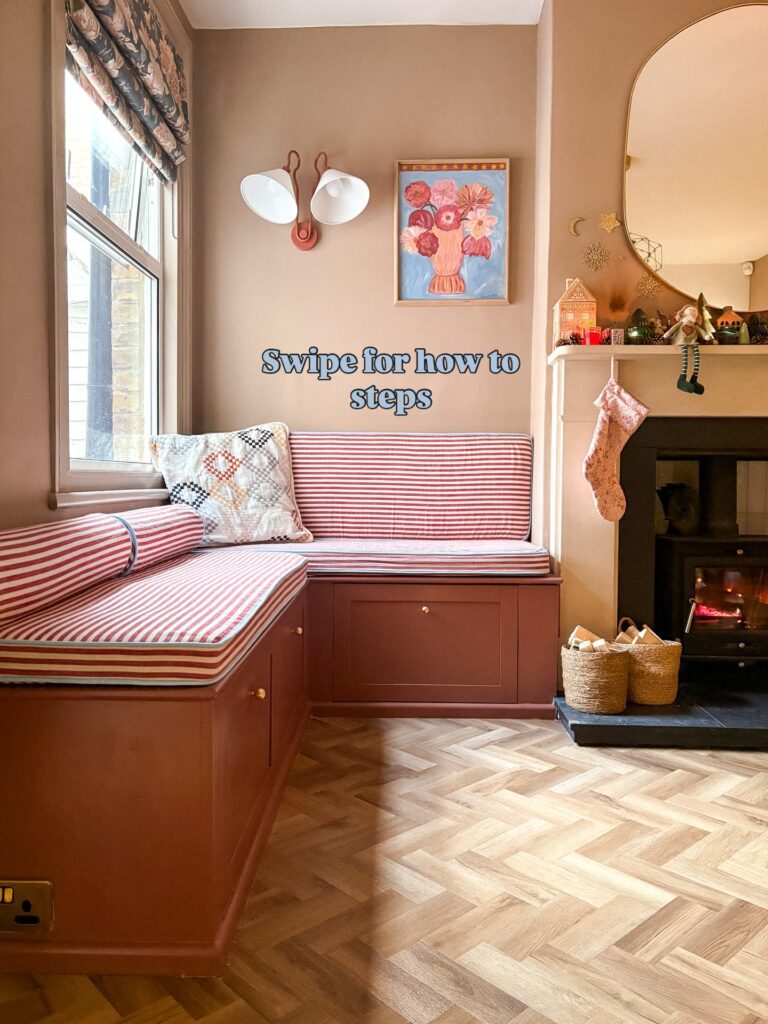
Okay, saving the best for last. If you want that custom built-in look without the custom price tag, the IKEA cabinet banquette hack is one of the most searched DIY projects for a reason. It genuinely works.
The basic idea: use IKEA base cabinets (like the SEKTION or BESTA line) as the structural base of your banquette. Stack them, face them toward the room, add a plywood top with a cushion, and finish the front with trim and paint. The result looks indistinguishable from a carpenter-built piece — and you get actual storage inside the cabinets.
Steps to pull this off:
- Measure your space and plan the layout on paper first
- Choose IKEA base cabinets that fit your dimensions
- Anchor them securely to the wall (non-negotiable for safety)
- Add a plywood or MDF top cut to size
- Finish edges with trim, caulk gaps, and paint everything the same color
- Top it with a custom-cut foam cushion and your favorite fabric
The total cost is usually a fraction of hiring a carpenter, and the end result is something you genuinely get to brag about.
Wrapping It Up
So there you have it, 12 small space banquette ideas that range from budget IKEA hacks to dreamy bay window builds. Whether you’re working with a cramped apartment corner or a narrow galley kitchen, there’s a banquette solution here that fits your space, your style, and your budget.
The bottom line? A banquette isn’t just a seating option — it’s a space-maximizing, storage-adding, vibe-setting decision that transforms the most overlooked spots in your home into the spots everyone wants to gather at.
Pick the idea that resonates most, start pinning references, and go for it. Your dining nook deserves better than four mismatched chairs crowded around a table that’s too big for the room. Trust me on this one.