

My patio used to feel like a pizza oven every summer afternoon. I’d step outside with an iced tea, sit down for exactly ninety seconds, and retreat back into the air conditioning like a vampire fleeing sunrise. The furniture just sat there, baking, completely untouched from May through September. Sound familiar? If you’re nodding along, you’re in the right place, because I spent an entire summer testing patio shade solutions so you don’t have to guess.
Here’s the thing nobody tells you when you buy a house with a “great outdoor space”: that space is only great if you can actually stand to be in it. I learned that the hard way after three seasons of watching my patio furniture fade in the sun while I hid inside. So I started digging into every shade option I could find, bought a few, borrowed a few from friends’ backyards, and figured out what genuinely works versus what’s just a nice photo on a landing page.
This list covers 15 patio shade ideas that actually work, ranging from cheap weekend fixes to bigger investments worth every penny. Some of these you can knock out in an afternoon with a trip to the hardware store. Others take real planning, a bit of a budget, and maybe a contractor on speed dial. I’ll tell you what I loved, what disappointed me, and what I’d genuinely warn a friend about before they buy.
By the end of this, you’ll know exactly which direction fits your patio, your budget, and how much effort you’re actually willing to put in.
1. Retractable Awnings for Instant Relief
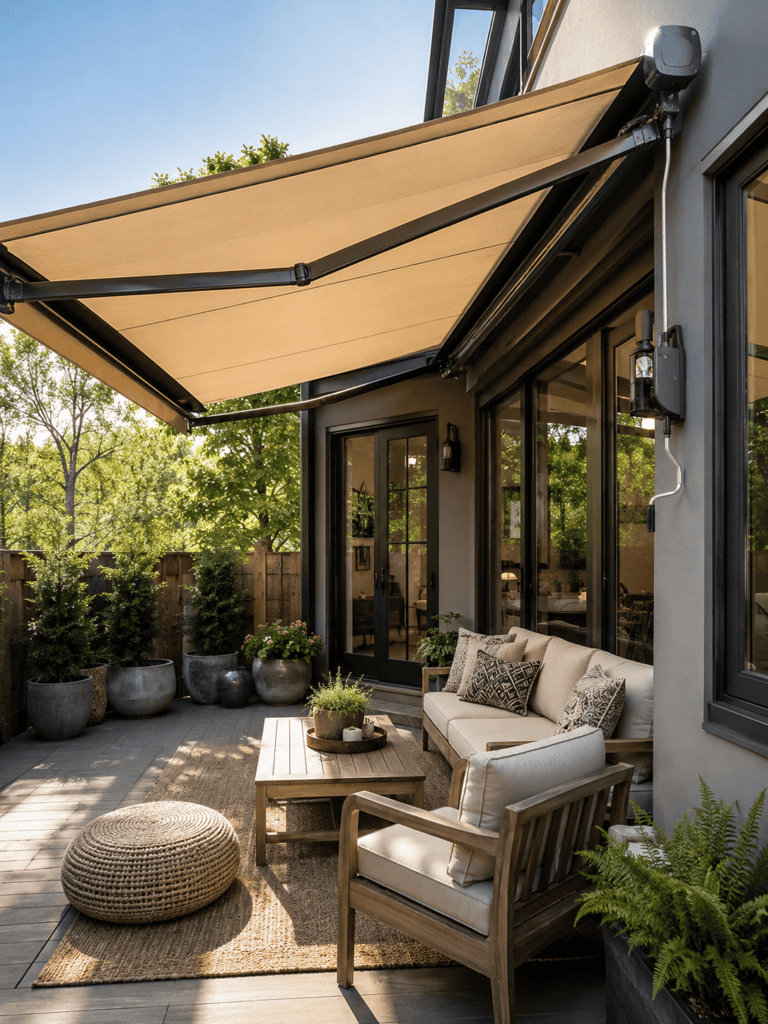
A retractable awning gives you shade on demand, which honestly feels like a small superpower. You crank it out when the sun’s brutal and roll it back in when you want that golden-hour glow.
I installed one on my own patio, and it changed how often I actually used the space. The best part? Most modern awnings come with motorized options, so you’re not wrestling with a hand crank while balancing a drink.
- Manual awnings cost less but need more effort
- Motorized awnings run higher but offer push-button convenience
- Retractable arms let you adjust the angle for low-hanging afternoon sun
Ever wondered why hotels and cafes love these things? It’s because they solve the shade problem without permanently blocking your view of the sky.
Installation matters more than people expect. You need solid mounting points, whether that’s a fascia board or a dedicated wall bracket, because a wobbly awning defeats the whole purpose. I’d also suggest checking the wind rating before you buy, since a gust can turn a cheap awning into a sad, bent mess within one season.
Price-wise, expect anywhere from a couple hundred dollars for a basic manual model to several thousand for a full motorized retractable system with sensors. Some higher-end versions even come with wind and rain sensors that automatically retract the awning before a storm hits, which feels a little excessive until the one time it saves your fabric from getting shredded.
2. A Pergola With Climbing Vines
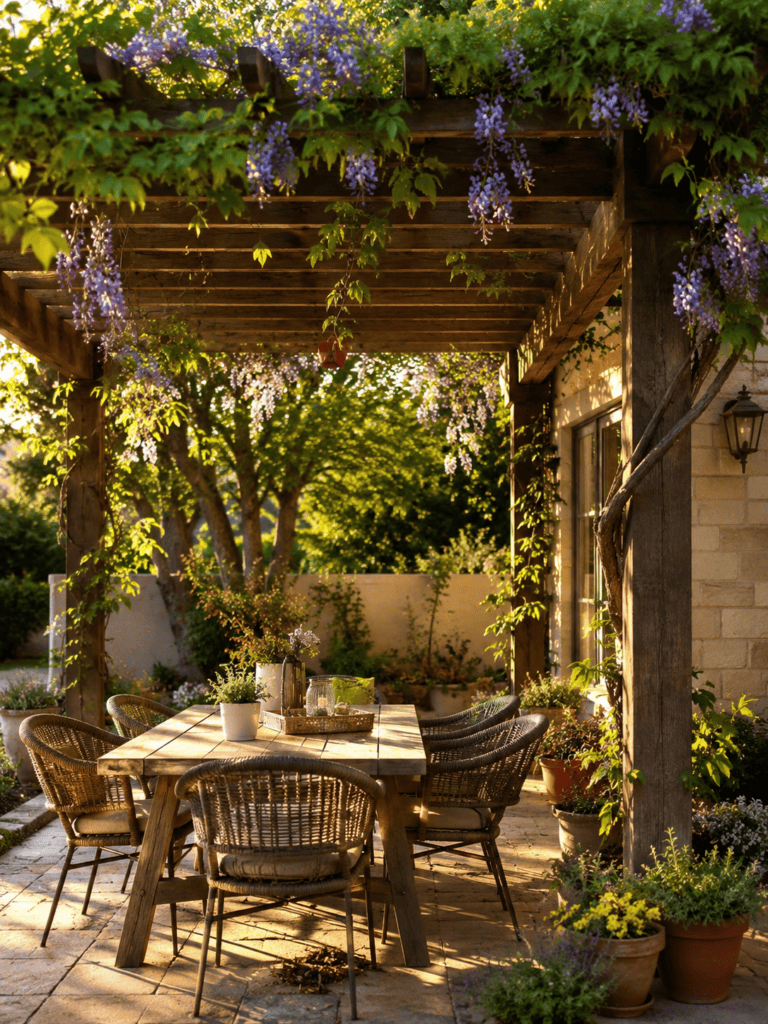
Pergolas bring structure and a little drama to an outdoor space. Add climbing vines like wisteria or clematis, and you get a living roof that shifts with the seasons.
I’ll be honest, though: vines take patience. You won’t get full coverage in year one, so manage your expectations if you’re hoping for instant Pinterest perfection.
Bonus points for the way pergolas frame your patio like an outdoor room. They photograph beautifully, and IMO that’s half the reason people choose them in the first place.
You can build a pergola from wood, vinyl, or aluminum, and each material comes with tradeoffs worth considering. Wood looks natural and warm but demands regular staining and sealing to survive outdoor conditions. Aluminum shrugs off weather without much maintenance, though it costs more upfront and reads as a bit more modern than rustic.
A few practical tips if you’re going this route:
- Orient the pergola so the slats or crossbeams run perpendicular to the sun’s path for maximum shade
- Add a retractable canopy underneath the frame if you want shade before the vines fill in
- Space your posts according to local building codes, especially if you’re attaching to your house
The waiting game with vines is real, so don’t get discouraged if your pergola looks a little bare the first year. Patience pays off, and a mature, vine-covered pergola is one of the most beautiful things you can add to a backyard.
3. Shade Sails for a Modern Look
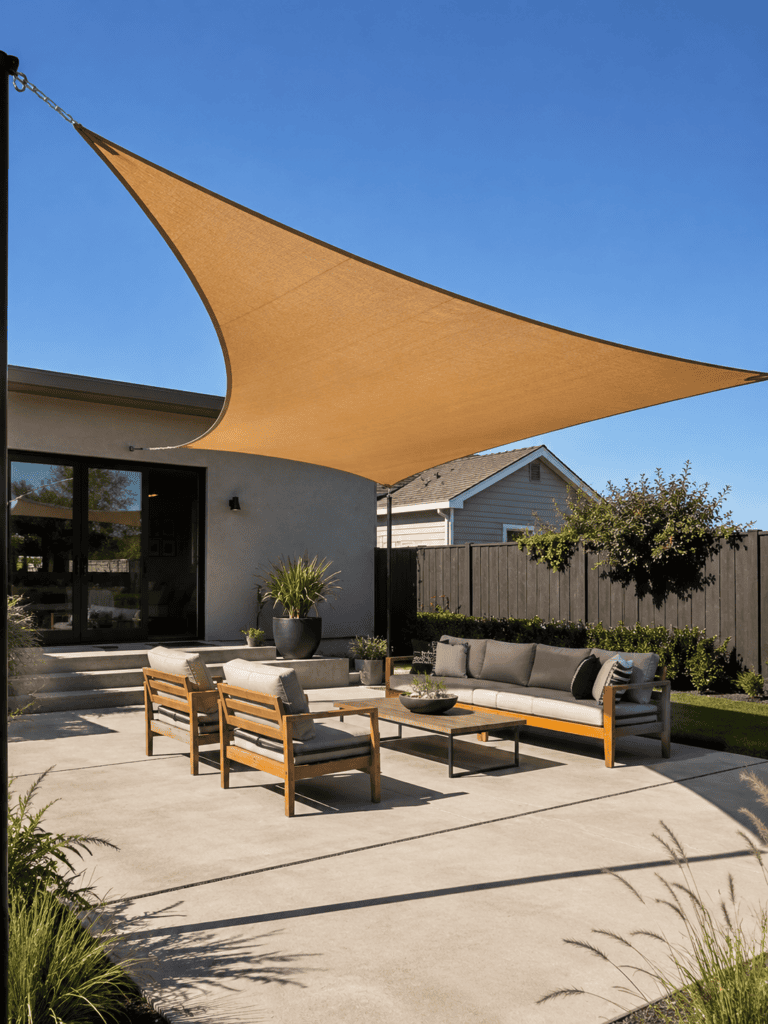
Shade sails give you that stretched, sculptural look you see in trendy backyard renovations. They’re triangular or square fabric panels anchored at multiple points, creating tension that holds them taut against wind.
I put one up over a friend’s deck last spring, and the transformation was dramatic. It went from “empty concrete slab” to “this could be on a design blog” in one afternoon.
- Choose breathable mesh fabric for airflow plus UV protection
- Angle sails to block the harshest afternoon rays
- Combine multiple sails for full patio coverage
Shade sails need strong anchor points, whether that’s a house wall, a sturdy post, or a nearby tree. Skip the flimsy hardware kits that come with cheaper sails; upgrade to marine-grade turnbuckles and stainless steel hardware so your investment doesn’t rip out of the ground during the first big storm.
Color choice matters more than you’d think, too. Darker sails block more light but absorb more heat, while lighter colors reflect sun and keep the space feeling airier. I went with a sandy tan color for my friend’s install, and it struck a nice balance between shade and brightness.
4. Classic Market Umbrellas
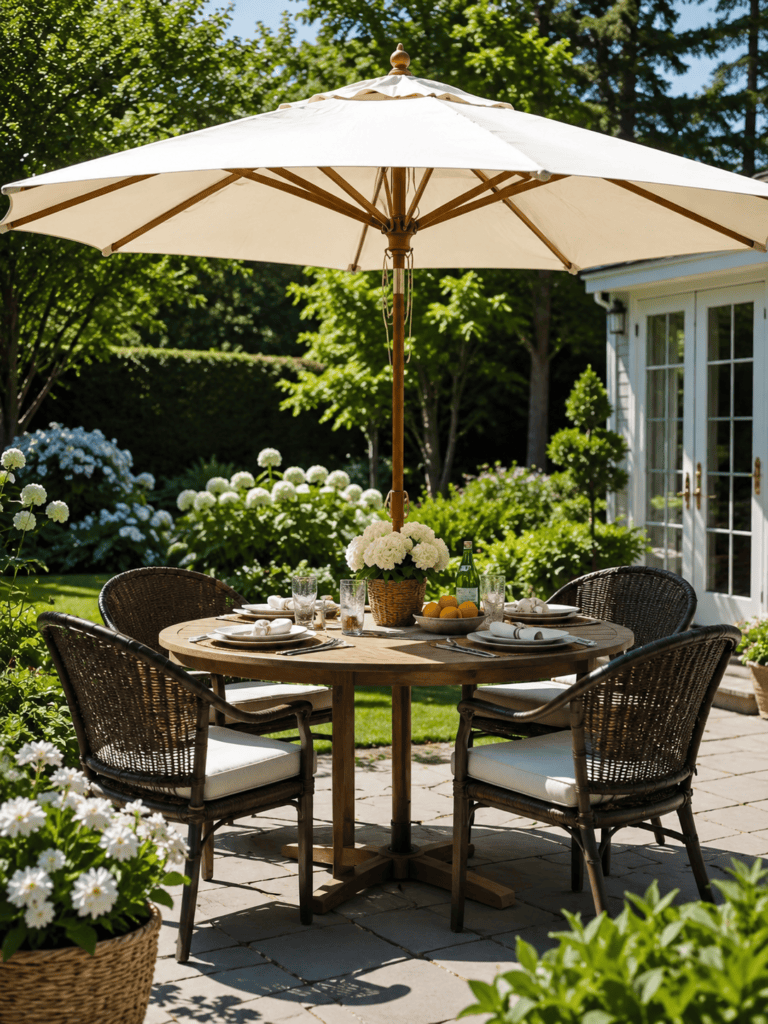
Market umbrellas remain a classic because they’re simple, portable, and don’t require permits or professional installation. Stick one through your table’s center hole, and you’ve got instant shade over your dining area.
Not every umbrella is created equal, though. Cheap ones fold like a cheap tent in moderate wind, so spend a little more if you want something that survives an actual summer storm.
Look for these features:
- A sturdy crank-lift mechanism
- Tilt functionality for tracking the sun
- UV-rated fabric rated at least 50+ SPF equivalent
Base weight is the detail everyone forgets until it’s too late. A lightweight base combined with a big canopy is basically an accident waiting to happen the moment wind picks up. I’d recommend a base weighing at least 50 pounds for anything larger than a nine-foot umbrella, and honestly, sandbags or a fillable base work great if you don’t want to haul concrete around your patio.
Offset versus center-pole is another decision worth thinking through. Center-pole umbrellas are cheaper and more stable, while offset styles free up your table space but need a heavier counterweight to stay upright.
5. Louvered Roof Systems
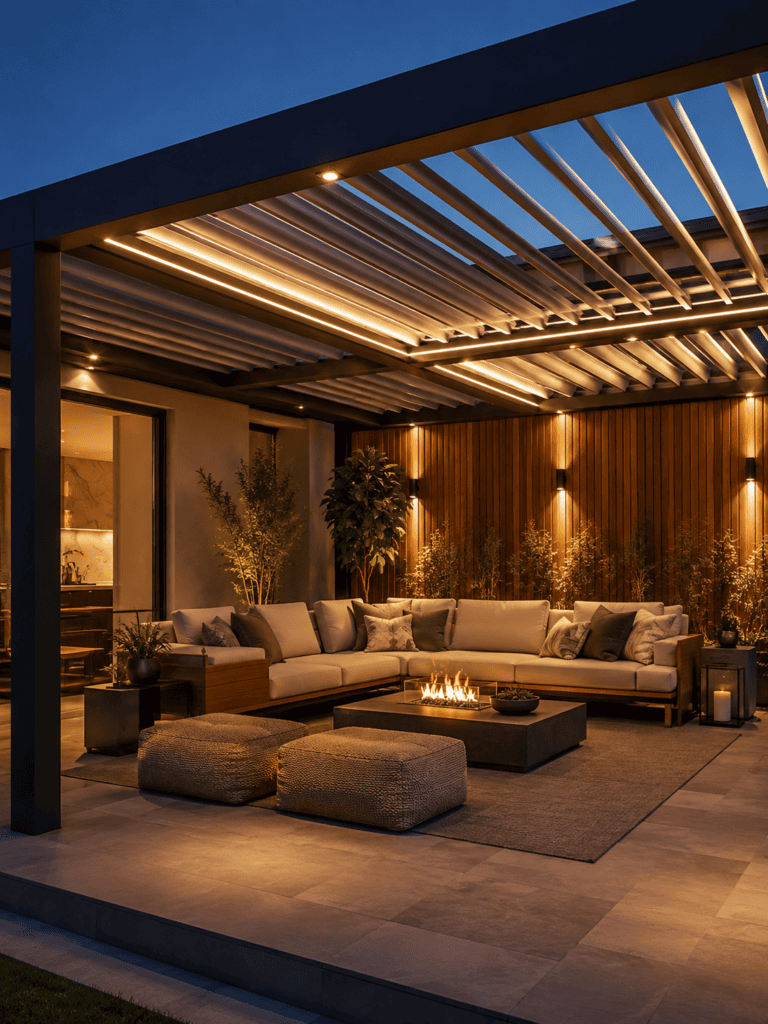
Louvered roofs are the shade solution for people who want total control. You adjust the slats to let in exactly as much light as you want, then close them completely when a surprise rainstorm rolls through.
I tested a friend’s louvered pergola during a light drizzle, and I stayed completely dry underneath. That alone justified the higher price tag in my book.
These systems tend to be an investment, but they function as a four-season outdoor room rather than a summer-only accessory.
Many louvered systems now integrate with smart home apps, letting you schedule the slats to open at sunrise and close automatically once temperatures spike. Some even pair with rain sensors, closing the roof the second the first drop falls so you don’t have to sprint outside mid-conversation to save your cushions.
Common add-ons include:
- Integrated LED lighting strips along the frame
- Built-in gutters that channel rainwater away from the seating area
- Motorized screens that drop down along the sides for extra wind or bug protection
If your budget allows for it, this is genuinely the closest thing to adding an extra room to your house without pouring a full foundation.
6. Bamboo or Reed Shades
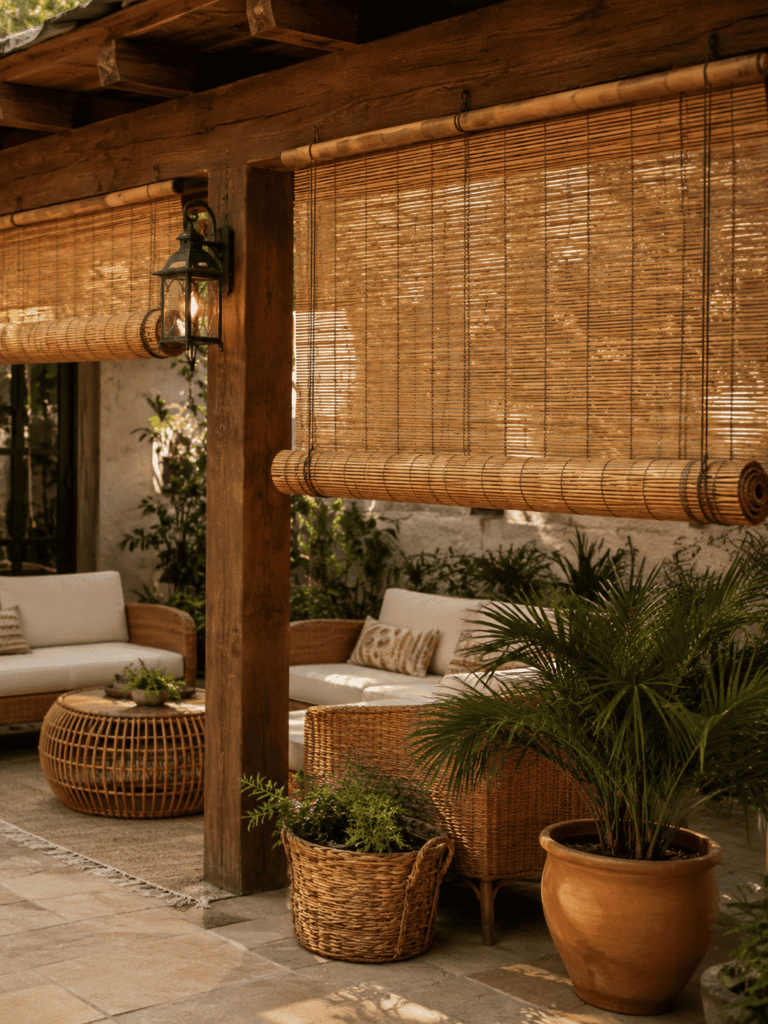
Bamboo shades bring texture and warmth that fabric alone can’t replicate. Roll them down along the sides of a covered patio, and you instantly create a cozier, more enclosed feel.
They’re inexpensive, which makes them perfect if you’re testing out a shaded look before committing to something permanent. FYI, they do weather over time, so don’t expect them to last forever in direct sun exposure.
Installation is about as simple as it gets. Most bamboo shades come with mounting brackets and a pull cord, so you can hang them from a pergola beam, an overhang, or even a simple hook screwed into your fascia. Roll them up when you want an open view, and drop them down when the sun gets aggressive.
One thing I’d add: treat the bamboo with a clear sealant if you live somewhere humid. Untreated bamboo can develop mold spots faster than you’d expect, and nobody wants their cozy shade feature turning into a science experiment.
7. A Living Green Wall or Trellis
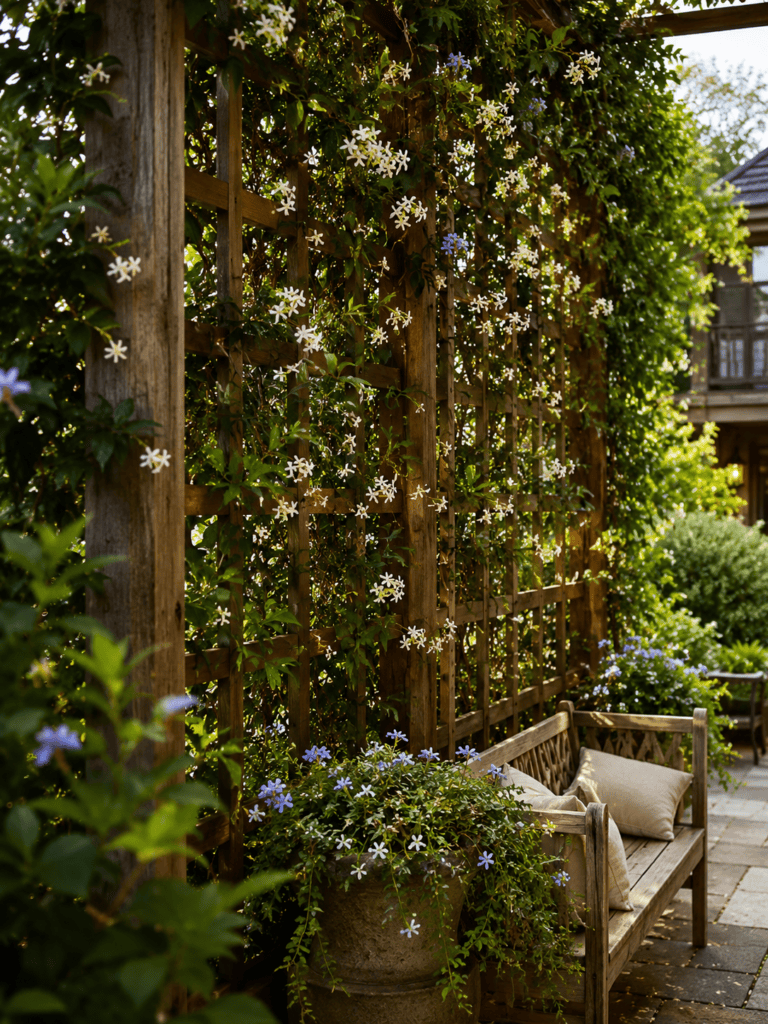
A trellis packed with fast-growing vines like jasmine or morning glory does double duty: shade plus a built-in privacy screen. Your neighbors won’t be able to see you sunbathing in your questionable pool float anymore.
Popular plant choices include:
- Jasmine for fragrance and quick coverage
- Morning glory for fast, dramatic growth
- Grapevine if you want a functional harvest bonus
This option takes longer to mature, but the payoff feels earned in a way that store-bought shade never quite matches.
Building the trellis itself doesn’t require carpentry skills. A basic wood or metal lattice attached to a wall or freestanding frame gets the job done, and most home improvement stores sell pre-made panels if you’d rather skip the DIY route entirely. Just make sure the structure can handle the weight of a mature vine, because grapevine in particular gets surprisingly heavy after a few seasons.
Maintenance tips worth knowing:
- Prune aggressively in early spring to control growth direction
- Water consistently during the first year while roots establish
- Check for pests like aphids, which love new vine growth almost as much as you do
8. Umbrella-Style Cantilever Shades
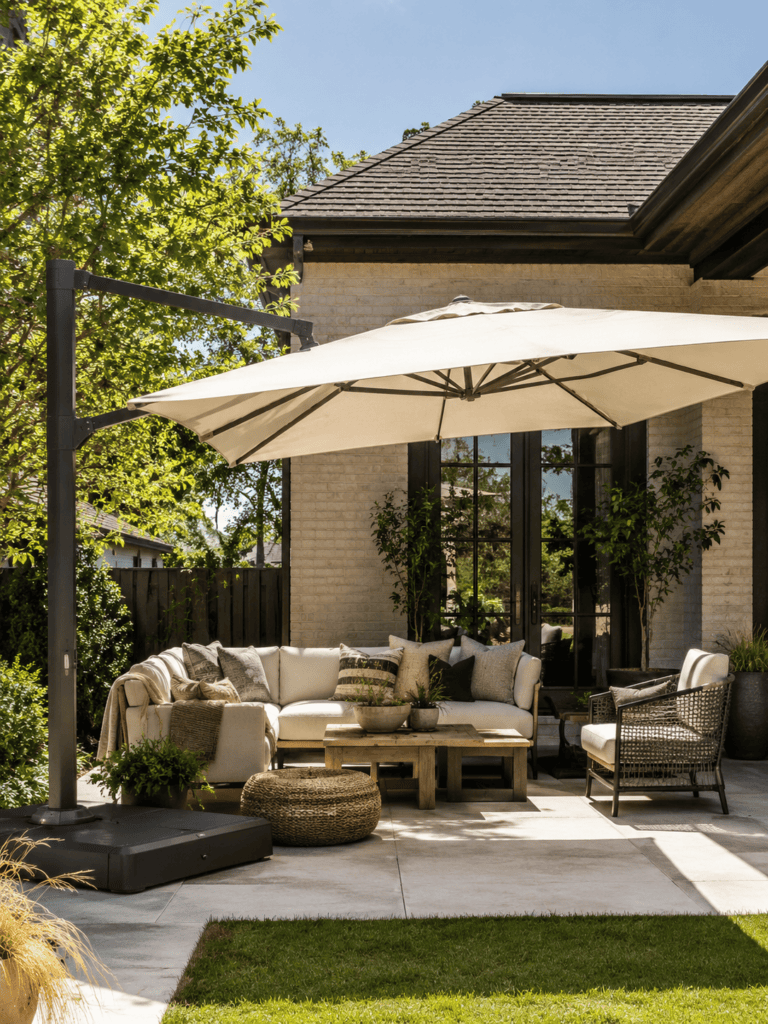
Cantilever umbrellas hang from an offset pole, meaning no center post interrupts your seating arrangement. That’s a genuinely clever design, and I don’t say that about patio furniture very often.
I switched from a standard market umbrella to a cantilever style, and I immediately appreciated the extra legroom. The tradeoff? These need a heavier, more stable base, so budget for that when you’re pricing one out.
Most cantilever models rotate 360 degrees around the base, which means you can chase the shade throughout the day without moving your furniture at all. Some also fold flat for storage, which matters if you live somewhere with real winters and need to pack things away seasonally.
Expect to pay noticeably more for a cantilever than a standard umbrella of the same size. You’re paying for the engineering that keeps a heavy canopy balanced on an offset arm, and honestly, once you’ve used one, going back to a center-pole umbrella feels like a step down.
9. Outdoor Curtains for a Breezy Vibe
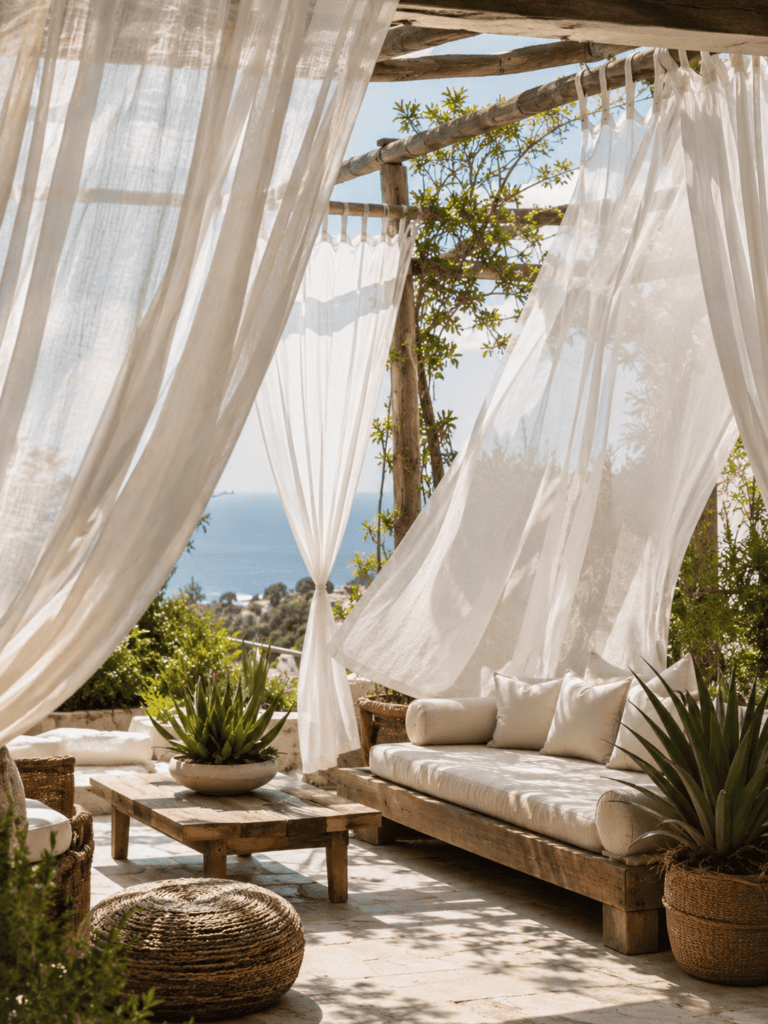
Outdoor curtains add softness and movement that hard structures can’t provide. Hang them from a pergola frame or a simple cable system, and you get shade that sways gently in the wind like something out of a beach resort.
Choose outdoor-rated fabric specifically, or you’ll end up with mildew and faded color within a single season. I learned that lesson the hard way with a set of curtains that weren’t actually meant for outdoor use.
Beyond shade, curtains give you an easy way to control privacy and light throughout the day. Tie them back in the morning to let sunlight stream through for coffee, then pull them closed in the afternoon when the heat rolls in. It’s a small ritual, but it genuinely makes the space feel more intentional.
Materials that hold up outdoors:
- Solution-dyed acrylic fabric, which resists fading better than printed cotton
- Polyester blends treated for water resistance
- Marine-grade vinyl for high-traffic or coastal areas
10. Shade Trees Planted Strategically
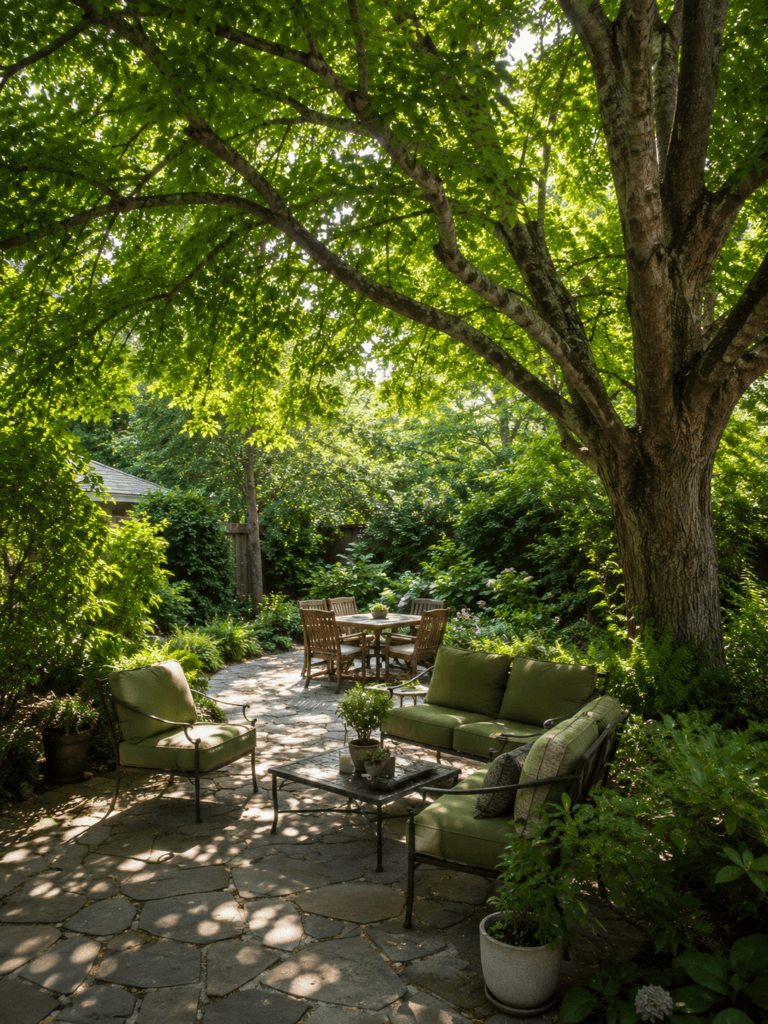
Nothing beats natural shade, and a well-placed tree does more than block sun. It cools the surrounding air, adds oxygen, and honestly just looks better with age than any manufactured structure ever will.
- Fast-growing options: hybrid poplar, willow, river birch
- Long-term investments: oak, maple, elm
- Plant on the south or west side of your patio for maximum afternoon coverage
The catch is obvious: trees take years to provide meaningful shade. If you’re patient, though, this is the most rewarding option on the entire list.
Think carefully about root systems before you plant anything close to your patio slab. Aggressive roots from certain species can crack concrete and mess with foundations over time, so ask a local nursery which trees behave well near hardscaping in your specific climate. Deciduous trees are usually the smart pick here too, since they shade you in summer and let winter sun through once the leaves drop.
If you genuinely can’t wait a decade for shade, consider planting a fast grower now while adding one of the structural options above as a stopgap. That combo gives you immediate relief plus a long-term payoff once the tree matures.
11. Corrugated Metal or Polycarbonate Roofing
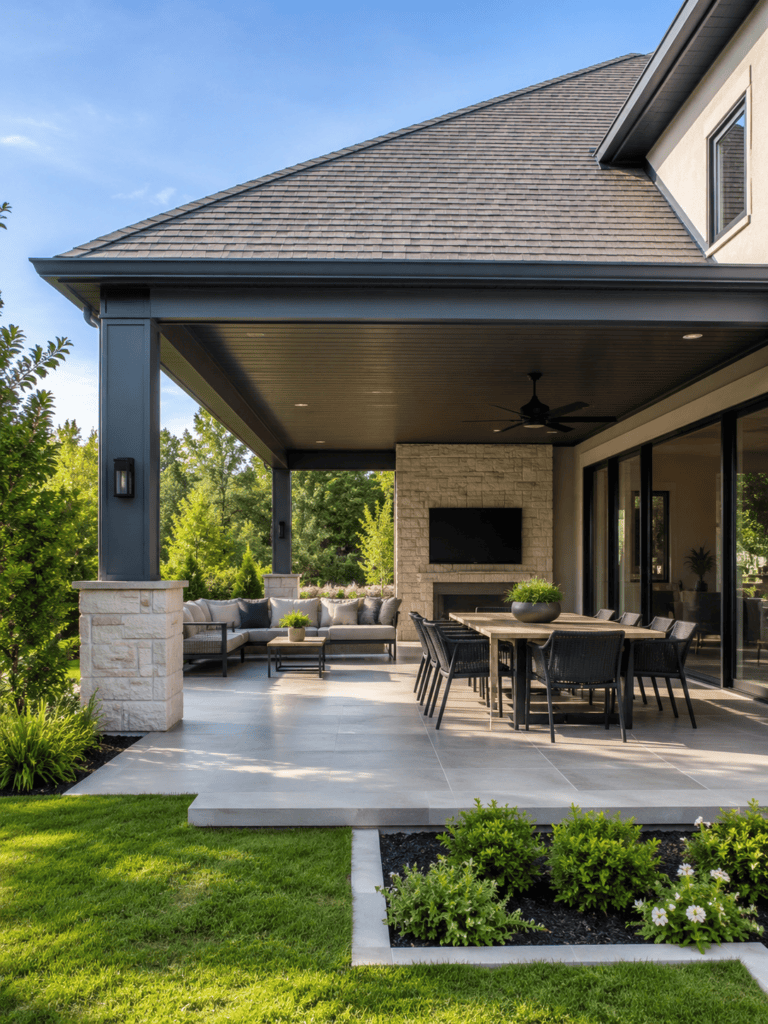
A solid roof panel over part of your patio gives you permanent, weatherproof shade that doesn’t care about wind gusts. Polycarbonate panels let some light through while still blocking harmful UV rays, which keeps the space from feeling like a cave.
I’ve seen homeowners pair this with string lights underneath, and the effect at night is honestly gorgeous. It’s a more industrial look, so it won’t suit every style of home, but it’s hard to beat for durability.
Polycarbonate panels come in several tints, and that choice actually changes the mood of your patio quite a bit. Clear or lightly tinted panels let in more natural light while still filtering UV rays, whereas bronze or opal panels create a moodier, more shaded feel underneath.
A few installation notes:
- Panels need proper overlap and sealing to prevent leaks
- Metal roofing gets loud in heavy rain, so factor that into your decision
- Both materials handle snow load better than fabric-based shade options
12. Cantilevered Roof Extensions
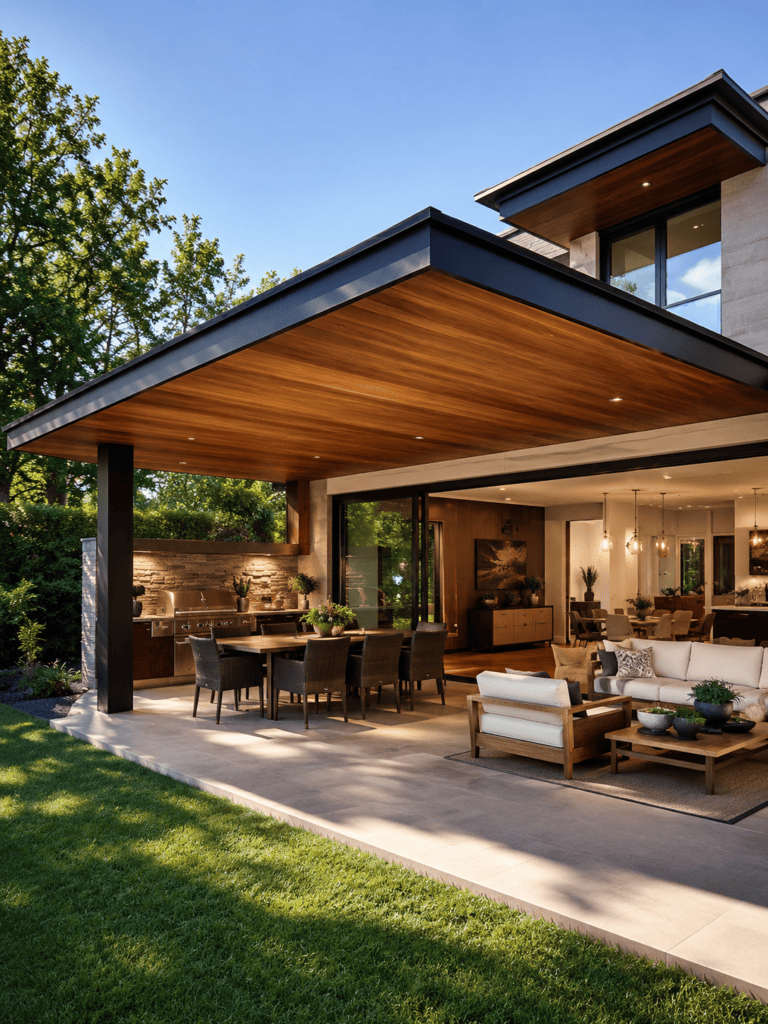
Extending your existing roofline over the patio creates a seamless transition from indoor to outdoor living. This is a bigger construction project, so it requires actual planning and probably a contractor.
Why consider it?
- Matches your home’s existing architecture
- Provides year-round protection from sun and rain
- Increases home value more than standalone shade structures
It’s not the cheapest option here, but it’s arguably the most permanent and cohesive.
You’ll need to check local permitting requirements before starting a project like this, since it typically involves tying into your home’s existing structure. A licensed contractor can help you figure out load-bearing considerations, proper flashing to prevent water damage, and how to match rooflines so the addition doesn’t look bolted on as an afterthought.
This is also the option that tends to boost resale value the most, according to several real estate renovation reports I’ve seen over the years. Buyers respond well to usable outdoor living space, especially in warmer climates where an extra covered room genuinely extends how much of the year you can enjoy the outdoors.
13. Freestanding Canopy Tents
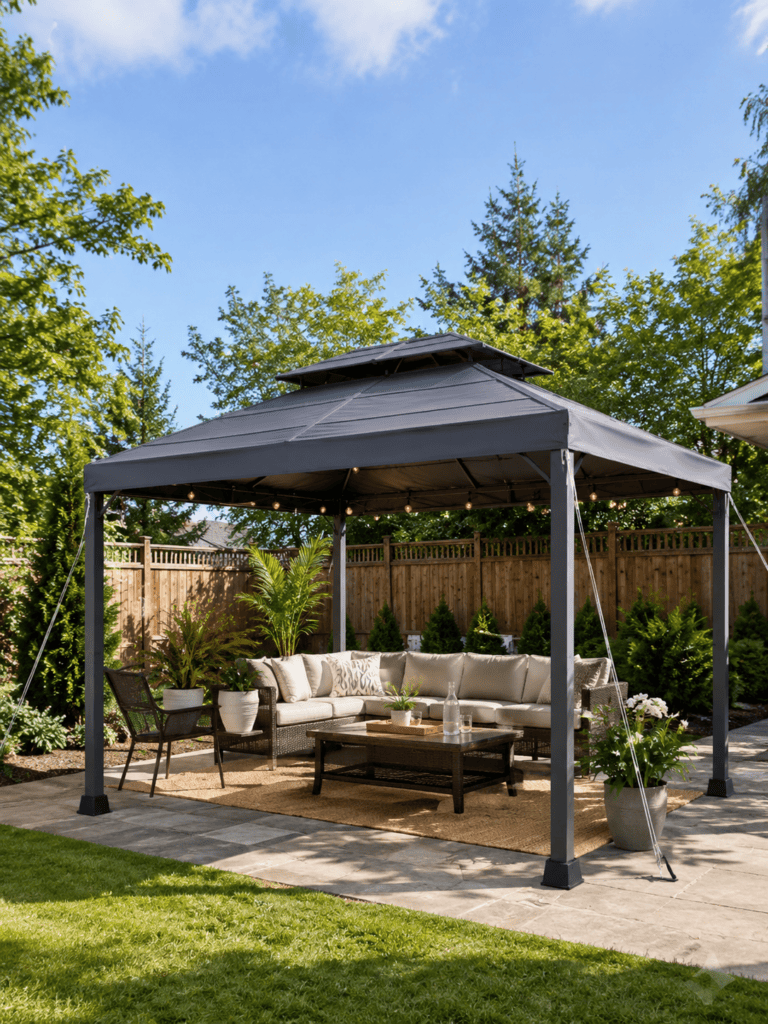
Canopy tents work great for renters or anyone who doesn’t want to commit to anything permanent. Pop one up in an afternoon, take it down before winter, and store it until next season.
I used one for two summers before upgrading to a pergola, and it served its purpose well. Just don’t expect it to survive a serious windstorm; these tents are shade solutions, not fortresses.
Look for canopy tents with powder-coated steel frames rather than cheap plastic joints, since the joints are usually the first thing to snap. Vented rooftops also help a ton, letting wind pass through instead of catching the whole canopy like a sail and sending it airborne into your neighbor’s yard.
- Stake down corners even on calm days; weather changes fast
- Choose a canopy with UV-treated fabric to prevent quick fading
- Consider sidewalls if you want extra protection from rain or wind
14. Shade Cloth Panels on a Simple Frame
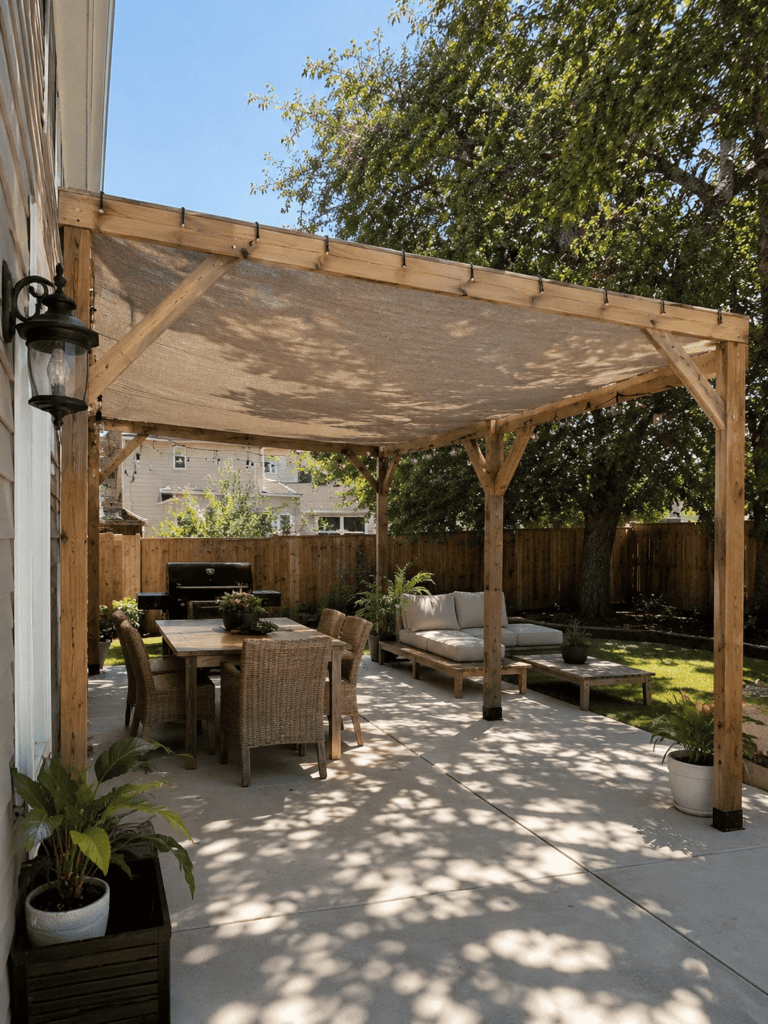
Shade cloth is the unsung hero of budget-friendly patio cooling. It blocks a specific percentage of UV rays depending on the weave, so you can choose exactly how much sun filters through.
- 30–50% shade cloth: good for partial sun areas
- 70–90% shade cloth: ideal for intense, direct afternoon sun
- Attach to a simple wood or metal frame for an easy DIY project
This is the option I’d recommend to anyone on a tight budget who still wants noticeable results.
Building the frame yourself takes a weekend at most, and you don’t need advanced tools. A few pressure-treated 4×4 posts, some crossbeams, and grommeted shade cloth attached with zip ties or bungee cords will get you a functional shade structure for well under a hundred dollars in most cases.
If DIY isn’t your thing, plenty of pre-made shade cloth kits exist that skip the building step entirely. You just anchor the frame into the ground and stretch the fabric across, which makes this one of the fastest options on the entire list to get up and running.
15. Combining Multiple Shade Elements
Here’s a secret nobody tells you upfront: the best patios rarely rely on just one shade solution. Combine a pergola with climbing vines, add outdoor curtains for evening privacy, and toss in a market umbrella for your dining table.
I’ve found that layering different elements creates depth and lets you adjust for different times of day. My personal setup uses a shade sail over the main seating area and a market umbrella near the grill, and it’s covered every scenario I’ve thrown at it so far 🙂
Think of your patio in zones rather than one single space that needs one single solution. A dining zone might benefit from a fixed umbrella, a lounge zone might call for a pergola with vines, and a fire pit zone might just need a shade sail angled to block late-afternoon glare. Treating each area individually almost always produces better results than trying to force one shade structure to do everything.
A quick checklist before you commit to any combination:
- Map out sun direction and movement across your patio during peak hours
- Identify which zones get used most and prioritize shade there first
- Mix at least one permanent structure with one flexible, seasonal option
This layered approach is exactly how professional landscape designers handle large outdoor spaces, and there’s no reason a backyard DIYer can’t apply the same logic on a smaller scale.
Wrapping It Up
You’ve got fifteen solid patio shade ideas now, ranging from a five-dollar bamboo roll-up shade to a full architectural roof extension. Pick based on your budget, your climate, and how permanent you actually want the solution to be.
My honest advice? Start small. Grab a market umbrella or a shade cloth panel, see how you use the space differently, and then decide if it’s worth investing in something bigger like a pergola or louvered roof.