
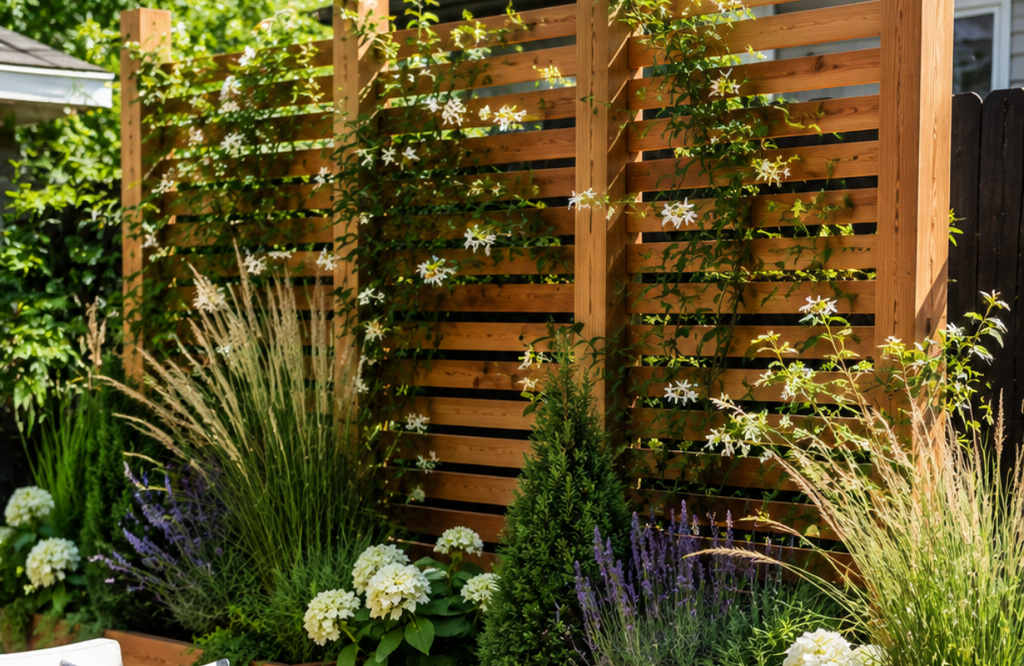
If you’ve ever sat outside with your morning coffee only to make awkward eye contact with your neighbor, you already know how much privacy affects whether you actually enjoy your outdoor space.
The frustrating part is that most privacy solutions aren’t exactly attractive. Solid fences can make a small yard feel boxed in, outdoor curtains need constant maintenance, and ready-made privacy screens often cost far more than they should.
That’s why a DIY Outdoor Privacy Screen With Planter Boxes has become one of my favorite backyard projects. It solves two problems at once. You get privacy where you need it, and you create a beautiful place to display flowers, ornamental grasses, herbs, or climbing plants.
Here’s the thing: the planter boxes aren’t just decorative. They also make the entire structure sturdier and more intentional, so it looks like custom landscaping instead of something you threw together on a Saturday afternoon.
Whether you’re trying to hide an unattractive fence, block a neighbor’s view, or create a cozy patio corner, this project is practical, customizable, and surprisingly beginner-friendly.
Why Planter Box Privacy Screens Work So Well
Most people think privacy is simply about blocking a view.
What actually works is creating layers.
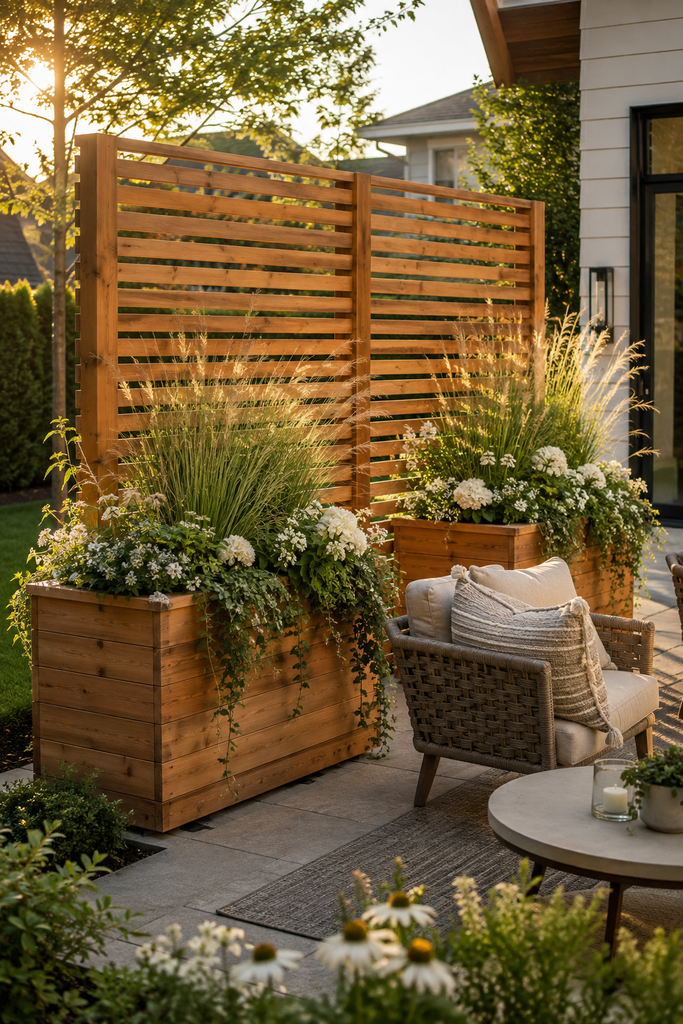
Instead of building one giant wall, you’re combining wood, plants, shadows, and varying heights to create visual separation. Your brain naturally focuses on the greenery rather than what’s happening beyond it.
That makes the space feel softer and much more inviting.
A DIY outdoor privacy screen with planter boxes also gives you flexibility.
You can:
- Move it if it’s freestanding.
- Paint or stain it any color.
- Change the plants every season.
- Expand by adding more sections later.
Unlike permanent fencing, you’re not locked into one design forever.
Plan Before You Build
Decide What You’re Actually Trying to Hide
This sounds obvious, but it’s where many DIY projects go wrong.
Walk around your yard and identify the exact sightline that’s bothering you.
Maybe it’s:
- Your neighbor’s second-story window
- An air conditioning unit
- Trash bins
- A chain-link fence
- A busy road
- A neighboring patio
You probably don’t need to screen off your entire backyard.
Blocking one or two key viewing angles often makes the biggest difference while saving both money and effort.
Measure From the Seating Area
Most people measure while standing.
But when you’re relaxing outside, you’re sitting.
Grab a patio chair and sit where you’ll actually spend time.
Notice what you can see from that position.
That’s the height your privacy screen should address.
For many patios, a screen between 5½ and 6½ feet tall creates privacy without feeling overwhelming.
Choosing the Right Design
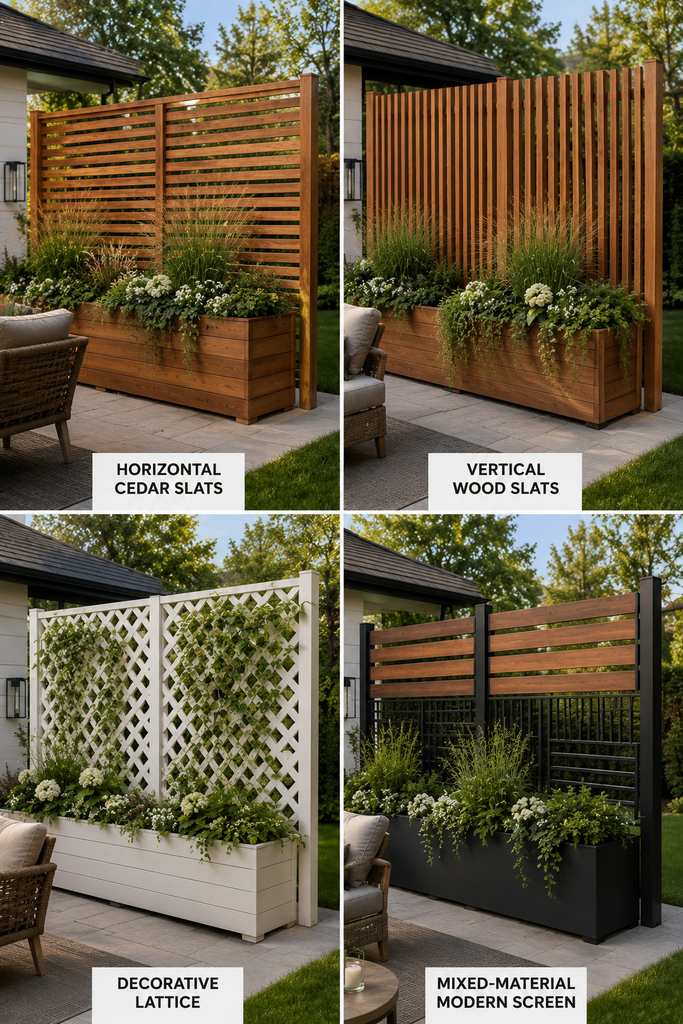
Horizontal Slats
Horizontal slats have become incredibly popular for good reason.
They feel modern, allow airflow, and look lighter than solid panels.
Spacing each board about ½ to 1 inch apart creates privacy while still letting breezes pass through.
This also reduces wind resistance during storms.
Vertical Slats
Vertical designs feel slightly more traditional.
They’re also easier for beginners because fewer precise measurements are required.
If your house has vertical siding, this style often complements it nicely.
Lattice Panels
Lattice is perfect if you want climbing plants to become part of the screen.
Jasmine, clematis, star jasmine, climbing roses, or even flowering vines can gradually transform a basic wooden structure into a living wall.
Just remember that climbing plants need time to mature.
The screen provides immediate privacy while the plants fill in over the next couple of seasons.
Mixed Material Designs
One of my favorite approaches combines:
- Cedar frame
- Black metal accents
- Horizontal wood slats
- Large cedar planter boxes
The contrast looks expensive without actually costing a fortune.
Materials That Hold Up Outdoors
Cedar Is Worth the Extra Cost
If your budget allows it, cedar is difficult to beat.
It naturally resists:
- Rot
- Moisture
- Insects
- Warping
It also ages beautifully even if you leave it unfinished.
Pressure-treated lumber is another option, especially for hidden structural pieces, but many people prefer cedar where the wood remains visible.
Don’t Forget Exterior Hardware
Indoor screws rust surprisingly fast outdoors.
Use:
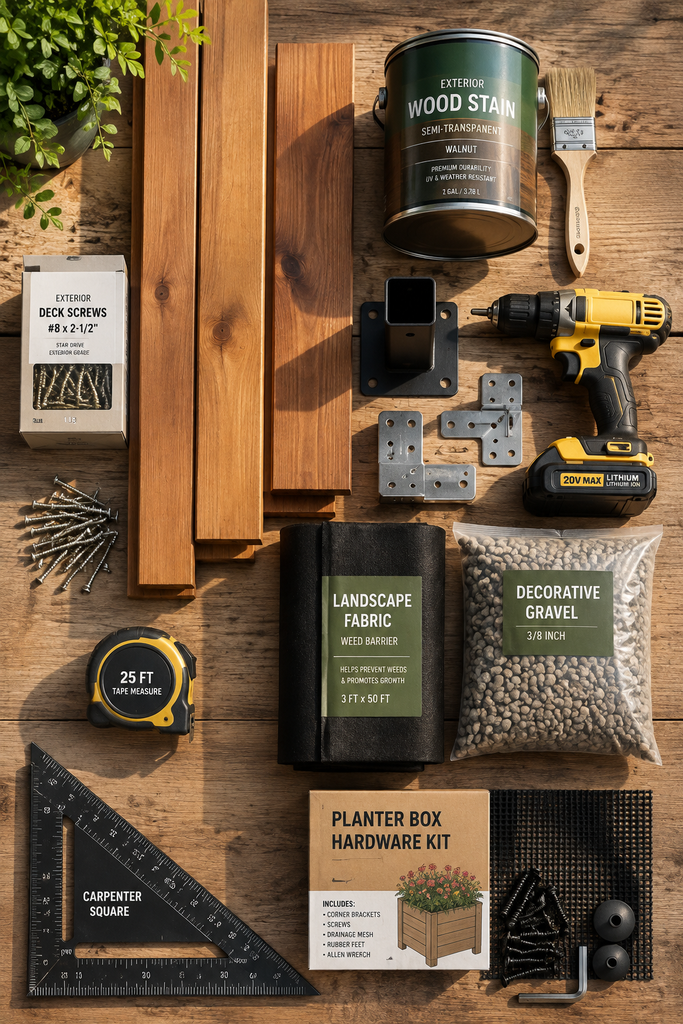
- Exterior-rated deck screws
- Galvanized brackets
- Stainless steel hardware
- Outdoor wood glue
These small upgrades prevent headaches later.
Add Drainage to Every Planter
This is probably the most overlooked part of the project.
Without drainage, planter boxes collect water after rain.
That creates:
- Root rot
- Heavy water weight
- Wood deterioration
- Mold
Drill several drainage holes in the bottom.
Then add:
- Landscape fabric
- Gravel layer
- Potting mix
The fabric prevents soil from washing out while still allowing excess water to escape.
How to Build a DIY Outdoor Privacy Screen With Planter Boxes
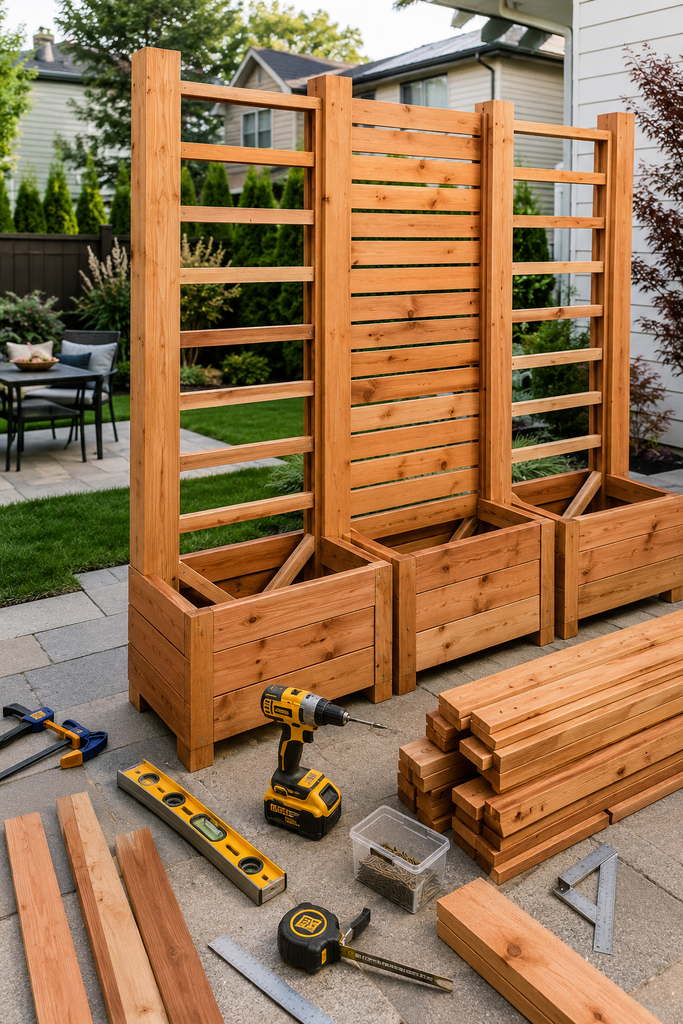
Step 1: Build the Planter Boxes
Think of the planter boxes as the foundation.
Use sturdy lumber to create rectangular boxes wide enough to support the screen above.
A common size is around:
- 48 inches long
- 18 inches wide
- 18–24 inches deep
Deeper boxes are more stable and hold healthier root systems.
Step 2: Reinforce the Interior
Here’s something many tutorials skip.
The posts supporting your privacy screen shouldn’t simply screw into thin planter walls.
Instead, anchor the posts inside the planter using structural framing.
This spreads the weight throughout the box rather than concentrating it in one weak point.
The result is a much stronger structure that won’t wobble.
Step 3: Install Vertical Posts
Check every post with a level before securing it.
Even a small lean becomes much more noticeable once horizontal slats are attached.
Take your time here.
Everything else depends on perfectly aligned posts.
Step 4: Attach the Privacy Panel
Now install your chosen design.
Whether you’re using:
- Horizontal slats
- Vertical boards
- Decorative panels
- Lattice
Maintain consistent spacing throughout.
A simple spacer block speeds up the process and keeps every gap identical.
Those evenly spaced lines make the finished project look professionally built.
Step 5: Finish the Wood
Don’t skip protection.
Even cedar benefits from a quality exterior stain or penetrating oil.
This helps reduce:
- UV fading
- Surface cracking
- Moisture absorption
Natural cedar tones look timeless, while black stain creates a modern backyard aesthetic.
Step 6: Fill the Planters
Now comes the fun part.
Choose plants based on your climate, sunlight, and maintenance preferences rather than simply buying whatever looks nice at the garden center.
Healthy plants always outperform trendy ones.
The Best Plants for Privacy Screens
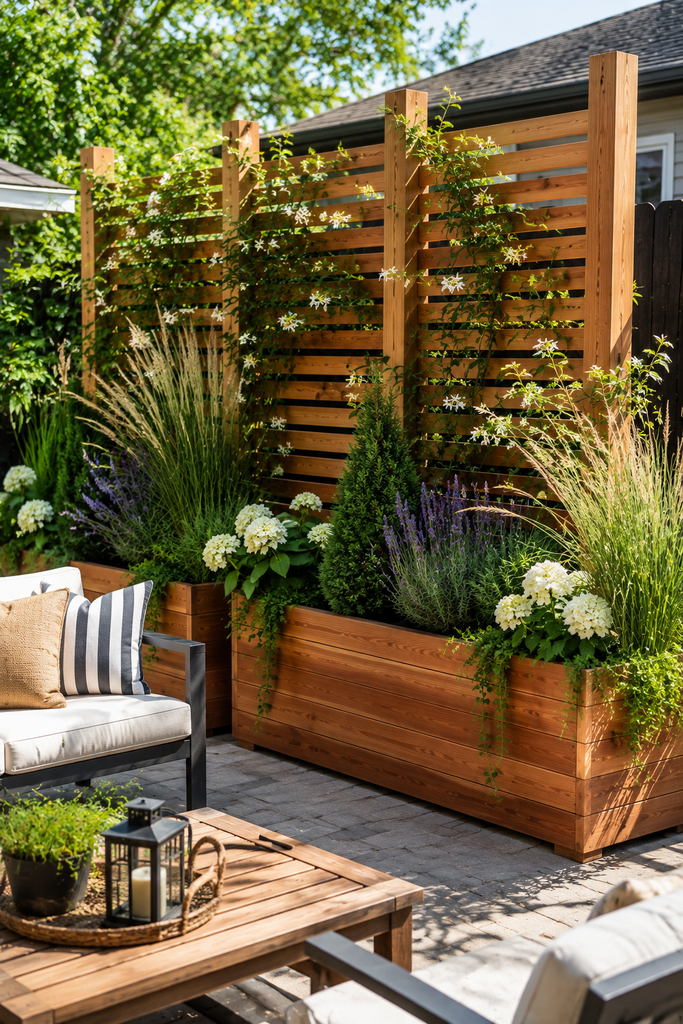
Ornamental Grasses
If you want quick height, ornamental grasses are hard to beat.
Great choices include:
- Feather reed grass
- Fountain grass
- Switchgrass
They sway beautifully in the wind and soften the wooden structure.
Evergreen Shrubs
Need year-round privacy?
Evergreens keep their foliage through winter.
Options include:
- Boxwood
- Dwarf arborvitae
- Japanese holly
These create a more permanent living screen.
Flowering Plants
If privacy isn’t your only goal, flowers add incredible curb appeal.
Consider:
- Hydrangeas
- Lavender
- Salvia
- Coneflowers
- Black-eyed Susans
Mixing bloom times keeps color going for months.
Climbing Vines
Vines eventually turn a wooden screen into living architecture.
Popular choices include:
- Clematis
- Star jasmine
- Climbing roses
- Trumpet honeysuckle
Just give them proper support from day one.
Common DIY Mistakes to Avoid
Building a Screen That’s Too Tall
Bigger isn’t always better.
An overly tall screen catches more wind and requires significantly stronger framing.
Most patios don’t actually need eight-foot walls.
Six feet is often enough.
Ignoring Wind Load
Here’s the thing.
A privacy screen acts like a sail during storms.
Solid panels catch enormous amounts of wind.
Leaving small gaps between slats dramatically reduces pressure while still maintaining privacy.
Using Shallow Planter Boxes
Tiny planter boxes dry out quickly.
They also don’t provide enough weight to stabilize the structure.
Larger boxes improve both plant health and structural safety.
Forgetting Irrigation
If you travel often or simply forget to water, your beautiful screen can become a row of dying plants.
A simple drip irrigation kit saves time and keeps moisture levels consistent.
The difference in plant health is noticeable.
Ways to Make It Look More Custom
Add Built-In Lighting
Solar cap lights or warm LED strip lighting instantly elevate the project.
Soft evening lighting highlights the wood texture while making the patio usable after sunset.
Paint Everything One Color
Many homeowners leave the planter one color and stain the screen another.
Sometimes it works.
Often it just looks mismatched.
Using one consistent finish creates a built-in appearance.
Repeat Materials Throughout the Yard
What actually works is repeating design elements.
If your screen uses black hardware, consider black planters elsewhere.
If your screen is cedar, echo that wood tone in outdoor furniture or raised garden beds.
Repeating materials ties the whole landscape together.
How Much Does It Cost?
The final cost depends on materials and size, but a typical DIY outdoor privacy screen with planter boxes often falls into these ranges:
- Budget build using pressure-treated lumber: $150–250
- Mid-range cedar project: $300–500
- Premium build with decorative panels and lighting: $600–900+
Compared to installing new fencing, it’s often a much more affordable upgrade while adding visual interest.
Plus, because it’s a DIY project, you can build one section now and expand later if your budget allows.
Conclusion
A DIY Outdoor Privacy Screen With Planter Boxes isn’t just about hiding what’s on the other side of your yard. It’s about making your outdoor space feel more comfortable, intentional, and enjoyable. The combination of natural wood, healthy plants, and smart design creates privacy without making your backyard feel closed off.
If you’re planning this project, don’t rush the foundation. Build sturdy planter boxes, use quality outdoor materials, and choose plants that match your climate rather than chasing whatever is trending online. Those decisions will make a much bigger difference than fancy decorative details.