
So you finally decided your backyard needs more than a sad, struggling tomato plant in a pot. Good call. Raised garden beds fixed more of my gardening headaches than any fancy tool I ever bought, and I’ve bought a lot of unnecessary tools. Give me a few minutes and I’ll walk you through fifteen ideas that’ll turn your yard into something you actually want to show off.
I built my first raised bed out of scrap lumber and pure stubbornness. It looked rough, but it worked, and that’s when I got hooked. Since then I’ve tried nearly every material, layout, and size combo you can imagine, so consider this your shortcut past all my trial and error.
Raised beds solve problems that in-ground gardening just can’t fix. Bad soil? Doesn’t matter, you’re filling the bed with good stuff from day one. Backaches from bending over? A taller bed handles that too. Let’s get into the ideas, and I’ll flag what actually worked for me versus what looked good in a catalog but fell apart by August.
1. Classic Wooden Raised Beds
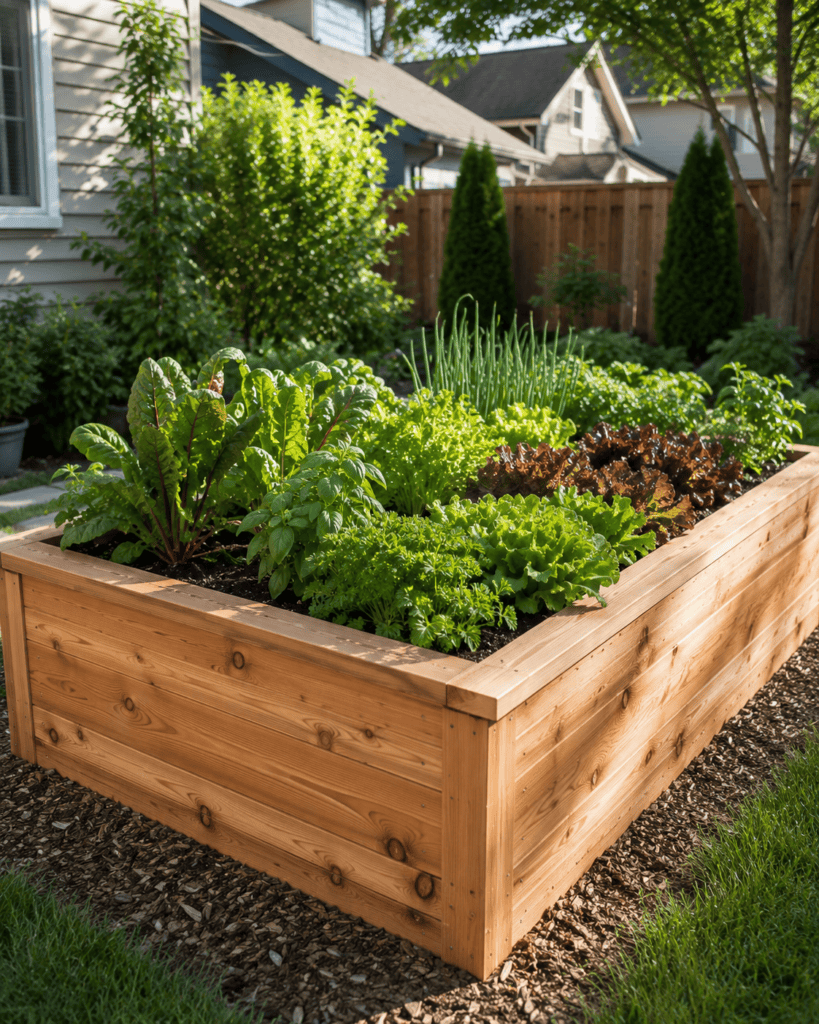
You can’t go wrong starting with the tried-and-true wooden raised bed. It’s affordable, easy to build, and forgiving if your carpentry skills are more “enthusiastic” than “precise.”
Cedar and redwood resist rot naturally, so they’ll last years without chemical treatment. Pine works too, but it breaks down faster—IMO it’s fine if you’re on a budget and don’t mind rebuilding in a few seasons.
- Cedar: Long-lasting, naturally pest-resistant, pricier
- Redwood: Similar durability to cedar, slightly less common
- Pine: Cheapest option, needs replacing sooner
Ever wondered why so many gardening blogs default to wood? It’s because it just works, and it looks good doing it. I’ve rebuilt my pine bed twice now, and honestly, I don’t regret the money I saved by not springing for cedar right away.
How Thick Should the Boards Be?
Go with at least 2-inch thick boards if you want the frame to hold its shape under the weight of wet soil. Thinner boards bow outward over time, and nobody wants a leaning garden bed that looks like it’s had a rough week.
2. Galvanized Steel Beds
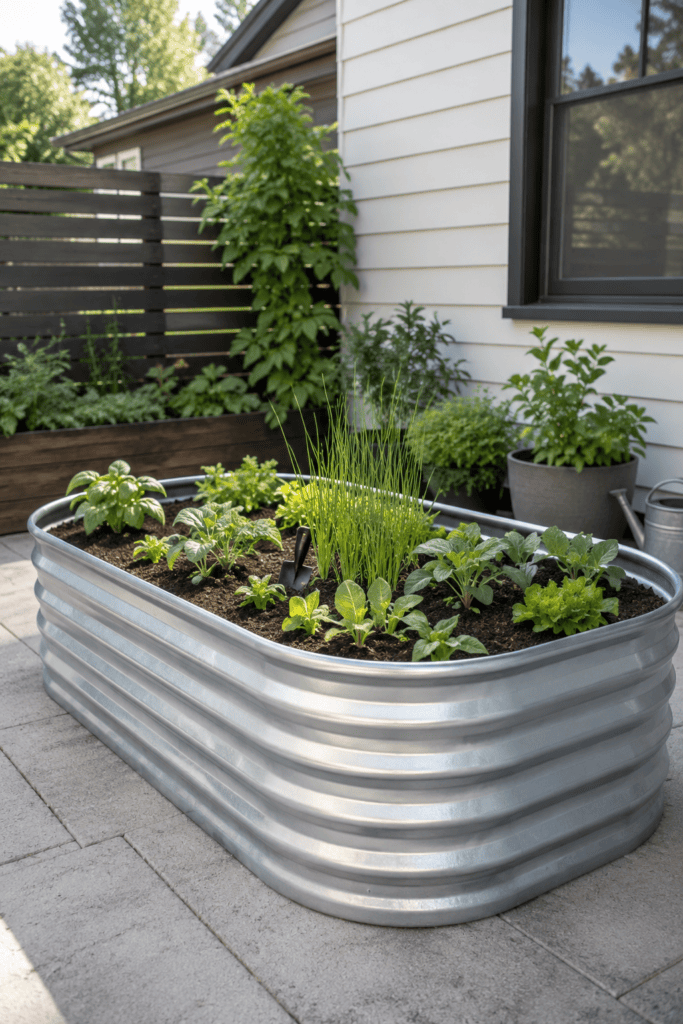
Steel beds bring a modern, clean look that wood simply can’t match. I added one to my side yard last spring, and the sleek silver panels instantly made the whole space feel more intentional.
They heat up faster in direct sun, so plants get an earlier start in spring. On the flip side, that same heat retention can stress out roots during a brutal summer, so line the interior with landscape fabric if you’re in a hot climate.
Steel beds also last decades without warping or rotting. You’ll pay more upfront, but you won’t be replacing boards every few years like you might with a cheap pine setup.
Rust: Should You Worry?
Most galvanized panels come with a zinc coating that resists rust for 20-plus years. Scratches can expose bare metal underneath, so handle the panels carefully during assembly and touch up any nicks with a bit of cold galvanizing spray if you’re picky about longevity.
3. Concrete Block Raised Beds
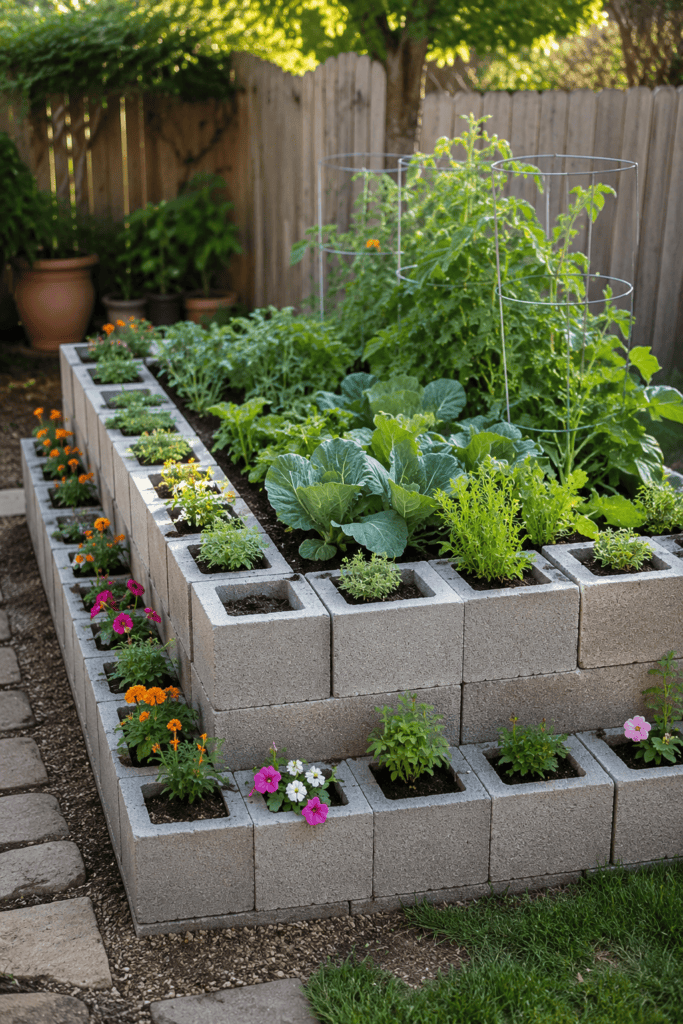
Concrete blocks (aka cinder blocks) make a sturdy, no-nonsense raised bed that basically refuses to fall apart. Stack them, fill the centers with soil, and you’ve got built-in planting pockets for herbs or flowers along the border.
I’ll be honest: they’re not the prettiest option out there. But if durability and low cost are your top priorities, concrete blocks deliver without complaint.
- Extremely durable and weather-resistant
- Budget-friendly compared to steel or composite
- Doubles as extra planting space in the block holes
One thing worth mentioning: concrete can leach lime into the soil over time, which nudges the pH upward. If you’re growing acid-loving plants like blueberries, keep an eye on your soil test results and amend as needed.
4. Cedar and Metal Hybrid Beds
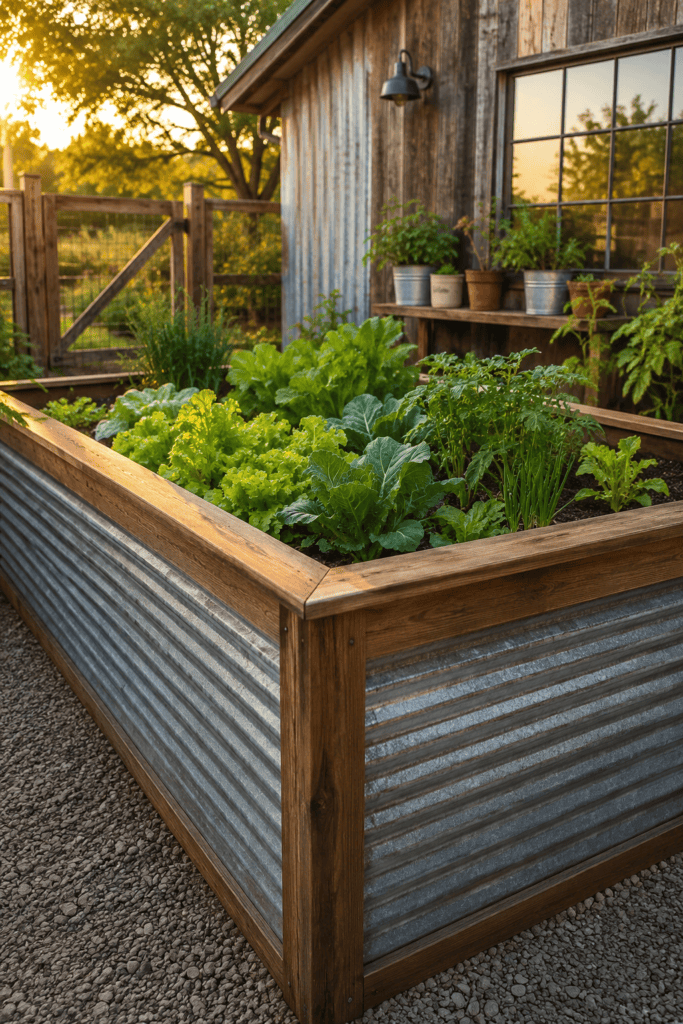
Why choose between rustic charm and industrial durability when you can have both? Hybrid beds pair cedar corners or trim with galvanized steel panel sides, giving you the best of both materials.
This combo shows up a lot in higher-end garden catalogs, and honestly, I get why. The wood softens the look while the metal keeps things sturdy and low-maintenance.
The corner posts also give you a built-in mounting point for a trellis or shade cloth later, which is a nice bonus you don’t get with a pure steel bed. It’s a bit pricier than going with one material alone, but the visual payoff is real.
5. Composite Lumber Beds
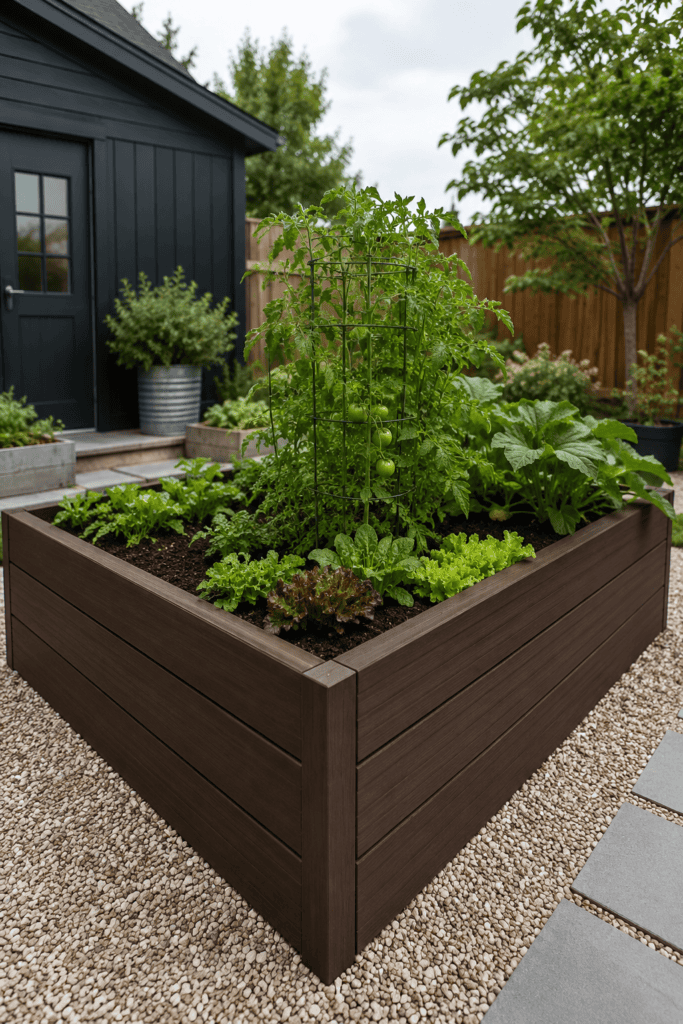
If you like the concrete block idea but want something that looks a bit more finished, composite lumber beds are worth a look. Made from recycled plastic and wood fibers, they won’t rot, splinter, or attract termites.
They cost more than plain pine, sure, but you’ll never repaint or reseal them. That’s a trade I’m happy to make every single time.
- Resists moisture damage completely
- Comes in multiple colors, unlike raw wood
- Heavier than lumber, so it’s harder to move once assembled
Composite boards also don’t leach any chemicals into the soil, unlike some older pressure-treated lumber. That’s worth considering if you’re growing anything you plan on eating.
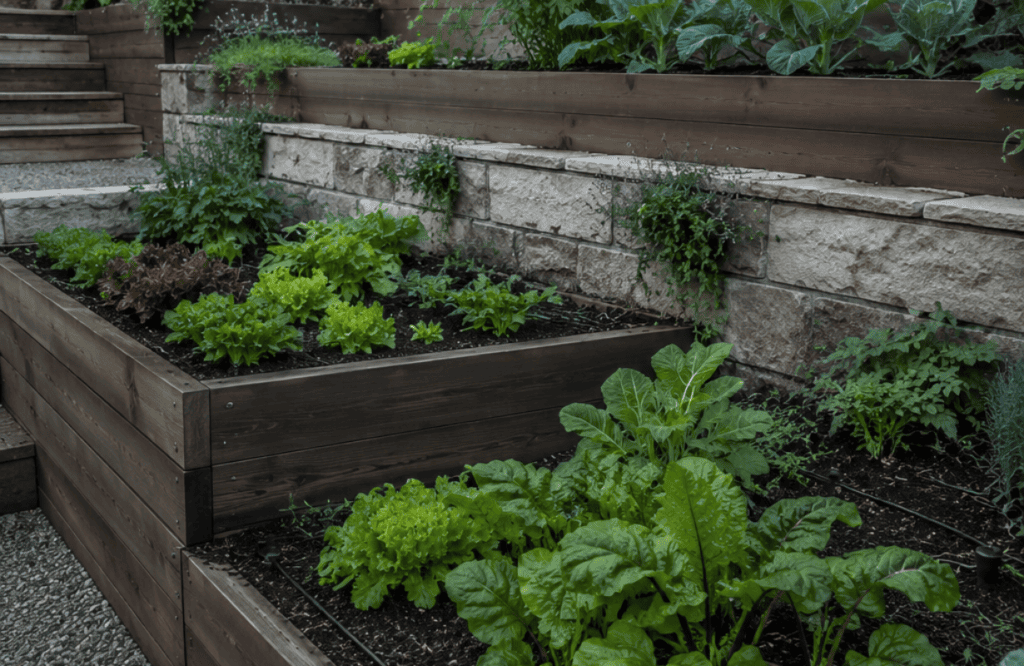
6. Tiered Raised Beds for Sloped Yards
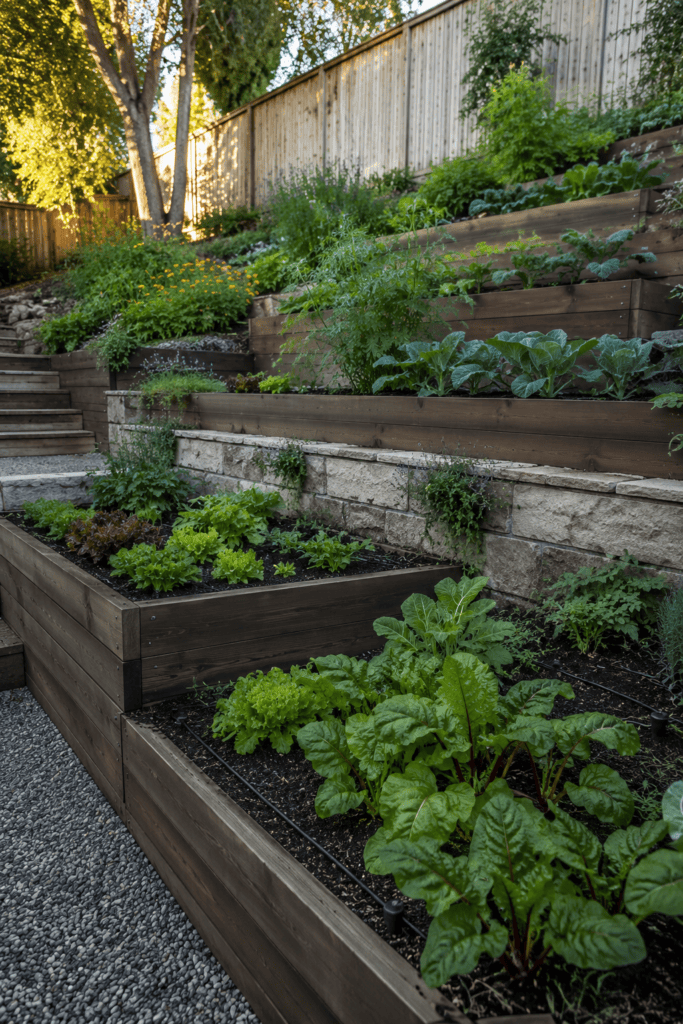
Got a slope in your yard that’s made gardening feel impossible? A tiered raised bed system turns that awkward incline into a genuine asset instead of a liability.
Each tier acts like its own mini garden, stepping down the hill and creating natural drainage between levels. It’s honestly one of the smartest solutions I’ve seen for yards that would otherwise go to waste.
- Prevents soil erosion on slopes
- Creates visual interest with multiple levels
- Improves drainage naturally between tiers
Building tiers does take more planning than a single flat bed. You’ll want to level each section individually and reinforce the retaining walls between tiers, or you’ll end up with soil sliding downhill after the first heavy rain.
7. Keyhole Garden Beds
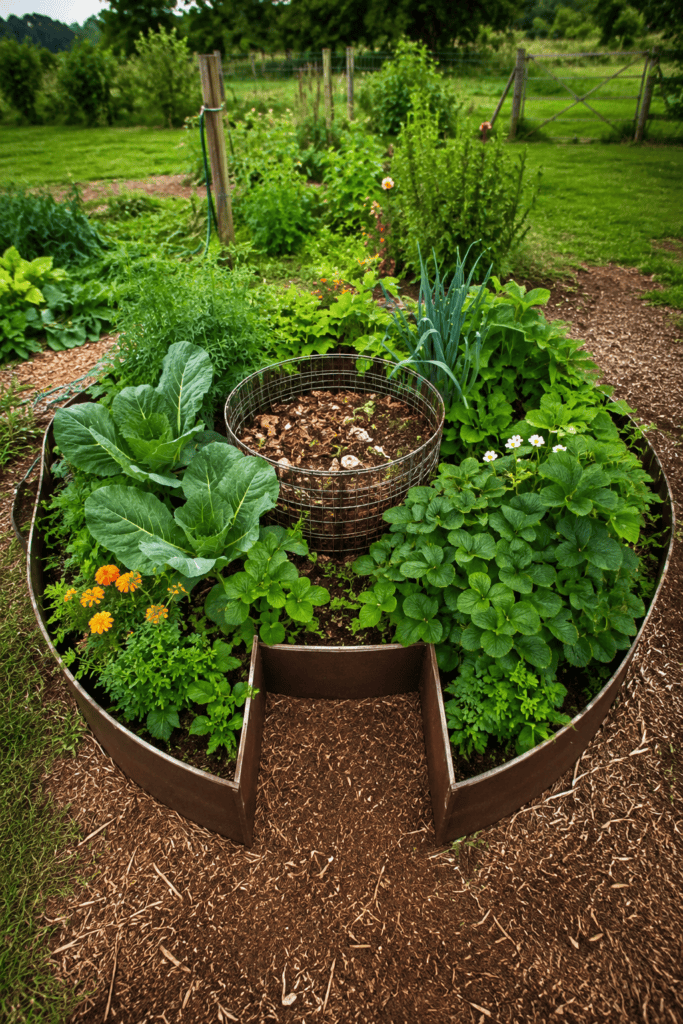
Keyhole beds originated in African permaculture design, and they’re brilliant for efficiency. The circular shape includes a small notch (the “keyhole”) that lets you walk to a central composting basket without stepping on your plants.
Nutrients from the compost slowly filter out into the surrounding soil, feeding your plants automatically. It’s basically a self-sustaining ecosystem in your backyard, and yes, that’s as cool as it sounds.
Building the Compost Basket
Use a cylinder of wire mesh in the center, filled with kitchen scraps, yard waste, and the occasional handful of soil to keep things balanced. Water poured directly into the basket carries nutrients outward with every watering session, which cuts down on how often you need to fertilize separately.
8. Vertical Raised Beds
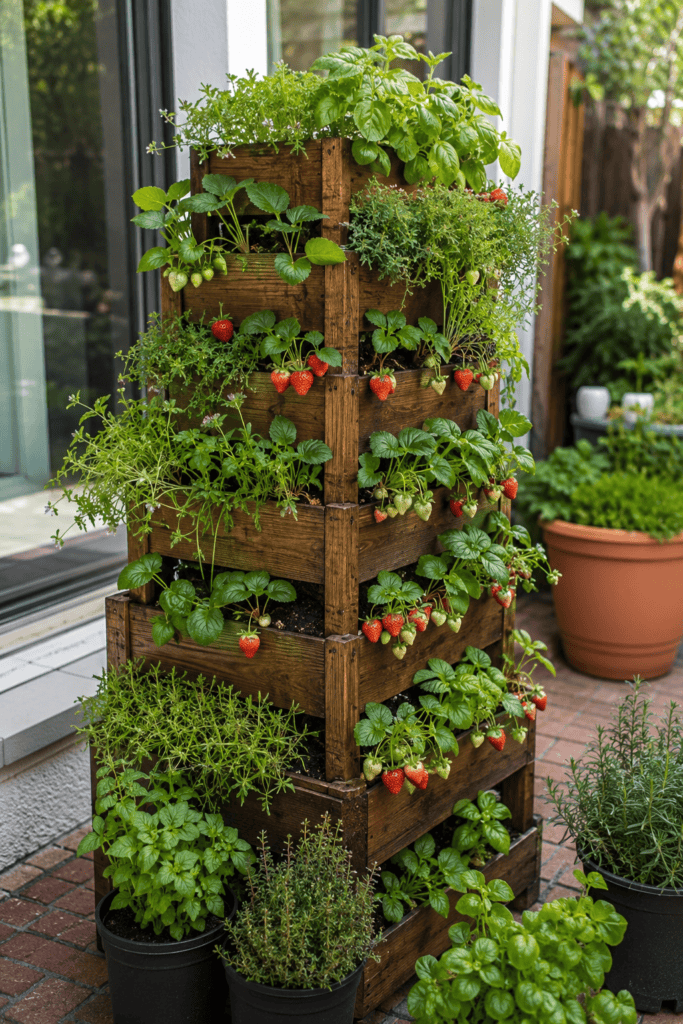
Short on space? Vertical raised beds stack growing space upward instead of spreading it outward. They’re perfect for small patios, balconies, or anyone dealing with limited square footage.
I tried one for strawberries and herbs, and honestly, the harvest surprised me given how little floor space it used. Just make sure whatever structure you choose can handle the weight of wet soil—trust me on this one.
- Great for herbs, strawberries, and lettuce
- Frees up ground space for larger vegetables
- Requires more frequent watering since soil dries faster
The faster drying soil is the real trade-off here. I water my vertical bed almost daily during summer, versus every other day for my ground-level beds, so factor that extra effort in before committing.
9. Raised Beds with Built-In Trellises
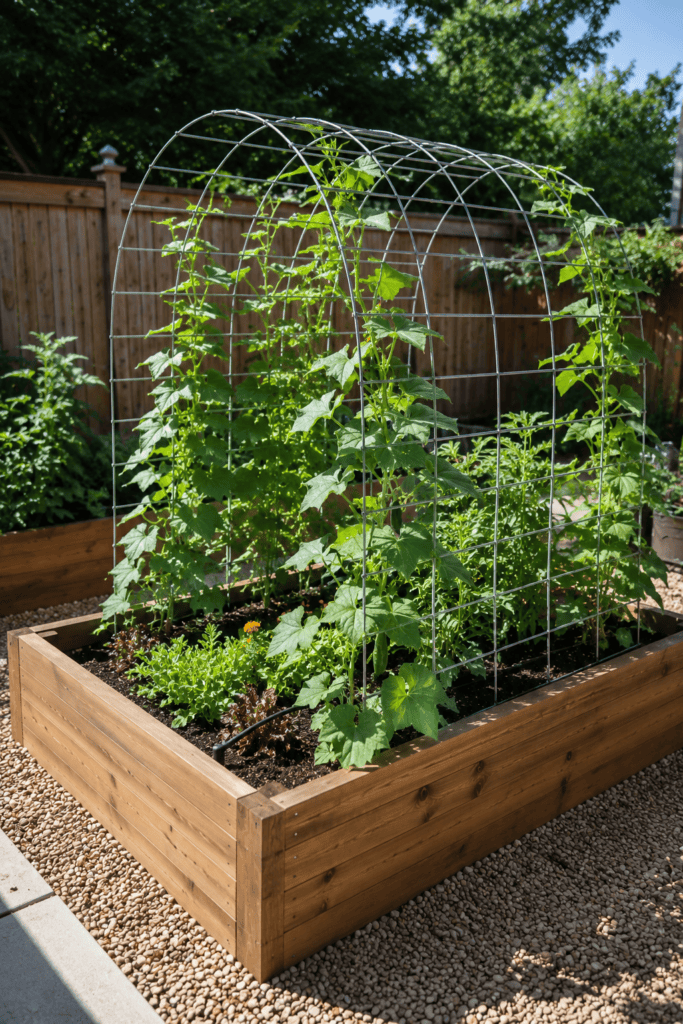
Growing climbing plants like beans, cucumbers, or peas? Attach a trellis directly to your raised bed frame and save yourself a ton of hassle later.
This setup keeps vines organized, improves airflow around the plants, and makes harvesting way easier since everything grows up instead of sprawling across the ground. It’s a small addition that pays off constantly throughout the season.
Materials for DIY Trellises
- Cattle panel arches
- Wooden lattice
- Wire mesh fencing
Cattle panels are my personal favorite. They’re rigid enough to hold heavy squash vines without sagging, and bending one into an arch between two beds creates a shaded walkway that doubles as a photo-worthy garden feature.
10. Raised Beds with Hoop House Covers
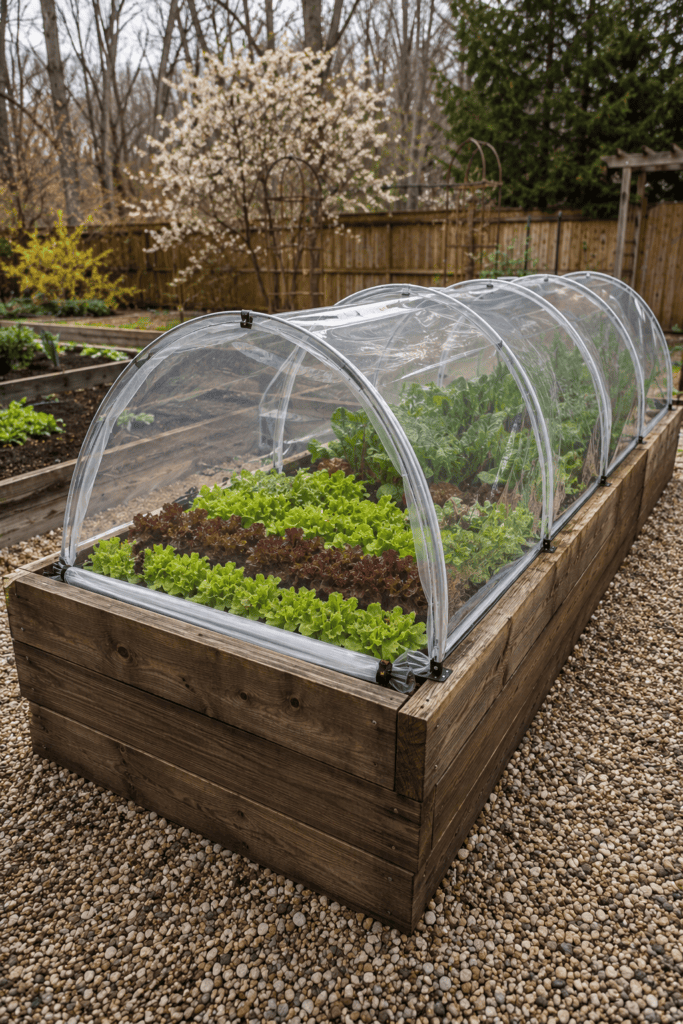
Adding hoop supports over your raised bed lets you stretch the growing season well past what nature intended. Cover the hoops with plastic sheeting in early spring or late fall, and you’ve basically built yourself a mini greenhouse.
I extended my lettuce season by nearly a month using this trick, and honestly, it felt like cheating 🙂 It’s an easy upgrade if you already own a raised bed and want more flexibility with timing.
Swap the plastic sheeting for insect netting during peak summer, and the same hoops protect your plants from pests instead of frost. One structure, two completely different jobs depending on the season.
11. Modular Raised Bed Kits
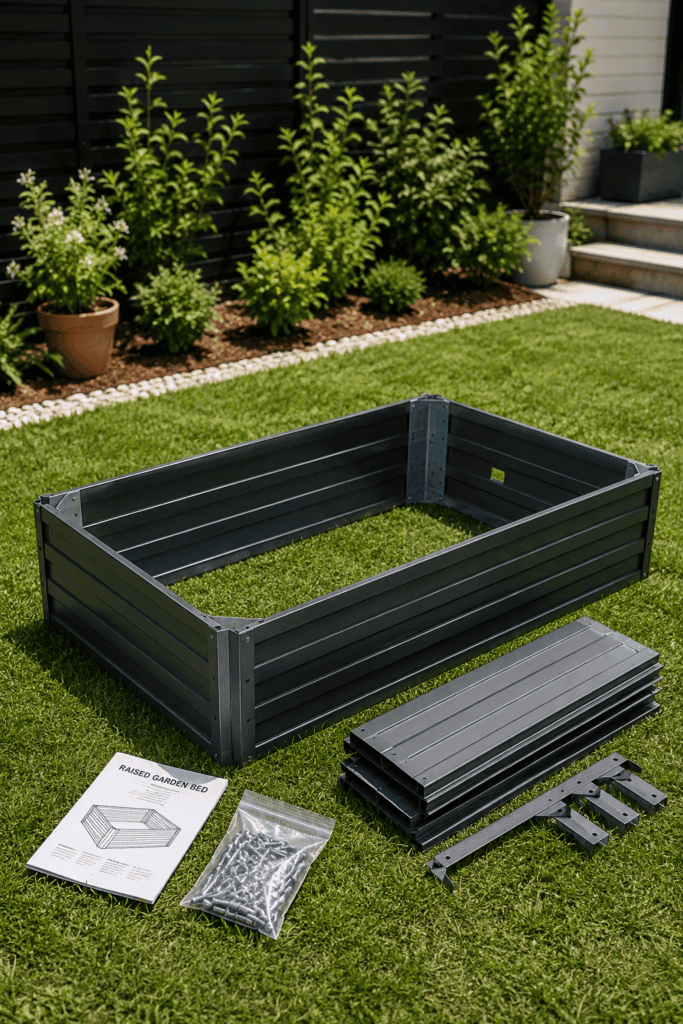
Not everyone wants to build from scratch, and that’s fine. Modular kits snap or bolt together in minutes, and most come with pre-cut, pre-drilled panels that make assembly nearly foolproof.
They’re a great option if you’re renting or planning to move soon since you can disassemble and relocate them without much trouble. Compare a few brands before buying though—quality varies a lot more than the marketing photos suggest.
- Fast assembly, usually under an hour
- Portable if you rent or move often
- Panel quality ranges widely between brands
Read reviews before buying a kit, not just the product description. I learned that lesson after one kit’s “premium steel” turned out to be thinner than a soda can.
12. Corrugated Metal Beds with Wood Trim
This style leans into an industrial-farmhouse aesthetic that’s popped up everywhere lately. Corrugated panels form the walls while a wooden cap along the top edge adds a finished look and doubles as a spot to rest your coffee mug while you weed.
- Rust-resistant coating extends lifespan significantly
- Wood cap prevents splinters when reaching in
- Pairs well with both modern and rustic yard designs
The wood cap needs occasional resealing since it’s more exposed to weather than trim tucked under a roofline. A quick coat of exterior sealant once a year keeps it looking sharp and prevents water from soaking into the end grain.
13. Raised Beds Built from Repurposed Materials
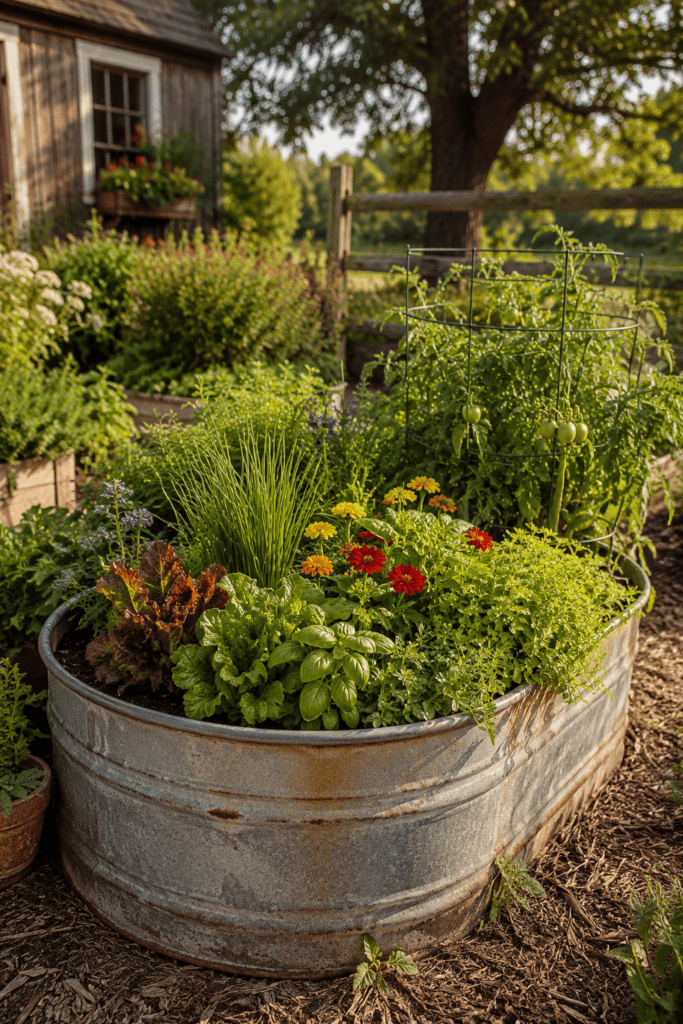
Old dresser drawers, wine crates, even discarded bathtubs—if it holds soil, someone’s turned it into a raised bed. I once used an old stock tank, and it’s held up better than some “proper” beds I’ve built since.
This route saves money and keeps usable materials out of landfills. Just drill drainage holes if the container doesn’t already have any, or you’ll end up with a swamp instead of a garden.
- Costs next to nothing if you already own the material
- Adds character and a story to your garden
- May need extra prep work like sanding or drainage holes
Check for old paint or coatings before repurposing anything, especially metal containers. Lead-based paint on vintage items is a real concern, and you don’t want that leaching into soil you’re growing food in.
14. Raised Beds with Integrated Seating
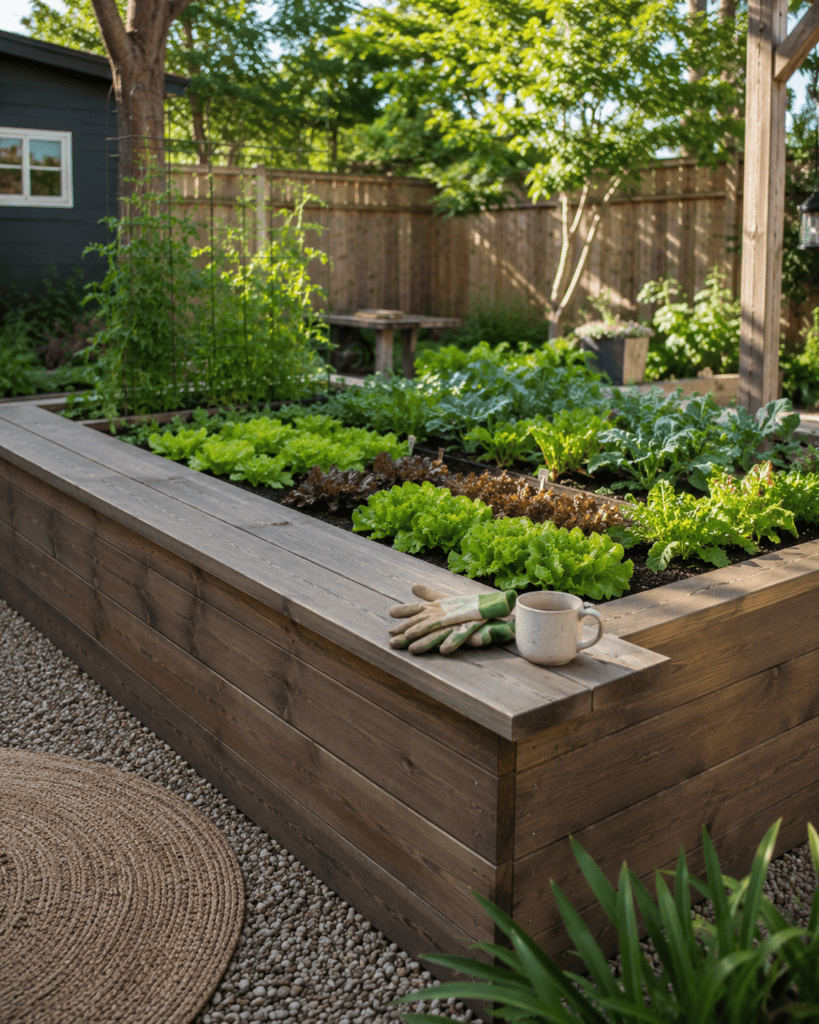
Building a bed a bit wider than usual lets you add a cap board across the top for seating. It’s a small design tweak that makes a huge difference when you’re out there for hours pulling weeds or just enjoying your plants.
My back thanked me the day I added this feature. Ever tried kneeling on hard ground for an entire afternoon? Yeah, don’t recommend it.
The seating cap also gives you a spot to set down a coffee mug, gardening gloves, or a beer if that’s more your speed. Small comfort upgrades like this are the reason I keep recommending wider beds to friends who think they only need the bare minimum frame.
15. Raised Beds with Automated Irrigation
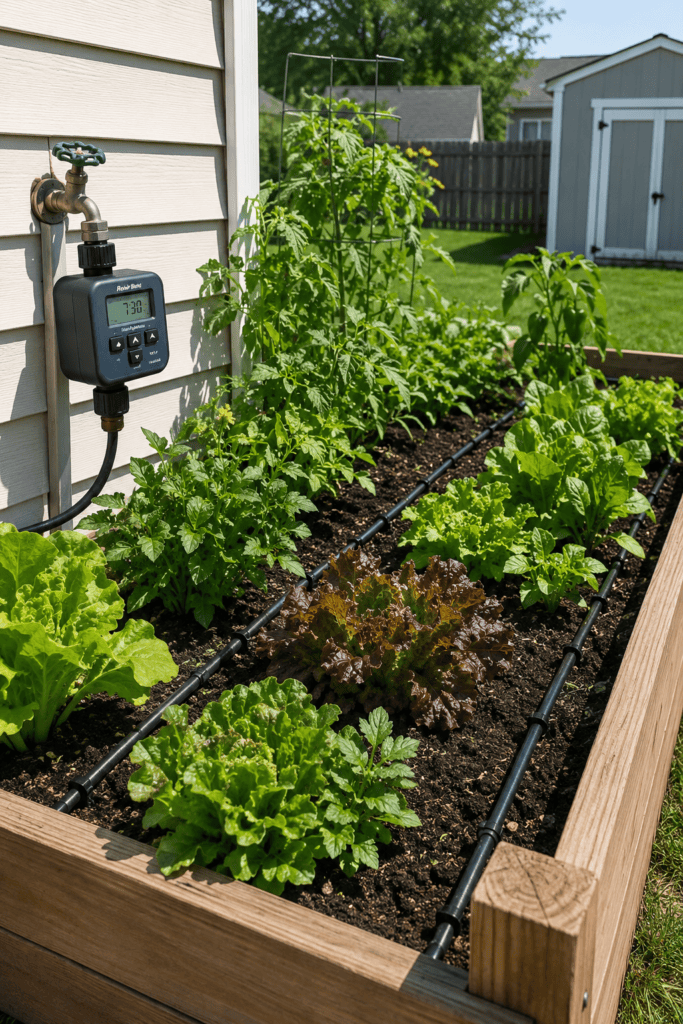
Pair your raised bed with a drip irrigation system on a timer, and watering becomes one less thing you have to remember. This setup is especially handy if you travel often or simply forget to water (no judgment, we’ve all been there).
- Reduces water waste compared to hand-watering
- Delivers moisture directly to roots
- Works with most timer-based garden systems
FYI, drip lines are cheap and surprisingly easy to install yourself, even if your only prior plumbing experience involved a leaky faucet and a lot of swearing.
Setting Up a Timer
Most battery-powered timers screw straight onto an outdoor spigot, and you program watering times through a simple dial or digital display. I run mine for fifteen minutes every morning, and it’s cut my water bill noticeably compared to hand-watering with a hose.
Choosing the Right Bed for Your Space
With fifteen options on the table, how do you actually pick one? Start by considering your climate, budget, and how much physical maintenance you’re willing to take on.
- Small space: vertical beds or modular kits
- Sloped yard: tiered beds
- Long-term durability: steel, composite, or concrete
- Budget-conscious: pine or repurposed materials
None of these choices are wrong, honestly. It just comes down to what fits your yard and your patience level for upkeep.
Common Questions About Raised Garden Beds
How deep should a raised bed be?
Most vegetables do fine in 12 inches of soil depth, though root crops like carrots appreciate closer to 18 inches. Deeper beds also mean less bending, which your back will genuinely appreciate come harvest time.
Do raised beds need a bottom?
Nope, and honestly I’d skip it. Leaving the bottom open lets roots reach into the ground below and improves drainage, though you’ll want hardware cloth underneath if burrowing pests are an issue in your area.
What’s the cheapest way to build one?
Repurposed materials win here every time, followed closely by basic pine lumber. Both options get you growing without draining your wallet, even if they won’t last quite as long as steel or composite.
Final Thoughts
Raised garden beds solve real problems—bad soil, poor drainage, aching backs, and yards that just don’t cooperate. Whether you go rustic with cedar, sleek with steel, or resourceful with an old stock tank, you’re setting yourself up for a healthier, easier garden.
Pick the idea that matches your space and your effort level, then just start building. Your future self, elbow-deep in fresh tomatoes, will thank you for it.