
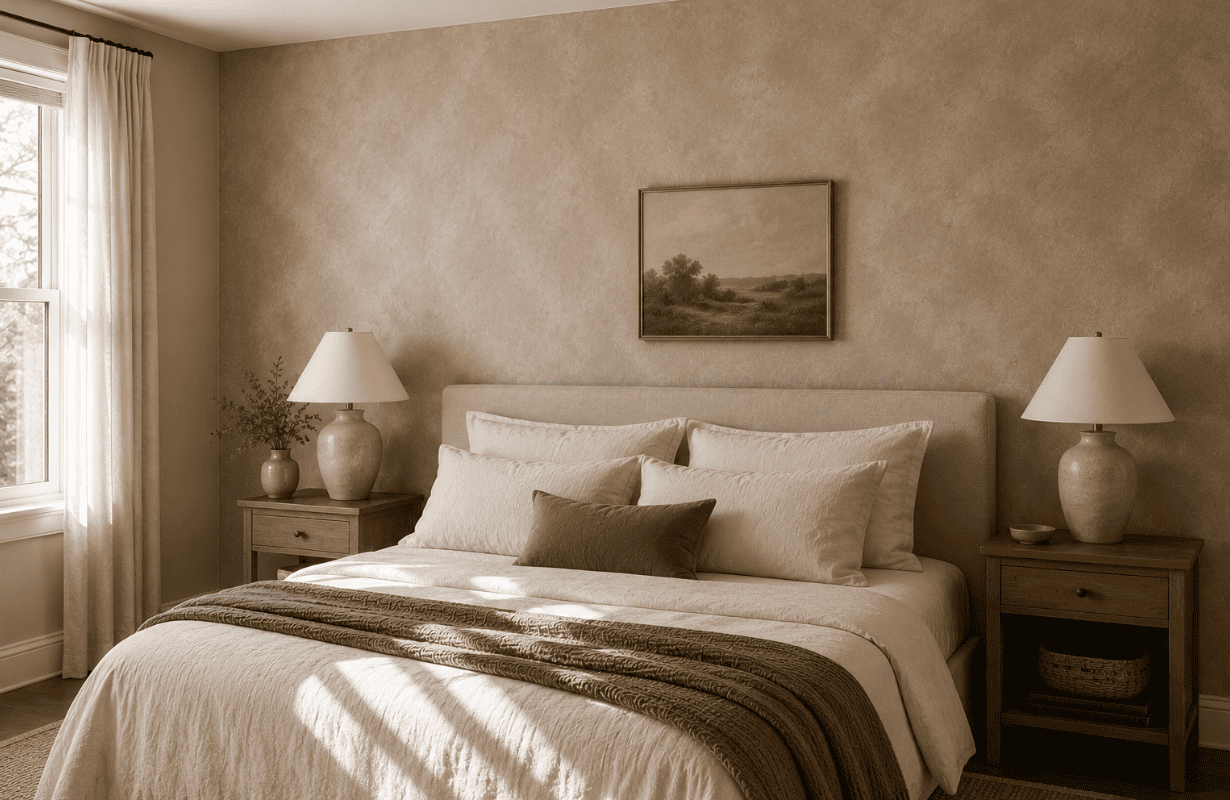
If you love the soft, cloudy look of limewash but don’t love the price, special-order products, or uncertainty of working with traditional lime-based finishes, there’s a much easier way to get close to the same effect. A DIY limewashed accent wall using paint can give a plain room that layered, slightly imperfect character without turning your weekend project into a chemistry experiment.
And honestly, that imperfection is the whole point.
A standard painted accent wall can sometimes feel a little too flat, especially in bedrooms, dining rooms, entryways, or living rooms where you want warmth rather than a sharp block of color. Faux limewash creates subtle movement because you’re building translucent-looking variations instead of trying to achieve one perfectly uniform coat.
The trick is not buying ten shades of paint or attacking the wall with a sponge. What actually works is choosing closely related colors, thinning and layering them carefully, and using broad, irregular brush movements.
Here’s how to make it look intentional rather than like an unfinished paint job.
What a Faux Limewash Paint Finish Actually Is
Traditional limewash is made with lime and creates its distinctive mineral, chalky variation as it cures. A faux limewash technique uses ordinary interior paint and application methods to imitate that tonal movement.
It won’t behave exactly like authentic limewash, and I think that’s worth saying upfront.
But if your goal is the look—soft color variation, visible brush movement, and an aged plaster-like feel—regular paint is much more approachable for the average DIYer.
This technique is especially useful on previously painted drywall, where switching to a true mineral finish may require additional preparation or compatible primers.
Choose a Wall That Can Handle Some Attention
Texture naturally attracts the eye, so don’t automatically choose the biggest wall.
A wall behind a bed, sofa, dining table, console, or fireplace often works better because the furniture gives the finish some visual structure. In a small room, one textured wall can add depth without making every surface feel busy.
Common Faux Limewash Mistakes That Make a Wall Look Messy
Using Colors With Too Much Contrast
Most people get this wrong because online inspiration can make the color differences appear stronger than they really are.
If your base is warm beige and your second color is dramatically darker brown, you’ll probably see obvious brush marks rather than subtle tonal variation.
Instead, stay within the same color family.
For example, pair a light mushroom beige with a slightly deeper mushroom tone. For a warm white wall, use two creamy off-whites rather than combining stark white with tan.
You want someone to notice the texture first, not immediately identify two separate paint colors.
Making Every Brushstroke the Same
Repeated X-shaped strokes can become surprisingly obvious.
Here’s the thing: authentic-looking variation isn’t perfectly patterned. Change your direction, stroke length, and starting point as you work.
Some areas can be slightly darker. Others can almost disappear into the base. That’s what keeps the wall interesting.
Trying to Fix Every Imperfection
This project becomes frustrating when you keep going back over areas.
Wet paint may look much darker than it will after drying. Constantly correcting those patches can eventually create more texture and contrast than you wanted.
Finish a manageable section, blend its edges, and give it time to dry before deciding it needs additional work.
What You’ll Need for a DIY Limewashed Accent Wall Using Paint
You don’t need an enormous supply list. A basic project typically requires:
- Interior wall paint in two closely related shades
- Quality 3- to 4-inch paintbrush
- Paint tray or small containers
- Roller for the base coat
- Painter’s tape
- Drop cloth
- Mixing container
- Clean water
- Stir sticks
- Clean rag
For the finish, I prefer a large brush rather than a tiny decorative one. A wider brush encourages loose movements and makes it harder to obsess over individual marks.
Flat or matte paint generally creates a more convincing limewash-inspired appearance than glossy paint because reflections can emphasize brush marks in the wrong way.
Step-by-Step: How to Create a Faux Limewash Wall With Paint
Step 1: Prepare the Wall Properly
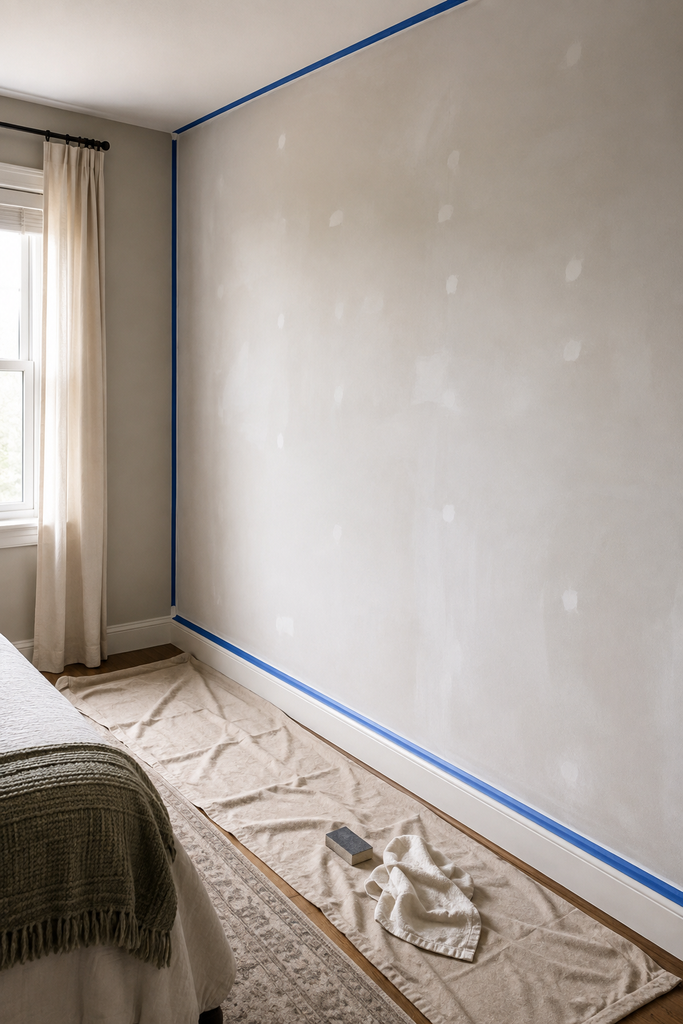
Patch obvious holes, lightly sand rough repairs, remove dust, and wipe down dirty areas.
Don’t make the wall obsessively perfect. Tiny surface variations can actually complement this finish, but dents, grease marks, and poorly filled holes will still show.
Tape adjacent trim and protect the floor before opening your paint.
Step 2: Apply Your Base Color
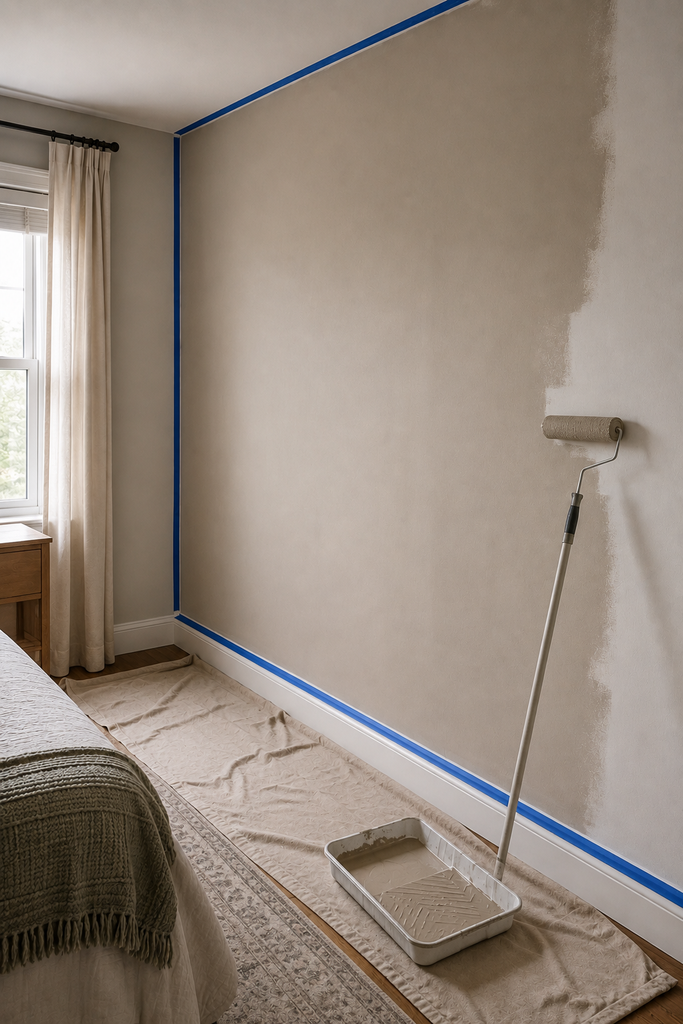
Roll on one or two coats of your lighter shade until you have an even background.
This matters more than it seems.
The base coat acts as your safety net. When the decorative layer becomes thin in certain areas, the color underneath shows through and creates natural-looking depth.
Let the base dry completely before moving forward.
Step 3: Create Your Working Paint Mixture
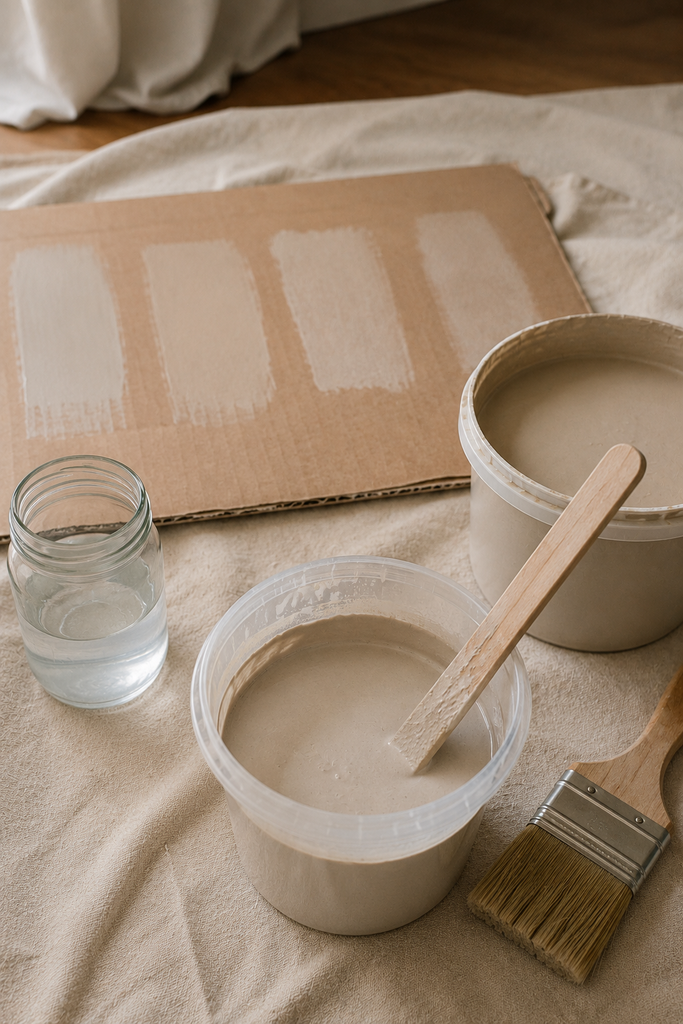
Pour a small amount of your second paint color into a separate container and gradually add a little water.
You aren’t trying to make colored water. The goal is simply to loosen the paint enough that it brushes more softly and allows some of the base color to influence the finished appearance.
Because paint formulas vary, test the mixture first on cardboard or an inconspicuous section.
If it drips everywhere, you’ve gone too thin.
Step 4: Brush in Loose, Overlapping Movements
Work in sections roughly 3 to 4 feet wide rather than coating the entire wall at once.
Load your brush lightly and apply the paint using loose diagonal, crisscrossing, and slightly curved strokes. Rotate directions instead of creating identical X marks.
Keep your hand relaxed.
What actually works is building many subtle marks that overlap one another. Heavy paint creates stripes; lighter layers create depth.
Step 5: Keep a Wet Edge
The biggest practical challenge is preventing obvious boundaries between sections.
As you approach the edge of your working area, use less paint and soften your strokes. Begin the next section before that edge completely dries so the two areas visually blend.
Don’t paint four perfect squares and try to connect them afterward. You’ll probably see exactly where each section started.
Step 6: Let It Dry Before Adding More
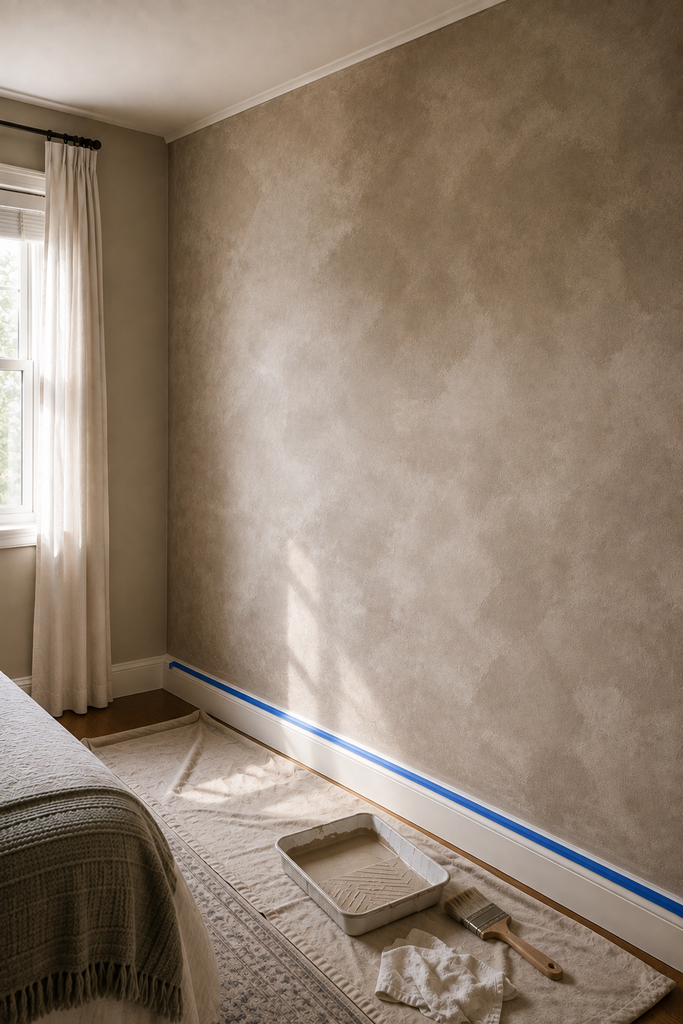
Once you’ve completed the wall, walk away.
Seriously.
Wet faux limewash can look alarming because certain areas appear dramatically darker. Once everything dries, the variation usually becomes much softer.
After drying, inspect the wall in daylight and again with your lamps turned on. If an area looks too flat, add another very thin layer rather than repainting the entire wall.
How to Make the Finished Wall Look More Expensive
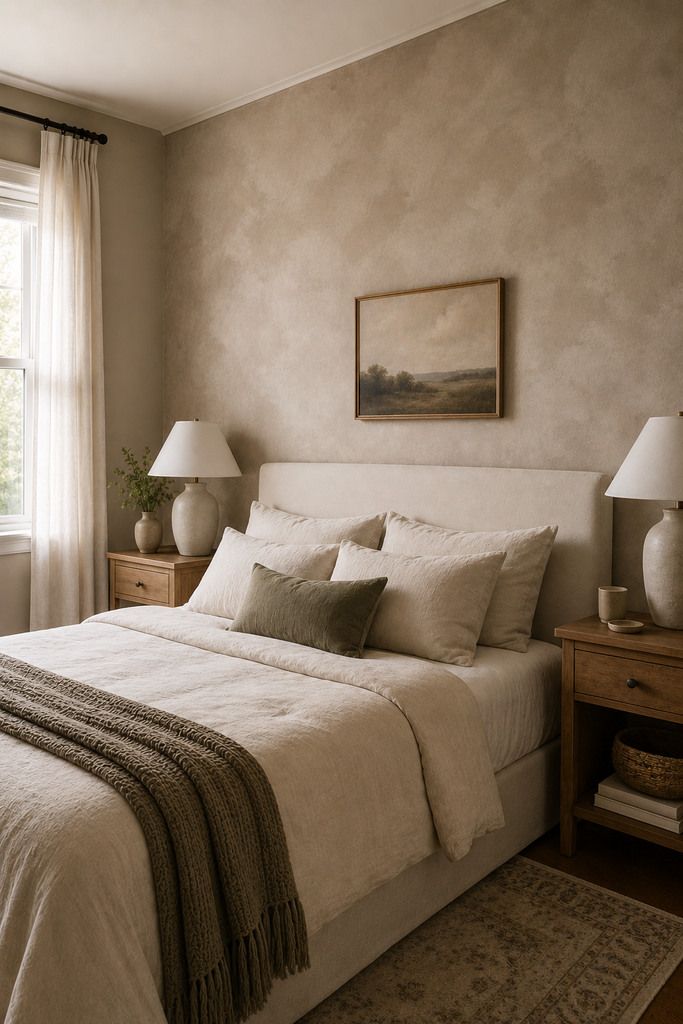
The wall itself is only half the equation. The room around it matters.
A limewash-inspired finish already provides visual movement, so I wouldn’t pile complicated artwork, highly patterned curtains, and busy furniture against it.
Simple materials usually look better.
Think linen curtains, warm wood, ceramic lamps, woven textiles, aged brass, natural upholstery, and artwork with generous negative space.
Lighting also changes the finish dramatically. Side lighting from a window or wall sconce highlights the subtle brush variation, while harsh overhead lighting can flatten everything.
And don’t assume neutral is your only option. Muted olive, dusty blue, clay, warm gray, and subdued terracotta can all work beautifully as long as the color variation stays restrained.
Practical Tips Before You Paint the Whole Wall
Always create a test area first. Paint a large piece of drywall, poster board, or another sample surface using the exact base color, top color, dilution, and brush technique you’re considering.
Then move it around the room.
A beige that looks beautifully earthy in afternoon sunlight might turn strangely yellow under warm bulbs at night.
Also, remember that less contrast is usually easier to add to than remove. Start subtle. If the dried wall needs more movement, you can introduce another light layer.
That’s much easier than trying to calm down an overly dramatic finish.
Is a DIY Faux Limewash Accent Wall Worth It?
For the right room, absolutely.
A DIY limewashed accent wall using paint is one of those projects where restraint makes a bigger difference than advanced DIY skills. Start with two closely related colors, establish a solid base coat, work with a wide brush, and build variation gradually.
Don’t chase perfection. You’re specifically creating a finish that should have movement, softer patches, and slight irregularities.
If you’re nervous, start with a bedroom wall behind the headboard or a smaller dining-room wall rather than tackling an entire living space. Once you understand how your paint behaves, the technique becomes surprisingly forgiving.