
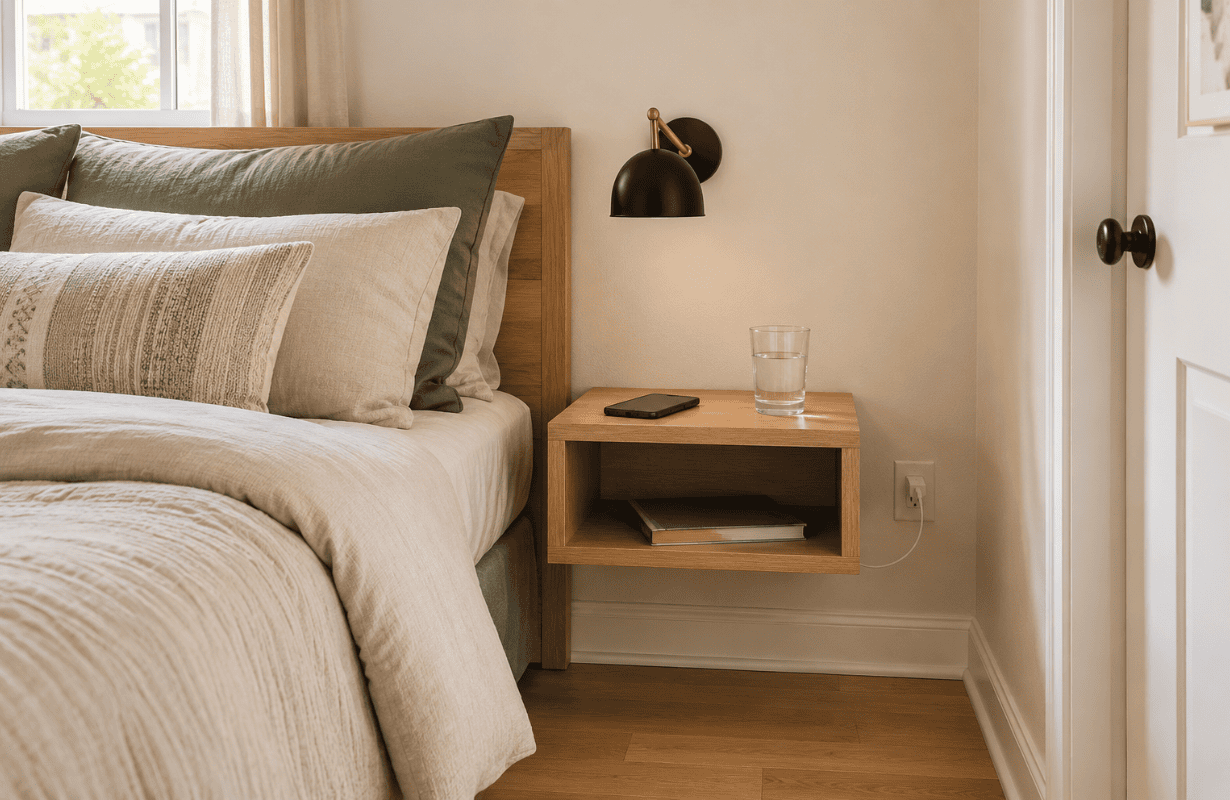
Small bedrooms have a way of making perfectly normal furniture feel enormous. You put a standard nightstand beside the bed, and suddenly the walkway disappears, the closet door barely opens, or the whole side of the room feels crowded.
That’s exactly where a floating nightstand makes sense.
A DIY floating nightstand for a small bedroom gives you the useful part of a bedside table a place for your phone, lamp, book, glasses, or morning coffee without adding bulky legs or a heavy piece of furniture to an already tight room.
And honestly, I prefer floating nightstands in small spaces for another reason: you can control the exact dimensions. You’re not stuck trying to squeeze a 20-inch-wide store-bought table into a 14-inch gap.
But there is a catch. A floating nightstand has to be built and mounted correctly. Too deep, too high, or poorly anchored, and something that was supposed to save space becomes annoying or worse, unstable.
Here’s how I’d build one that actually works.
Why a Floating Nightstand Works So Well in a Small Bedroom
Here’s the thing: saving floor space isn’t just about physically gaining a few square inches.
It’s also about visual space.
When you can see more of the floor underneath furniture, a small bedroom tends to feel lighter and less crowded. That’s why wall-mounted desks, floating vanities, and floating nightstands can work so well in compact rooms.
A traditional nightstand creates a solid block from the floor upward. A floating version leaves that lower area open.
You also gain flexibility with sizing.
If you only have 15 inches between your bed and the wall, you can build a nightstand that’s 12 to 14 inches wide. If your mattress sits unusually high, you can mount it accordingly instead of searching endlessly for a table that’s exactly the right height.
For most bedrooms, you really don’t need a huge bedside surface anyway. A lamp, phone, water glass, and maybe a book don’t require an entire cabinet.
Decide What Your Nightstand Actually Needs to Hold
Most people get this wrong because they start with the design.
They see a beautiful floating box on Pinterest and immediately decide to recreate it.
Start with function instead.
Look at what genuinely sits beside your bed every night.
If it’s only your phone, glasses, and a glass of water, a simple floating shelf might be enough. If you read in bed, you’ll probably want room for a book and lamp. If you’re constantly hiding chargers, medications, earbuds, and other little items, consider building a shallow drawer or open cubby.
This decision affects your dimensions.
For a compact bedroom, a nightstand around 12–18 inches wide and 10–14 inches deep can provide plenty of usable space without projecting too far into the room.
I would avoid making it unnecessarily deep. A 17- or 18-inch-deep floating nightstand beside a bed can defeat the whole point of building space-saving furniture.
Get the Height Right Before You Build
The height matters more than people think.
As a general starting point, position the top of the nightstand roughly level with the top of your mattress, or just a little higher or lower depending on how you use it.
Don’t blindly copy a measurement you find online.
Beds vary enormously.
A low platform bed might put the mattress around 20 inches from the floor, while a tall bed with a thick mattress could be closer to 30 inches.
Sit or lie on your bed and reach toward the wall as though you’re grabbing your phone.
Where does your hand naturally land?
That’s approximately where your nightstand surface should be.
I like this approach much more than choosing a standard height because you’re building the furniture for your bedroom, not an imaginary average bedroom.
What You’ll Need for a Simple DIY Floating Nightstand
You don’t need a complicated woodworking setup for a basic version.
For a straightforward wooden floating nightstand, you’ll typically need:
- 3/4-inch plywood or a solid wood board
- Wood screws
- Wood glue
- Sandpaper
- Wood filler
- Paint, stain, or clear finish
- Drill/driver
- Level
- Measuring tape
- Stud finder
- Saw, or boards cut to size at the store
- Appropriate wall-mounting hardware
If you’re creating a simple box-style nightstand, you’ll also need pieces for the top, bottom, and two sides.
Good-quality plywood is one of my favorite materials for this project. It’s stable, relatively affordable, and much easier to work with than trying to make cheap construction lumber look like finished bedroom furniture.
You can also apply edge banding to exposed plywood edges if you want a cleaner, more furniture-like finish.
How to Build a DIY Floating Nightstand for a Small Bedroom
Step 1: Measure the Available Space
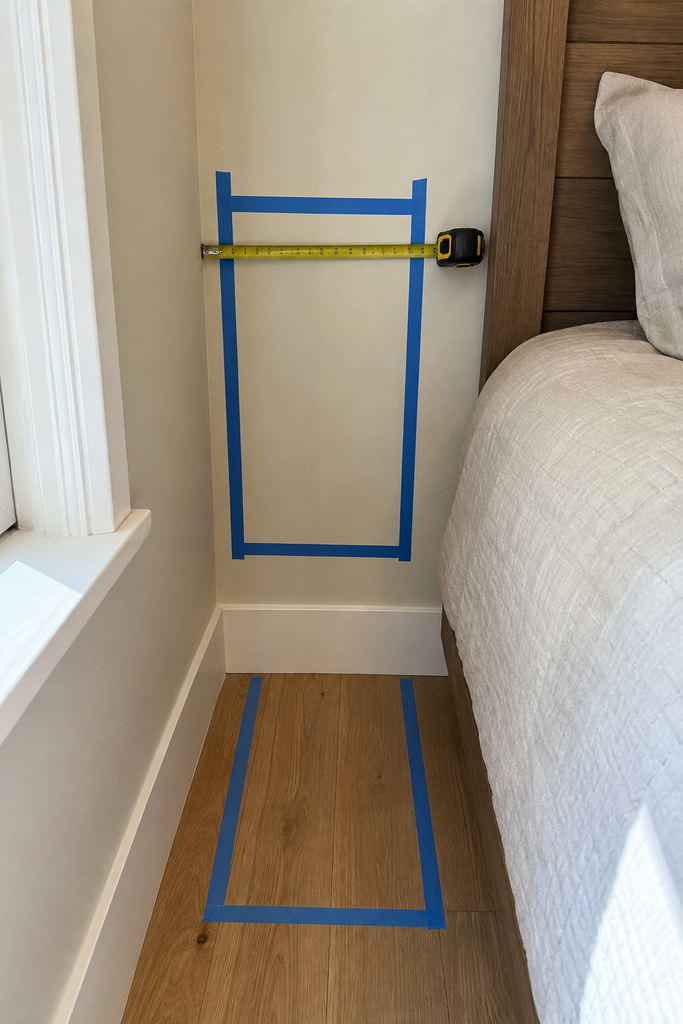
Measure the distance between your bed and whatever is beside it—the wall, closet, doorway, dresser, or window.
Then leave breathing room.
If you have a 17-inch gap, don’t automatically build a 17-inch nightstand. Something closer to 13 or 14 inches may make the room much easier to move through.
Use painter’s tape to mark the proposed dimensions directly on the wall.
I love doing this because measurements on paper can be misleading. A taped rectangle immediately shows you whether the nightstand will look proportional to the bed.
Also tape the depth on the floor if necessary. That makes it much easier to see whether you’ll bump into the corner every morning.
Step 2: Choose a Simple Construction Style
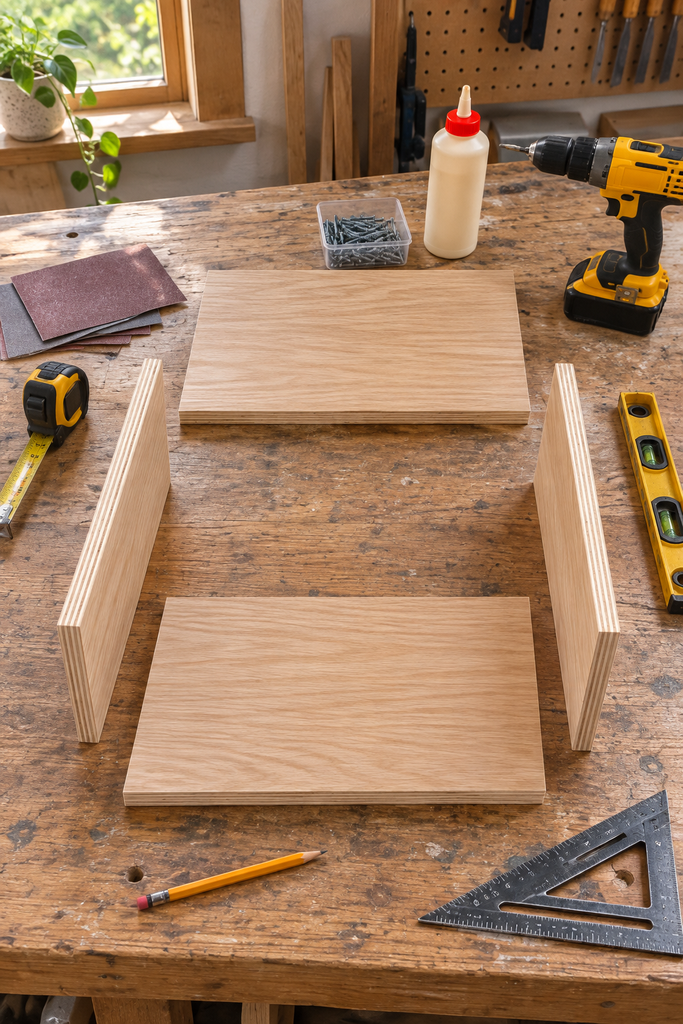
For a first project, I’d choose one of two designs.
The easiest is a single floating shelf.
The slightly more involved—and much more useful—option is a small open box with a top surface and a cubby underneath.
The cubby gives you somewhere to slide a book, tablet, or small basket while keeping the top relatively clear.
Avoid adding complicated drawers unless you actually need one. Drawer slides require more precise measurements, and a tiny bedroom nightstand doesn’t always gain enough storage to justify the extra work.
Step 3: Cut and Sand Your Pieces
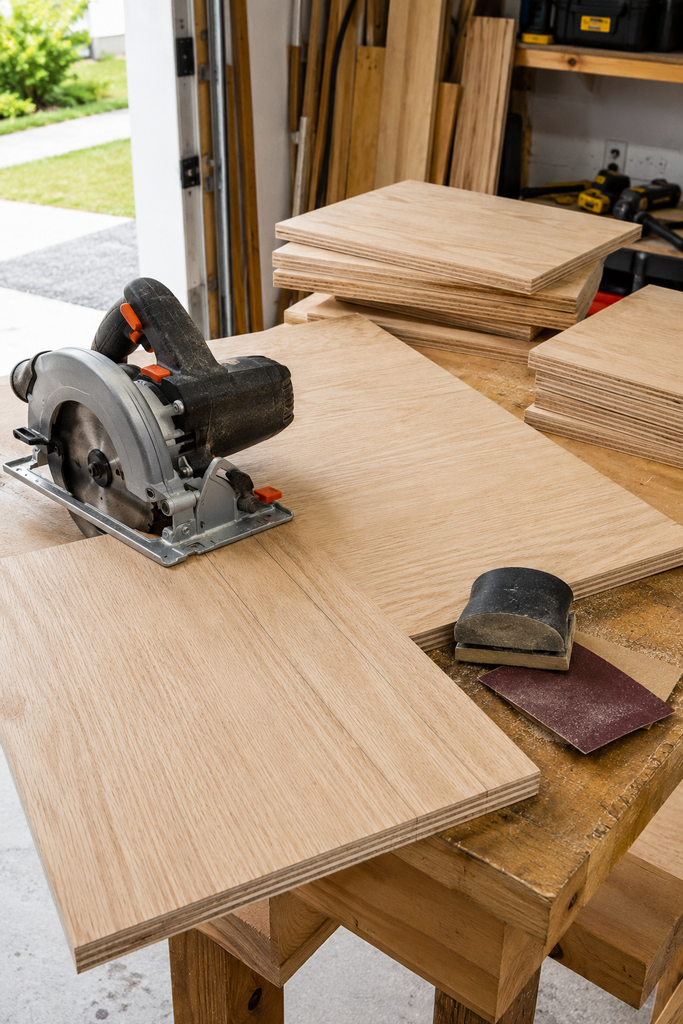
For a basic open-box design, cut:
- One top panel
- One bottom panel
- Two side panels
The exact dimensions depend on your space.
For example, you might build a finished nightstand roughly 16 inches wide, 12 inches deep, and 7 inches tall.
Dry-fit everything before adding glue.
Check that the sides sit square and that your top and bottom pieces align properly.
Then sand the surfaces and especially the exposed edges. Start with a medium-grit sandpaper to smooth rough areas and finish with a finer grit before painting or staining.
It’s much easier to deal with rough edges now than after everything is hanging on the wall.
Step 4: Assemble the Nightstand
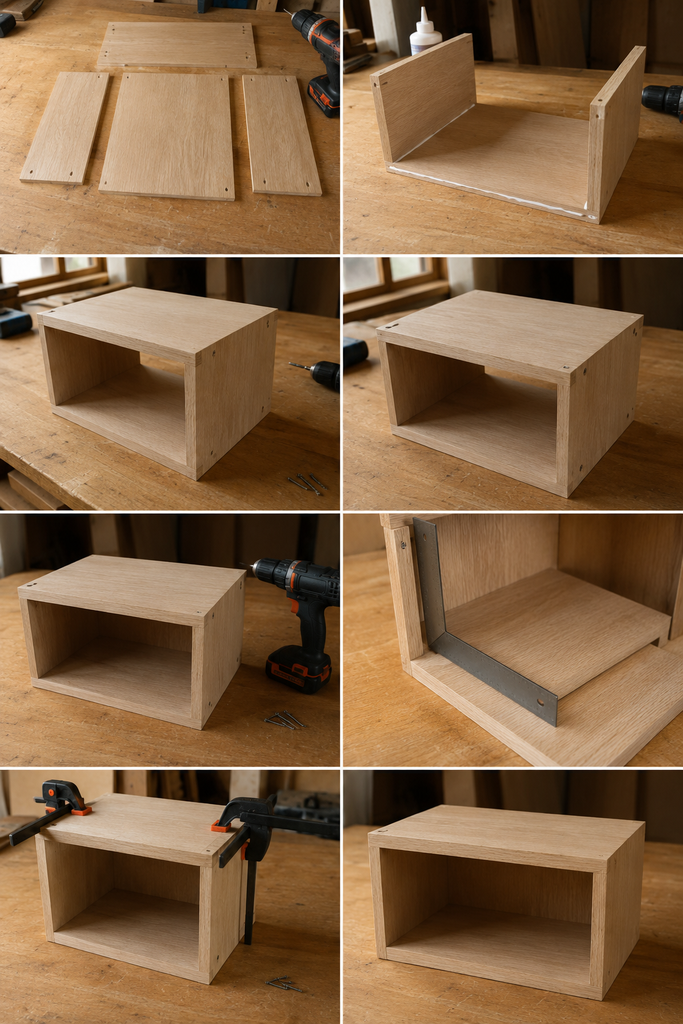
Apply wood glue along the joining edges and secure the pieces with screws.
Predrilling your screw holes is worth the extra minute, especially when you’re working close to the edge of plywood. It reduces the chance of splitting and helps the screws go in straighter.
Check for square as you assemble.
This sounds like a fussy woodworking detail, but a slightly crooked box becomes very noticeable once it’s mounted beside straight architectural lines like walls, baseboards, and a headboard.
Fill visible screw holes if you want a seamless painted finish.
Then allow the glue to cure according to its instructions.
Step 5: Paint or Stain Before Installation
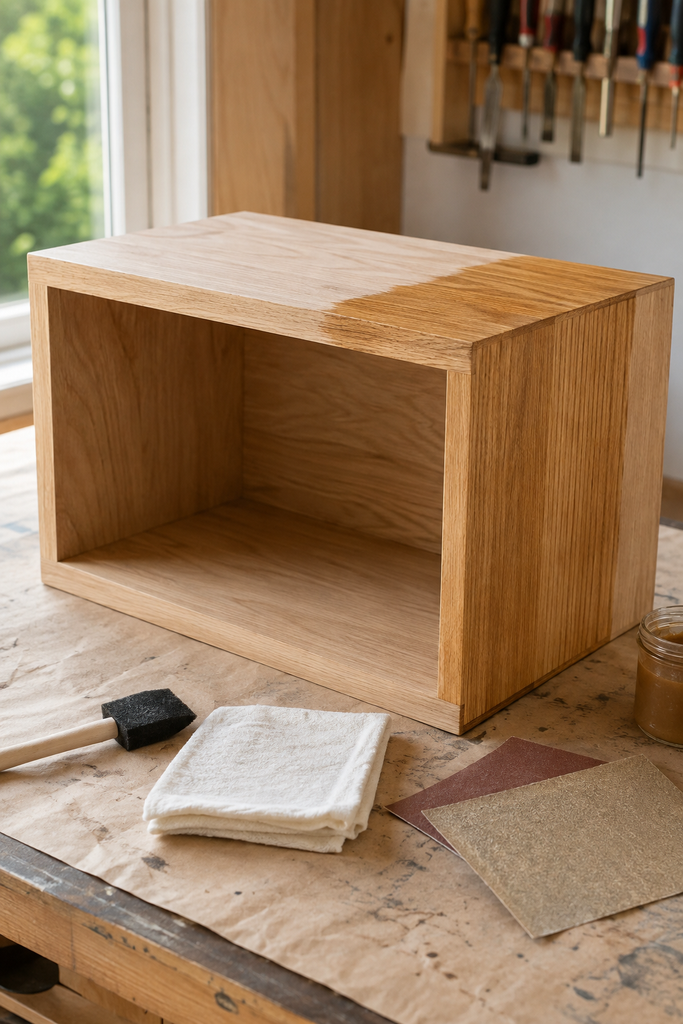
What actually works is finishing the nightstand before mounting it.
Trying to stain a shelf that’s already attached to your bedroom wall is a fantastic way to discover how far wood stain can travel.
For a small bedroom, I usually prefer visually quiet finishes.
Painting the nightstand close to the wall color can make it almost disappear, which is great when the room already has several furniture pieces.
Natural light oak or medium wood tones work beautifully if you want a little warmth.
Very dark finishes can look great too, but I’d use them intentionally—perhaps to connect the nightstand with a black bed frame, dark sconces, or another strong element in the room.
Step 6: Mount It Securely
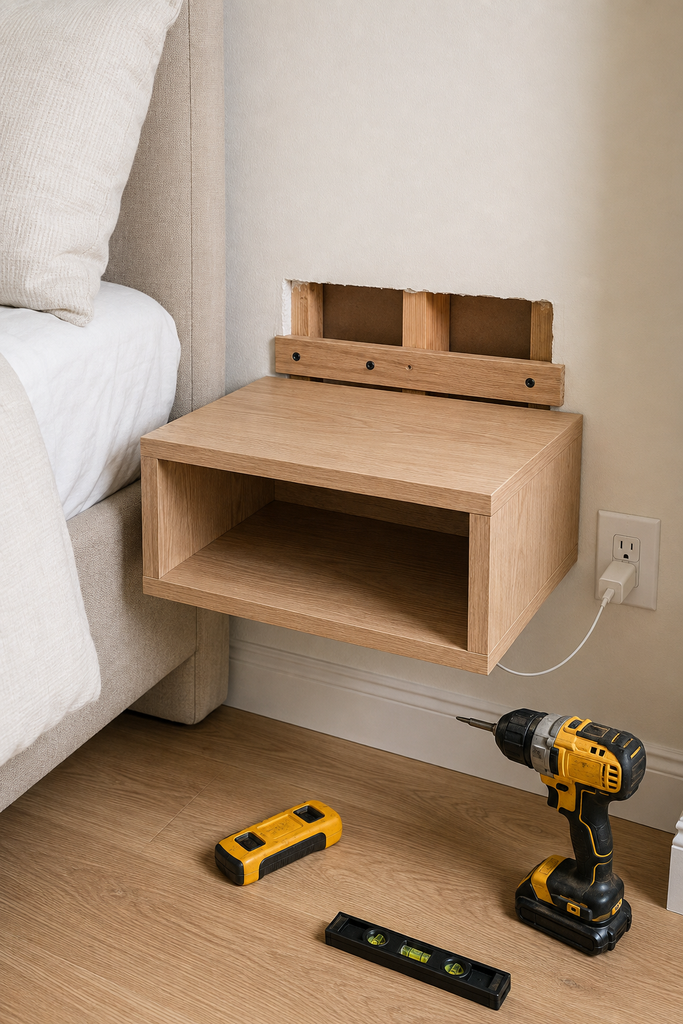
This is the part I wouldn’t rush.
A floating nightstand is only as good as its mounting system.
Whenever possible, secure the mounting hardware directly into wall studs. Use a stud finder to locate them and confirm where your mounting points need to go.
Depending on the design, you might use a hidden mounting cleat, heavy-duty floating shelf brackets, or an internal wooden mounting strip secured through the back of the nightstand.
Use hardware appropriate for both your wall type and the expected load.
If you can’t attach every required point directly to a stud, use wall anchors specifically rated for your wall material and the load they’ll carry. Follow the hardware manufacturer’s installation and load instructions rather than guessing.
And don’t treat the nightstand like a seat afterward. It’s meant to hold bedside essentials, not your body weight.
Use a level before tightening everything completely.
A slightly crooked nightstand will bother you every time you look at it.
Common Floating Nightstand Mistakes to Avoid
Making It Too Large
This is probably the biggest mistake.
You’re building for a small bedroom, so resist the temptation to turn your nightstand into a mini dresser.
Give yourself enough surface area for your essentials and stop there.
A smaller nightstand with good proportions usually looks more intentional than a large one awkwardly squeezed beside the bed.
Ignoring Charging Cables
Think about electricity before mounting anything.
If you charge your phone beside the bed, locate the nearest outlet and decide where the cable will run.
You can create a small hole or cable pass-through in the back of an open-cubby design so cords aren’t dangling across the front.
If you use a bedside lamp, plan for that cord too.
Tiny details like cable placement are what make a DIY project feel genuinely useful instead of merely attractive.
Mounting It Into Drywall Without the Right Hardware
Don’t assume a couple of ordinary screws in drywall will hold a loaded nightstand.
Your mounting method needs to match the wall construction and expected load.
Finding a stud may require shifting your mounting position slightly or adjusting the internal bracket design, but that’s a compromise I’d happily make for a sturdier result.
Putting It Too Close to the Bed
Leave a small gap between the nightstand and bed if possible.
Beds move. Bedding hangs over the sides. Mattresses shift slightly.
A little separation prevents your comforter from constantly catching on the nightstand and keeps the arrangement from looking jammed together.
Small Details That Make the Finished Nightstand Better
Once the basic construction works, focus on usability.
Rounded or softened front corners are worth considering in a tight bedroom, especially if the nightstand sits beside a narrow walkway. Walking into a sharp plywood corner at 2 a.m. is not an experience you need.
You can also install a wall-mounted sconce above the nightstand instead of placing a lamp on top.
That’s one of my favorite small-bedroom combinations: floating nightstand + wall sconce.
You keep the bedside surface almost completely free while still having proper reading light.
For styling, keep things simple. A small book stack, water glass, phone, and one decorative object are enough.
The goal isn’t to fill the surface you’ve just created.
The goal is to give everyday essentials somewhere convenient to live.
Conclusion
A DIY floating nightstand for a small bedroom is one of those projects where a relatively small change can make the entire room function better.
The trick isn’t building the fanciest nightstand possible. It’s building one that fits the exact space you have.
Measure the available gap, figure out what you genuinely need beside your bed, keep the depth reasonable, and choose a mounting method appropriate for your wall and expected load. That’s what makes the project work.
If you’re nervous about committing to dimensions, grab a roll of painter’s tape and mock up the nightstand on the wall first. Live with that outline for a day.
Once the size feels right, build it.