
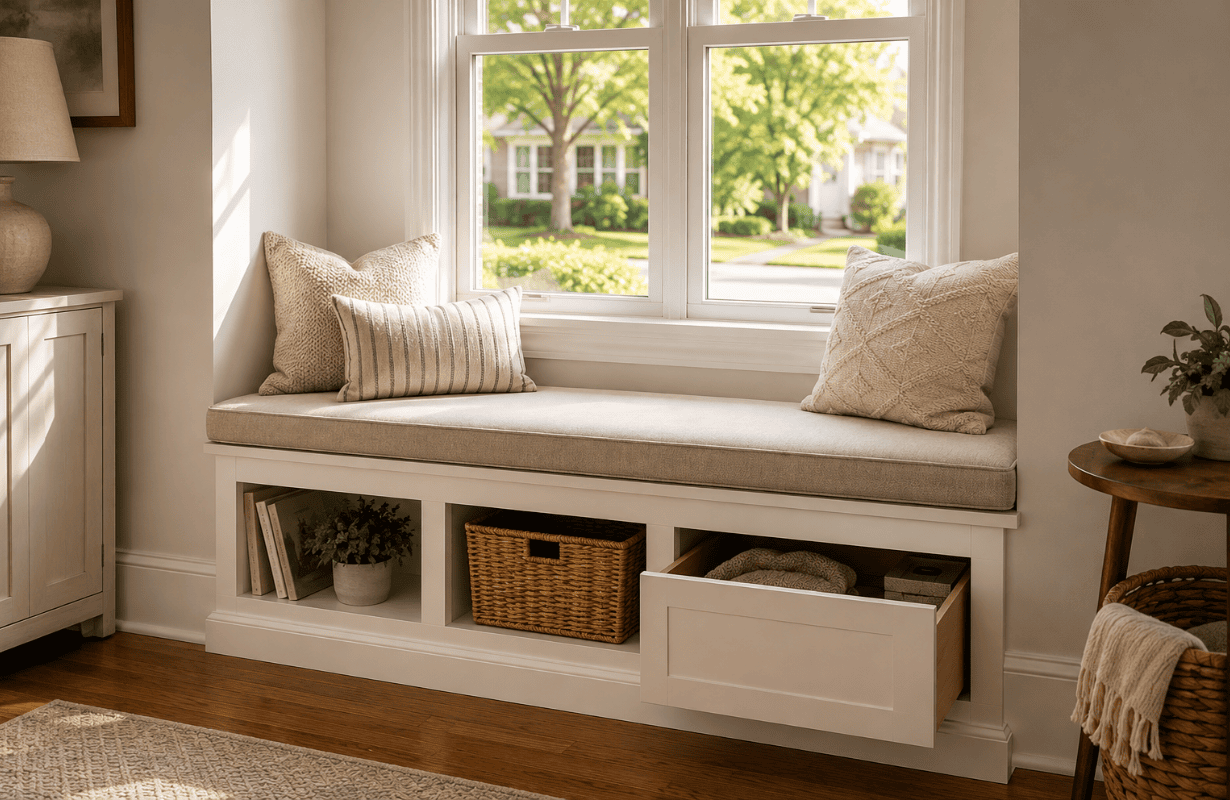
There’s something about a window seat that makes a room instantly feel more intentional. You get a cozy place to sit, an awkward stretch of wall suddenly has a purpose, and if you build it right you gain a surprising amount of hidden storage.
The problem is that a DIY window seat with storage can go wrong pretty quickly. Make it too deep and it feels like a daybed you have to climb onto. Build it too high and it’s uncomfortable to sit on. Forget about baseboards, vents, or how the storage will actually open, and you can end up rebuilding half of it.
Here’s the thing: you don’t need advanced woodworking skills or expensive built-in cabinetry to make a window seat look like it belongs in the room. What actually works is getting the proportions right first, building a simple sturdy base, and using trim to create that finished built-in appearance.
If you have a neglected window wall and could use extra storage, this is one DIY project that can genuinely earn its footprint.
Plan the Window Seat Before Buying Lumber
Most people get this wrong by starting with the window dimensions. The window matters, obviously, but it shouldn’t be the only thing determining the size of your bench.
You’re building something people need to comfortably sit on.
Get the Height Right
A finished window seat around 18 to 20 inches high, including the cushion, usually feels comfortable for most adults.
If you’re adding a 3-inch cushion, for example, you might build the actual bench around 16 inches high.
Pay attention to the bottom of your window, too. You don’t want a thick cushion awkwardly covering several inches of the window or interfering with the sill.
Don’t Make the Seat Too Deep
Around 18 to 22 inches deep works well for many window seats.
You can go deeper if you’re deliberately creating a lounging nook, but there’s a tradeoff. A 26-inch-deep seat may look incredibly cozy in photos while being less practical for someone who simply wants to sit down and put on shoes.
Before building anything, use painter’s tape to mark the footprint on your floor. Live with that outline for a day or two.
It sounds overly cautious. It isn’t.
You’ll immediately notice whether the proposed bench blocks a walkway, crowds nearby furniture, or sticks farther into the room than you expected.
Decide How You Want the Storage to Work
Storage shouldn’t be something you figure out after building the box.
There are three practical approaches.
Lift-Up Storage
A hinged top gives you one large storage compartment underneath the seat.
This works particularly well for bulky things you don’t need every day—extra blankets, seasonal pillows, board games, or kids’ toys.
The downside is obvious once you think about it: you have to move the cushion every time you open the bench.
For occasional storage, that’s fine.
For something you use every morning? Annoying.
Front-Opening Cabinets or Drawers
Front-access storage is usually more convenient because the seat can stay completely untouched.
Drawers are fantastic for everyday items, while cabinet doors can handle baskets, books, shoes, or larger belongings.
They’re more complicated to build from scratch, though.
If you’re relatively new to DIY projects, don’t underestimate the convenience of using unfinished or ready-made cabinet boxes as the base and trimming around them.
Open Cubby Storage
Open cubbies are probably the easiest option.
They work especially well in mudrooms, kids’ bedrooms, playrooms, and casual family spaces where you can slide baskets underneath.
The downside? Open storage needs some discipline. Without baskets or clearly defined zones, your charming window seat can quickly become a display shelf for random clutter.
Materials You’ll Need for a DIY Window Seat With Storage
Your exact materials will depend on the width and storage configuration, but a straightforward build typically requires:
- 2×4 lumber for the supporting base
- 3/4-inch plywood for the bench structure
- Wood screws
- Construction adhesive
- Wood filler
- Sandpaper
- Primer and paint
- Baseboard or decorative trim
- Caulk
- Hinges if you’re creating a lift-up top
- Level
- Stud finder
- Drill/driver
- Circular saw or table saw
- Tape measure
For a painted window seat, cabinet-grade or sanded plywood is worth the small upgrade over rough construction plywood. You’ll spend considerably less time trying to make the surface look presentable.
How to Build a DIY Window Seat With Storage
The basic construction is surprisingly simple. You’re essentially creating a strong platform, adding storage boxes, and then making everything look built-in with trim.
Step 1: Remove the Existing Baseboard
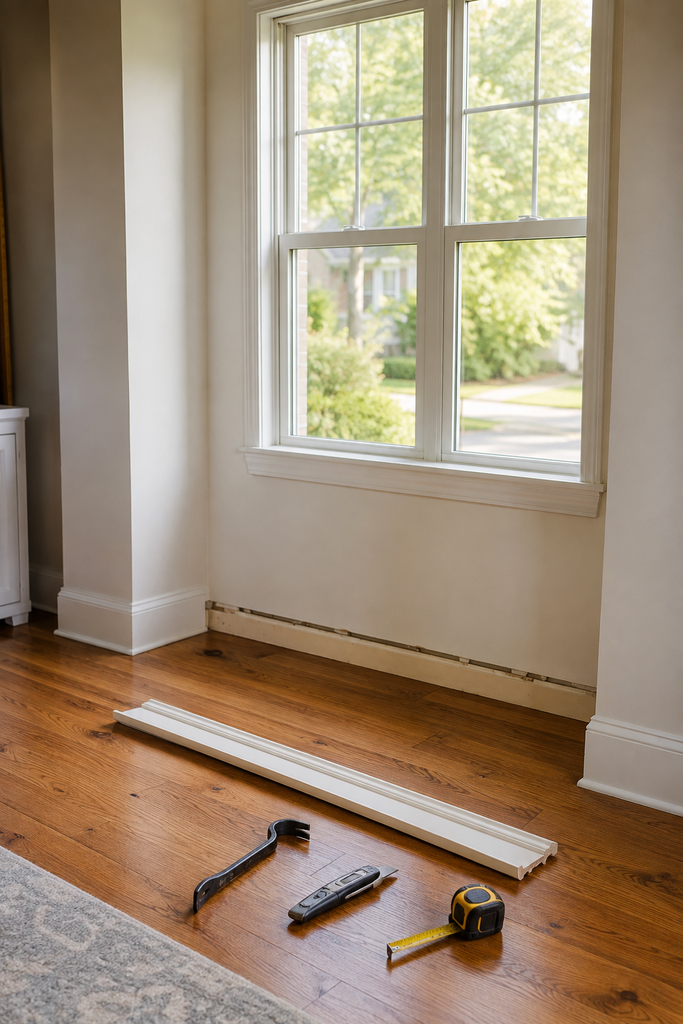
If your window seat will sit directly against the wall, remove the section of baseboard behind it.
Why bother?
Because building against the drywall allows the bench to sit flush instead of leaving an awkward baseboard-sized gap behind it.
Save the trim if possible. Depending on your design, you may be able to reuse sections on the front of the finished bench.
Step 2: Build a Level Base
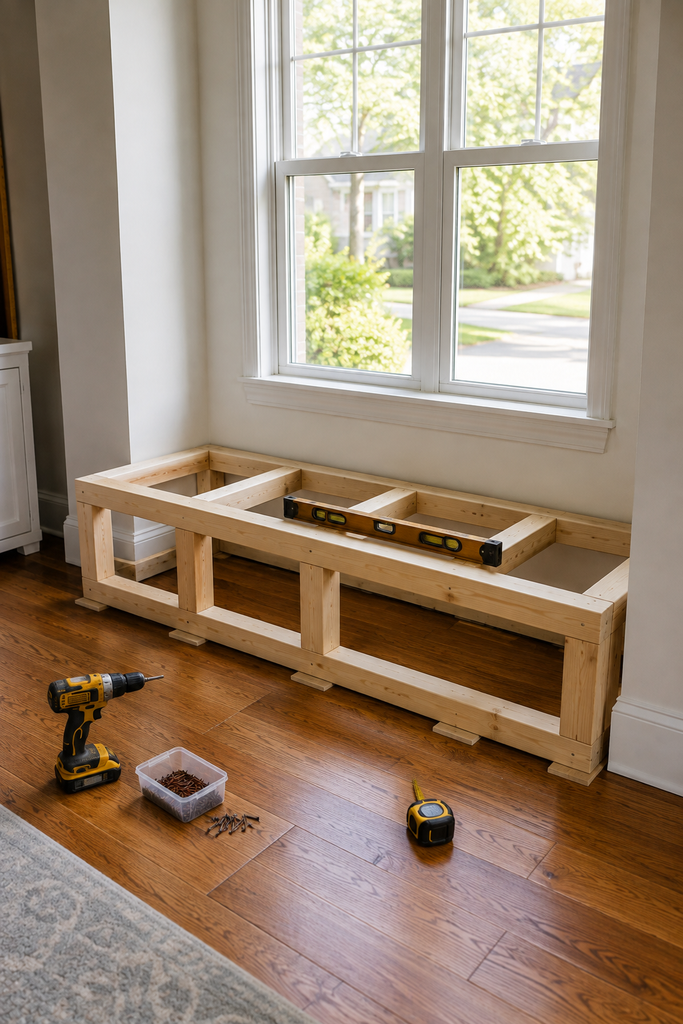
Build a rectangular platform from 2×4 lumber matching the footprint of your window seat.
This base does more than raise the cabinets.
Floors and walls are rarely perfectly straight—even in relatively new houses. The platform gives you an opportunity to shim and level everything before installing the visible portion of the bench.
Secure the base appropriately and check it with a level in multiple directions.
Don’t rush this part.
A slightly crooked platform becomes a noticeably crooked window seat once long horizontal trim lines are installed.
Step 3: Build the Storage Boxes
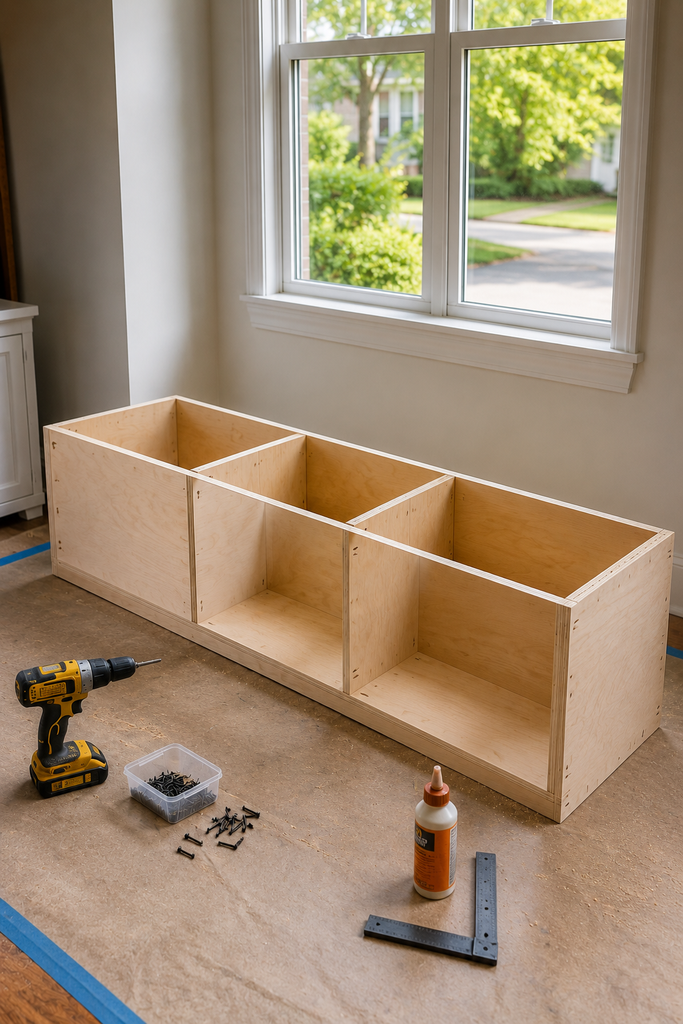
Cut 3/4-inch plywood to create individual cabinet boxes or one long storage carcass.
For a basic design, you’ll need a bottom, sides, dividers, and potentially a back panel.
Dividers are important on longer benches because they prevent the top from sagging and create useful storage sections.
A six-foot bench with one giant unsupported compartment underneath might technically work at first, but it’s not how I’d build something that’s supposed to handle people sitting on it for years.
Step 4: Install and Secure the Boxes
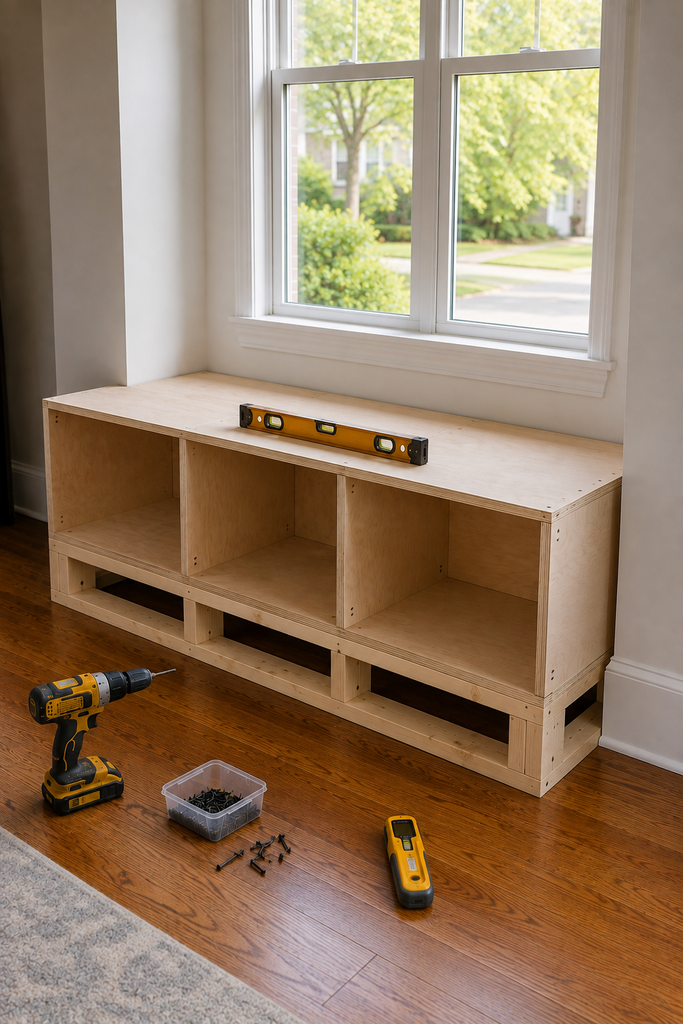
Position your storage units on the base and make sure everything is level and aligned.
Then secure the boxes to each other and anchor the assembly into wall studs where appropriate.
Here’s where careful measuring earlier pays off.
The bench should now feel solid before you’ve even installed the finished seat. If the structure rocks or shifts, fix that now rather than hoping the trim will somehow stabilize it later.
It won’t.
Step 5: Add the Seat Top
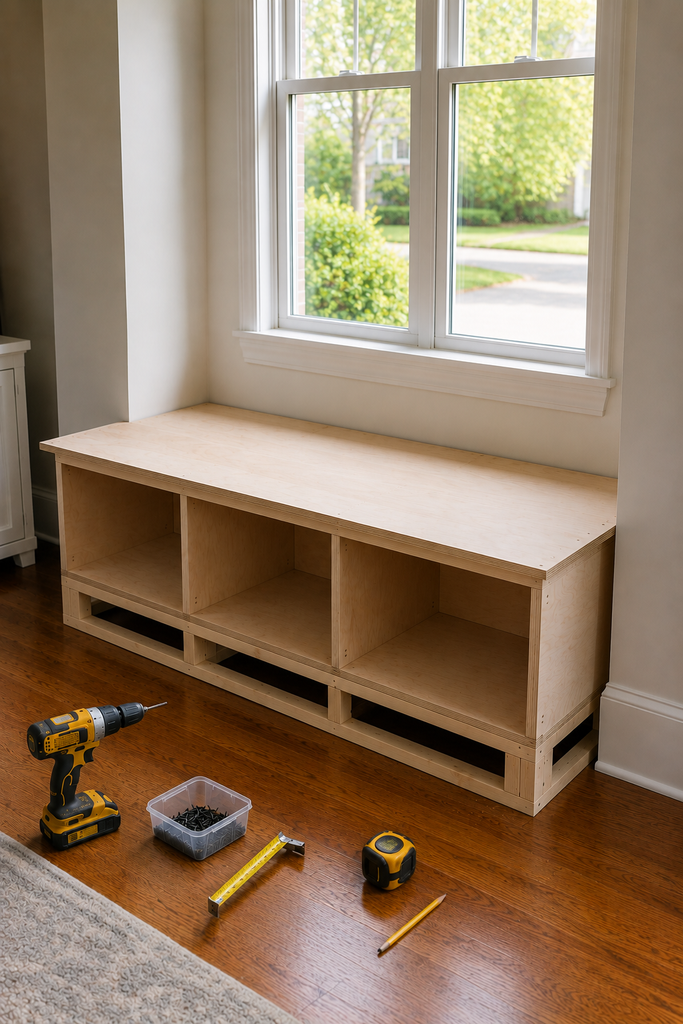
Cut 3/4-inch plywood for the top.
For front-access cabinets or cubbies, this can simply be a fixed top secured to the structure.
For hidden storage, divide the top into appropriately sized hinged sections.
Don’t make one enormous lid unless the bench is fairly small. Large plywood lids become heavy once you add a cushion, and lifting the entire seat every time you need a blanket gets old fast.
Soft-close or lid-support hinges are a worthwhile upgrade, particularly in a home with children.
Step 6: Add Face Trim and Baseboard
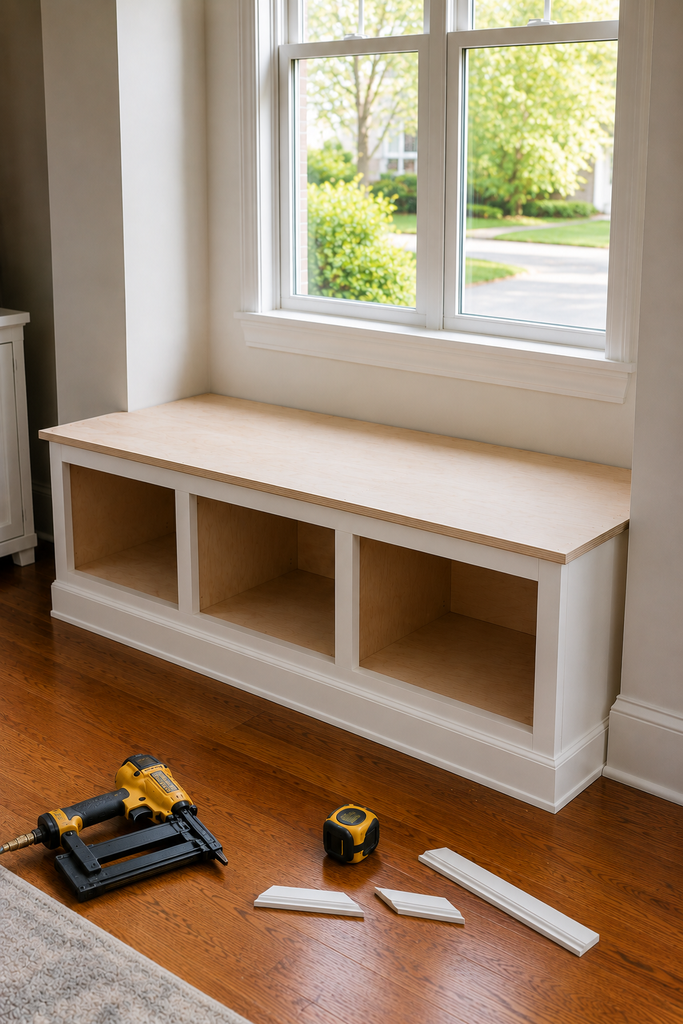
This is the stage that transforms a plywood box into something that looks like an actual built-in.
Use simple face-frame pieces to cover exposed plywood edges and create clean vertical divisions between storage sections.
Then continue the room’s existing baseboard across the front whenever possible.
What actually works is making the window seat visually connect with the architecture already in the room.
Matching existing baseboards, trim profiles, and paint colors usually makes a DIY built-in look far more convincing than adding elaborate decorative molding everywhere.
Step 7: Fill, Caulk, Sand, and Paint
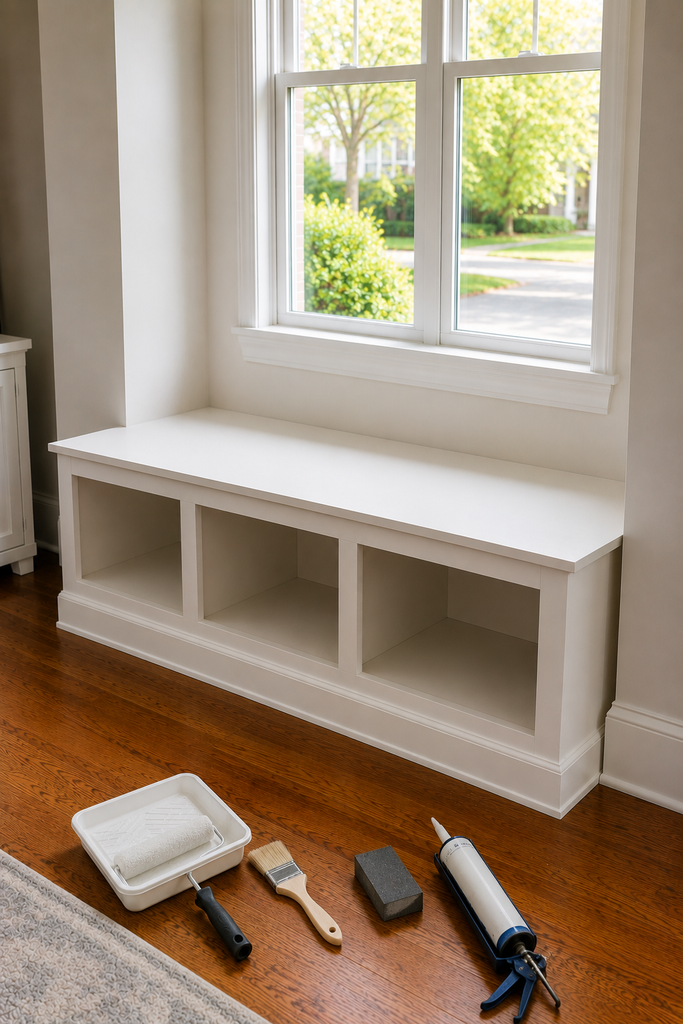
Fill screw holes and visible seams with wood filler.
Sand the surfaces smooth, then caulk small gaps where the bench meets the wall or trim.
Prime before painting, especially when you’re working with raw plywood and wood filler.
For the final finish, a durable cabinet or trim paint is preferable to ordinary wall paint. Window seats get kicked, climbed on, leaned against, and generally treated more like furniture than walls.
Make the Window Seat Look Truly Built-In
Construction gets you most of the way there. The final details determine whether the finished project looks custom or obviously homemade.
Match the Existing Room
If your room has simple craftsman-style trim, keep the window seat simple.
If you’ve got traditional molding, repeating some of that detail can make sense.
But don’t overdecorate the bench just because you built it yourself.
A straightforward window seat painted the same color as the surrounding trim often looks more expensive than one covered in unnecessary molding.
Leave Some Breathing Room Around the Window
Avoid visually swallowing the window.
If you’re building only the bench, keeping the wall around the window relatively simple makes the seating area feel open and bright.
If you’re adding bookcases on both sides, consider how their depth and height affect natural light before committing.
Those gorgeous wall-to-wall library window seats aren’t automatically the best choice for every room.
Don’t Forget Heating Vents and Electrical Outlets
This is one of those boring details that can completely derail the project.
Check for HVAC registers, electrical outlets, and return vents before designing your storage layout.
Never simply build over an active vent.
Depending on your home’s HVAC system and local requirements, you may need to reroute the airflow through the toe kick or modify the design. Electrical outlets may also need to remain accessible or be professionally relocated.
When you’re unsure about HVAC or electrical modifications, that’s the part of the project worth handing to a qualified professional.
The pretty cushion can wait.
Choose a Cushion That Actually Fits
Once the woodworking is finished, measure for the cushion—not before.
Even careful DIY construction can change the final dimensions by half an inch or more.
A 2- to 4-inch-thick cushion usually provides enough comfort without making the seat look excessively bulky.
High-density foam holds its shape better than very soft foam, particularly if the window seat will get regular use.
And if you have kids, pets, or coffee anywhere near this area, use a removable, washable cushion cover.
You’ll thank yourself later.
Keep the pillows restrained, too. Three comfortable pillows you actually use are better than eight decorative ones you have to throw onto the floor every time someone wants to sit down.
Common DIY Window Seat Mistakes to Avoid
The biggest problems usually aren’t complicated woodworking mistakes. They’re planning mistakes.
Building the seat too high once the cushion is included is probably the most common. Making it unnecessarily deep is another.
I’d also avoid designing inaccessible storage just to maximize every cubic inch. Storage you hate opening isn’t especially useful.
Watch out for undersupported long spans, blocked HVAC vents, doors or drawers that collide with nearby furniture, and oversized lids that become frustratingly heavy.
One more thing: don’t assume your walls are square.
Measure the width at several points and check corners before cutting a perfectly rectangular top. Houses have a funny way of revealing just how imperfectly straight they are the moment you try installing built-in furniture.
What Should You Store Under a Window Seat?
Think of window-seat storage as medium-access storage.
It’s ideal for belongings you want nearby but don’t necessarily need multiple times per day.
In a living room, that might mean blankets, board games, extra pillow covers, and seasonal decor.
In a bedroom, it could hold extra bedding or out-of-season clothes.
A mudroom window bench can store shoes, bags, hats, and outdoor accessories.
Kids’ rooms are especially good candidates because large drawers or baskets can swallow toys quickly without requiring an elaborate organization system.
The goal isn’t squeezing as much stuff as humanly possible underneath the seat. It’s giving belongings that already live in the room a logical place to go.
Is a DIY Window Seat With Storage Worth Building?
For the right wall, absolutely.
A good DIY window seat with storage does three jobs at once: it creates seating, adds useful storage, and makes an otherwise awkward window area feel intentional.
Just don’t start by cutting plywood.
Measure the room, tape out the footprint, decide how you’ll access the storage, and calculate your finished seat height including the cushion. Those decisions matter far more than decorative trim.
Once the proportions are right, the actual construction can be surprisingly straightforward.