
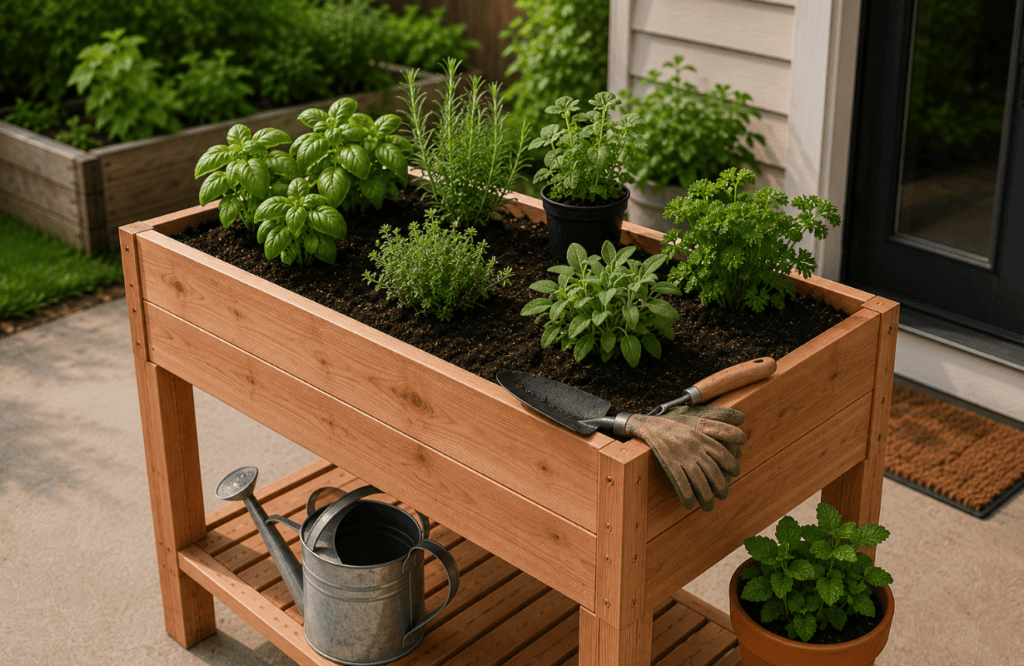
If you love the idea of stepping outside and snipping fresh basil, rosemary, or parsley for dinner, but your outdoor space is basically a patio and a couple of chairs, you might assume an herb garden isn’t realistic.
It absolutely can be. You just need to stop thinking of a garden as something that requires an actual yard.
A DIY raised herb garden for a patio is one of the most practical ways to grow herbs in a small outdoor space because it gives you control over the soil, drainage, placement, and overall footprint. Plus, you don’t have to spend your afternoon kneeling on concrete while trying to pull weeds from tiny pots.
Here’s the thing, though: building the box is the easy part. Getting the size, depth, drainage, and location right is what determines whether your herbs actually thrive.
So before buying a pile of lumber and six random herb plants, let’s go through how to build a raised patio herb garden that fits your space and is genuinely easy to maintain.
Why a Raised Herb Garden Works So Well on a Patio
Individual pots seem like the obvious solution for patio gardening, and they certainly can work. The problem is that a collection of small containers often dries out quickly and eventually turns into a cluttered collection of mismatched pots.
A raised planter gives you one defined growing area instead.
More importantly, a larger volume of soil generally holds moisture more consistently than several tiny pots. That can make your herbs much easier to manage during hot summer weather.
You also control exactly what goes into the planter.
Instead of dealing with poor native soil—or no soil at all—you can create a loose, well-draining growing environment from the beginning.
And visually? One thoughtfully designed wooden herb planter usually looks much more intentional on a patio than eight plastic nursery pots scattered around the furniture.
Plan the Herb Garden Before You Build Anything
Most people get this wrong. They decide what planter they want to build first and figure out where to put it afterward.
Reverse that process.
Find Your Best Sunny Location
Spend a day paying attention to how sunlight moves across your patio.
Many popular herbs, including basil, rosemary, thyme, oregano, and sage, perform best with plenty of direct sunlight. A spot receiving around six or more hours of sun is generally a strong starting point.
But don’t automatically choose the sunniest possible corner.
A south- or west-facing patio can become intensely hot during summer, especially when surrounding brick, siding, or concrete reflects heat back toward the planter.
Your goal is good light without accidentally creating an oven.
Think About Your Daily Routine
Put the garden somewhere you’ll actually use it.
A planter beside the kitchen door may be far more useful than one tucked into the farthest corner of the patio.
This sounds like a small decision, but convenience matters. If grabbing parsley requires putting on shoes and walking around the house, you’ll probably use it less often.
Leave Yourself Room to Move
Don’t size the planter based only on the empty space you see.
Think about chairs being pulled out, doors swinging open, grill access, and normal walking paths.
For many patios, something around 2 feet deep and 3 to 4 feet wide gives you useful planting space without creating a massive obstacle.
Keeping the planter relatively narrow also means you can comfortably reach the herbs at the back.
Choose the Right Height and Depth
You don’t need an extremely deep raised bed for most culinary herbs.
A growing depth of roughly 10 to 12 inches can work well for many common herbs. A little extra depth gives roots additional room and helps the soil retain moisture more consistently.
But the overall planter can be taller.
That’s one of the biggest advantages of building a raised herb garden specifically for a patio.
You might build a waist-high structure with the actual planting box sitting near the top. That gives you comfortable access without requiring the entire structure to be filled with expensive soil.
What actually works is designing around how you’ll use the garden.
If you cook with herbs several times a week, having them around waist height is surprisingly convenient.
Materials You’ll Need
You don’t need an elaborate woodworking setup for this project. A straightforward rectangular planter can be built with basic materials.
You’ll typically need:
- Exterior-grade lumber such as cedar or another naturally durable wood
- Exterior-rated screws
- Landscape fabric or suitable planter liner
- Drill/driver
- Saw or pre-cut lumber
- Measuring tape
- Carpenter’s square
- Sandpaper
- Potting or raised-bed soil suitable for containers
- Compost or organic matter
- Your chosen herb plants
Cedar is a popular choice because it handles outdoor conditions well and has a simple natural appearance that works with most patios.
Whatever wood you choose, avoid using questionable reclaimed lumber that may have been treated with chemicals you can’t identify.
How to Build a DIY Raised Herb Garden for a Patio
Now we can actually build the thing.
The exact measurements can change depending on your patio, but the basic construction method stays fairly simple.
Step 1: Measure and Mark Your Patio
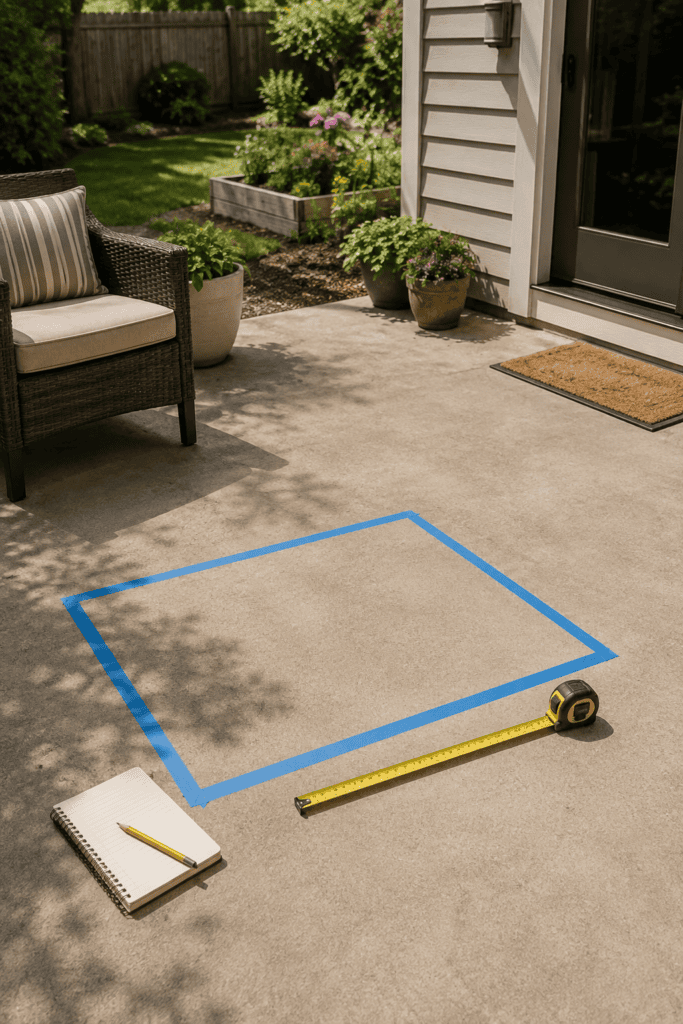
Before cutting wood, mark the planter’s footprint directly on your patio.
Painter’s tape works beautifully for this.
For example, mark out a 24-by-48-inch rectangle and leave it there for a few hours. Walk around it. Open nearby doors. Pull out your patio chairs.
You’ll immediately notice whether the planter feels comfortable or ridiculously large.
This five-minute test can save you from building something you’ll later regret.
Step 2: Cut the Planter Pieces
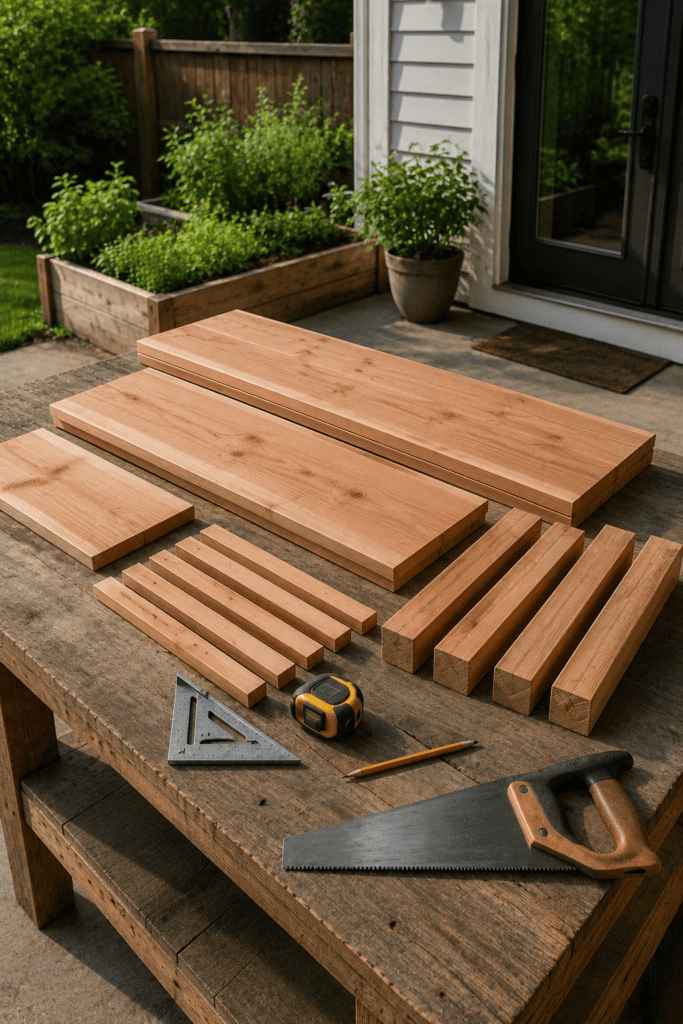
Cut your front, back, side, and support pieces according to your planned dimensions.
For a basic rectangular design, you’ll need two longer boards for the front and back and shorter boards for each end.
If you’re making a tall elevated planter, you’ll also need four sturdy legs and framing pieces that support the planting box.
Measure everything twice before cutting.
Yes, you’ve heard that advice before. There’s a reason.
Step 3: Build the Main Frame
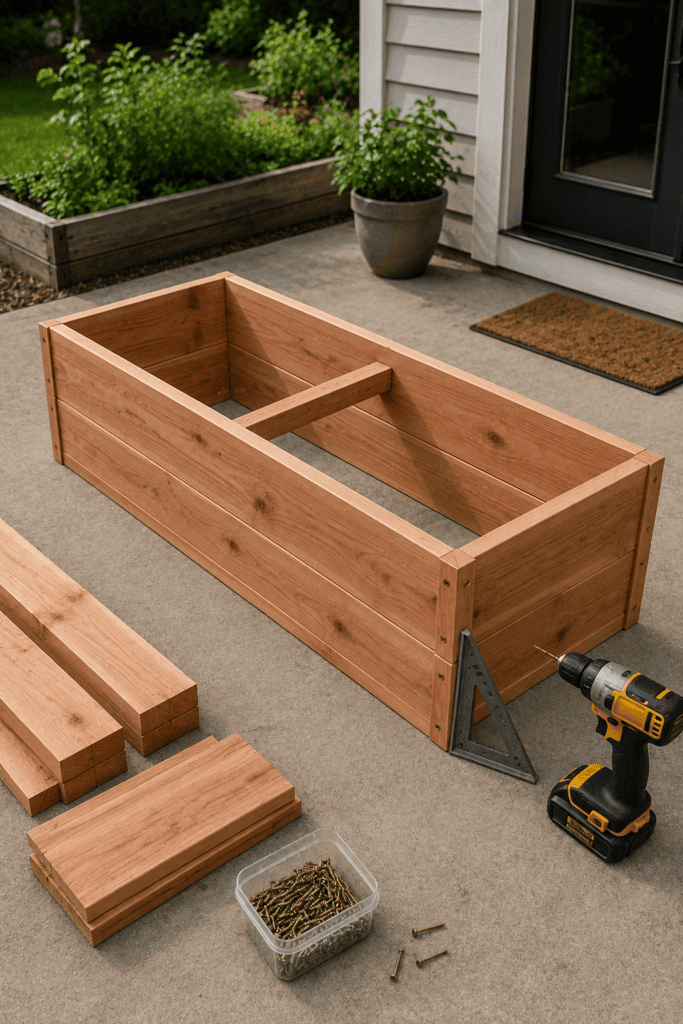
Assemble the rectangular planter box on a flat surface.
Attach the side pieces to the front and back boards using exterior-rated screws.
Check the corners with a carpenter’s square before fully tightening everything.
If you’re building a longer planter, add internal supports so the weight of wet soil doesn’t gradually push the sides outward.
People underestimate how heavy soil becomes after watering.
Your planter should be designed for the wet weight, not just how sturdy it feels while empty.
Step 4: Add Legs and Lower Supports
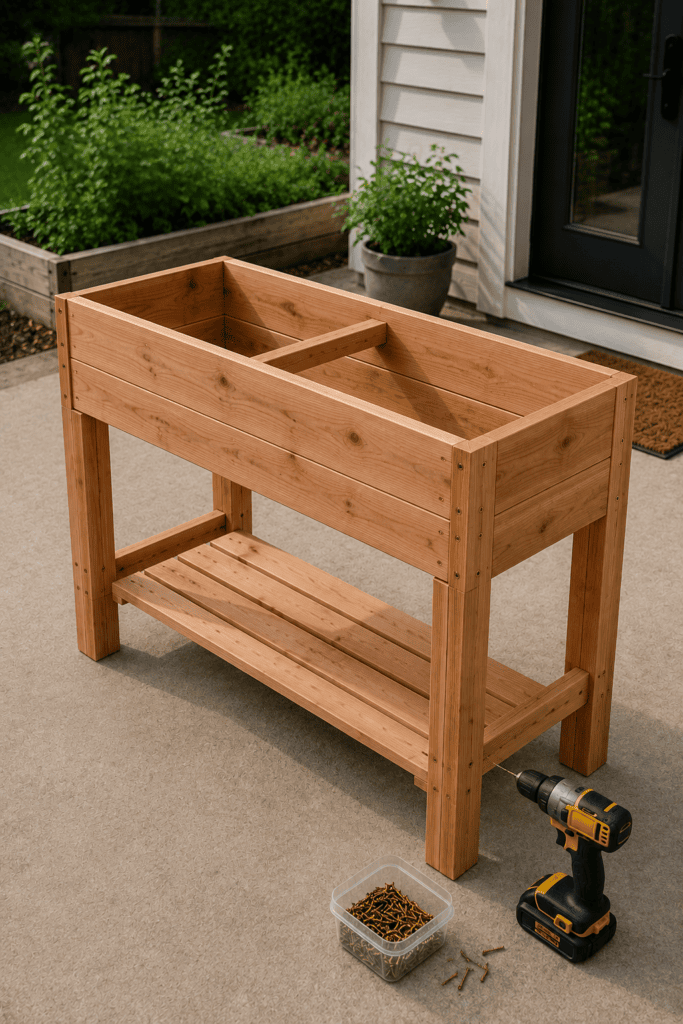
For an elevated design, attach four legs securely to the planter box.
Then connect the legs with lower horizontal supports.
These braces dramatically improve stability and can also create space for a useful lower shelf.
A shelf underneath is great for storing a watering can, gardening gloves, or an extra pot without adding more clutter to the patio.
Make sure the finished planter sits level and doesn’t wobble.
Step 5: Create Proper Drainage
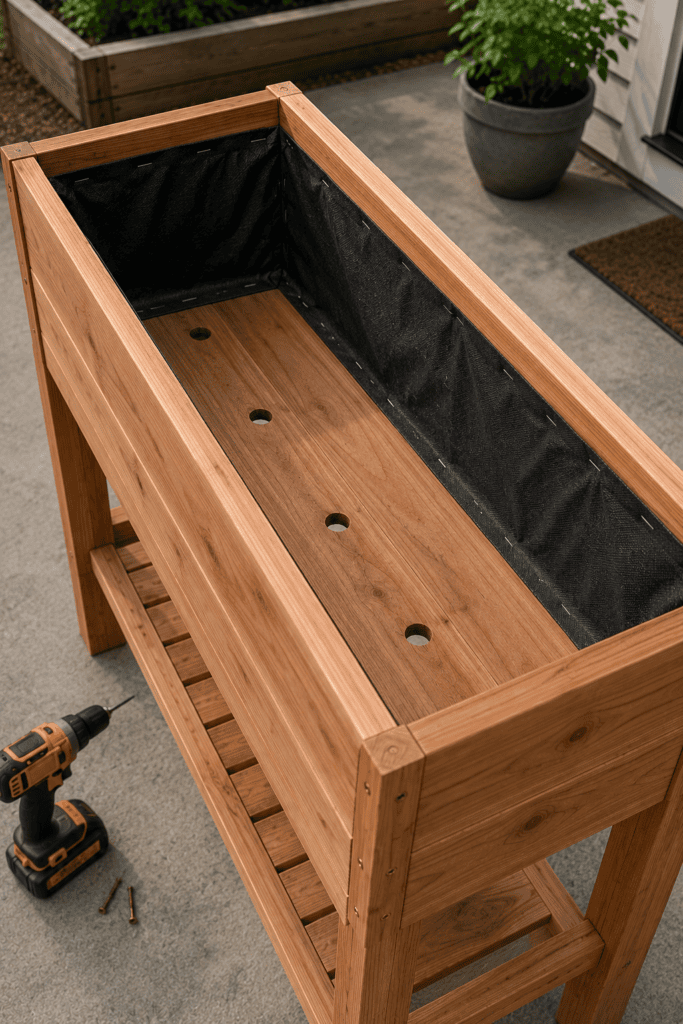
This might be the most important part of the entire project.
Herbs generally don’t appreciate sitting in constantly waterlogged soil.
Your planter needs drainage openings that allow excess water to escape freely.
If you’re using a liner, make sure it doesn’t accidentally cover or block those drainage points.
Also think about where that water will go.
On a concrete patio, uncontrolled runoff can leave stains or create annoying puddles. Plan the drainage so water exits somewhere manageable rather than pouring directly beside your patio door.
Step 6: Add the Soil
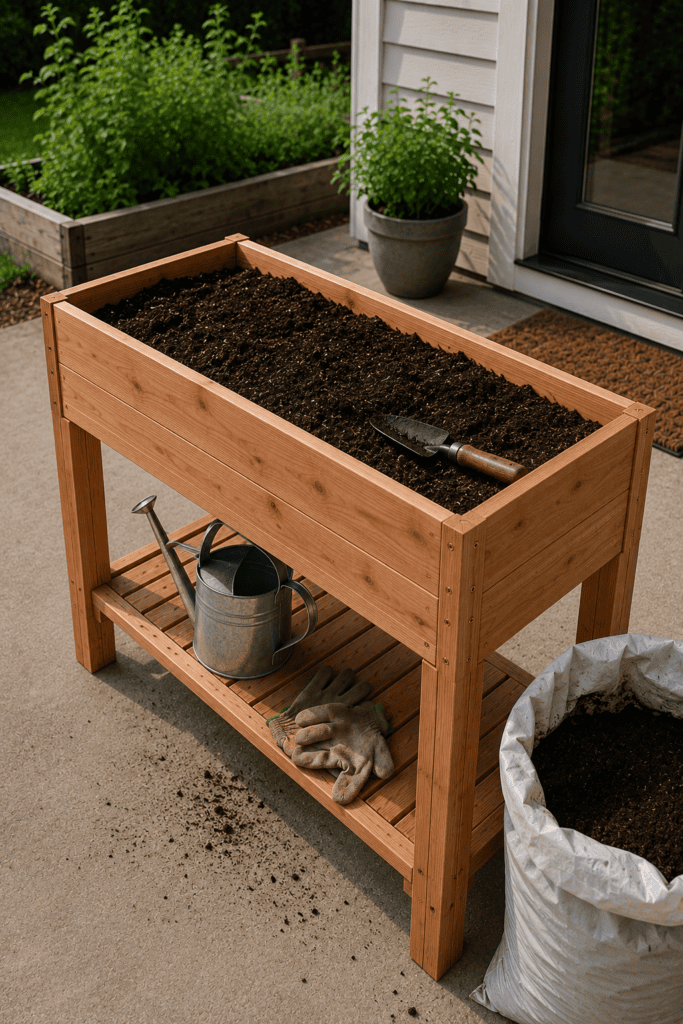
Don’t fill the planter with regular garden dirt.
It can become heavy and compacted inside a container.
Use a quality potting or raised-bed mix intended for containers, ideally with enough organic material to retain moisture while still draining properly.
Fill the planter gradually rather than dumping everything in at once.
Lightly settle the soil with your hands, but don’t aggressively pack it down.
Roots need air as much as they need water.
Step 7: Arrange the Herbs Before Planting
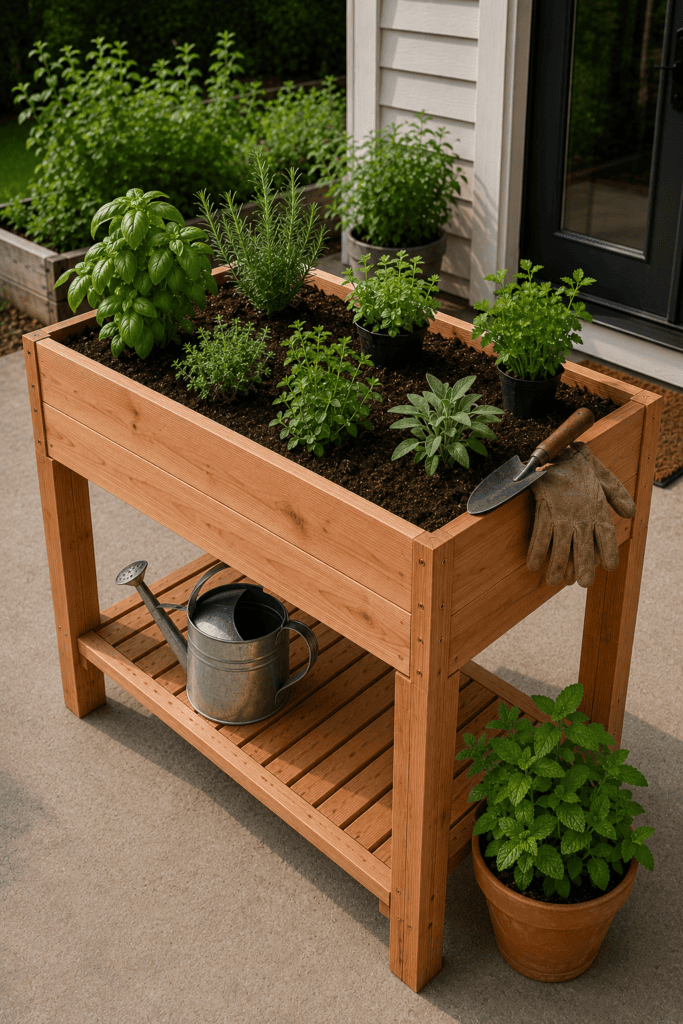
Here’s another step people rush.
Keep your herbs in their nursery containers and arrange them on top of the soil first.
Move them around until the spacing makes sense.
Think about mature size, not how adorable those tiny plants look today.
Rosemary can eventually become substantial. Mint can spread aggressively. Basil gets much bushier than people expect.
Give each plant room to become the plant it’s supposed to be.
Then plant them at approximately the same soil level they were growing at in their original containers.
Be Strategic About Which Herbs Share the Planter
Not every herb wants exactly the same growing conditions.
Mediterranean herbs such as rosemary, thyme, oregano, and sage generally appreciate excellent drainage and don’t need constantly moist soil.
Basil and parsley usually prefer somewhat more consistent moisture.
That doesn’t mean they can never share a planter, but grouping plants with similar needs makes maintenance much easier.
And then there’s mint.
Mint is delicious. Mint is useful. Mint also has absolutely no respect for personal boundaries.
I’d keep it in its own container rather than allowing it to take over your carefully planned raised bed.
You can even place that separate pot beside or inside the larger planter if you want everything to look visually connected.
Common Raised Herb Garden Mistakes
Building the planter correctly doesn’t help much if everyday maintenance works against you.
Overcrowding the Planter
That beautifully full herb garden you see in photos may have been styled specifically for the picture.
Real plants need space.
Overcrowding reduces airflow, increases competition, and makes harvesting awkward.
Start slightly sparse. Give everything time to fill in naturally.
Watering Everything on a Schedule
Don’t automatically water every morning because somebody online told you to.
Check the soil.
Push your finger about an inch into it. If the upper layer is dry, watering may be appropriate. If it’s still noticeably damp, wait.
Weather, planter size, herb variety, and sun exposure all affect how quickly your soil dries.
Forgetting About Patio Heat
Raised containers can dry faster than garden beds, particularly on hot concrete patios.
During the hottest part of summer, check your planter more frequently.
A thin layer of organic mulch can help reduce moisture loss, but keep it slightly away from the stems of your herbs.
Make the Garden Look Like Part of the Patio
A DIY herb planter doesn’t have to look like a random gardening project dropped beside your furniture.
Match the finish to your existing outdoor space.
Natural cedar looks great with warm wood furniture. A darker exterior stain can complement black metal patio pieces. A simple clear exterior finish works beautifully if you prefer a relaxed, natural look.
Keep accessories restrained.
One watering can, a few simple plant markers, and maybe a small pair of herb scissors are plenty.
The herbs should be the visual focus.
Putting It All Together
A DIY raised herb garden for a patio doesn’t need to be huge or complicated to completely change how useful your outdoor space feels.
The important part isn’t building the fanciest planter. It’s creating one that’s the right size for your patio, drains properly, gets enough sunlight, and makes harvesting herbs convenient.
Start by marking the footprint before you buy lumber. Build a sturdy frame, give excess water somewhere to go, use container-friendly soil, and resist the temptation to cram every herb you love into one box.